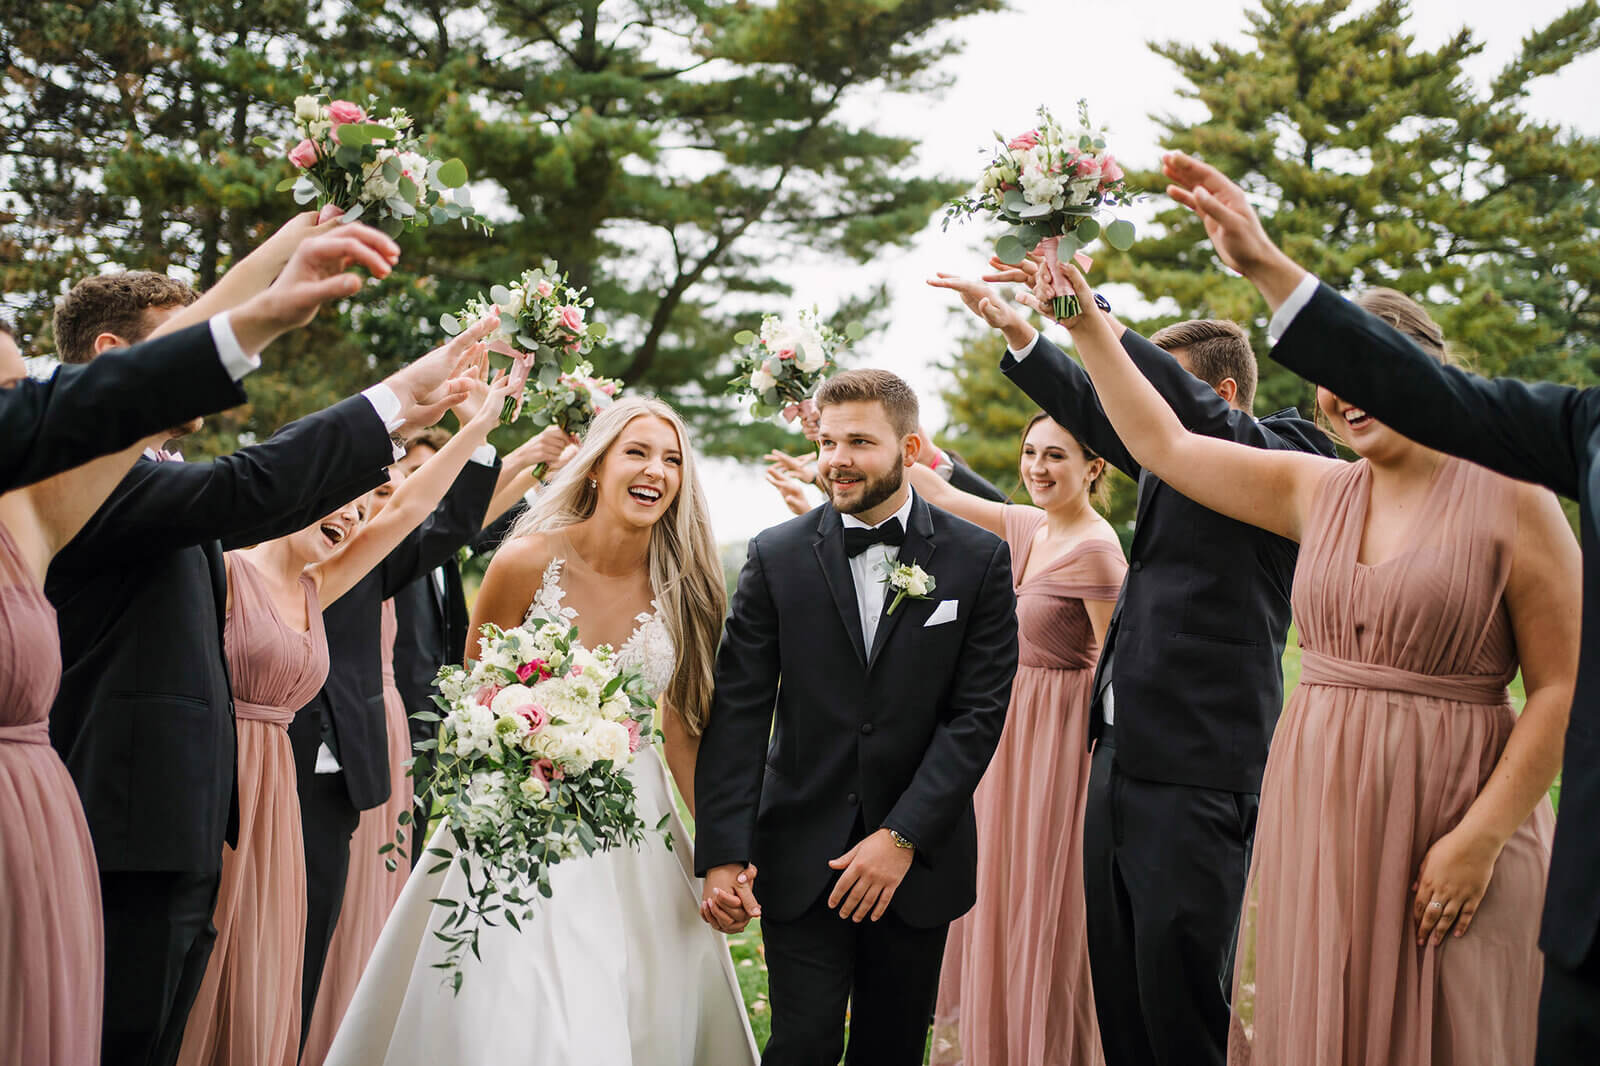
Natural light portrait photography is a fascinating genre with endless potential. As a portrait photographer, you can find great success by experimenting with natural light in different locations. After over 15 years of capturing portraits, I’ve discovered many techniques that can help you make your models stand out anywhere.
This guide will introduce you to some of the most important fundamentals of natural light portrait photography. All you need is your camera, a model, and a little curiosity!
What you’ll learn in this article
- 1 What is Natural Light Portrait Photography?
- 2 Why do Photographers Use Natural Light in Portrait Photography?
- 3 10 Natural Light Portrait Photography Tips (with Examples)
- 3.1 1. Choosing the Right Portrait Location
- 3.2 2. Getting to Know Different Types of Natural Light
- 3.3 3. Positioning Your Portrait Subject
- 3.4 4. Use Direct Sunlight for Portraits
- 3.5 5. Use Reflectors and Diffusers
- 3.6 6. Adjust Camera Settings
- 3.7 7. Capturing Expressions and Fleeting Moments
- 3.8 8. Using Your Subject’s Eyes
- 3.9 9. Find Great Backgrounds for Portraits
- 3.10 10. Look for Natural Light Portrait Photography Inspiration Online
- 4 Retouching Your Portrait Photos with a Safe Hand
- 5 FAQs – Natural Light Portrait Photography
- 5.1 What time is the best for natural lighting?
- 5.2 What is the best lens for natural light portraits?
- 5.3 What shutter speed should I use for natural light portraits?
- 5.4 What is the difference between natural light photography and artificial light photography?
- 5.5 Can you mix natural light with artificial light?
- 6 Conclusion
What is Natural Light Portrait Photography?
As its name suggests, natural light portrait photography is all about using natural light to take visually appealing photos of people. If approached correctly, portrait photography with natural light can help you produce images with soft shadow transitions and stunning compositions.
You can achieve this effect both indoors and outdoors. However, keep in mind that the location and time of day that you choose will have a significant effect on the outcome of your photoshoot. The most important thing to remember is this: no matter where you choose to photograph, you can take stunning portraits if you use the right approach.
Why do Photographers Use Natural Light in Portrait Photography?
Using natural light in portrait photography can help you achieve new heights as a photographer. Here are some reasons that you should give it a try:
- When used correctly, natural light can enhance your model’s features and make them look flattering.
- Natural light is free to use, so you can practice as much as you want without needing to pay for lighting equipment.
- Natural light is limited. This might seem like a disadvantage, but it can help you get creative and strengthen your technical skills in unexpected ways.
- Using natural light in portrait photography will give your photographs an authentic feeling. Even though the effect of natural light can be created using artificial light, there’s nothing quite like the real thing.
- Natural light comes in different intensities and colours, depending on the time of day. As a result, you can use it to take creative portraits that stand out from the rest.
- Once you learn the fundamentals of natural light portrait photography, you’ll be able to use natural light easily and intuitively.
Is there any confusion in your mind about portraits and headshots? Which type of photography is best for you? Check this out to find the difference between portrait and headshot photography.
10 Natural Light Portrait Photography Tips (with Examples)
1. Choosing the Right Portrait Location
The term “scouting” means looking for a suitable photoshoot location in advance. This is often done in landscape photography, but it can also benefit portrait photographers. When scouting for locations, you need to pay attention to potential backgrounds and weather conditions that could get in the way. Once you overcome these obstacles, you’ll be able to take natural light portraits with confidence.
a) Indoor Location
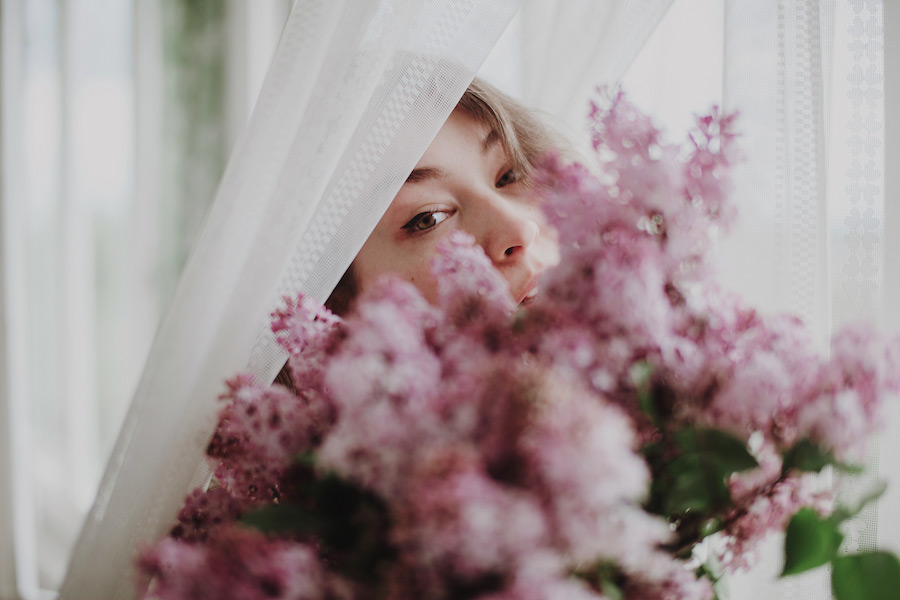
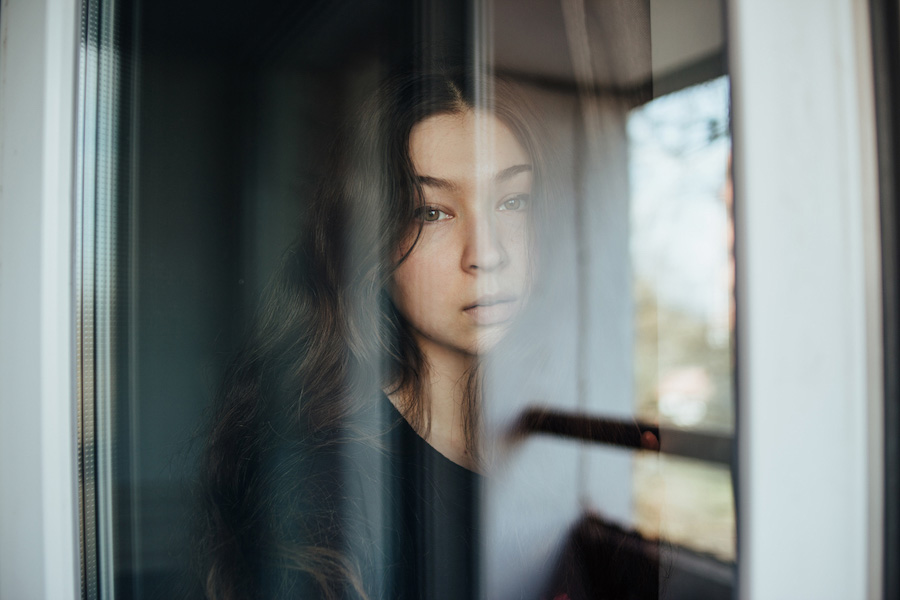
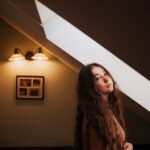
Indoor natural light portraits are known for their mystery. Thanks to walls and windows, you can create soft shadows on your model’s face. This will add depth and complexity to your images.
When shooting indoors, make sure that your model stands next to a window. If it’s sunny and the room is bright, you can shoot through curtains to diffuse the light and create a softer effect. If it’s gloomy or cloudy outside, make sure to stand as close to the window as possible. This will ensure that your model’s face is well-lit and looks flattering.
When shooting indoors, it’s important to watch out for objects that could distract the viewer from your main subject. Make sure that the location behind your model is tidy so that your portrait has a simple but harmonious atmosphere.
b) Outdoor Location
The great outdoors offers a diverse range of locations for natural light portrait photographers. First, figure out what kind of “mood” you want to create in your photographs. Come up with a story that resonates with you. Here are a few ideas:
- Create a feeling of longing by taking photos in an abandoned house on a gloomy day.
- Create a joyful atmosphere by taking photos in a field during the golden hour.
- Take candid photos of your model walking on the street to create a feeling of curiosity and wonder.
Once you figure out the “mood” of your photoshoot, look for a location that will allow you to take photos safely and comfortably. Some locations aren’t suitable for portrait photography.
For example, a popular tourist destination that gets crowded every day or a street corner that’s overflowing with trash cans. Crowds, flashing lights, and rubbish can all take the spotlight away from your model and create imbalance in your work. Look for places with clean backgrounds that complement your model’s outfit. When in doubt, keep it simple.
2. Getting to Know Different Types of Natural Light
Personally, what I love the most about natural light is its versatility. If you take photos at the same location three times a day, you’ll notice a significant difference in your portraits. Depending on the kind of natural light you’re working with, you can create outstanding portraits that effectively bring your vision to life.
Here are some of the most popular natural lighting types that you can use to enhance your portraits.
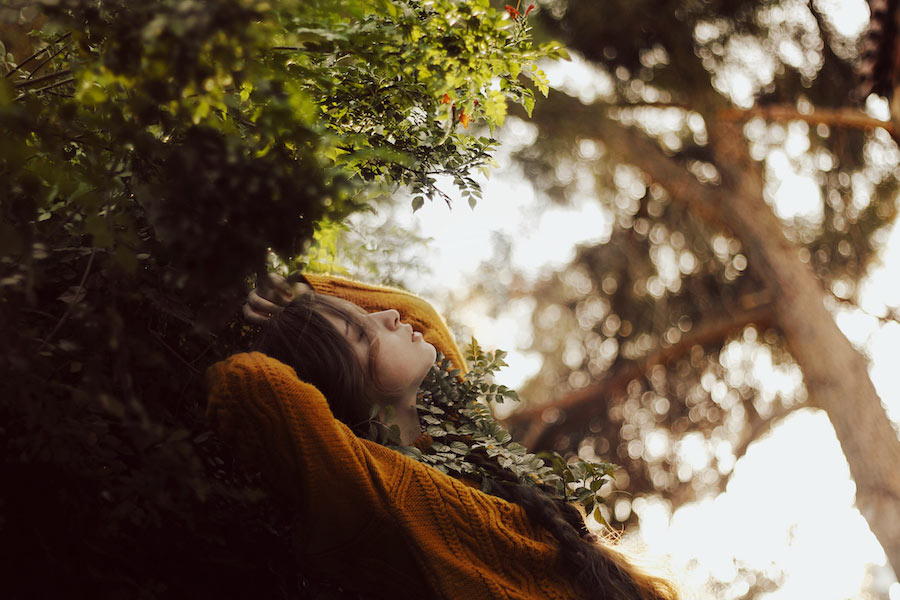
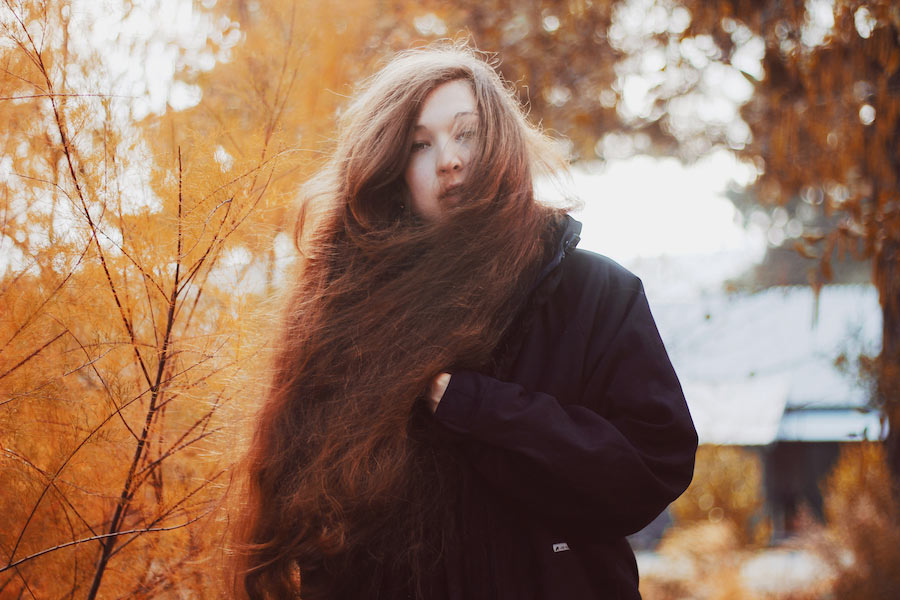
a) Golden Hour
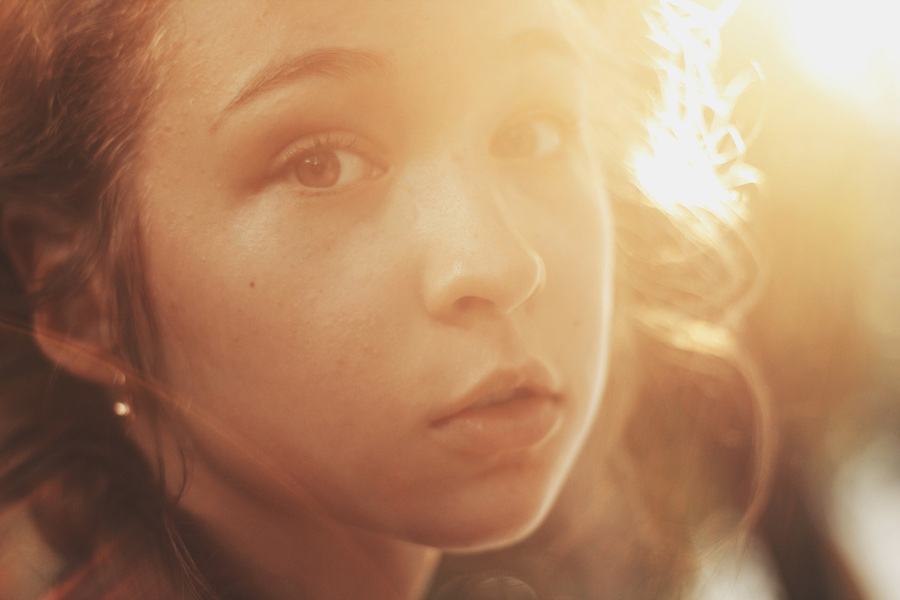
Have you ever come across a warm photo that looks like it’s glowing? This effect can be achieved during the golden hour, also known as the “magic hour”. It’s one of my favourite natural lighting techniques for portrait photography because it gives my photos an effortlessly dreamy look.
Depending on where you live and the time of year, the golden hour can occur at various times, typically between 6 PM to 10 PM. Search for ‘Golden Hour Calculator’ in your app store to find a tool that will help you figure out exactly when golden hour begins in your area.
During the magic hour, you can experiment with many different portrait poses and angles. Your subject can stand with their back to the light source, creating a silhouette. Alternatively, they can directly face the light source. This will result in a flattering glow that will add depth and dimension to the portrait.
b) Blue Hour
The blue hour is another popular time of day that can help you take dramatic photographs. The blue hour occurs right before the sun rises and shortly after it sets, creating a “blue” atmosphere that’s perfect for moody portrait photography.
To make the most of this lighting technique, use a tripod. If you’re shooting handheld, use a higher ISO to ensure that your portraits remain sharp. Take photos in a well-lit location so that your model’s face is clear. Fields and beaches are the perfect locations for blue hour portrait photoshoots.
c) Overcast Skies
Cloudy weather might look boring, but it’s actually a great opportunity to master diffused light! This kind of light can soften your model’s features and help you create a well-lit environment for your photoshoot.
If you find that the light isn’t bright enough, you can use a reflector to fill unwanted shadows. Use a silver surface to create a bright reflection on your subject’s face. This will allow you to take professional-looking portraits outdoors.
3. Positioning Your Portrait Subject
Now that you’re familiar with some of the most flattering types of lighting, it’s time to explore positions. Depending on where your model stands, you could end up with eye-catching or unflattering photos. Taking a step back or slightly shifting the position of your camera can make a huge difference!
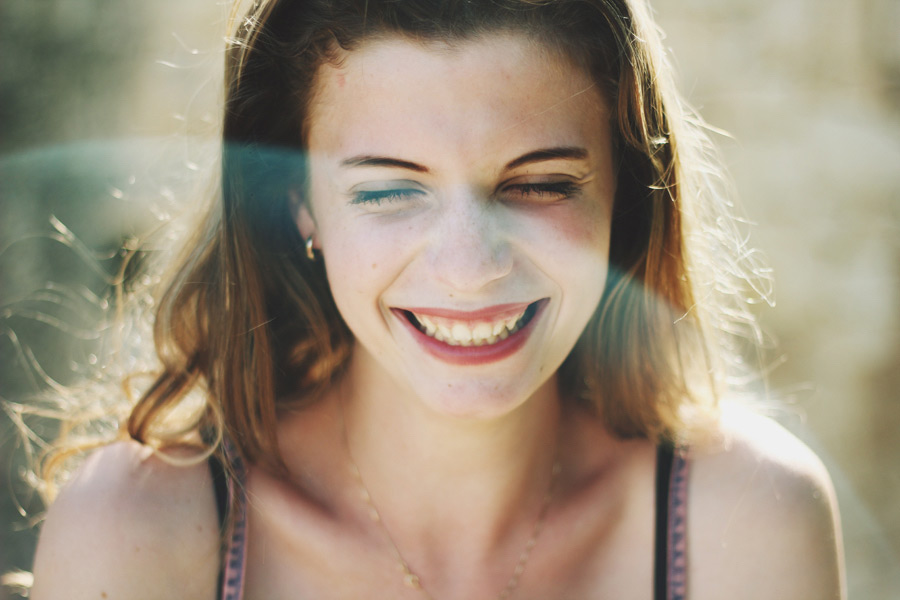
a) Front Light
Front light is when your model directly faces the light source. The light spreads evenly and doesn’t cast any shadows on the model’s face. However, if the light is harsh, it can highlight imperfections.
When working with front light, make sure that the light itself is soft and diffused. This way, your model’s face will have a soft glow without putting the spotlight on pimples or wrinkles. (However, there’s nothing wrong with highlighting texture in your portraits if that’s your preferred style.)
b) Backlight
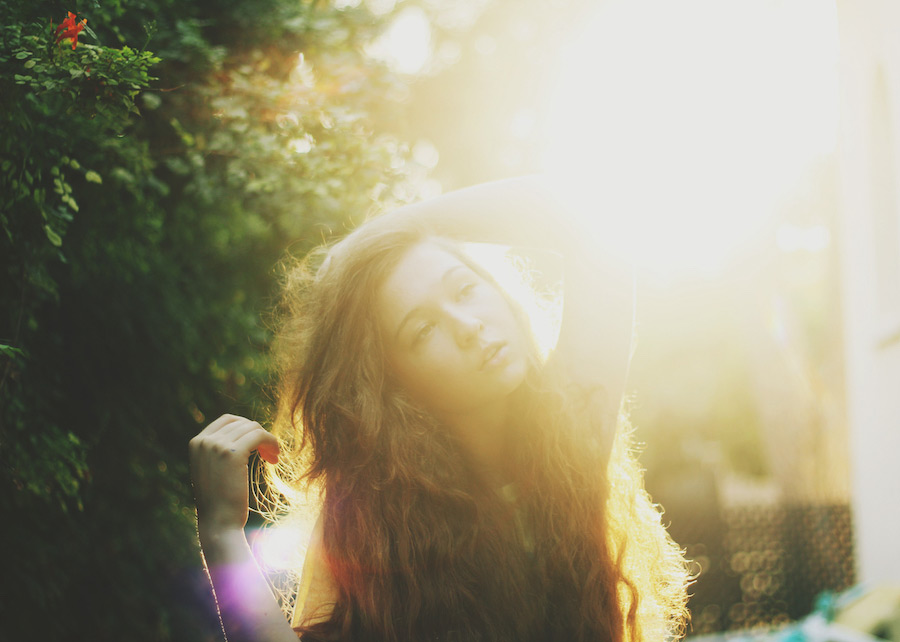
Backlight is when the light source is right behind your subject. Backlight can be used to create:
- Silhouettes: if you lower your exposure, you’ll highlight the model’s silhouette. While this will hide their features, it will create a dramatic atmosphere. If you use this technique sparingly, you’ll get unique results.
- Dreamy and overexposed portraits: if you increase your exposure, your subject’s face will be visible. However, their surroundings will be “blown out” or overexposed. You can use this technique to create an ethereal effect that isolates your subject from their environment.
Both techniques are creative in their own right and can help you build a strong portfolio as a portrait photographer.
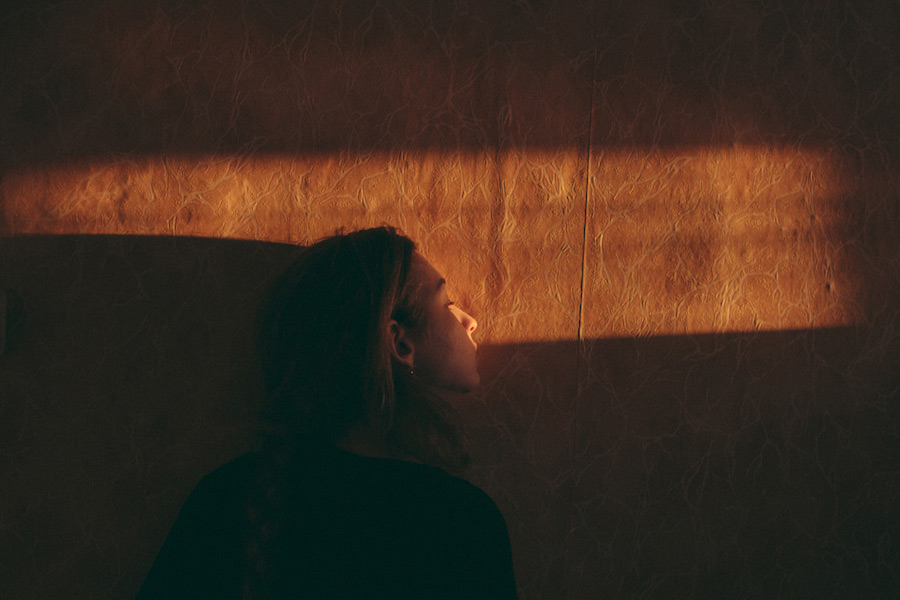
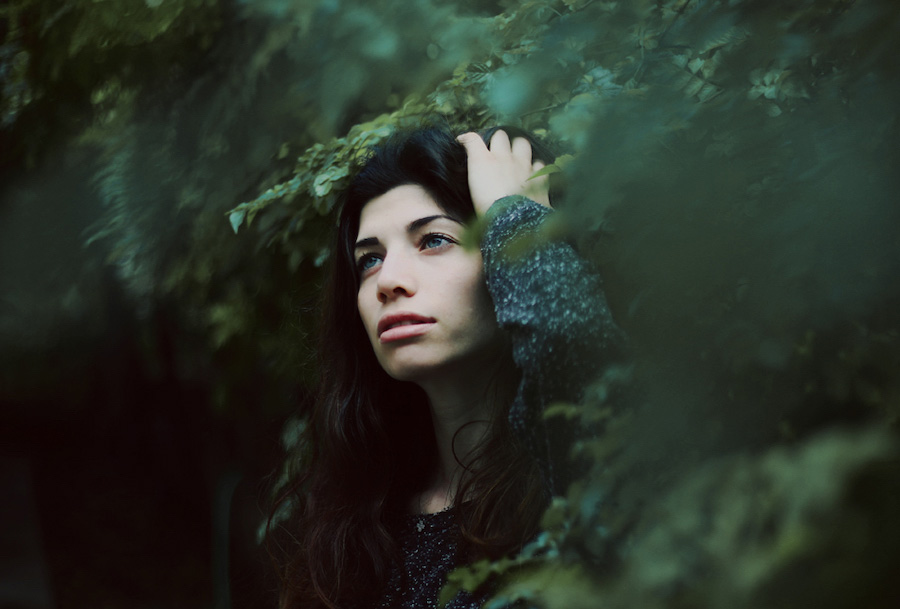
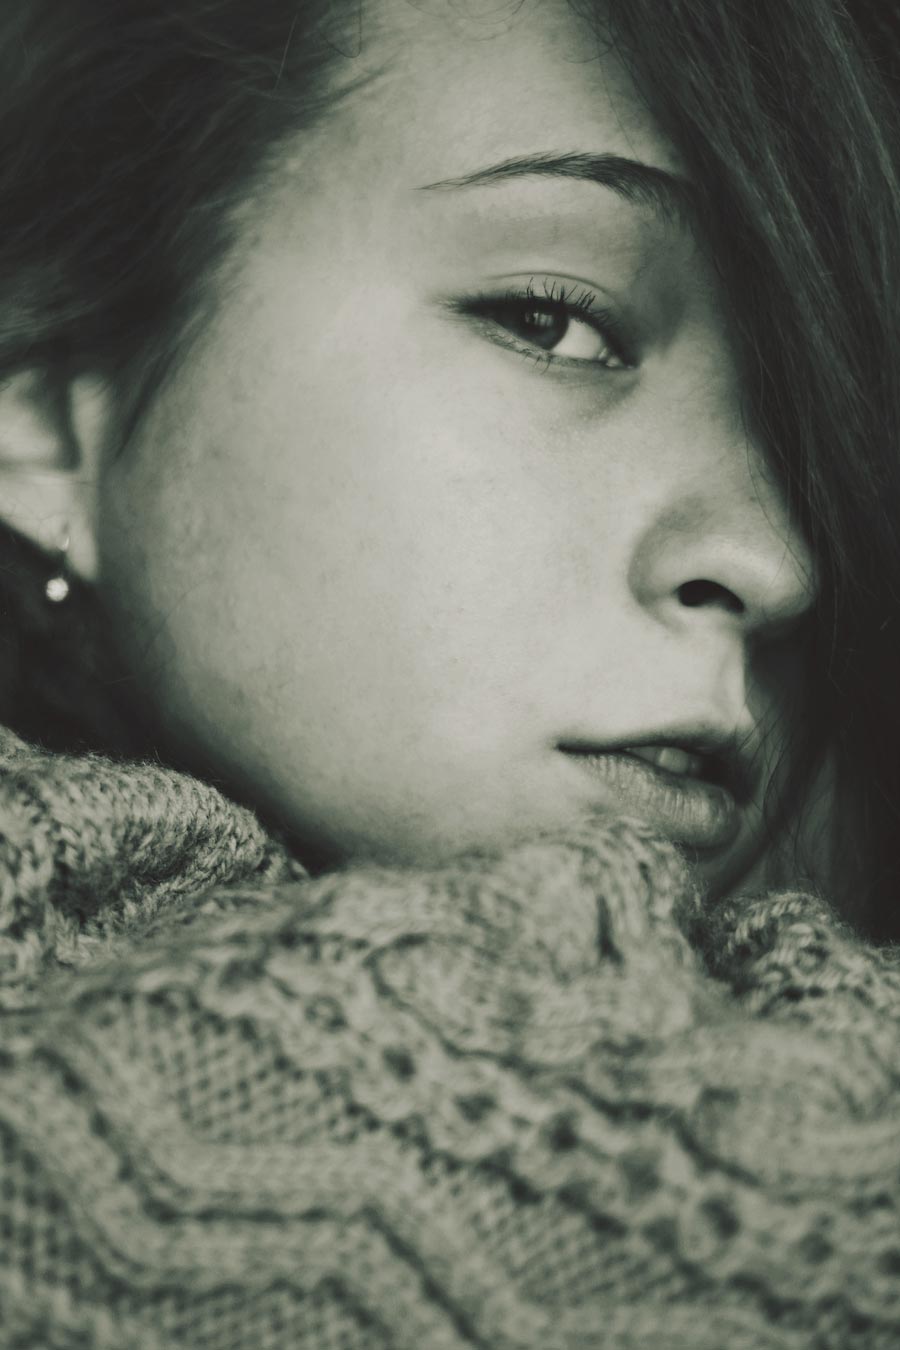
c) Side Light
Side light is one of my favourites because it highlights part of the model’s face and adds mystery to the rest of the composition. If the model stands with their side to the light source, the light will illuminate only half of their face. If there’s no other light source available, everything else will be hidden in shadow.
You can use this technique to create dramatic and flattering photos of people both indoors and outdoors. However, in my experience, side lighting will give you the best results when you shoot indoors on a sunny day.
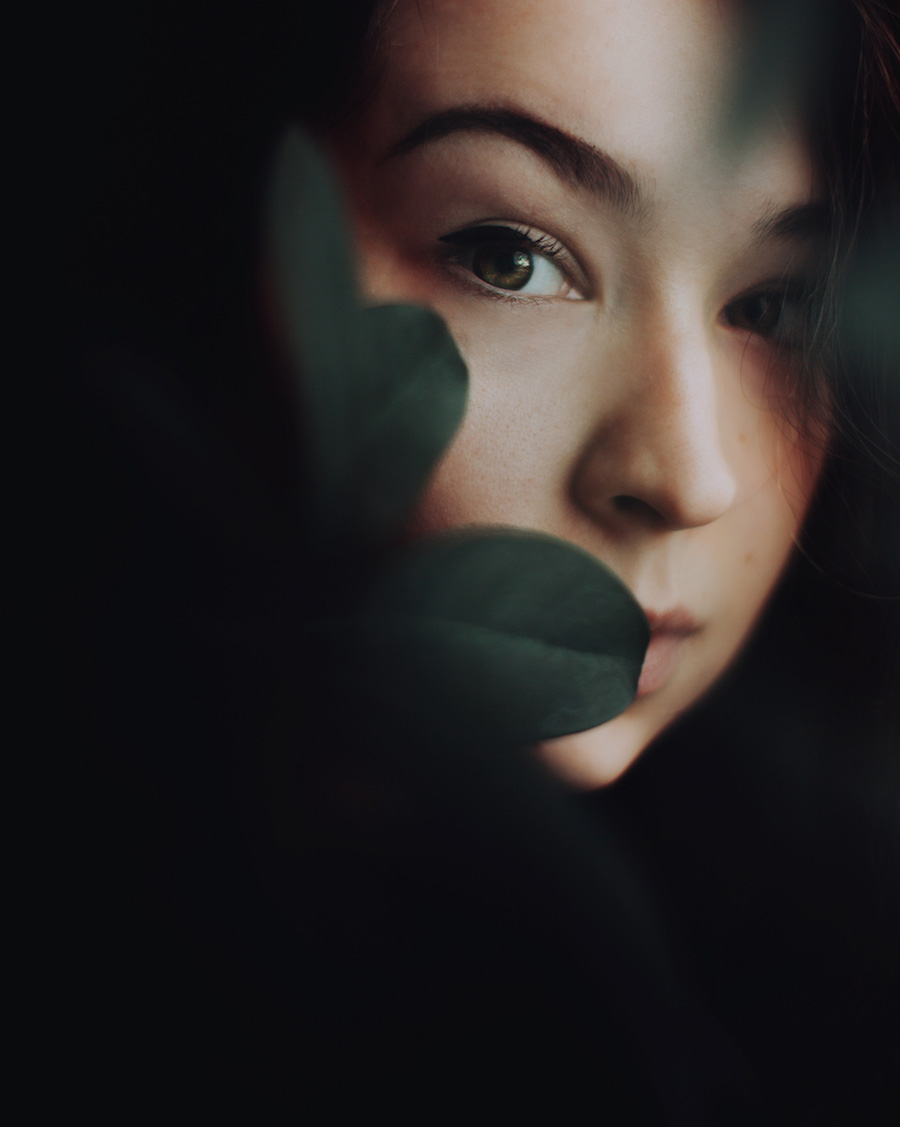
4. Use Direct Sunlight for Portraits
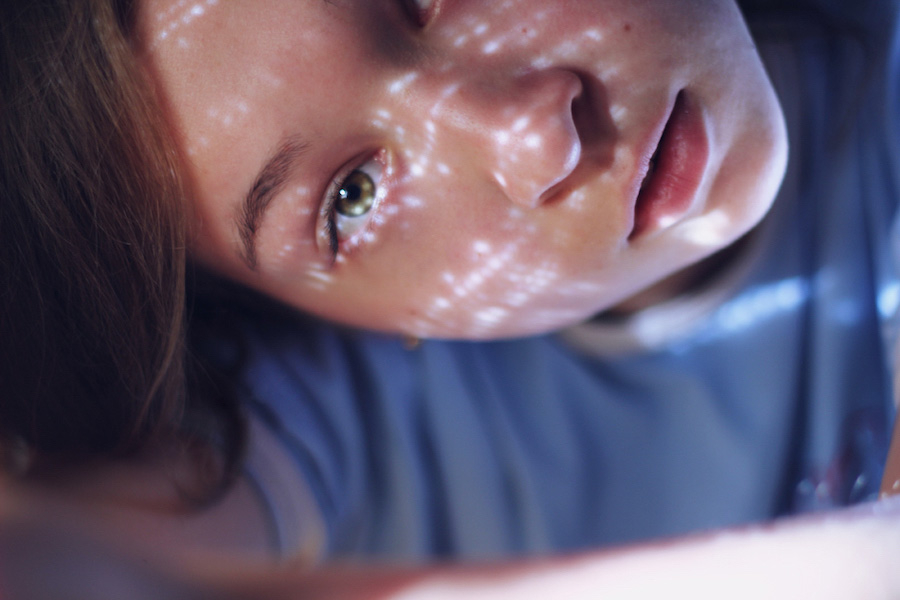
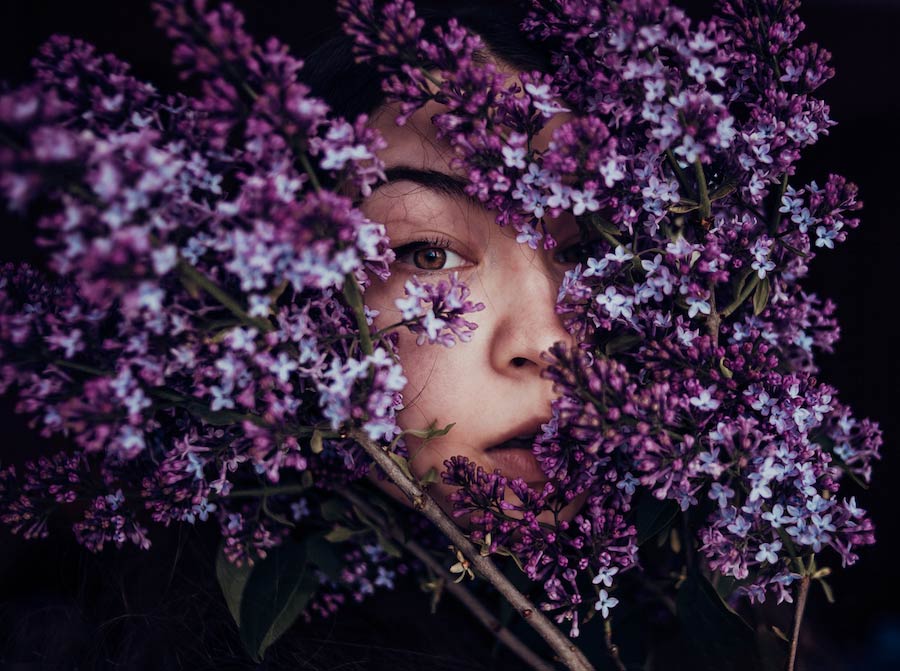
If you want to take creative portraits in natural light, make use of harsh shadows. For this, you need direct sunlight and something to create a pattern, like lace curtains or hair. Ask your model to hold something in front of their face as they face the light.
The closer they are to the object, the sharper the shadows will appear on their face. There’s no right or wrong way to approach this; experiment with various distances to figure out your unique portrait photography style.
Extra tip: More often than not, portraits with intense shadows tend to look more eye-catching in black & white. If you want to create a “wow” effect in your natural light portraits, convert your photos to black & white. You can do this in a professional editing program like Lightroom or in a free editing app like Snapseed.
5. Use Reflectors and Diffusers
In natural light portrait photography, reflectors and diffusers are your best friends. These are the best times to use them:
- Use reflectors when you want to remove shadows or add more light to your subject’s face. The reflector must be positioned opposite the light source to reflect light onto your subject’s face.
- Use a diffuser when you want the light to be less intense. If the sun is creating too many harsh shadows, hold a diffuser between the light source and your model to soften the light. Keep in mind that this will decrease the intensity of the light, so you might need to compensate for that by increasing your exposure. (This shouldn’t be an issue if you’re shooting in very bright conditions, though.)
If you’re looking for more artistic natural light portrait photography techniques, try using coloured diffusers. These diffusers will not only soften light, but they’ll also add a pop of colour to your model’s face. Just make sure to use flattering colours that aren’t too intense. Avoid neon colours unless you want to take surreal portraits!
6. Adjust Camera Settings

No matter where you’re shooting, always make sure to keep an eye on your camera settings. If you’re shooting in Auto Mode, try switching to Manual Mode. This will give you full control over settings such as shutter speed, ISO, temperature, etc., all of which will help you take flattering portraits in natural light.
Many portrait photographers are scared of ISO because too much of it creates a grainy effect. If you’re shooting in limited light conditions (during the blue hour, for example), don’t be afraid of increasing your ISO to compensate for the lack of light. You can use an advanced editing program, such as Lightroom, to remove noise within seconds. Of course, too much of anything isn’t good, but a slight increase in ISO won’t hurt your portraits.
Another thing to keep in mind is focus. If you focus too much on your camera settings during your photoshoot, you’ll miss out on other important factors like posing, facial expressions, etc. If you’re a beginner in natural light portrait photography, remember to take it slow. Don’t forget to communicate with your model and to check your camera settings whenever the light changes or you move to another location.
7. Capturing Expressions and Fleeting Moments
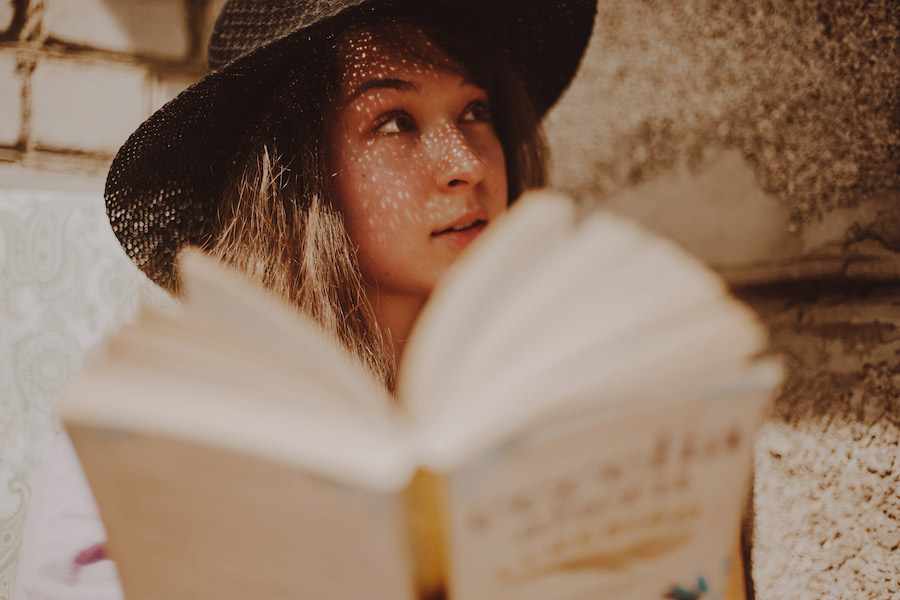
Speaking of facial expressions, there’s something very special about candid portraits. When working in natural light, you have many opportunities to take spontaneous photos of your model. Yes, it’s possible to take candid photos even when your model is aware of the camera’s presence!
To create candid moments, ask your model to interact with their surroundings or to move around. If possible, take photos of at least two people so that they can speak to each other and create natural moments for you to capture.
Another way to create a natural environment for candid portraits is to speak with your model as you shoot. You don’t need to do this constantly; a few encouraging words or jokes can make a big difference. To achieve a beautiful natural light portrait, make sure that your model is relaxed.
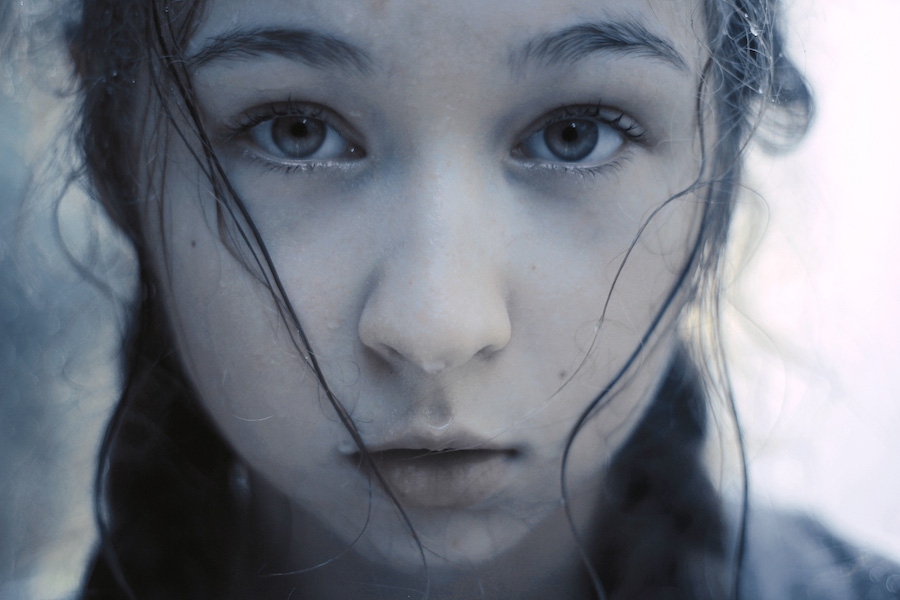
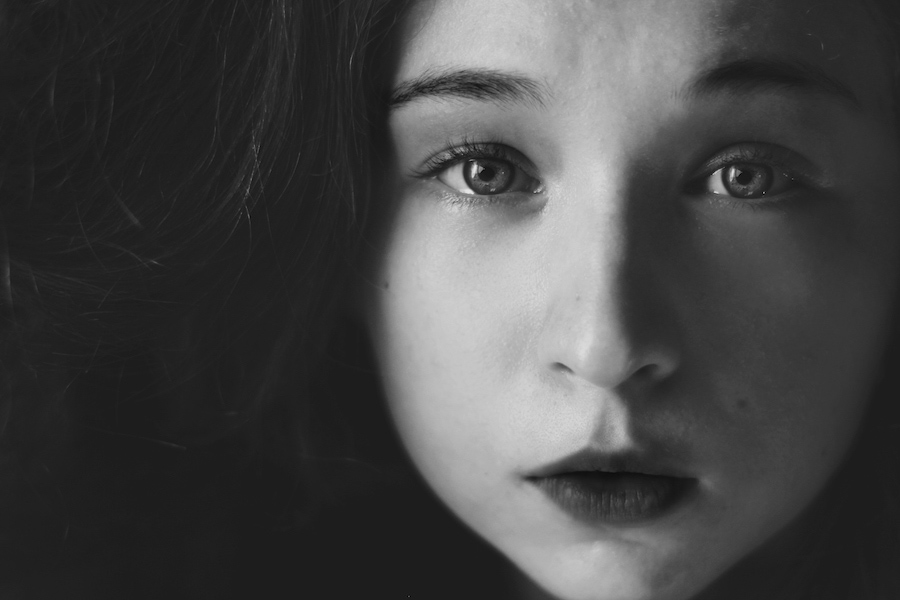
8. Using Your Subject’s Eyes
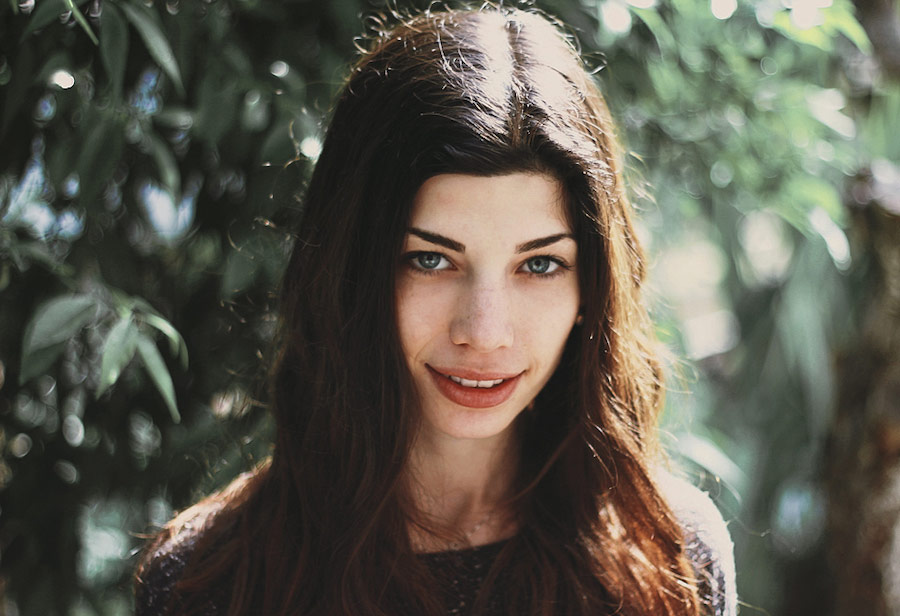
Your model’s eyes are one of the most important parts of your photograph. When I was a beginner, I thought that my models always had to look straight into the camera. With time, I realised that there’s more to the eyes than a direct gaze.
Utilise different “eye expressions” throughout your photoshoot to create dynamic and unique photos. This will make your natural light portrait photography stand out from the rest! Ask your model to look up, sideways, or down. Give them something specific to look at so that their gaze is natural.
Since you’ll be using natural light, you’ll be able to capture stunning reflections in your model’s eyes. If you take photos at the beach or anywhere with lots of reflections, your model’s eyes will sparkle thanks to all the natural highlights.
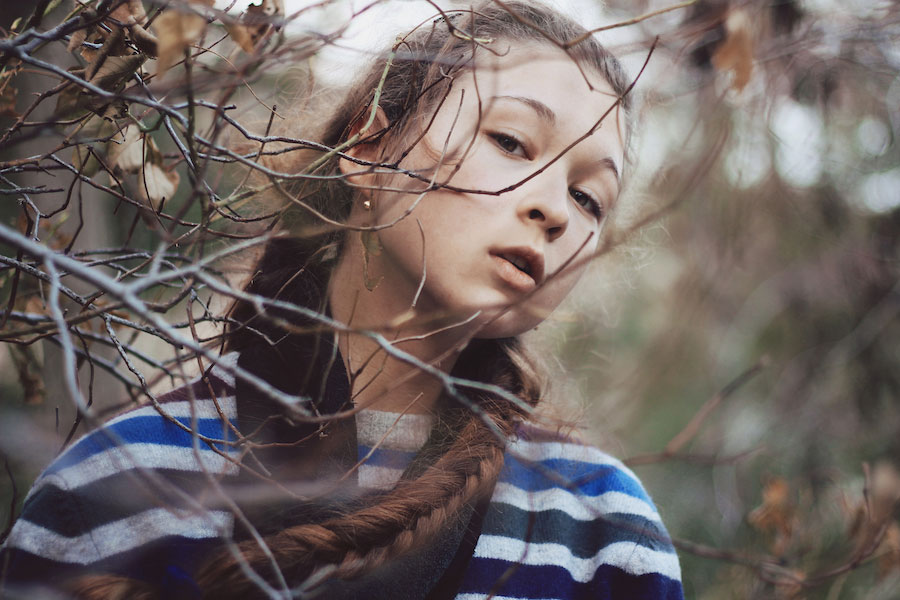
9. Find Great Backgrounds for Portraits
As I mentioned earlier in this article, backgrounds are an incredibly important part of any portrait. If your background is cluttered or too colourful, your model won’t stand out. If there’s too much going on around your model, they’ll blend into the background.
Study the colour wheel to find colour combinations that flatter your subject. For example, blue and orange go well together. A blue outfit and an orange background will go well together. For a less colourful effect, take skin tones into consideration. Warmer skin tones go well with cool-coloured backgrounds, while warm-coloured backgrounds might be more suitable for cooler skin tones. This isn’t a rule, but it might help you take more visually appealing portraits.
Last but not least, use a wide aperture. If there’s a small detail in the background that can’t be removed, you can blur it out by using a wide aperture.
A lot of people ask about the “ideal” aperture in portrait photography. There’s no perfect aperture for every single photo. It depends on your style, the location, and the look you’re going for. If you’re okay with blurring out details and creating soft bokeh, use the widest aperture possible. Apertures like f/1.2 and f/1.8 will help you achieve a soft and creamy look that’s popular in natural light portrait photography.
If you want there to be more detail in your portraits, try using a more narrow aperture like f/2.8. This will still blur the background, but you’ll be able to see more details on your model’s face and outfit.
10. Look for Natural Light Portrait Photography Inspiration Online
There are many talented portrait photographers out there, but I’d like to share some of my favourites. You have plenty of options to choose from if you need inspiration for your next natural light portrait photoshoot!
Here are some of the best natural light portrait photographers:
- Alessio Albi – Based in Italy, this talented photographer is a master at taking creative photographs using natural light. You’ll often find him cleverly using colours, shadows, and poses to create dramatic portraits both indoors and outdoors. I highly recommend checking out his work.
- Marta Bevacqua – This is another Italian photographer who takes elegant photos, primarily of women. She shoots underwater, indoors, and outdoors. Her indoor natural light portraits are some of my favourites, and they might give you the inspiration you need to start taking creative portraits in your own home.
- Woody Lau – Based in Hong Kong, Woody takes dreamy and ethereal photos of people. His portfolio is overflowing with positivity and brightness. He uses natural light for most of his portraits, so you’re guaranteed to find a lot of inspiration while browsing through his portfolio!
Retouching Your Portrait Photos with a Safe Hand
Even though editing isn’t mandatory, it can add even more depth to your photographs. You can edit photographs on your own or hire a professional service to do the work for you. Hiring a professional service can save a lot of your time and give you the freedom you need to take even more photos.
For a high-end look, consider using Offshore Clipping. Ease your workload with the help of the professional retouchers at Offshore Clipping, who have over 13 years of experience and over 1,200 happy clients.
They offer colour correction, tone correction, make-up correction, and other adjustments that will make your photos look their best. They have a fast turnaround rate and an amazing customer support team. With Offshore Clipping, you can focus on improving your natural light portrait photography without worrying about editing at all!
Retouch Your Natural Lighting Portrait with a Professional
FAQs – Natural Light Portrait Photography
What time is the best for natural lighting?
If you want to have as much light as possible during your photoshoot, check the weather in advance. Use a weather app to get an accurate picture of what to expect on the day of your photoshoot.
Make sure to take photos on a sunny or cloudy day to make the most of natural light. If the weather is good, consider taking photos during the golden hour (right before sunset) to create a golden glow in your portraits.
Typically, shooting in the morning or afternoon will give you the best results.
What is the best lens for natural light portraits?

This depends on where you primarily want to shoot. If you want to take wide-angle photos that capture your model and their surroundings, use a 35mm lens. If you want to take intimate close-up photos of your model, consider using a 50mm or 85mm prime lens.
You can take it further by using a 135mm lens for portrait photography. However, keep in mind that your subject will need to stand farther away for you to take sharp photos of them. There are also plenty of versatile zoom lenses that can help you take close-up and wide portraits without moving an inch.
Ultimately, think about what you want to achieve as a portrait photographer. If possible, rent or borrow a few lenses to get a clearer idea of what you prefer.
What shutter speed should I use for natural light portraits?

This depends on the amount of light that’s available. A relatively normal shutter speed should be at least 1/125th of a second. The faster it is, the more movements you’ll be able to capture sharply. However, since this isn’t sports photography, you don’t need a super fast shutter speed.
What is the difference between natural light photography and artificial light photography?
Artificial light photography requires the use of artificial lighting equipment. Natural light photography requires natural light (i.e., sunlight). Natural light constantly changes, which makes it unpredictable. However, it’s very versatile and accessible to everyone, so you can use it freely.
Professional artificial lights need to be bought and often require an indoor studio. They also need to be stored in a safe location. Artificial light can be used at any time and fully relies on your control, so you can get very creative with it.
Can you mix natural light with artificial light?
Absolutely! If you’re taking photos in an indoor studio, you might benefit from mixing natural light with artificial light. You can experiment with different kinds of lighting techniques to take outstanding photographs of people.
Conclusion
Natural light portrait photography can help you improve your skills, get creative, and reach new heights as a photographer. I encourage you to think outside the box, experiment with different natural light portrait photography techniques, and find inspiration in other photography portfolios.
Together, these approaches will help you improve consistently. Keep practicing, don’t be afraid of making mistakes, and enjoy taking stunning natural light portraits of your own.