Photo editing background refers to the professional process of adjusting, adding, removing, replacing, enhancing, or cleaning an image’s background to highlight subject focus, realism, and visual impact. Different background editing types include white, transparent, lifestyle, studio, gradient, shadow-based, etc. Edited background strengthens storytelling, meets platform-specific standards, and contributes to boosting conversion.
What you’ll learn in this article
- 1 What is Photo Editing Background?
- 2 What are the Different Types of Photo Editing Backgrounds?
- 2.1 1. White Background
- 2.2 2. Transparent Background
- 2.3 3. Abstract Background
- 2.4 4. Studio Background
- 2.5 5. Blur Background
- 2.6 6. Pattern Background
- 2.7 7. Composite Background
- 2.8 8. Reflection Shadow Background
- 2.9 9. Artificial Shadow Background
- 2.10 10. Background Cleanup
- 2.11 11. Solid Color Background
- 2.12 12. Lifestyle Background
- 3 Why Photo Editing Background Matters in Photography?
- 4 Which Photoshop Tools are Used to Change a Photo’s Background While Editing?
- 5 How to Remove Background in Photoshop While Editing a Photo?
- 6 How to Blur Background in Photoshop While Photo Editing?
- 7 How to Add Realistic Shadow While Photo Editing?
- 8 FAQ’s
- 8.1 What background is best for products?
- 8.2 Which app is best for professional background editing?
- 8.3 Is AI background editing good for professional results?
- 8.4 Can i create shadows on a new background?
- 8.5 What is the difference between background removal and background replacement?
- 8.6 What types of backgrounds work best for portraits?
What is Photo Editing Background?
The photo editing background is the image processing technique of removing, replacing, enhancing, adjusting, and cleaning up the background to align it for visual focus, clarity, and competitive advantage of brands for e-commerce or marketing. Professionally edited background highlights the subject by adjusting colors, elements, and removing distractions.
Editing image backgrounds is highly effective to develop a consistent and quality look in e-commerce. Besides, it assists in the business’s promotional activities by making the following impacts.
- Meets e-commerce platform’s image requirements
- Improves the product’s visibility and focus
- Creates a consistent look across different devices and platforms
- Makes the product look beneficial and attractive to assure viewers
- Increases engagement and conversion rates in e-commerce listings
What are the Different Types of Photo Editing Backgrounds?
The different types of photo editing backgrounds include white background, transparent, abstract, studio, blur, pattern, composite, reflection shadow, artificial shadow, background cleanup, solid color, lifestyle background, among others.
1. White Background
The white background is the editing process to clip the subject and place it on the pure white (#FFFFFF) backdrops. A white background is used for Amazon, Shopify, and eBay product image listings to create clean, distraction-free, compliant images for delivering consistent and conversion-focused images.
2. Transparent Background
Transparent background refers to the editing technique when the subject of the photo has no specific background and is usable on any background. The purpose of transparent backdrops is to create reusable visuals, seamlessly integrate the subject for advertisements, packaging, web design, etc.
3. Abstract Background
Abstract background editing is to place the subject on a creatively designed background for artistic impact in photos. Abstract background can cover non-realistic colors, shapes, and effects that were absent in the real images.
4. Studio Background
Studio background editing refers to processing images in artificial backdrop images that are commonly used in the photography studio or indoor photography setup for controlled output. It can be neutral, b/w or colourful to create consistent and timeless results.
5. Blur Background
Blur background or the bokeh effect is the process of softening the background, keeping the foreground sharp. Blurry background editing creates visual depth, cinematic focus, or isolates the subject.
6. Pattern Background
Pattern background editing is the process of placing a pattern behind the subject to create a decorative look, focus the brand’s personality, and establish visual rhythm. Patterns are generally repeating textures and designs, and go well with fashion products or packaging.
7. Composite Background
Composite background editing is the technique to blend several images to create one scenario or depict a different vibe of one concept. This editing is mostly used in advertising, creative campaigns for controlled storytelling, or to create a conceptual message.
8. Reflection Shadow Background
Reflection background editing refers to creating a mirror shadow behind the subject. In this technique, subjects get a shadow that looks alike. Reflection shadow background editing is used for high-end products to add visual symmetry.
9. Artificial Shadow Background
Artificial shadow creation in the background is performed to add depth and realism in images to boost viewers’ credibility. In this process, photo editors manually add a shadow, considering the lighting source in images. It is mostly used in e-commerce product images.
10. Background Cleanup
When the background consists of too many props or overshadows the subject, background cleanup helps create a lean and realistic appearance, restoring the original environment. In this process, background flaws are removed and adjusted to treat the subject right.
11. Solid Color Background
Solid color background editing is placing a subject on a single-color, flat, and uniform-looking background. It strengthens brand identity, creates a minimal look, and bold visuals.
12. Lifestyle Background
Lifestyle background refers to placing the subject in a real-life setting or real-world environment. The purpose of editing the subject on the lifestyle background is to create an emotional connection, a context-based story, and build trust.
Why Photo Editing Background Matters in Photography?
Photo editing background matters in photography because it enables control over visual focus, eliminates distractions, supports the concept of photography, enhances subject clarity, and supports storytelling. A well-edited background balances lighting, color, element placement, and depth, strengthens composition, and improves professional quality. As a result, it captivates viewers, delivers the intended message, and fulfills the photo’s purposes.
Why Background Editing Matters in Product Photography?
Background editing matters in product photography for its accurate color presentation, marketplace compliance, improved product focus, brand consistency, and higher conversion potential. A clean backdrop accentuates the product’s features, eliminates flaws, supports uniform visuals across different platforms and devices, and builds buyer trust that directly influences purchase decisions.
Why Background Editing Matters in Portrait Photography?
Background editing matters in portrait photography because of subject isolation, mood control, skin-tone enhancement, and professional presentation. Editing the background minimizes visual noise, complements lighting and emotion, and guides the viewer’s attention to facial expressions in the foreground. As a result, you get refined results suitable for personal branding, corporate profiles, and creative portraits.
Why Background Editing Matters in Real Estate Photography?
Background editing matters in real estate Photography as it enhances property appeal by improving lighting balance, removing clutter, and creating visual clarity. Real estate photo Editing makes spaces look brighter, larger, and more inviting, helping listings attract attention, generate more inquiries. When potential buyers see those properties, they feel convinced, and conversion proceeds faster.
Which Photoshop Tools are Used to Change a Photo’s Background While Editing?
Photoshop tools such as the Pen tool, Select and Mask, Layer Mask, Quick Selection Tool, Background Eraser Tool, Brush Tool, Clone Stamp & Healing Tools, and Select Subject (AI Tool) are used to change a photo’s background while editing, among others.
1. Pen Tool: The Photoshop Pen tool is used to create precise, manual paths around objects with hard edges.
2. Select and Mask: The Select and Mask tool is used for refining selections on subjects having soft edges, such as hair, fur, etc, before removing or replacing backgrounds.
3. Layer Mask: Layer masks are used for selective editing. By using it, photo editors hide or reveal background areas non-destructively.
4. Quick Selection Tool: Photoshop’s Quick Selection tool allows brush-based selection with speed and moderate control.
5. Background Eraser Tool: The Background eraser tool is used for removing backgrounds by detecting edge contrast.
6. Brush Tool: The Brush Tool is used for controlled and specific manual cleaning of edges and blending subjects into new backgrounds.
7. Clone Stamp & Healing Tools: The Clone Stamp Tool and Healing Tool are used for fixing background imperfections after replacement.
8. Select Subject (AI Tool): Select Subject is an AI tool that automatically detects the main subject using Adobe AI, making fast and accurate selections.
How to Remove Background in Photoshop While Editing a Photo?
The process to remove the background in Photoshop while editing a photo is as follows.
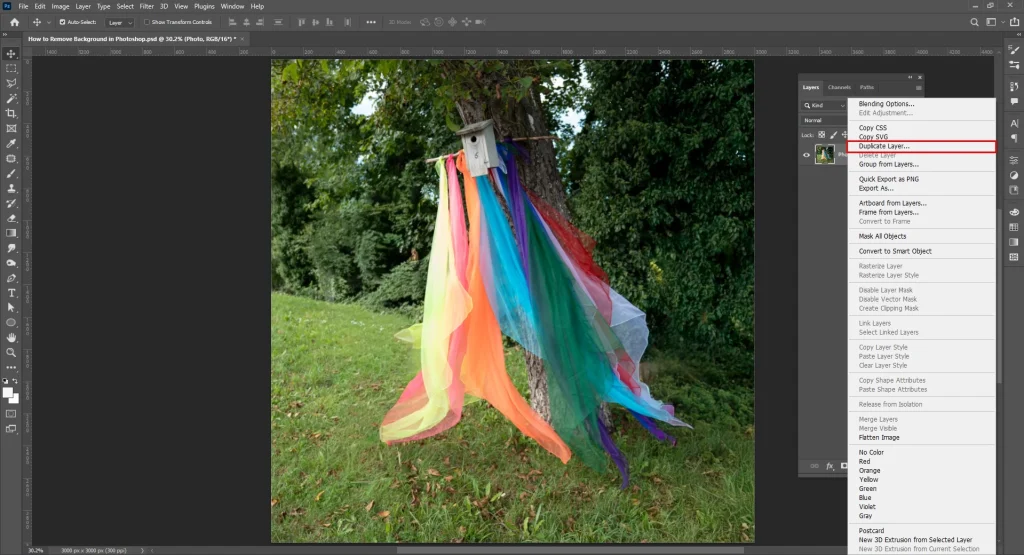
Step 1: Open and Duplicate the Image
Open your photo in Adobe Photoshop. Duplicate the background layer to protect the original image.
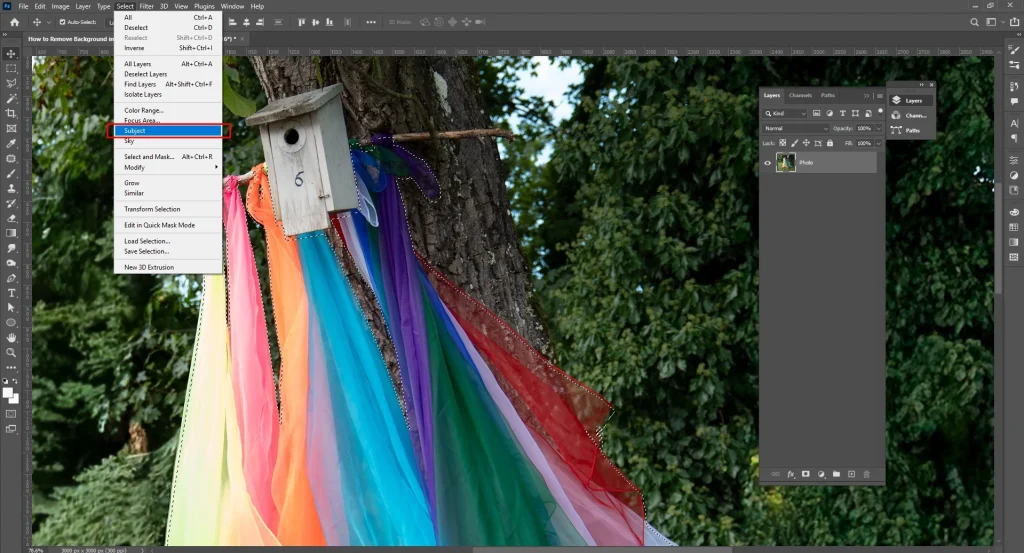
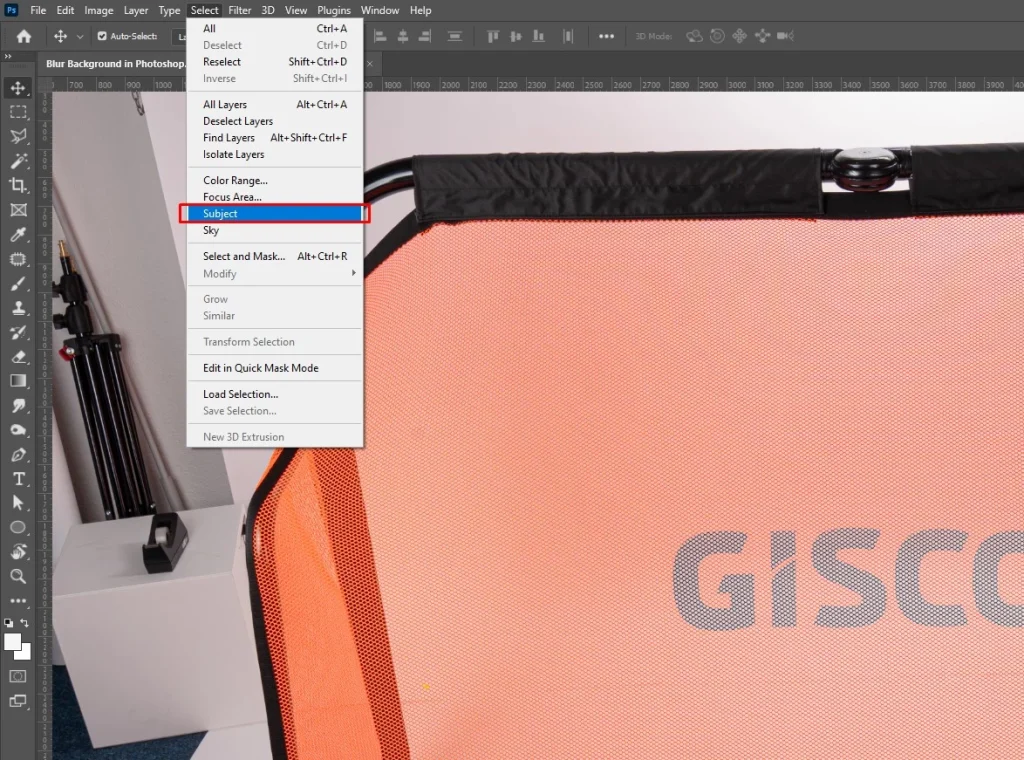
Step 2: Select the Subject Automatically
Go to Select and then click Subject. It will let Photoshop AI detect and select the main subject.
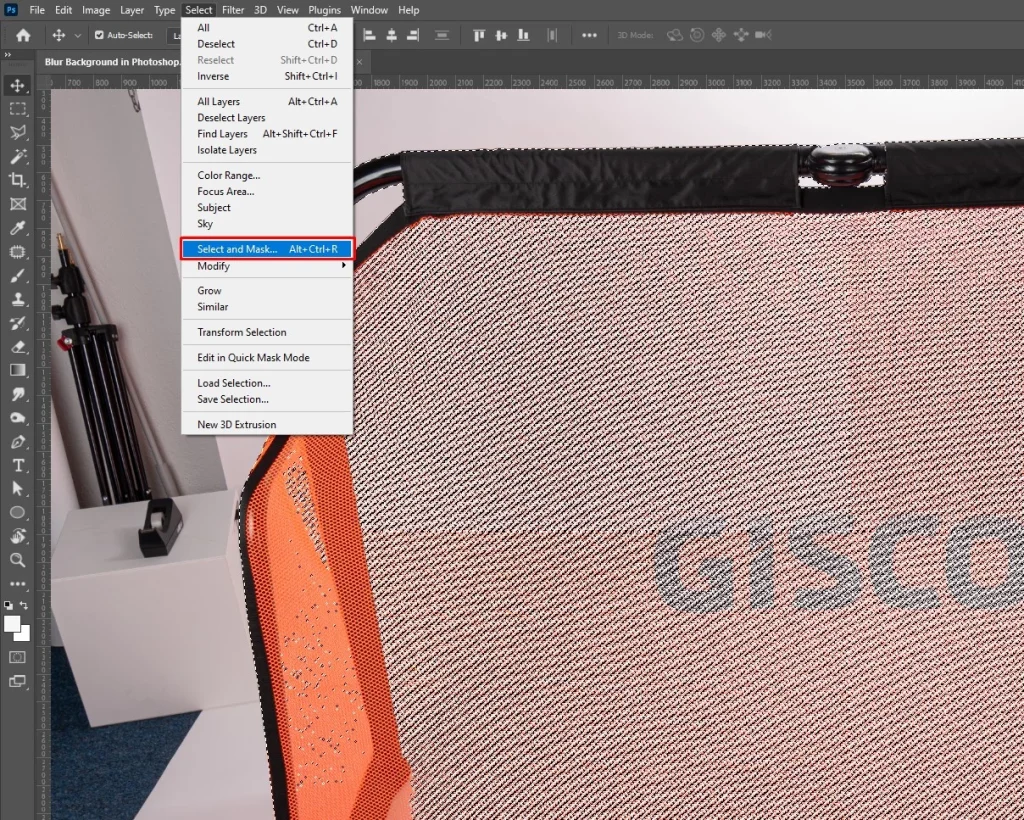
Step 3: Refine Edges with Select and Mask
Click Select and Mask.
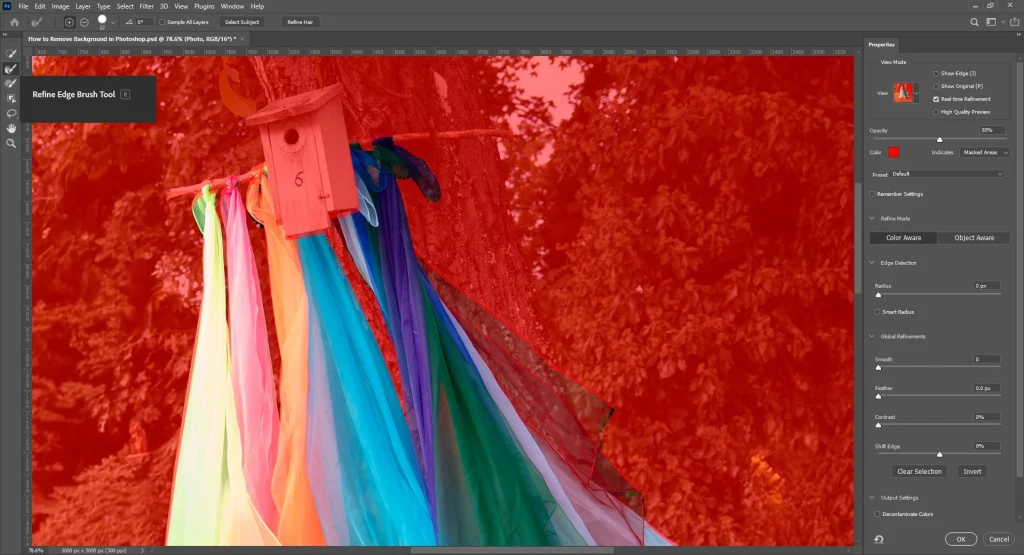
Then, go to Refine Edge tools to refine edges, especially hair, fur, and soft areas.
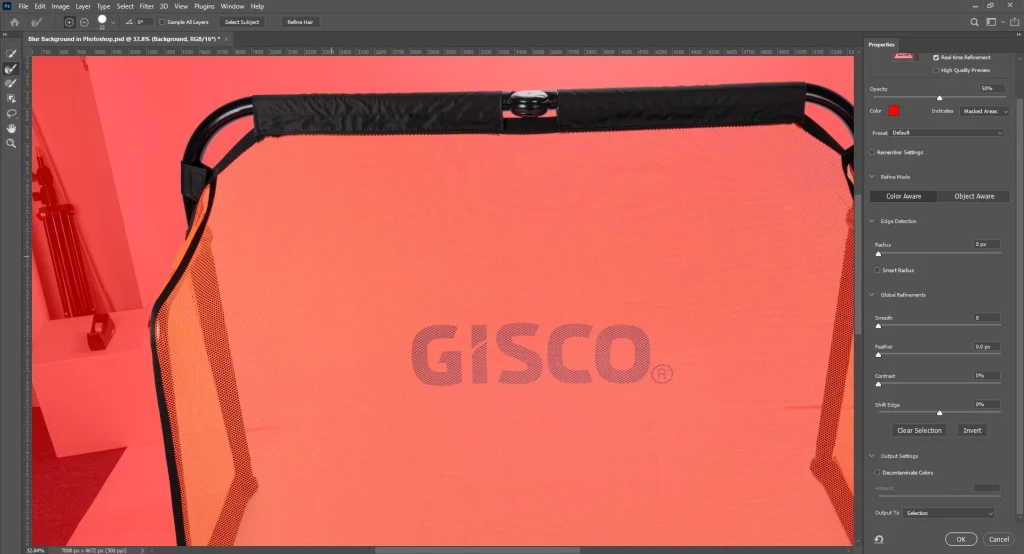
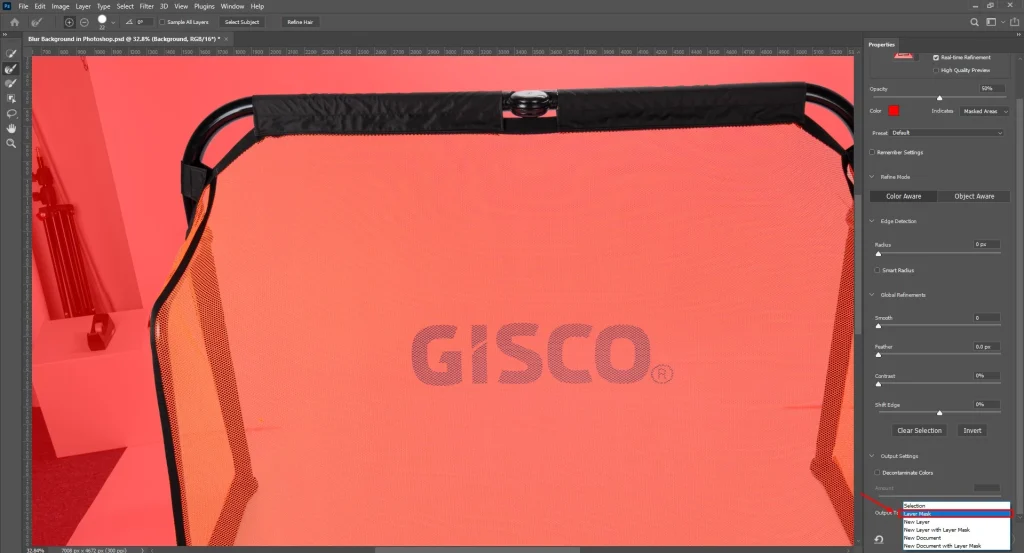
Step 4: Remove the Background Using a Layer Mask
Output the refined selection as a Layer Mask, which effectively removes the background without deleting pixels.

Step 5: Export or Replace the Background
Save as PNG for transparency or place the subject onto a new white, solid, or lifestyle background.

How to Blur Background in Photoshop While Photo Editing?
Here is the process to blur the background in Photoshop while photo editing.
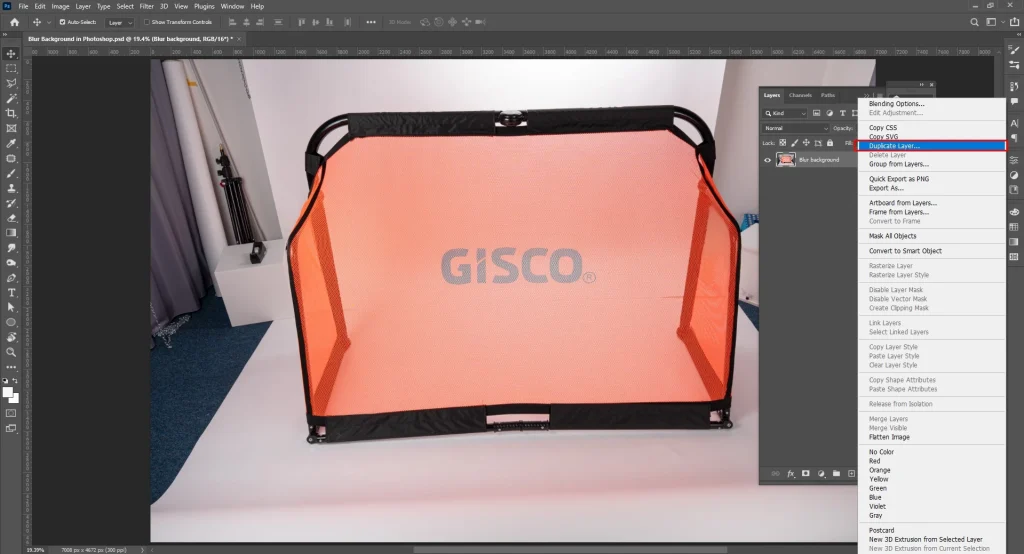
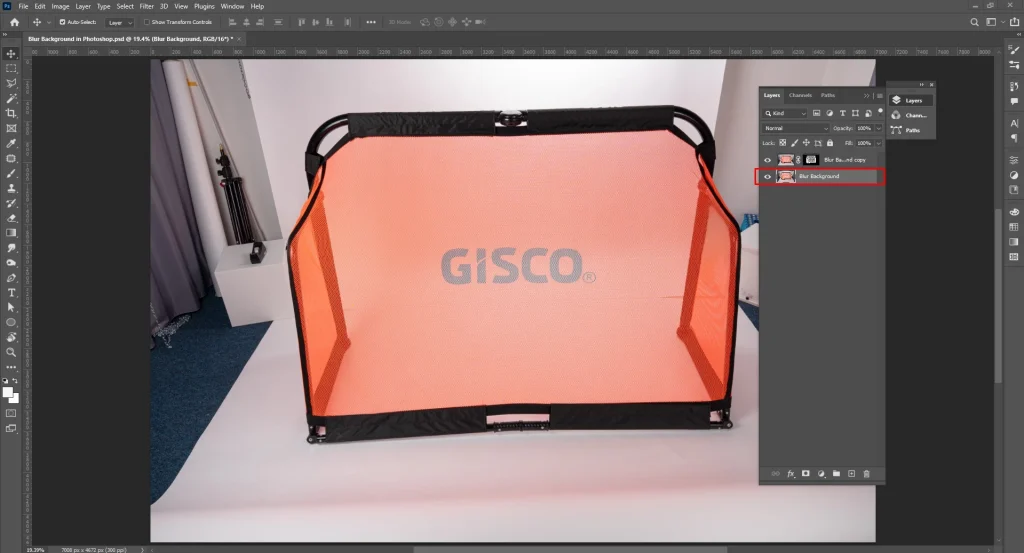
Step 1: Open and Duplicate the Image
Open the image you will work on in Adobe Photoshop. Duplicate the background layer to perform non-destructive editing.
Step 2: Select the Main Subject
Follow these steps to select the subject in the image.
- Go to Select and then Subject.
- Use Select and Mask to refine edges, especially hair and soft details.
Step 3: Create a Layer Mask
Output the refined selection as a Layer Mask to keep the subject sharp and isolated.
Step 4: Blur the Background
To blur the background, select the background.
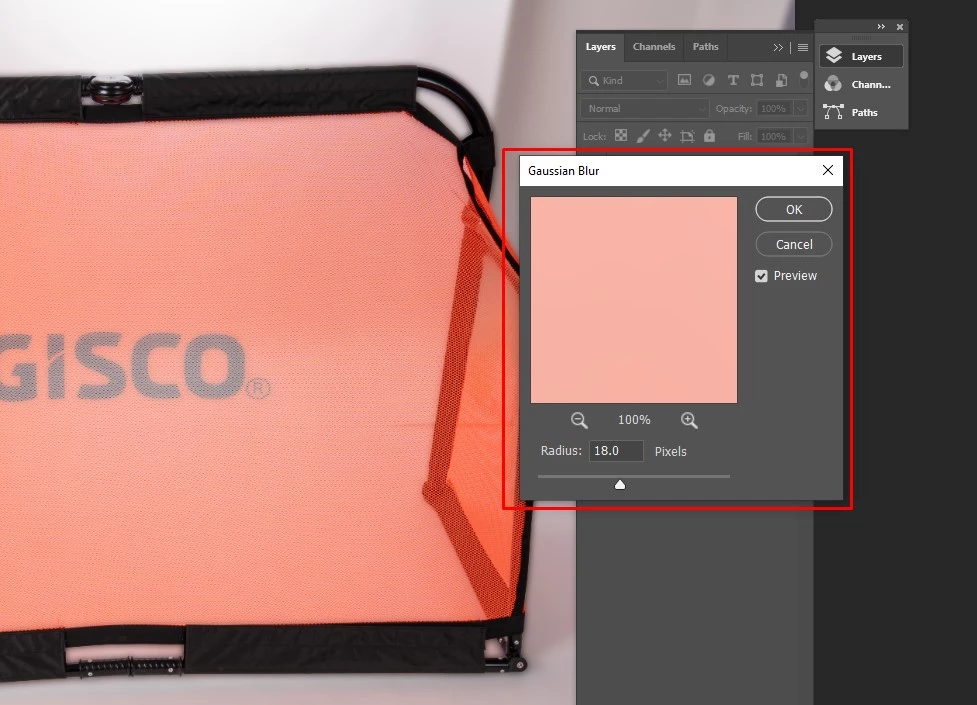
Then, apply Filter → Blur → Gaussian Blur.
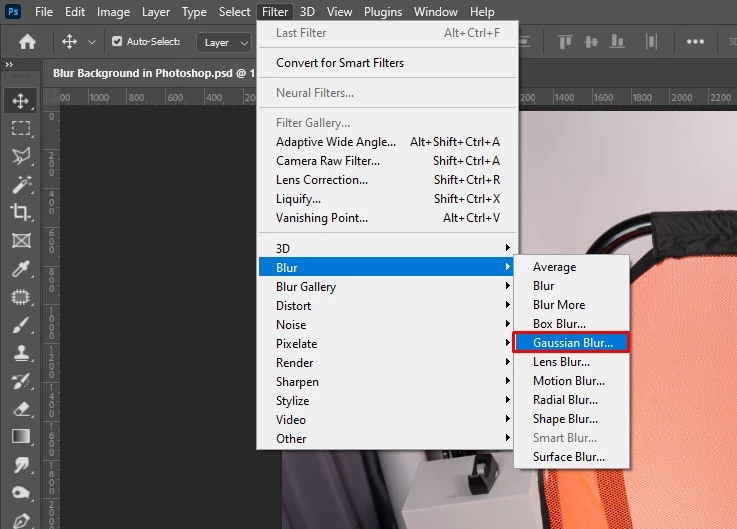
Then, refine the edges by setting the blur radius (15–35 px). Avoid blur halos and ensure realism by cleaning edges with a soft black brush.
How to Add Realistic Shadow While Photo Editing?
There are different ways to add realistic shadows while photo editing. It depends on the type of shadows: drop shadow, cast shadows, and reflection shadows as follows.
Method 1: Adding a Realistic Drop Shadow while Photo Editing
The step-by-step process for adding a realistic drop shadow during editing photos is as follows.
Step 1: Isolate the Subject
Select your subject with tools like Quick Select, Pen tool, or AI Select Subject and put it on its own layer.
Step 2: Create a shadow base
Duplicate the subject layer by pressing Ctrl/Cmd+J. Fill the duplicate with solid black: Select→Fill→Black, or apply a Black Color Overlay.
Step 3: Position & Transform
Now, move the newly created black silhouette to where the shadow would fall.
- Use Edit
- Transform
- Distort/Perspective/Warp to flatten the angle along the surface
Match the perspective to the floor/ground plane.
Step 4: Blur for Softness
Follow these steps to blur the shadow.
- Click Filter
- Apply Blur
- Then apply Gaussian Blur.
Remember the product and its lighting angles. Hard light equals to low radius; soft light equals to higher radius. Then, set the layer to Multiply and reduce opacity (start ~25–60%).
Step 5: Adjust the Color & Temperature
Add a hue/saturation or color balance adjustment clip to the shadow layer. It can be slightly warm or cool depending on the scene’s ambient. Add a soft layer mask and paint with a low-opacity black brush to feather edges or remove shadow under lifted edges of the subject. Subtle noise (1–3%) stops the shadow from looking artificially smooth.
Step 6: Fine-tune
Adjust opacity, blur, and mask until it appears natural from a distance.
Method 2: Adding Realistic Cast Shadow while Photo Editing
Here are the steps to add a realistic cast shadow while editing images.
Step 1: Take a soft and low-opacity brush, paint a shadow or create a shape on a new layer following the silhouette.
Step 2: Transform for perspective.
- Click Edit
- Then, go to Transform
- Click Distort/Warp
Step 3: Use Gaussian Blur and set Blend = Multiply, and adjust opacity. Lighten the inner edge slightly where contact is closest to the subject.
Method 3: Adding Realistic Reflections Shadow while Photo Editing
Here is the step-by-step guide to add a reflection shadow while editing images.
Step 1: First, duplicate the subject. Flip it vertically and place it under the subject.
Step 2: Add a vertical gradient mask. Lower the opacity and apply motion or a Gaussian blur. Set blend to Multiply or Normal depending on the look.
Step 3: For reflective surfaces, keep sharper near contact, blur more as it recedes.
FAQ’s
What background is best for products?
A background that highlights products is for products, especially a white, neutral, and clutter-free background. They meet e-commerce background requirements, brand guidelines, and keep online shoppers’ focus in line. Background can also contain lifestyle scenarios, natural scenarios to make viewers relate to the real-world use case.
Which app is best for professional background editing?
Adobe Photoshop is the best for professional background editing, along with other editing. Photoshop offers plenty of features such as Pen Tool, layer masks, refined edge, and realistic shadow creation, ensuring faster workflows with accuracy and scalability.
Is AI background editing good for professional results?
AI background editing is good for professional results if that includes basic level editing, batch processing, etc. It produces consistent results with bulk editing. However, manual processing is still required for the final output and confirmation to get accurate and premium-level images.
Can i create shadows on a new background?
Yes, you can create shadows on a new background there are different types of shadows, such as drop shadows, natural shadows, or reflection shadows, etc. By using any photo editing software, you can create any shadow, balancing the products and lighting position to create realistic images.
What is the difference between background removal and background replacement?
The differences between background removal and background replacement are the position of the background; the removal process is to isolate the subject for a transparent background, or to use it on a different background. Background replacement is to swap the existing background with another one.
What types of backgrounds work best for portraits?
Gradient background, dark background, portrait background, solid color background, and lifestyle background work best for portraits. They add timeliness and depth, enhance a person’s facial features, and create an aesthetic look in a photo by highlighting the subject.