A checkered background is a checkboard pattern that appears behind an image in Photoshop and other photo editing tools, indicating transparency. This pattern doesn’t get exported it only resides inside the software. PNG, WebP, and SVG files show transparency through a chessboard pattern, but JPEG files display transparency with a white or black background.
Knowing how checkered backgrounds work is essential for e-commerce sellers, professional photographers, graphic designers, and marketers as they create professional product images, marketing visuals, and flexible designs to use on multiple platforms.
What you’ll learn in this article
How Do You Remove the Checkered Background in Photoshop?
Here is the step-by-step guide to remove, fix or replace a checkerboard background in Photoshop.
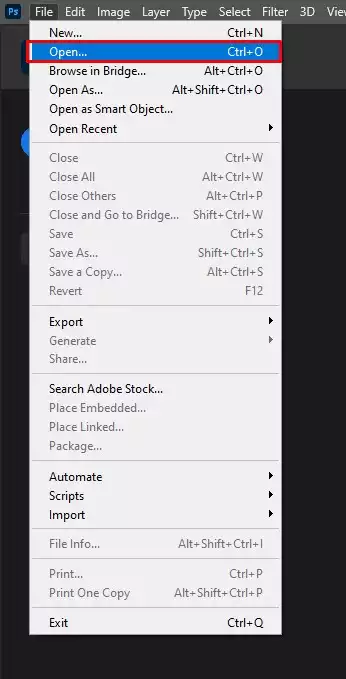
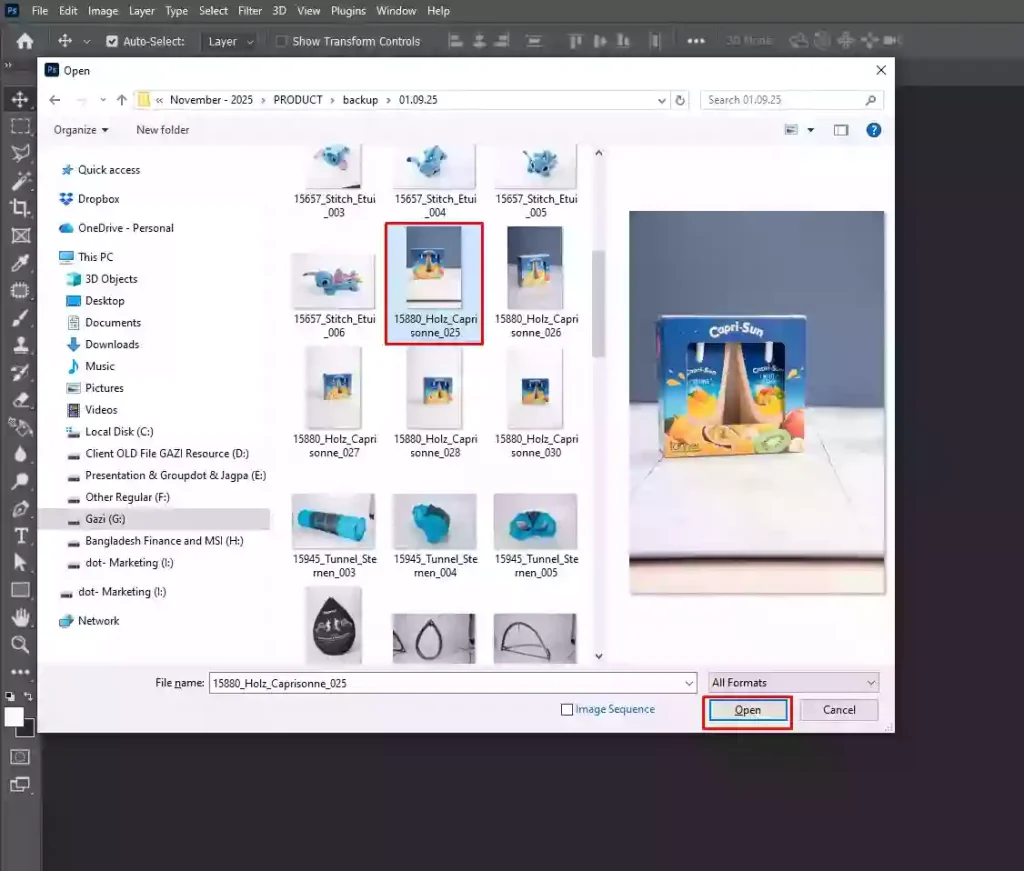
Step 1: Open Your Image in Photoshop
- Go to Photoshop
- Click File
- Click Open, then select your image
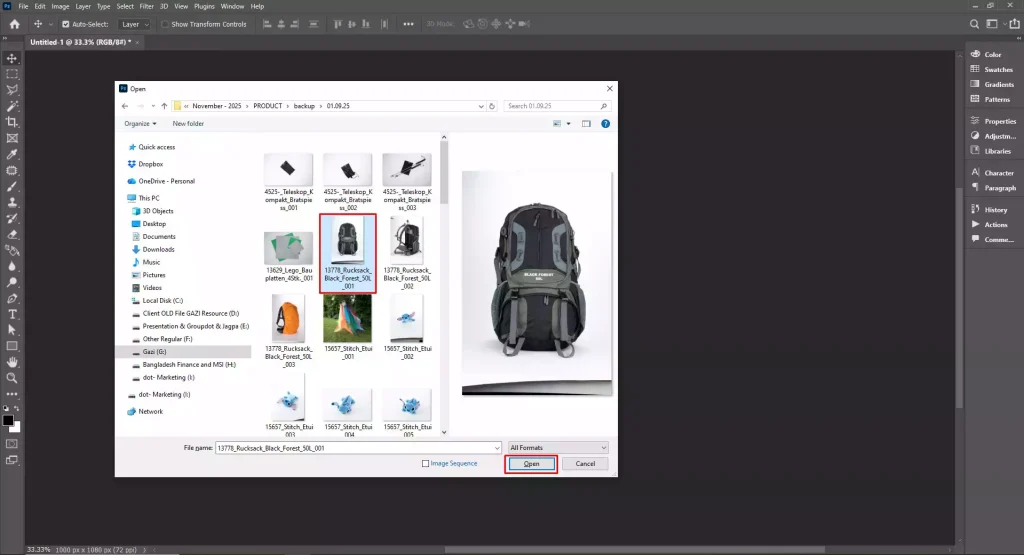
If you see a gray-and-white checkered background, it means the image has transparent areas instead of a solid background.
Step 2: Open the Layers Panel
- Go to the Window
- Click Layers to open the Layers panel
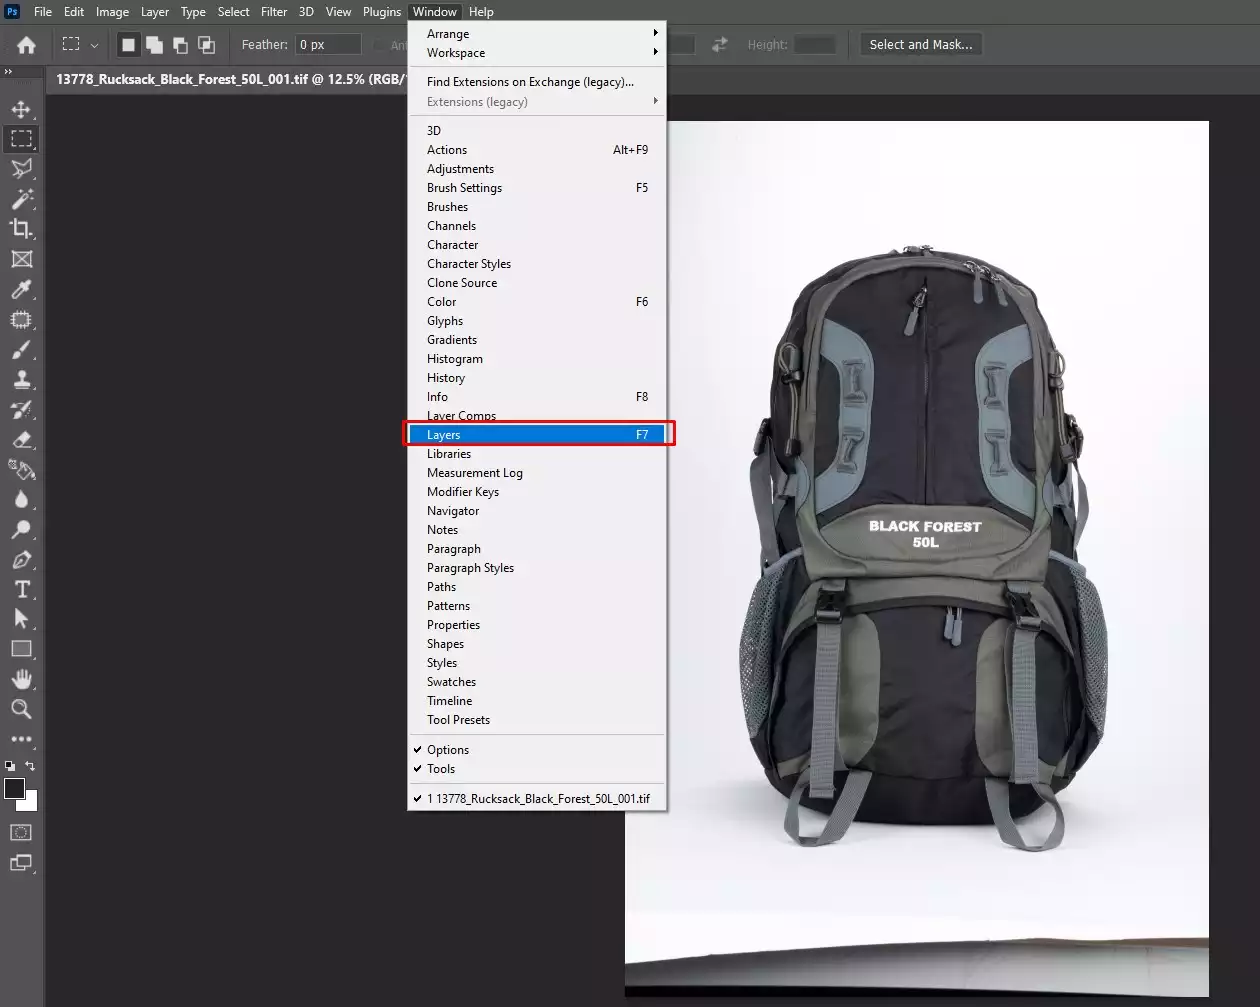
Here you will see your image layer, and any checkered areas indicate transparency, not an actual background.
Step 3: Unlock the Image Layer
If the layer shows a lock icon, double-click the Background layer and click OK to unlock it.
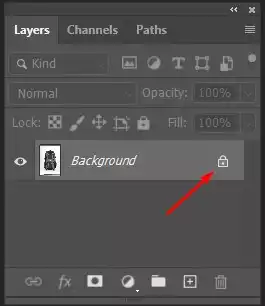
This converts the layer into an editable layer so you can remove or replace the background.
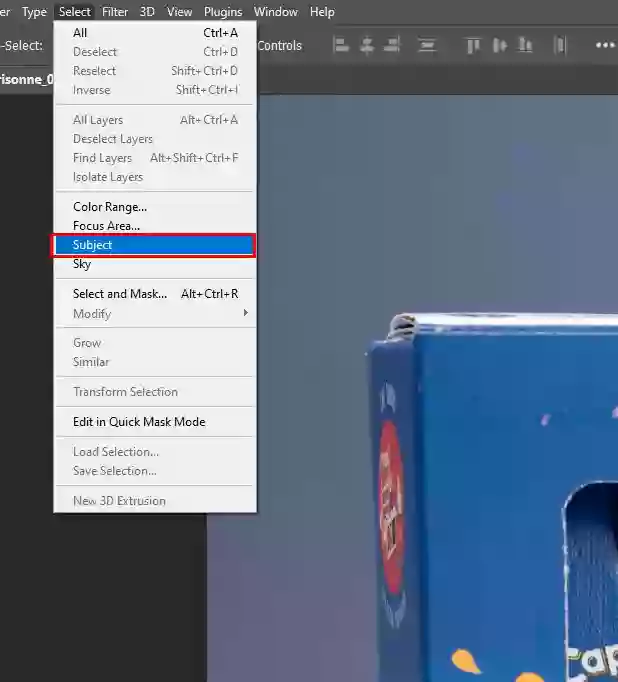
Step 4: Select the Subject Automatically
- Go to Select
- Then Subject
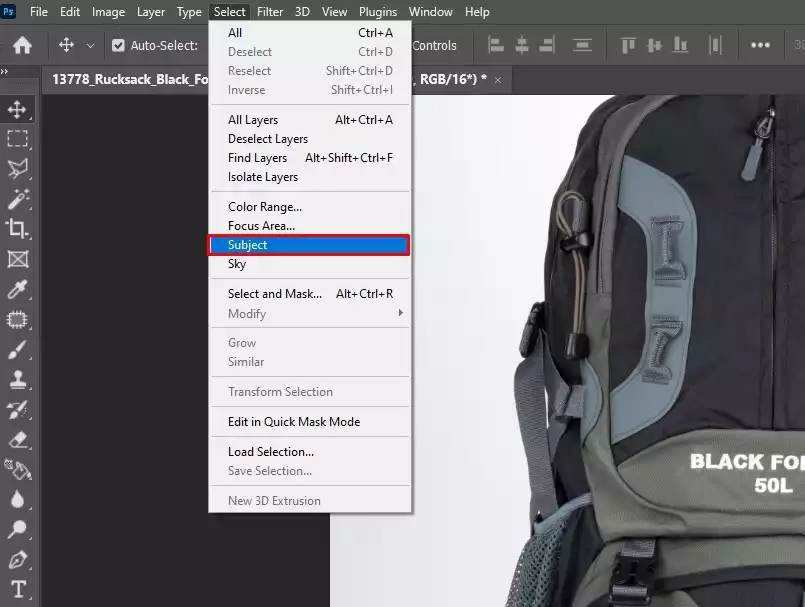
Photoshop automatically detects and selects the main subject using AI, and selection lines (marching ants) will appear around the object.
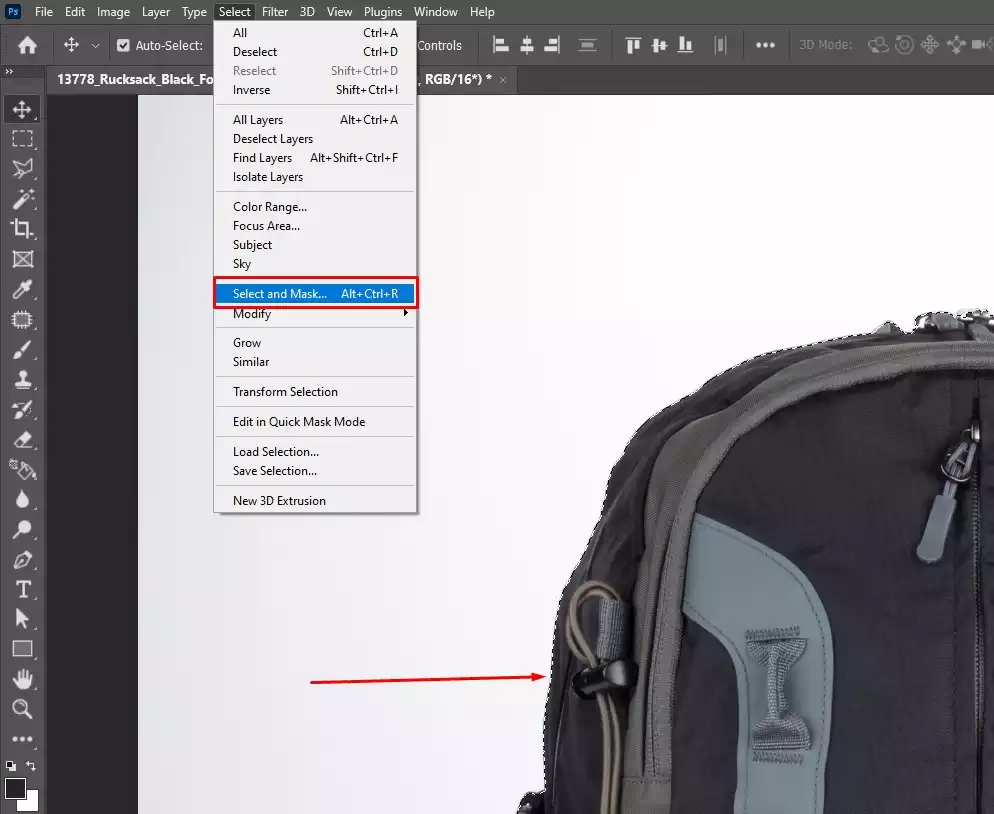
Step 5: Open Select and Mask Workspace
With the subject still selected, go to Select → Select and Mask to open the workspace where you can refine and clean the edges of the selection.
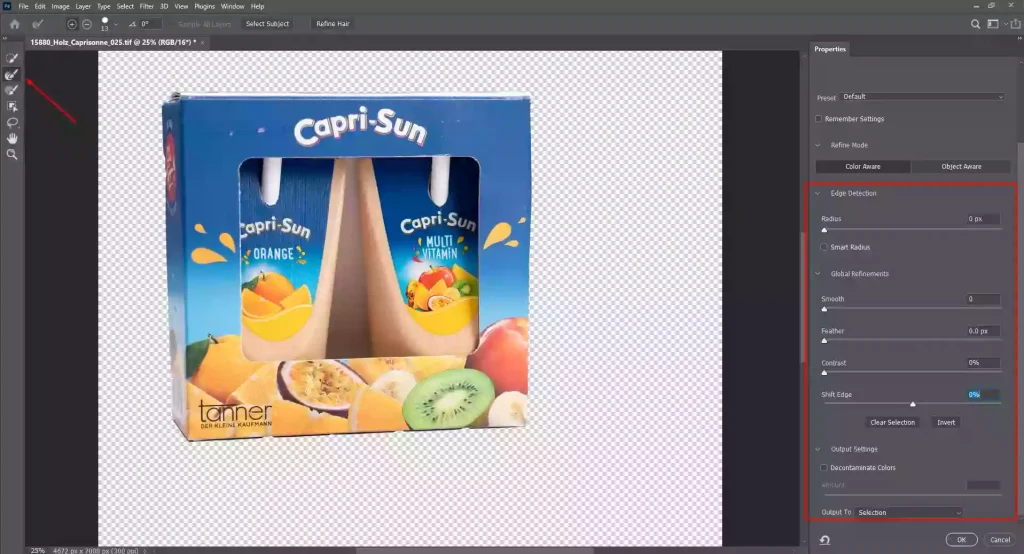
Step 6: Refine the Edges
- Go to the Select and Mask workspace.
- Choose the Refine Hair Tool from the left toolbar.
Then gently brush over hair, fur, or soft edges where the background looks rough or unfinished.

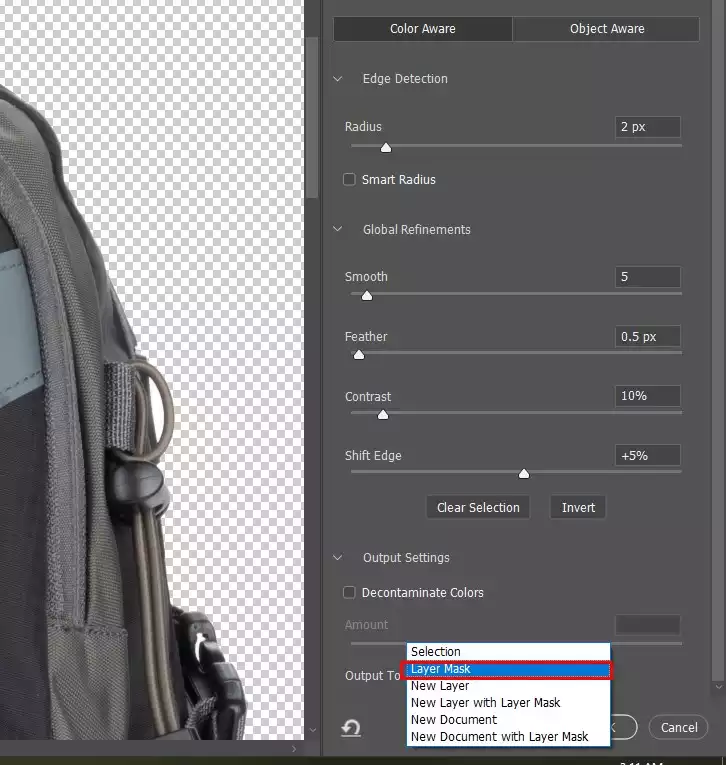
On the right-side Properties panel, adjust the settings to improve edge quality.
- Set the radius to 2–5 px to detect soft edges.
- Increase smooth to 5–10 to reduce jagged lines.
- Add feather around 0.5–1 px for natural blending.
- Raise contrast to 10–20% to sharpen the edge.
- Move shift edge to −5% to −10% to pull the selection inward and remove leftover background pixels slightly.
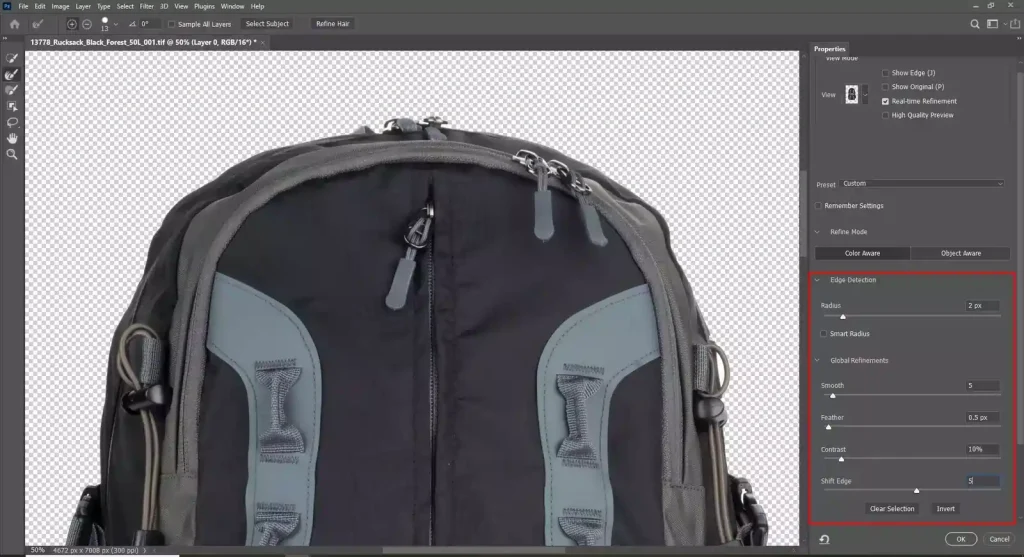
These adjustments help Photoshop clean up halos and make the subject edges look natural and professional.
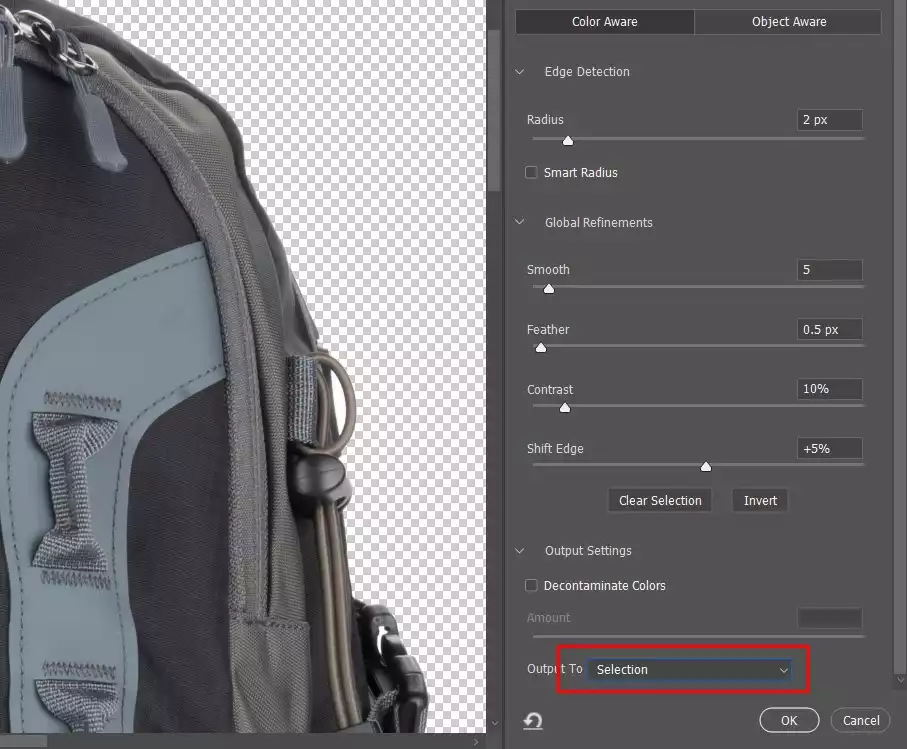
Step 7: Output as Layer Mask
At the bottom-right corner of the select and mask window, find output to.
- Click the dropdown menu.
- Choose Layer Mask.
- Click OK.
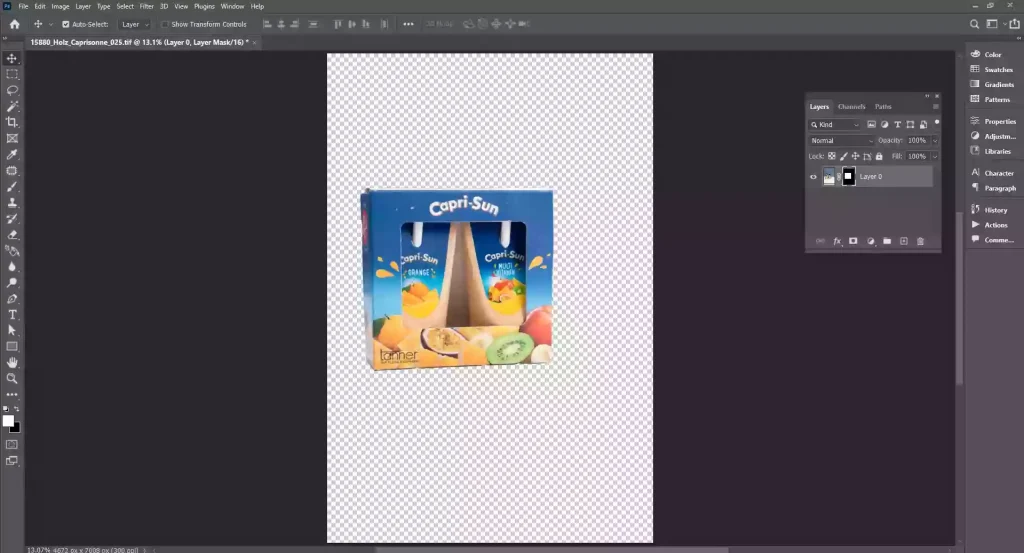
Photoshop now hides the background, and the removed area appears as a checkered pattern. It means the background is transparent, and you can restore it later.
Step 8: Remove the Checkered Background
- Go to Layer
- Click New Fill Layer
- Then click Solid Color
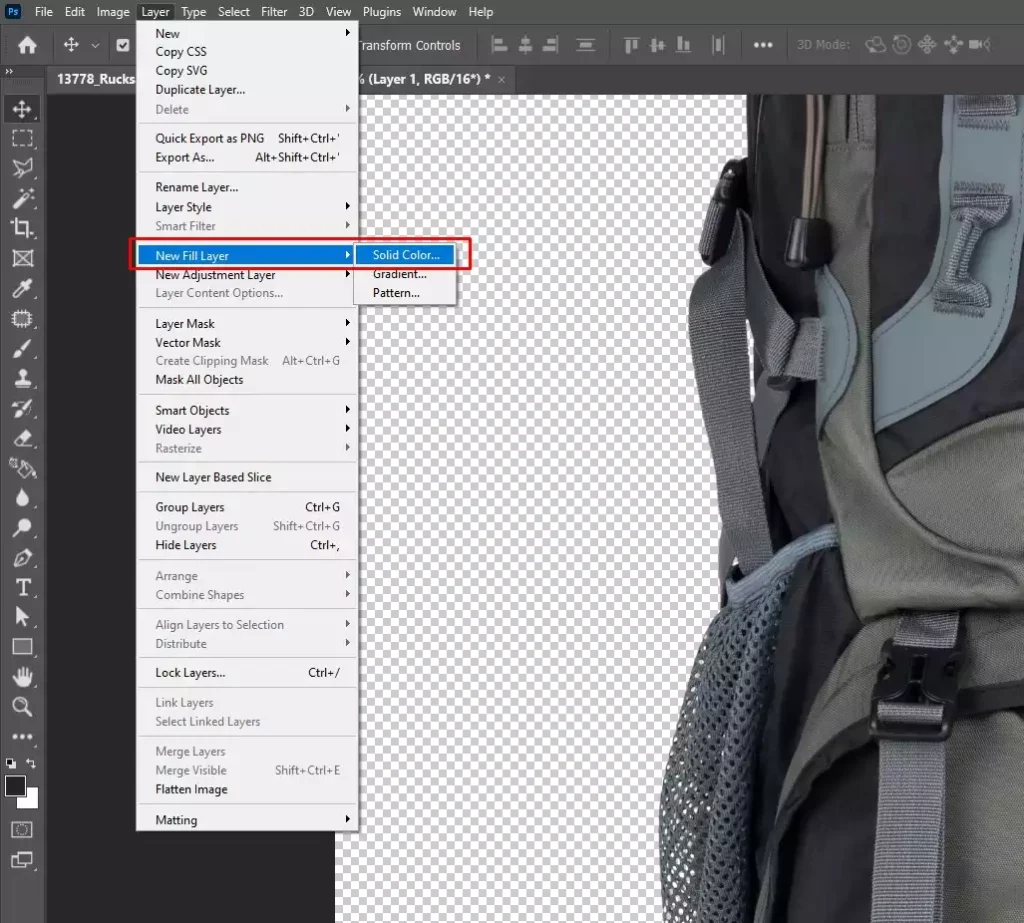
Now choose any color, white is commonly used, and click OK. Drag this new color layer below your subject layer. This will eliminate the checker background, as there is a new visible background.
Step 9: Fix Remaining Transparent Areas
This is an optional step; use only if you still see transparent holes. Click the Layer Mask thumbnail. Select the Brush Tool (B).

Use a white brush if you want to reveal the subject or a black brush to hide unwanted parts. Gently brush over the clean edges until you are satisfied with the output.
Step 10: Export Without the Checkered Background
- Go to File, then click Export. A sub window will open showing ‘Export As’, choose any format you prefer.
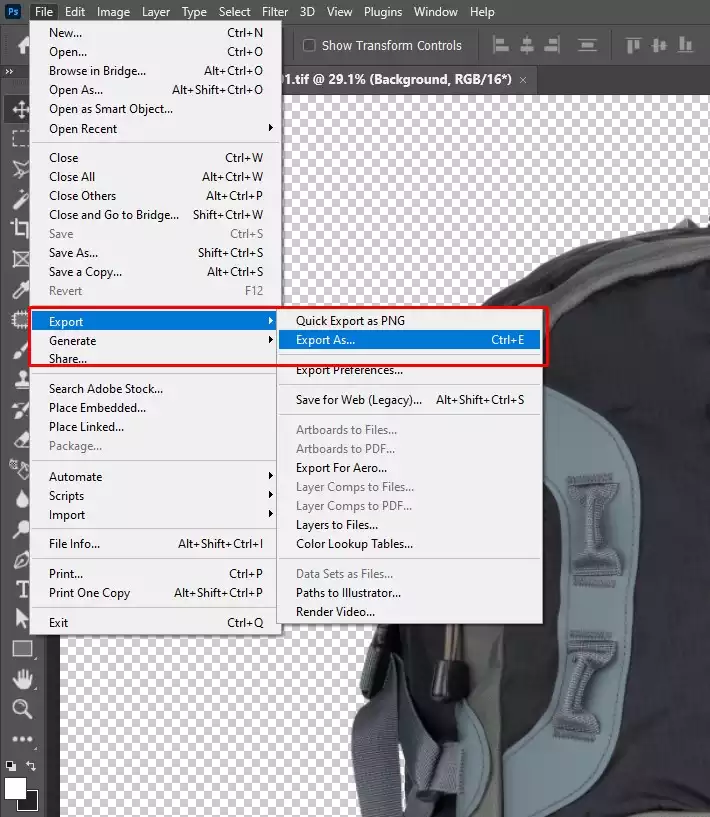
JPEG removes transparency and is best for website use, PNG keeps transparency, or you can choose PSD for later editing. Once done, click Export.
How Do You Create a Checkered Background in Photoshop?
Follow these steps to create a checkered background in Photoshop.
Step 1: Create a New Document
- Go to File
- Then, click New
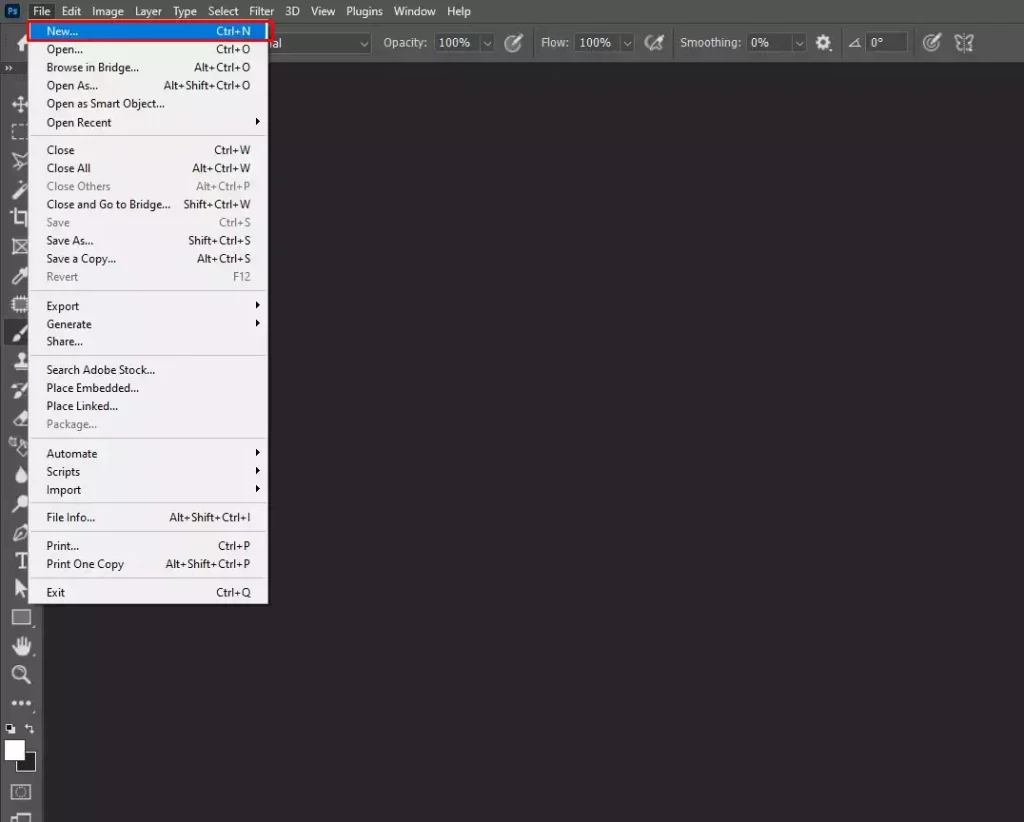
Enter your document size and resolution, then click Create to open a blank canvas.
Step 2: Add a New Layer
To add a new layer, follow these steps.
- Go to Layer
- Click New
- Then click Layer
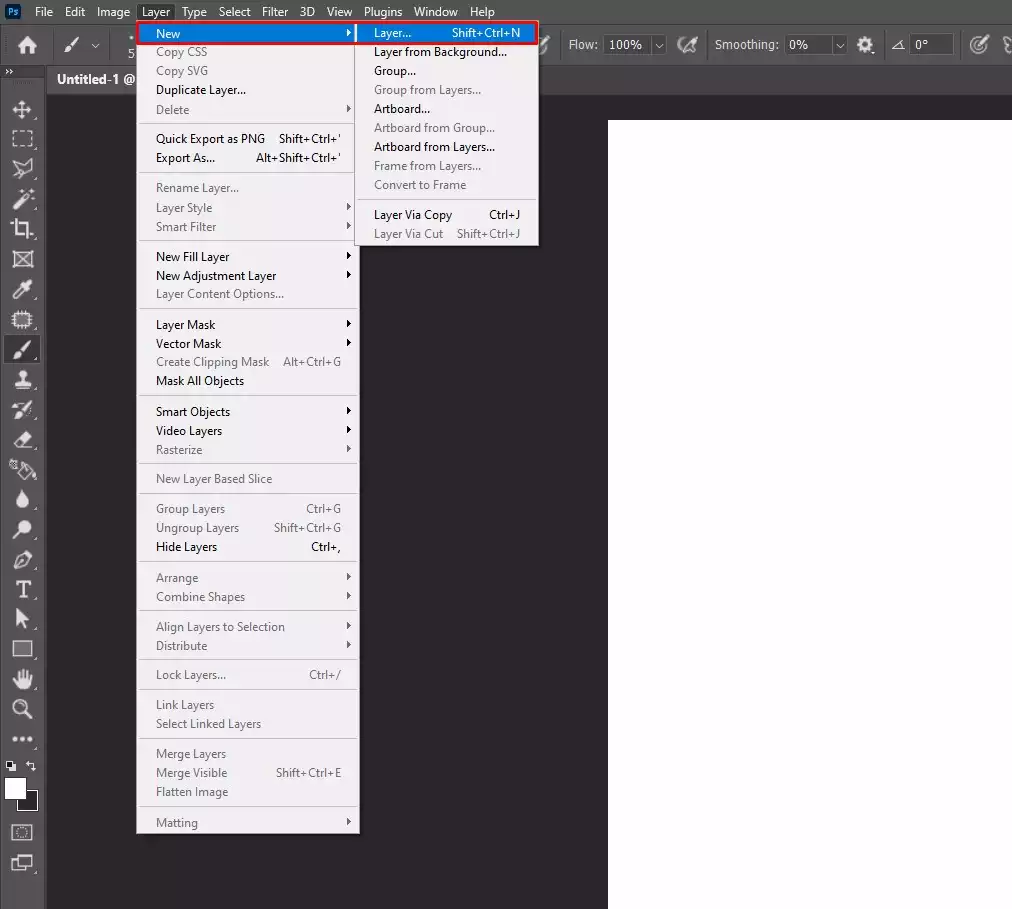
This process will create an empty layer above the default background layer.
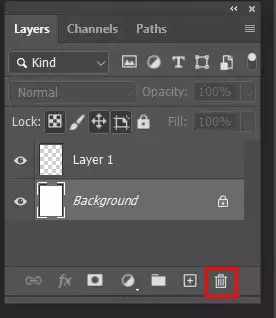
Step 3: Remove or Hide the Background Layer
In the Layers panel, unlock the background layer if necessary. Click the eye icon to hide it or delete it.
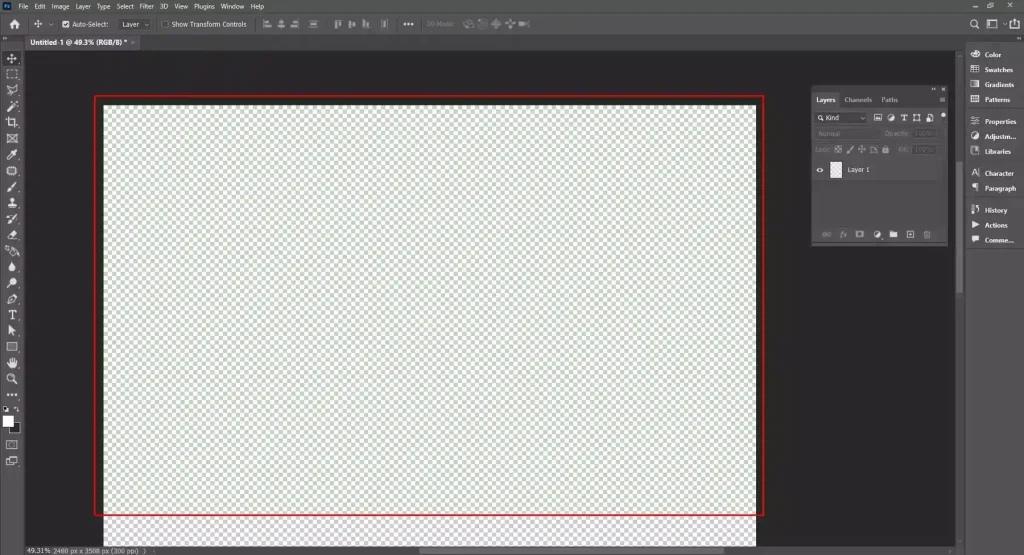
Step 4: View Transparency Grid
When you remove or hide the background layer, a gray and white checkered pattern will appear in Photoshop, indicating transparent areas.
How Do You Make an Image Transparent with a Checkered Background?
To make an image transparent with a checkered background, follow these steps.
Step 1: Open and Prepare the Image
First, go to File, click Open, and select your image. In the Layers panel, double-click the Background layer and click OK to unlock it for editing.
Step 2: Select the Main Subject
- Go to Select
- Click Subject
Photoshop will automatically detect the object. This process will create an active selection around the subject.
Step 3: Refine and Remove the Background
- Click Select
- Select and Mask to improve the edges
Then set Output To Layer Mask and click OK to hide the background.
Step 4: Confirm Transparency
After applying the mask, the removed area will appear as a gray-and-white checkered pattern, indicating a transparent background.
How Does a Clipping Path Create a Checkered Background?
Here are the steps of how a clipping path creates a checkered background.
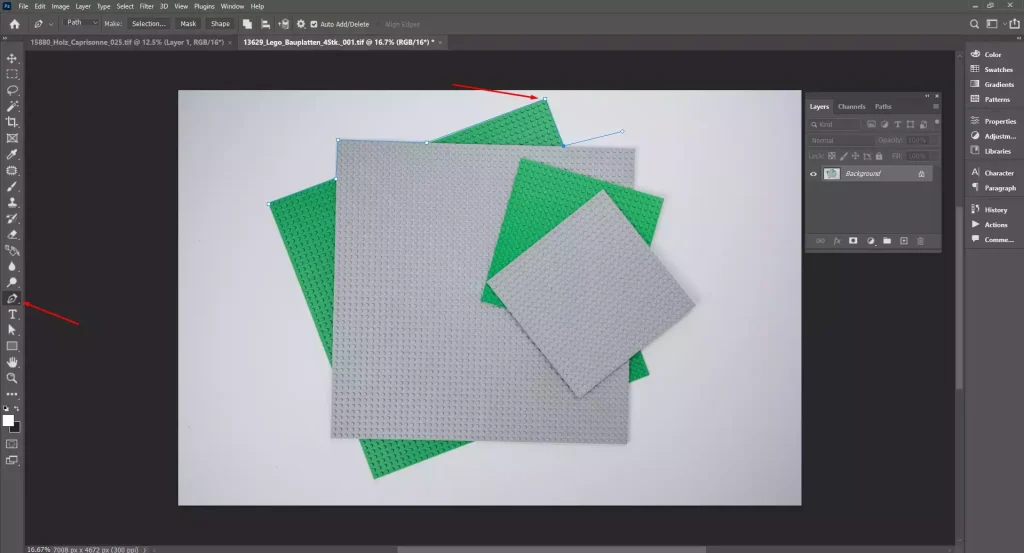
Step 1: Create the Clipping Path
Select the Pen Tool (P) from the toolbar. Now, carefully draw anchor points around the subject’s edges to create a clipping path.
Step 2: Convert Path and Remove Background
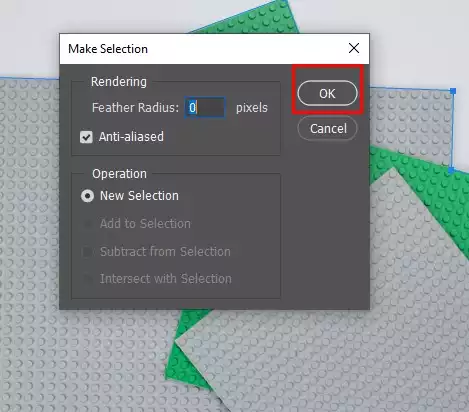
- Right-click inside the completed path
- Choose Make Selection
- Click OK
- Then click the Add Layer Mask icon in the Layers panel
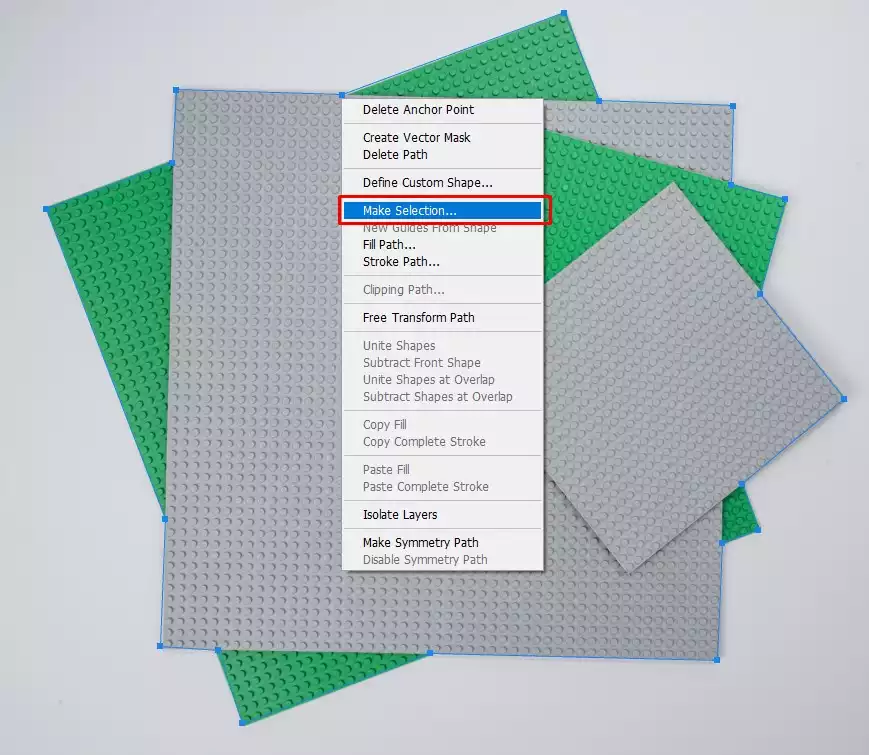
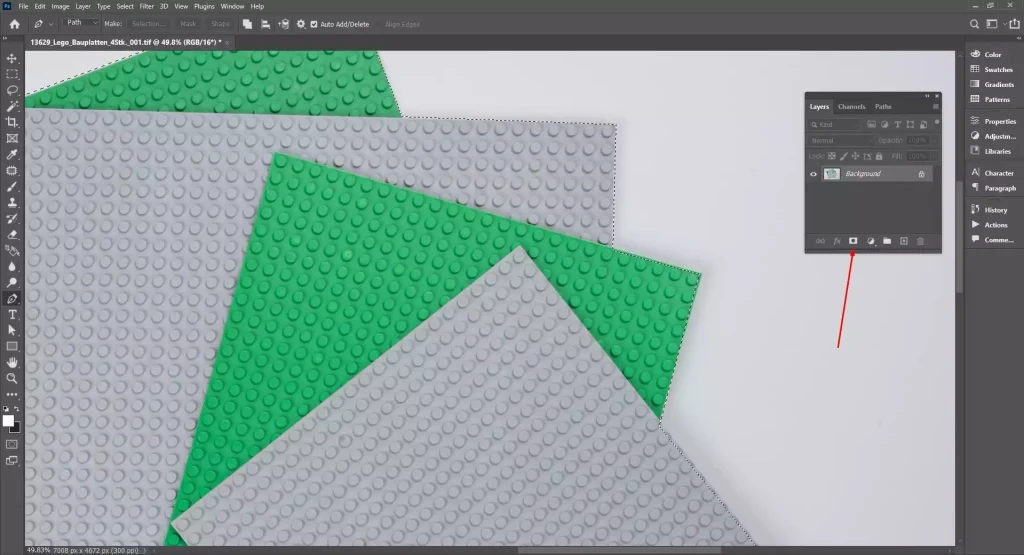
This process will hide the background.
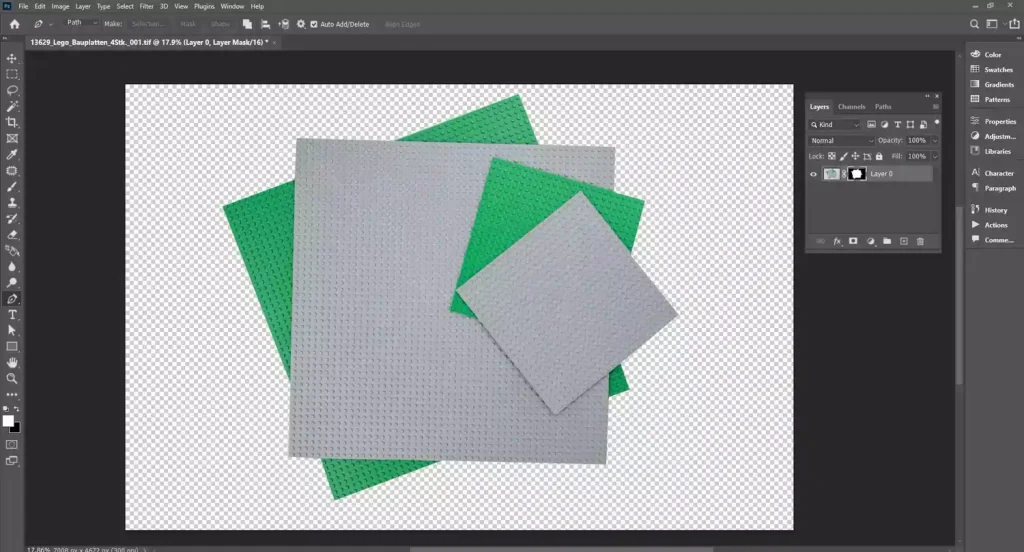
Step 3: Confirm Transparency
Upon applying the mask, the removed background will appear as a gray-and-white checkered pattern, indicating transparency.
What is a Checkered Background?
A checkered background is a transparent or no-background in images with an appearance of black and white squares similar to a chessboard. When SVG or PNG images have no pixels on any specific part, those empty parts will appear checkered in Photoshop or Illustrator. A checkerboard background in images helps photo editors differentiate transparent areas from the solid background.
Key information to know about a checkerboard background is as follows.
- The checkboard pattern in images appears after background removal.
- It doesn’t export it exists only inside the software.
- PNG/WebP/SVG files keep transparency when converted to JPEG, the check is replaced by white or background colors.
- Checkboard appearance is customizable you can change colors and the size of the checker for better visibility.
Why is a Checkered Background Used in Image Editing?
A checkered background is used in image editing to differentiate image transparency and allow background flexibility. It outlines the areas without pixels. So, photo editors and graphic designers can place the subject on a different background without affecting the original images.
Other importance of a checkered background in photo editing are as follows.
- Checkered Background Is Non-Destructive: It allows editing without damaging the images, allowing revisions, corrections, and any adjustments safe and fast.
- It Identifies Transparency: A checkered background signifies areas without pixels, so editors and users know which parts of images are empty and need backgrounds.
- It Allows Checking the Background: Users can detect halos, leftover edges, and unwanted pixels after the background removal process and use suitable backgrounds for multi-platform use.
- It Follows E-commerce Standards: Check background being transparent, easy to place, and use on a white background for e-commerce product listing.
What is the Difference Between Transparent and a Checkered Background?
The difference between a transparent and a checkered background is their visibility or appearance. While a transparent background shows the actual absence of pixels, a checkered pattern indicates the absence of pixels through a checkerboard background inside a photo editing software.
Other differences between a transparent background and a checkered background are as follows.
| Topic | Transparent Background | Checkered Background |
|---|---|---|
| Definition | No pixels exist in the transparent area | Appearance of the visual grid in the transparent area |
| Visibility | Invisible in the final design | Visible only inside editing software |
| Permanence | Actual image property | Temporary software display |
| Purpose | Allows background replacement | Helps detect transparent areas |
| Output | Preserved in PNG and WebP formats | Does not export in final files |
| Use cases | Used for e-commerce, ads, branding | Used for accurate editing, no external use |
Who Needs a Checkered Background Service Provider?
E-commerce sellers, photographers, graphic designers, online marketers, and product catalog managers need a checkered background service provider. They use transparent backgrounds to professionally display their products on marketing and selling platforms, create flexible designs, and maintain consistent, visually appealing imagery across websites, ads, and catalogs.
Professionals and industries that need a checkered background are as follows.
- E-commerce sellers need checkered backgrounds to create distraction-free product images and ensure uniform catalog presentation.
- Professional photographers need it to isolate subjects, remove flaws, and enhance portraits or product shots for standard delivery.
- Graphic designers need checkboard patterns on images to easily place subjects into different designs, marketing materials, or creative layouts.
- Marketers and advertisers need it to quickly prepare campaign visuals for social media, ads, and banners.
- Product catalog managers need checkered backgrounds to maintain consistent, professional listings for building customer trust.
How Do You Choose the Best Checkered Background Service Provider?
To choose the best checkered background service provider, look for a professional background removal service provider, their experience, expertise, work quality, turnaround, pricing, reviews, etc., as they cover many other background-related services. You expect to receive quality services with consistency and on time.
Consider the following factors to choose the best checkered background service provider.
- Experience and Expertise: Check for their years of experience in image editing, knowledge of Photoshop or similar tools.
- Quality of Work: Check the gallery or portfolio on how they work, from clean cutouts, precise edges, and no leftover halos.
- Turnaround Time: Check the regular timeline and faster delivery; they can work without compromising quality.
- Pricing and Packages: Know the pricing for your services, bulk discounts, seasonal prices, etc.
- Communication: Reach through their contact details, understand their client service, know about custom services, revision, work flexibility, etc.
- Reviews and Testimonials: Go through their testimonials and reviews; often, you will find them on the website or popular consumer review platforms such as Google Reviews or Trustpilot.
How Do You Find a Reliable Checkered Background Service Provider Online?
To find a reliable checkered background service provider online, use search terms or keywords such as professional transparent background service or checkered background removal Photoshop. Transparent PNG background editor, etc. Check for their online reviews, service quality, and the free trial options to understand the communication and work precision level.
Get Professional Checkered Background Service Provider
FAQ’s
Why do PNG files show a checkered background?
PNG files show a checkered background as a preview that there are no actual pixels in the background. PNG supports transparency, so when the background pixels are omitted, it shows a checkerboard pattern inside photo editing software such as Photoshop or Illustrator.
Why does JPEG not support a checkered background?
The JPEG does not support a checkered background because it doesn’t support transparency. It always converts transparent areas into a solid color. That’s why when you save as JPEG, you will see that the transparent areas are automatically solid color, often white, removing the checkered transparency preview.
Can you edit images directly on a checkered background?
Yes, you can edit images directly on a checkered background, as there is empty space. You can edit, adjust, move, mask, or add new backgrounds underneath the subject. This process won’t affect the original image pixels.
Can i modify and use any image with a checkered background i find for my own purposes?
No, you shouldn’t modify and use any image with a checkered background you find for your personal purposes, mostly due to the copyrighted material. Images with a checkered background available online are mostly from people, companies, or brands not for arbitrary usage. Stock image platforms offer plenty of free images to use; still, check their license, usage rights, and commercial permission before modifying them, just to be safe.