Realistic Shadows may sound like a very minor thing to a person who is just starting his online store but what most entrepreneurs forget is one of the secrets behind a booming business is to focus on every single detail.
According to multiple statistics, shadows can indeed leave a huge impact on your online business. Prominent online markets use this unique feature on their product images since long and experts suggest the newbies of the industry to apply this on their startups too.
There are three basic types of shadows that can be added to your product images –
- Natural Shadow
- Drop Shadow
- Reflection Shadow
Today, we will discuss these three shadows in detail. Also, you will get the tutorials on how to add these effects on your images from this article.
What you’ll learn in this article
- 1 Tutorial: How to Add a Natural Shadow in Photoshop
- 1.1 Step 1: Open your image
- 1.2 Step 2: Copy background layer
- 1.3 Step 3: Select path
- 1.4 Step 4: Select feather
- 1.5 Step 5: Add mask
- 1.6 Step 6: Put a solid color
- 1.7 Step 7: White color
- 1.8 Step 8: Background 2 layer
- 1.9 Step 9: Use solid color
- 1.10 Step 10: Turn off
- 1.11 Step 11: Go to channel
- 1.12 Step 12: Copy a layer
- 1.13 Step 13: Adjust the shadow
- 1.14 Step 14: Inverse the level layer
- 1.15 Step 15: Select shadow
- 1.16 Step 16: Inverse the selection
- 1.17 Step 17: Select color
- 1.18 Step 18: Delete the rest of the image
- 1.19 Step 19: Deselect image
- 1.20 Step 20: Delete layer from channels
- 1.21 Step 21: Select the vector mask
- 1.22 Step 22: Turn on the background copy
- 1.23 Step 23: Set feather
- 1.24 Step 24: Use brush tool
- 1.25 Step 25: Increase shadow
- 1.26 Step 26: Adjust layer
- 1.27 Step 27: Cross the flyout menu
- 1.28 Step 28: Save the file
- 2 Tutorial: How to Add a Drop Shadow in Photoshop
- 2.1 Step 1: Open image
- 2.2 Step 2: Copy the background layer
- 2.3 Step 3: Background Copy layer
- 2.4 Step 4: Color Picker
- 2.5 Step 5: Fresh layer
- 2.6 Step 6: Do path
- 2.7 Step 7: Add Feather Radius
- 2.8 Step 8: Set the background color
- 2.9 Step 9: Select the mask
- 2.10 Step 10: Select the Brush Tool
- 2.11 Step 11: Save the file
- 3 Photoshop Tutorial: How to Create a Reflection Shadow
- 3.1 Step 1: Open your image
- 3.2 Step 2: Create a background copy
- 3.3 Step 3: Select Path
- 3.4 Step 4: Mask
- 3.5 Step 5: Fill the background
- 3.6 Step 6: Copy the layer
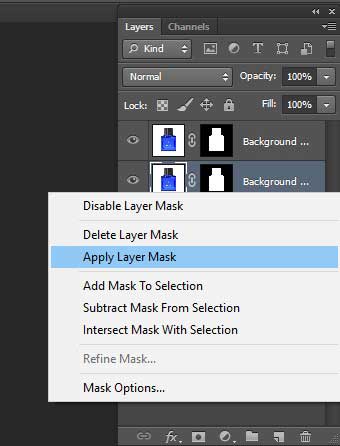
- 3.7 Step 7: Apply a layer mask
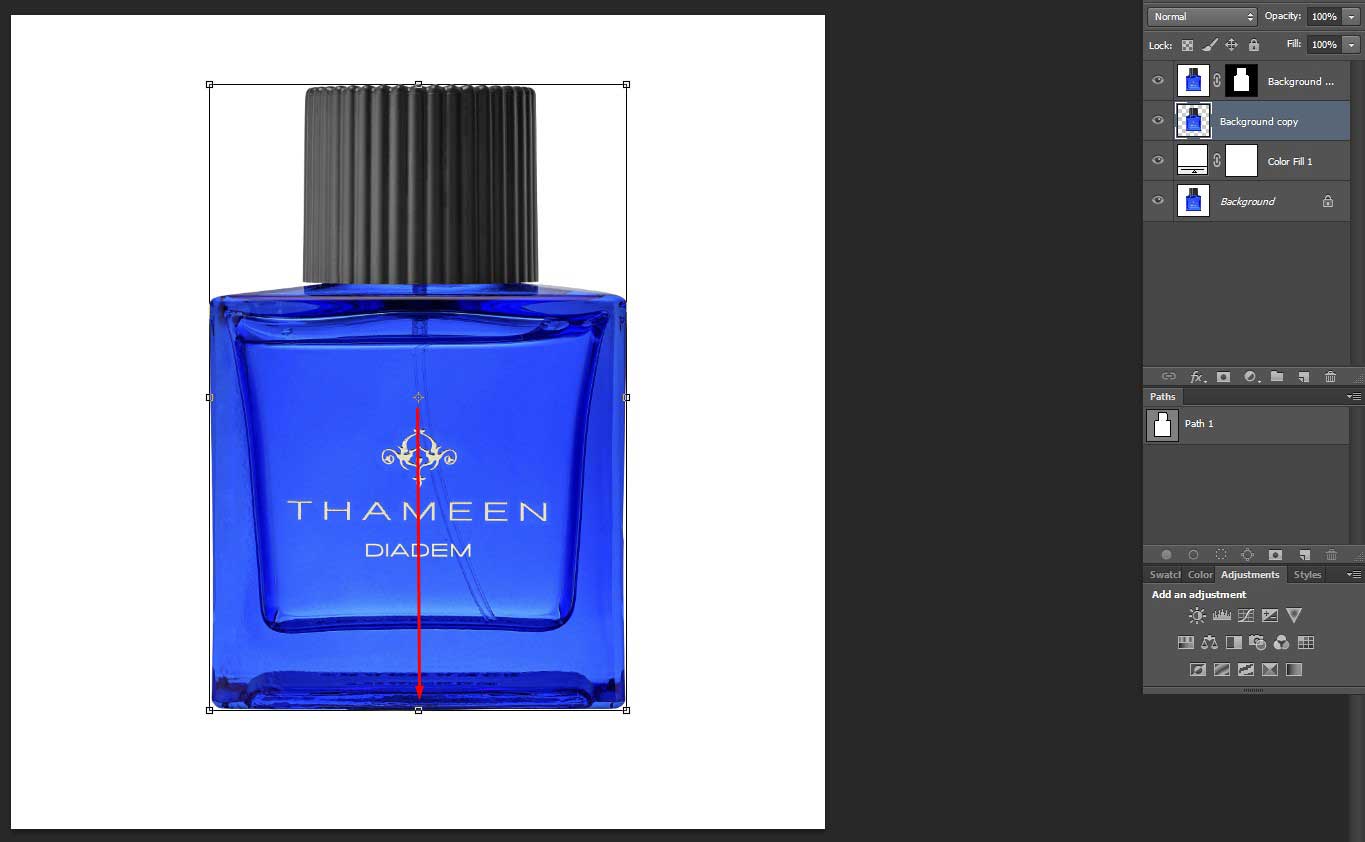
- 3.8 Step 8: Middle mark
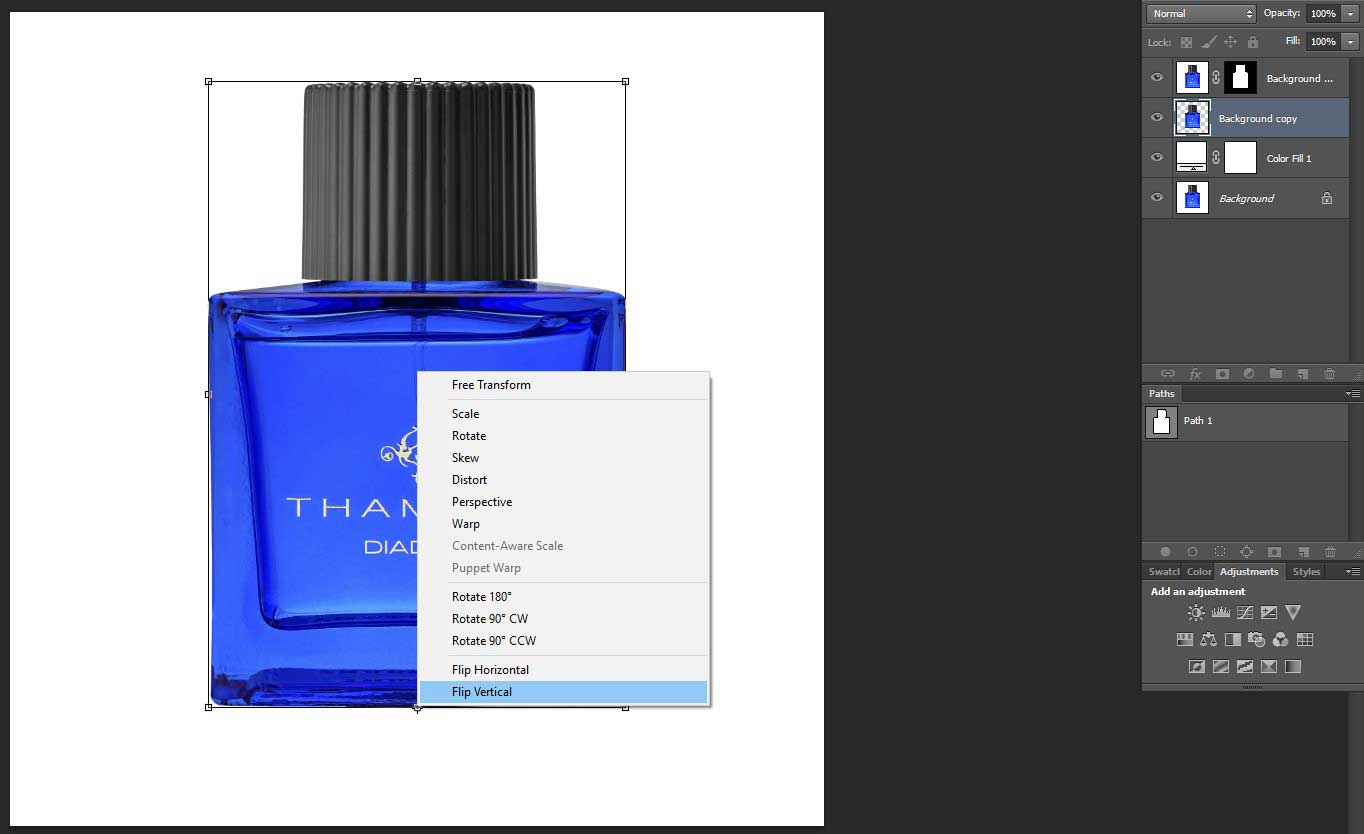
- 3.9 Step 9: Flip Verticle
- 3.10 Step 10: Mask Layer
- 3.11 Step 11: Reflection of your product
- 3.12 Step 12: New layer
- 3.13 Step 13: Merges with reflection
- 3.14 Step 14: Set the feather
- 3.15 Step 15: Set default color
- 3.16 Step 16: Blend the shadow
- 3.17 Step 17: Set the angle
- 3.18 Step 18: Blend in the gradient
- 3.19 Step 19: Set opacity
- 3.20 Step 20: Remove extra shadow
- 3.21 Step 21: Save the file
Tutorial: How to Add a Natural Shadow in Photoshop
Natural shadow is what we get as the natural reflection of light. There is no artificial touch in it. Keeping the real shadow in your product images are always wise.
Natural shadow goes with any kind of products. It may be glass bottles, models and any other products.
Here is a step by step tutorial of creating the natural shadow on your product or e-commerce images with Photoshop –
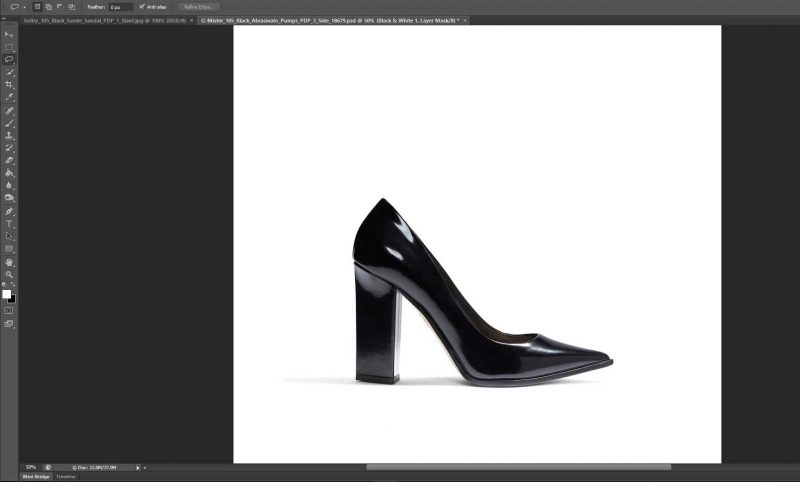
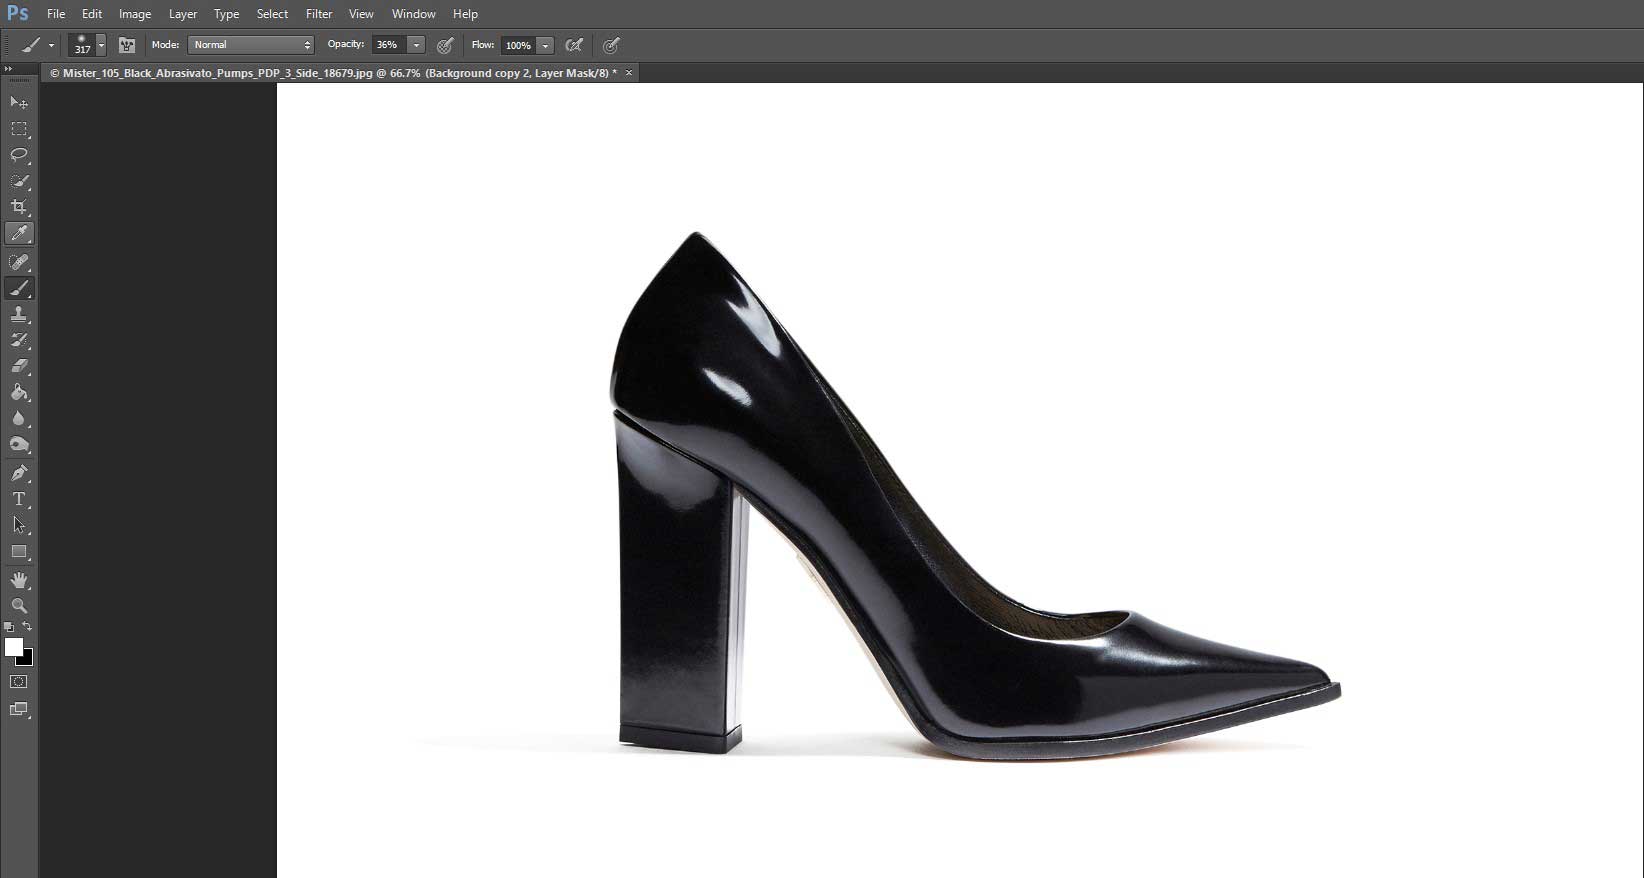
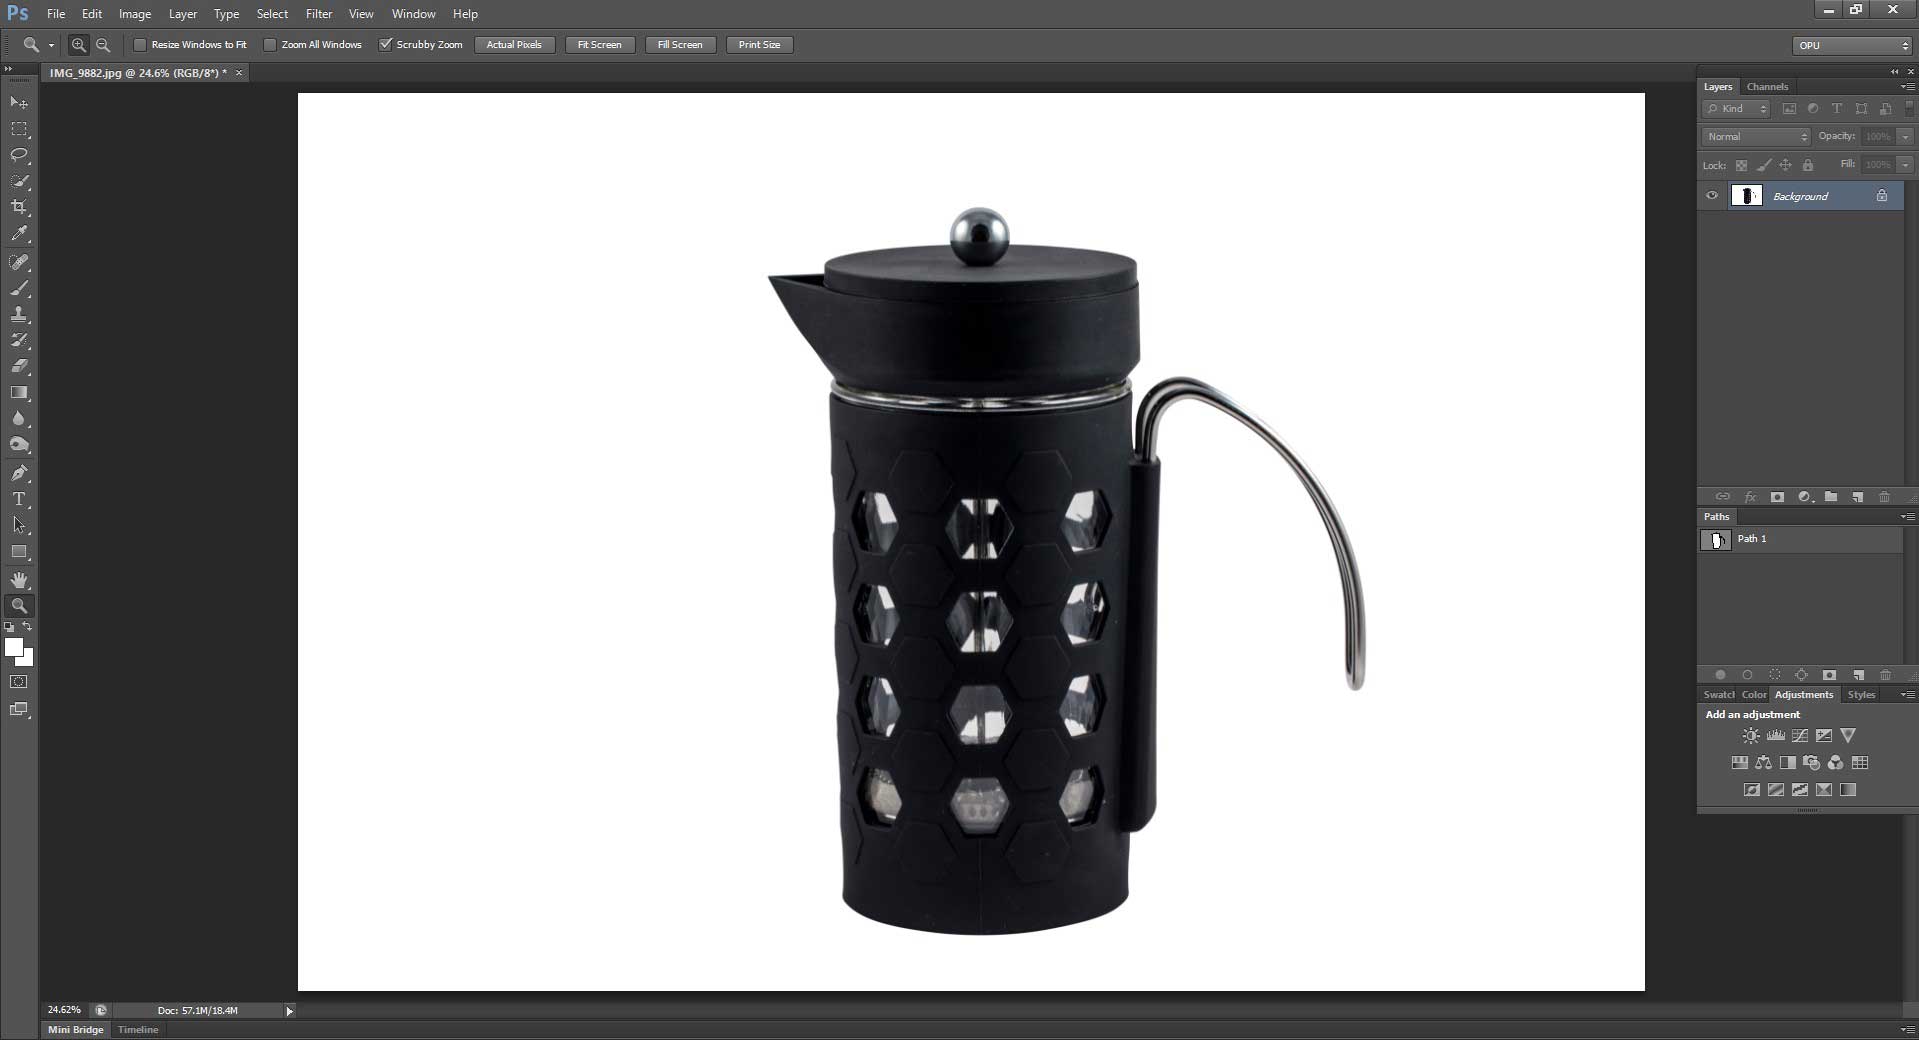
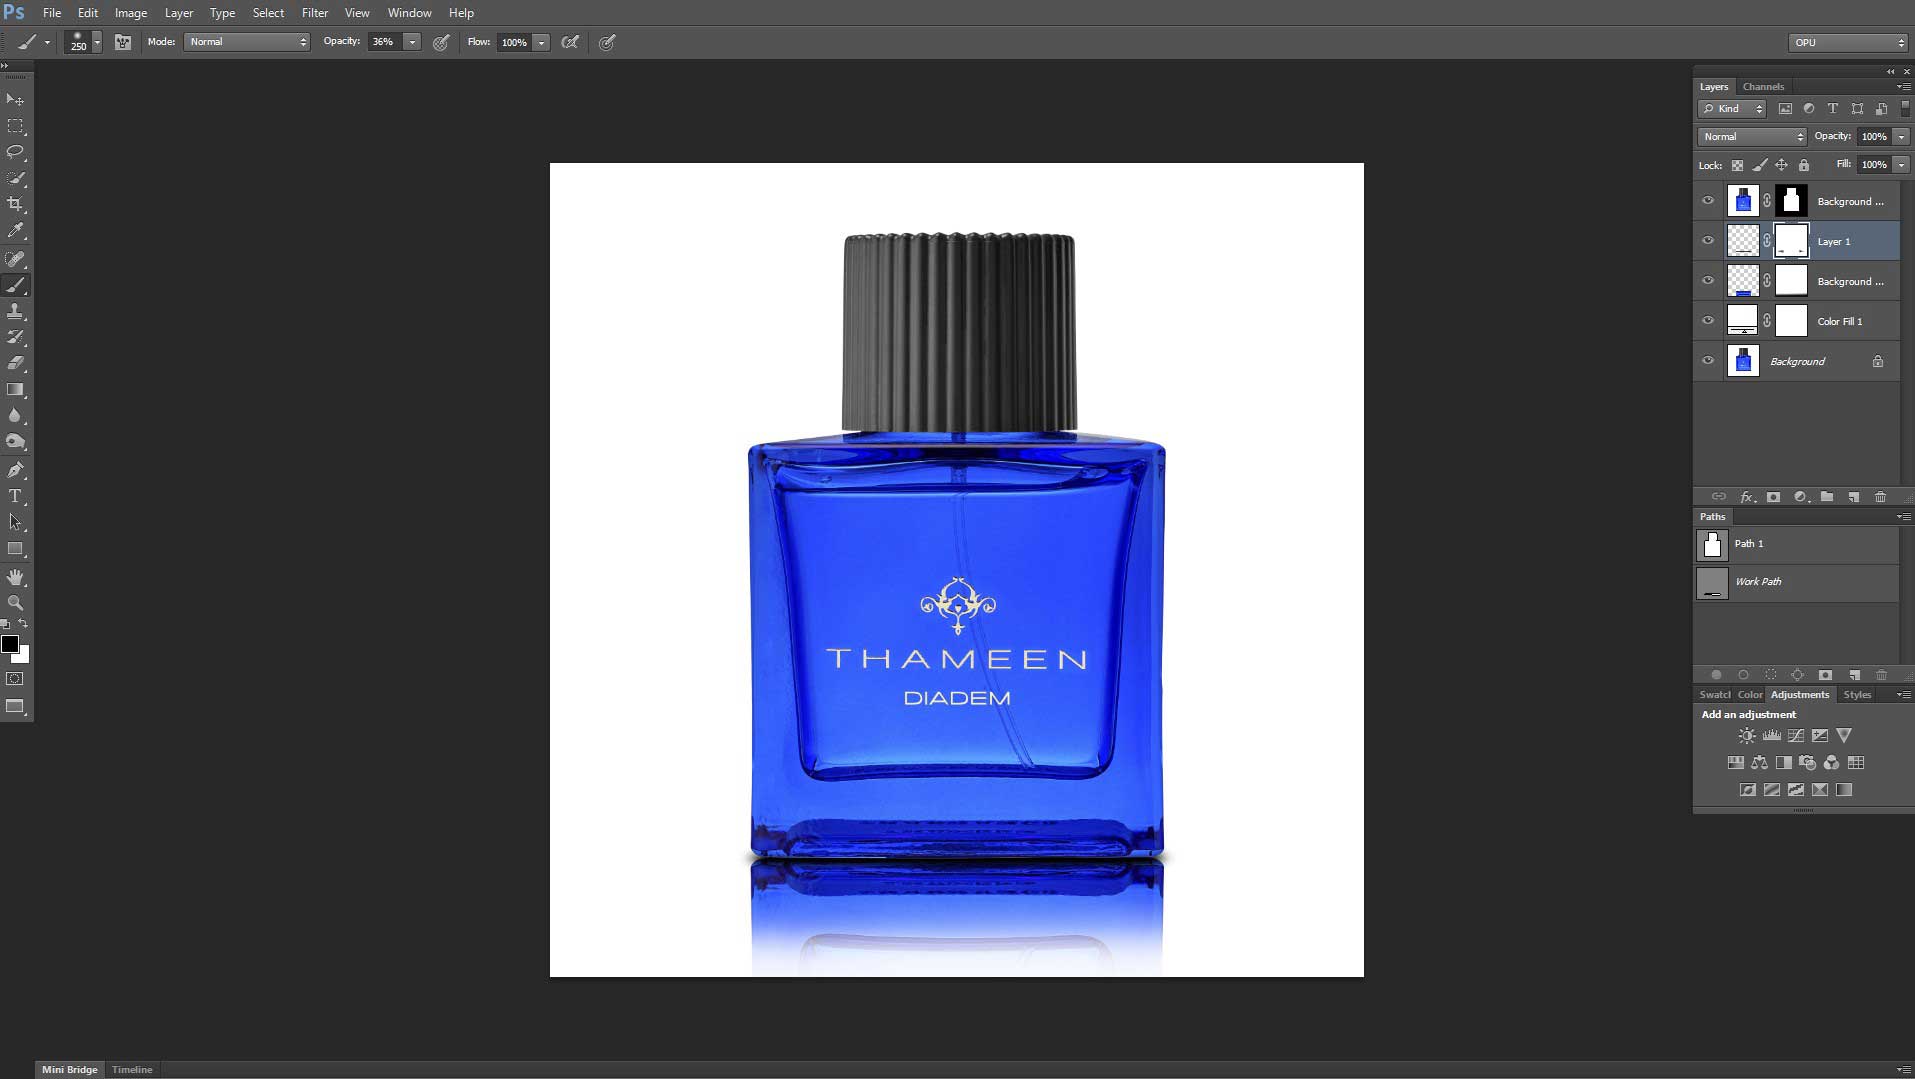
Step 1: Open your image
Open your image with Photoshop
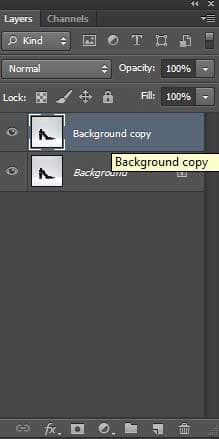
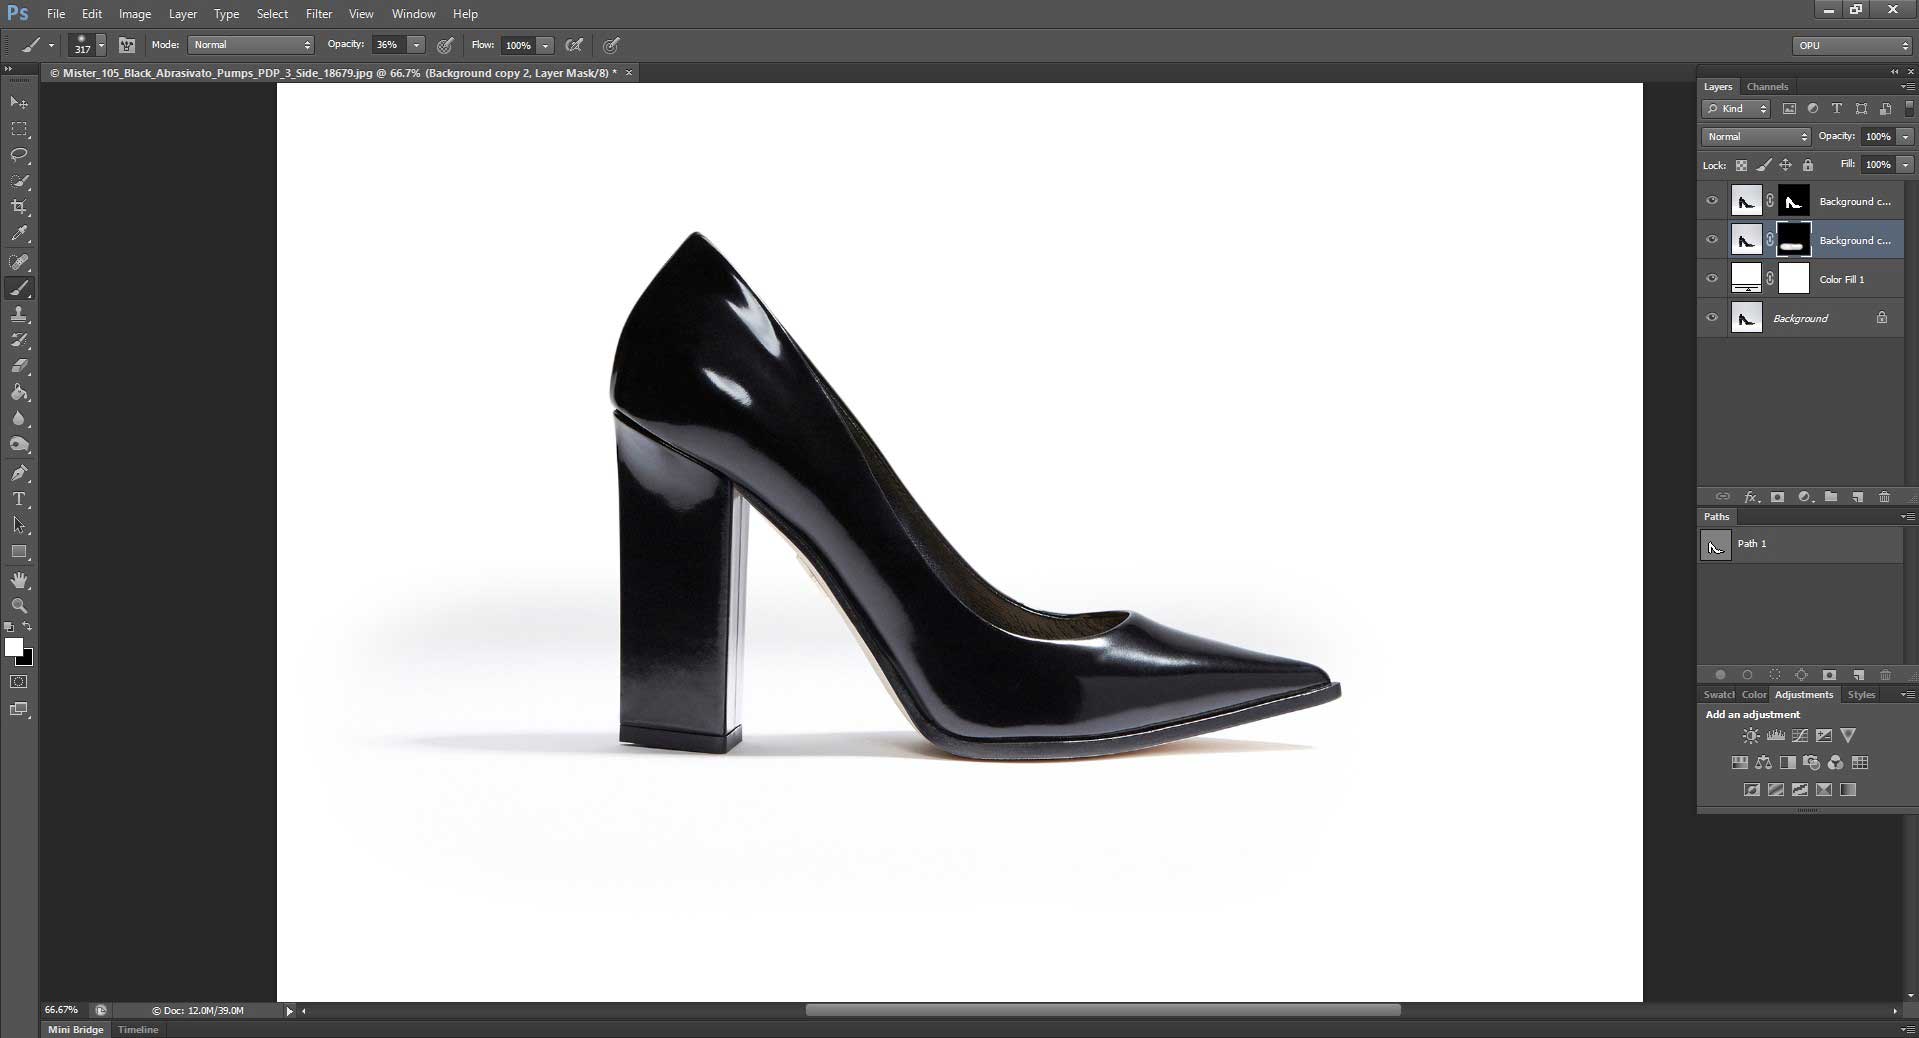
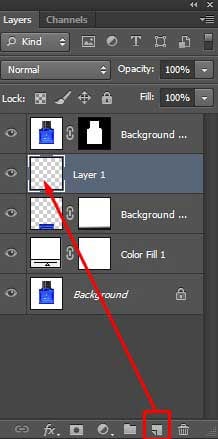
Step 2: Copy background layer
Copy the background layer from the layer panel
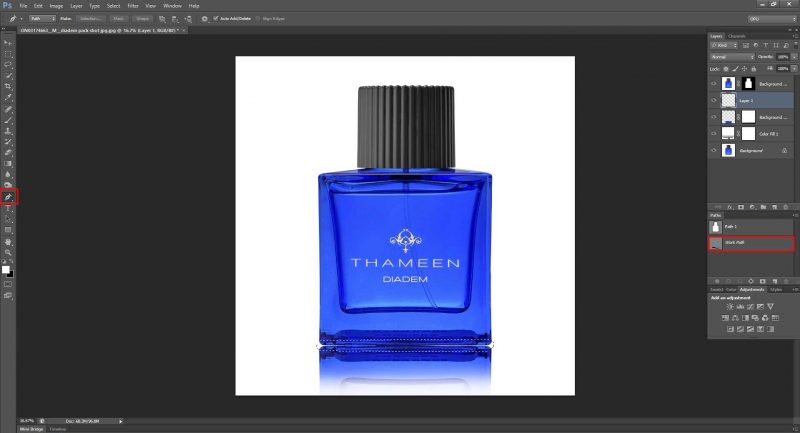
Step 3: Select path
Select path (shortcut: Ctrl+Path)
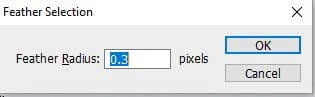
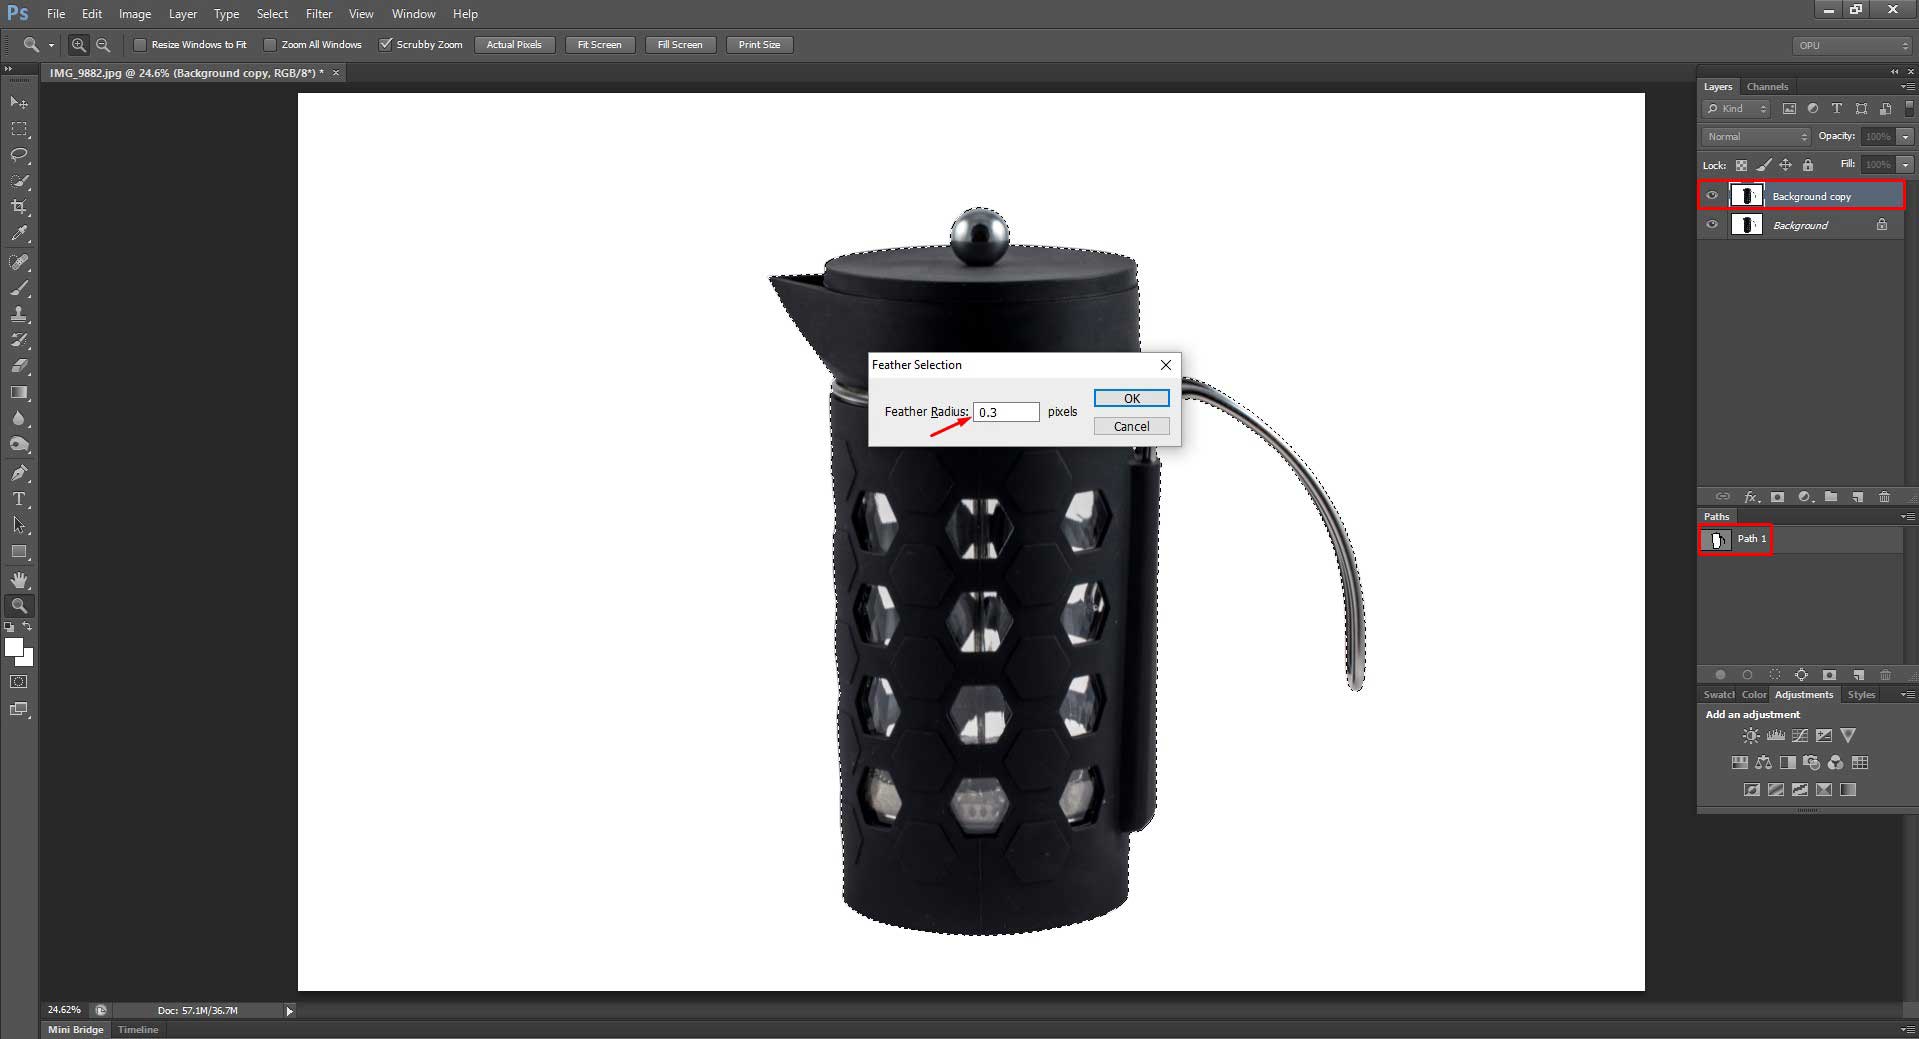
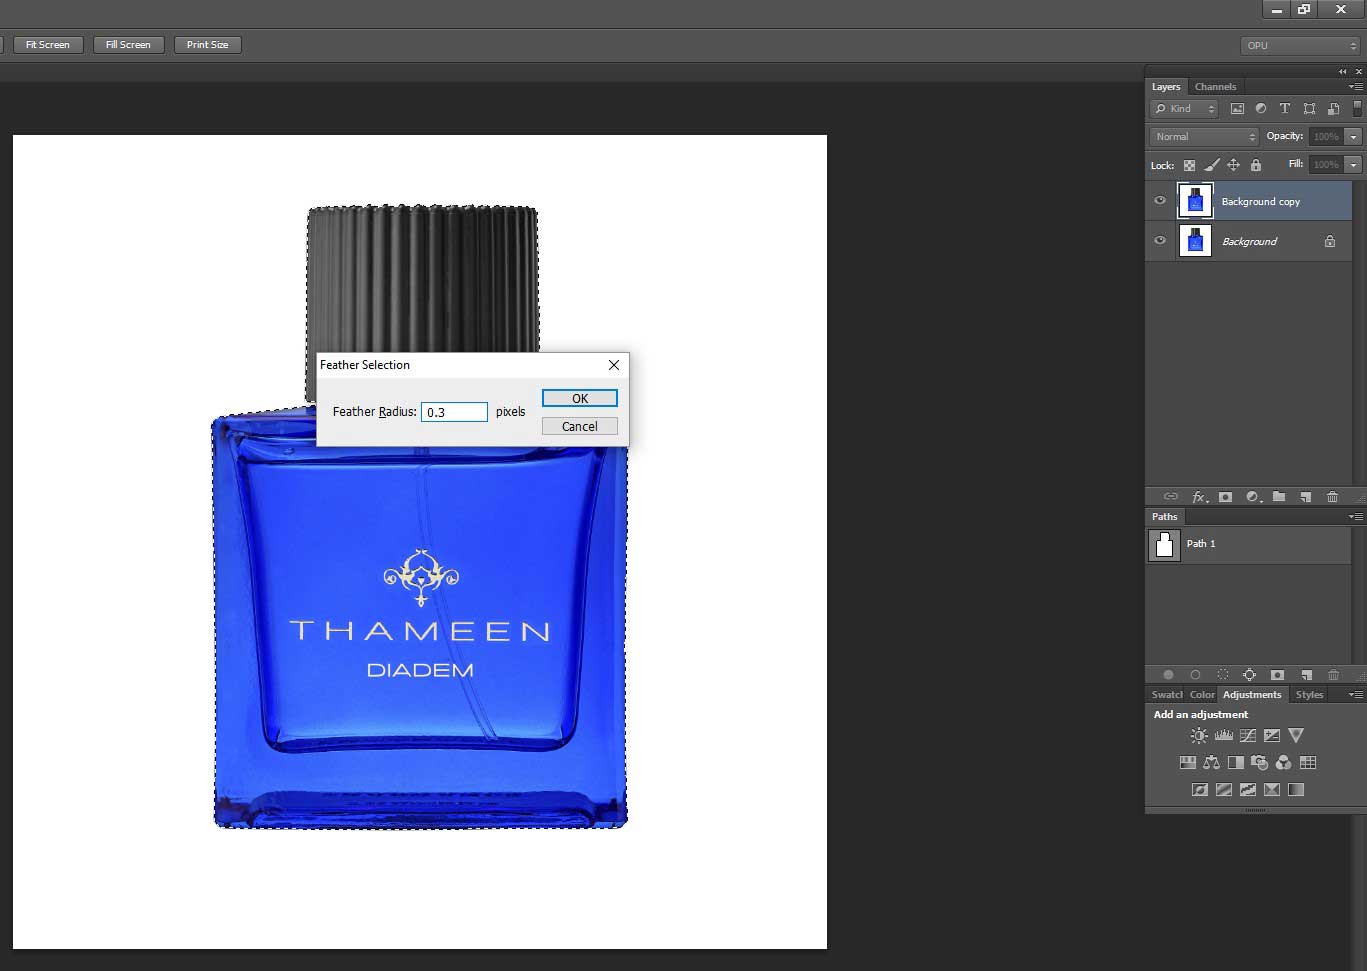
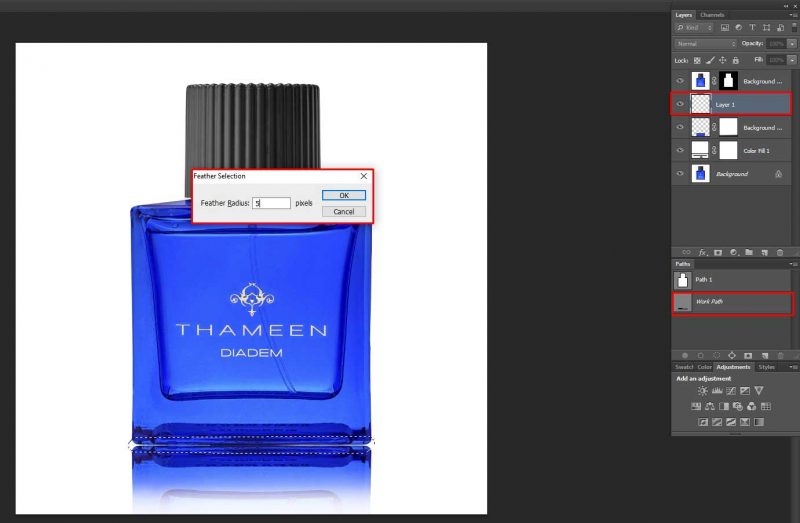
Step 4: Select feather
Select feather (shortcut: Ctrl=Alt+D) keep the radiation at 0.3
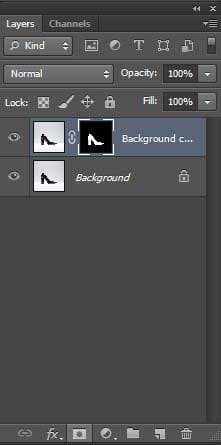
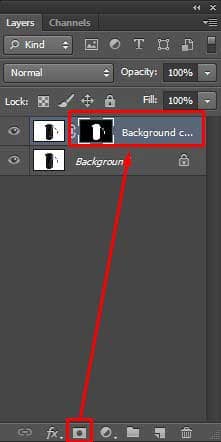
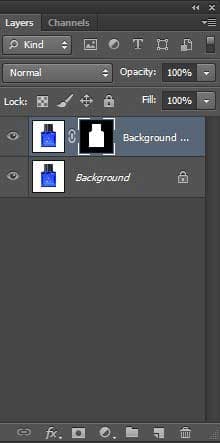
Step 5: Add mask
Add mask
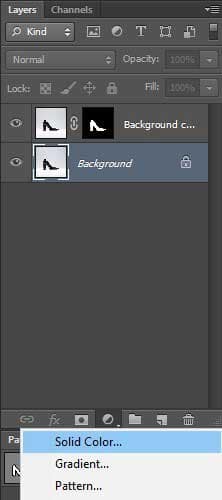
Step 6: Put a solid color
Select the background layer and put a solid color in it
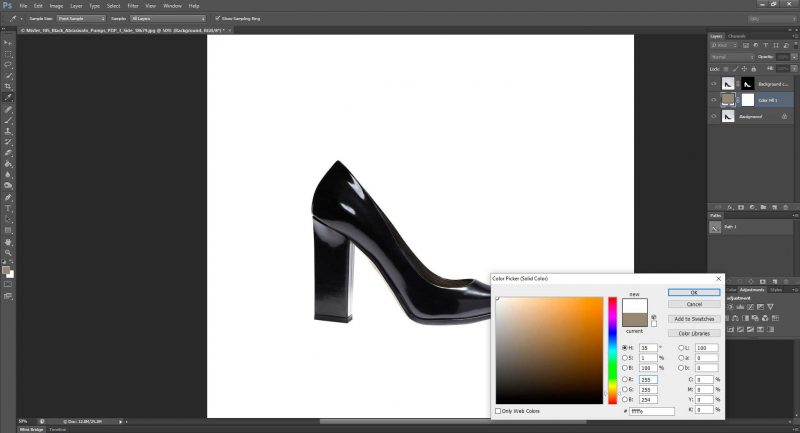
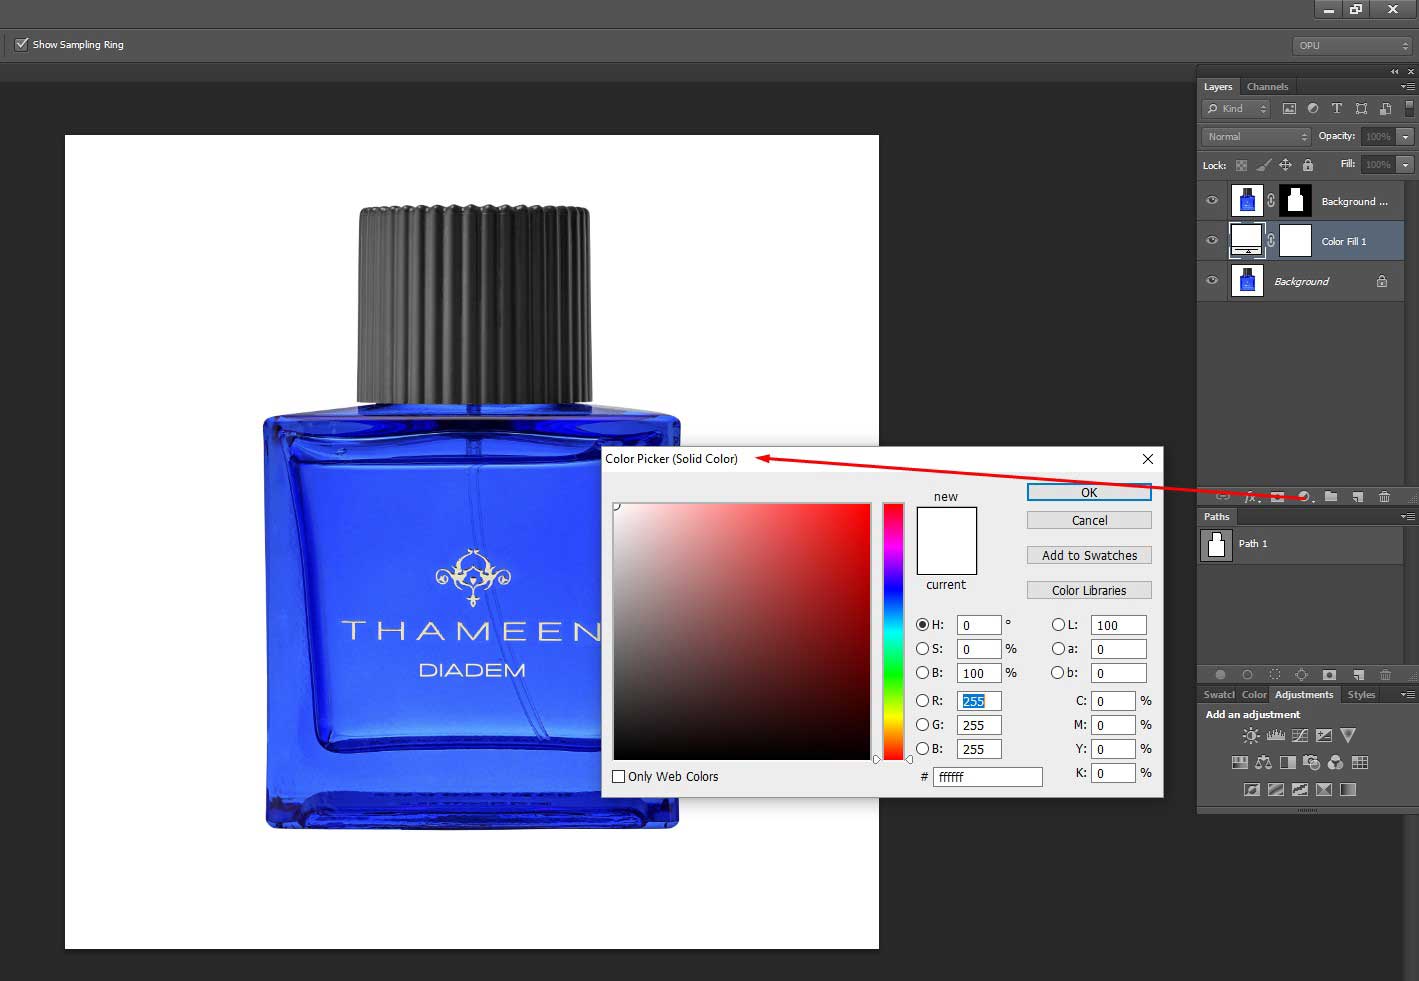
Step 7: White color
Select white
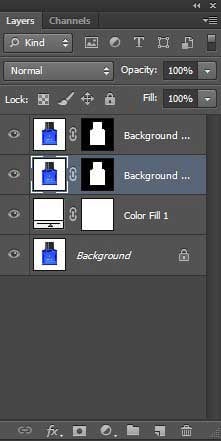
Step 8: Background 2 layer
Copy the background again and create background 2 layer
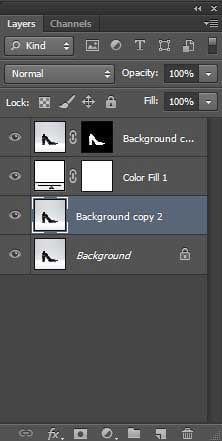
Step 9: Use solid color
Put background copy 2 on a solid color
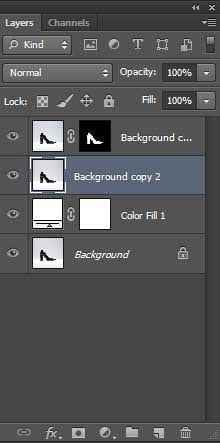
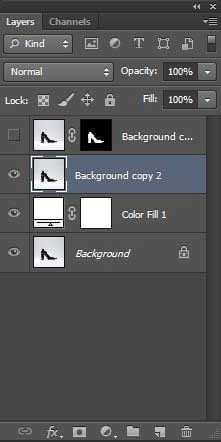
Step 10: Turn off
Turn off the background copy
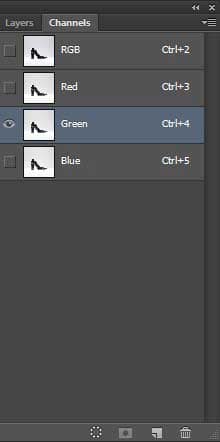
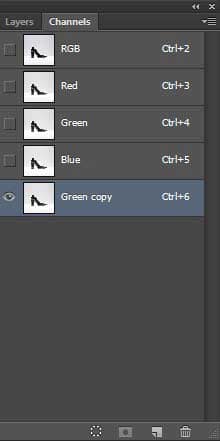
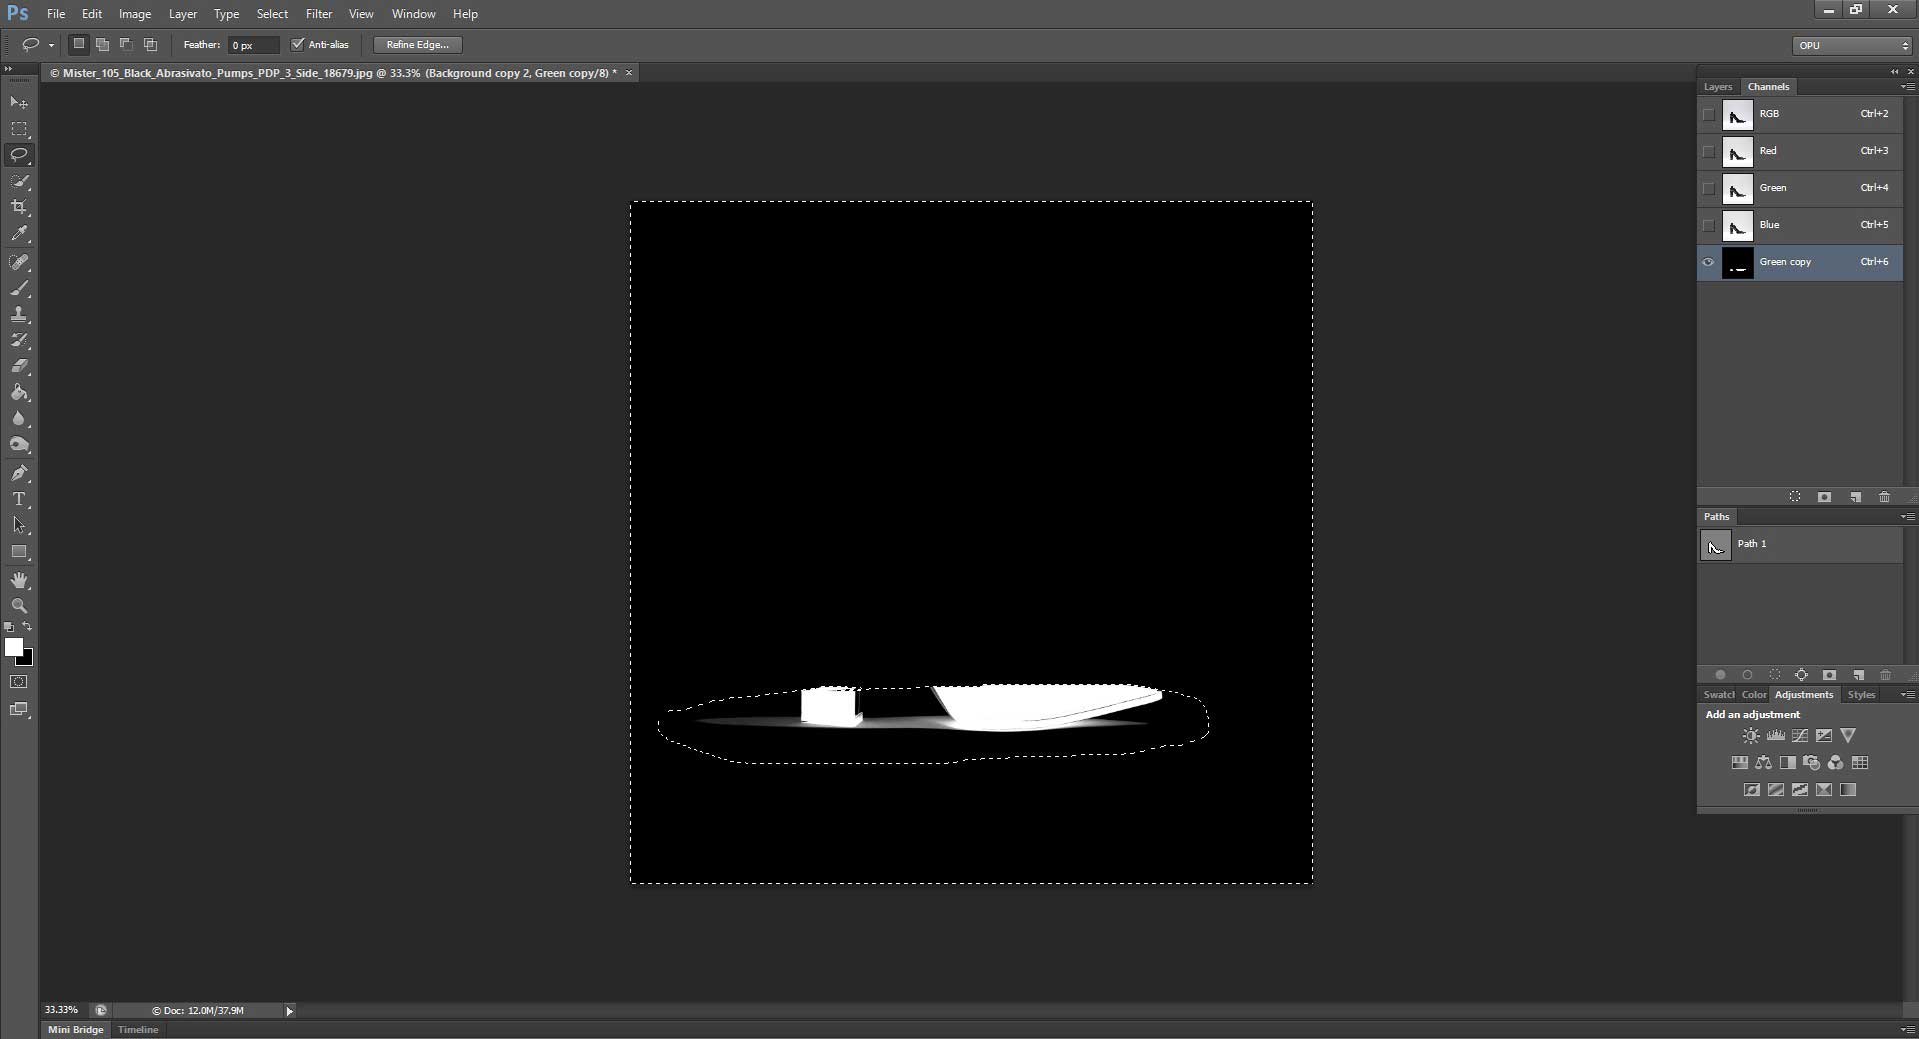
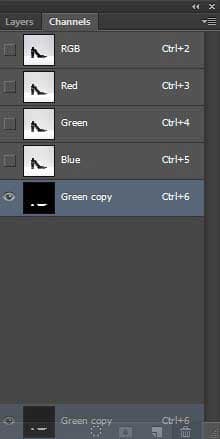
Step 11: Go to channel
Go to channel and choose a darker color from the RGB color panel (in this tutorial it’s green)
Step 12: Copy a layer
Copy the green layer
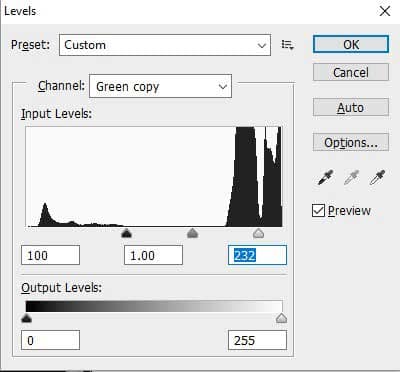
Step 13: Adjust the shadow
Now adjust the shadow from the level layer (shortcut: Ctrl+L)
Step 14: Inverse the level layer
Inverse the level layer (shortcut: Ctrl+I)

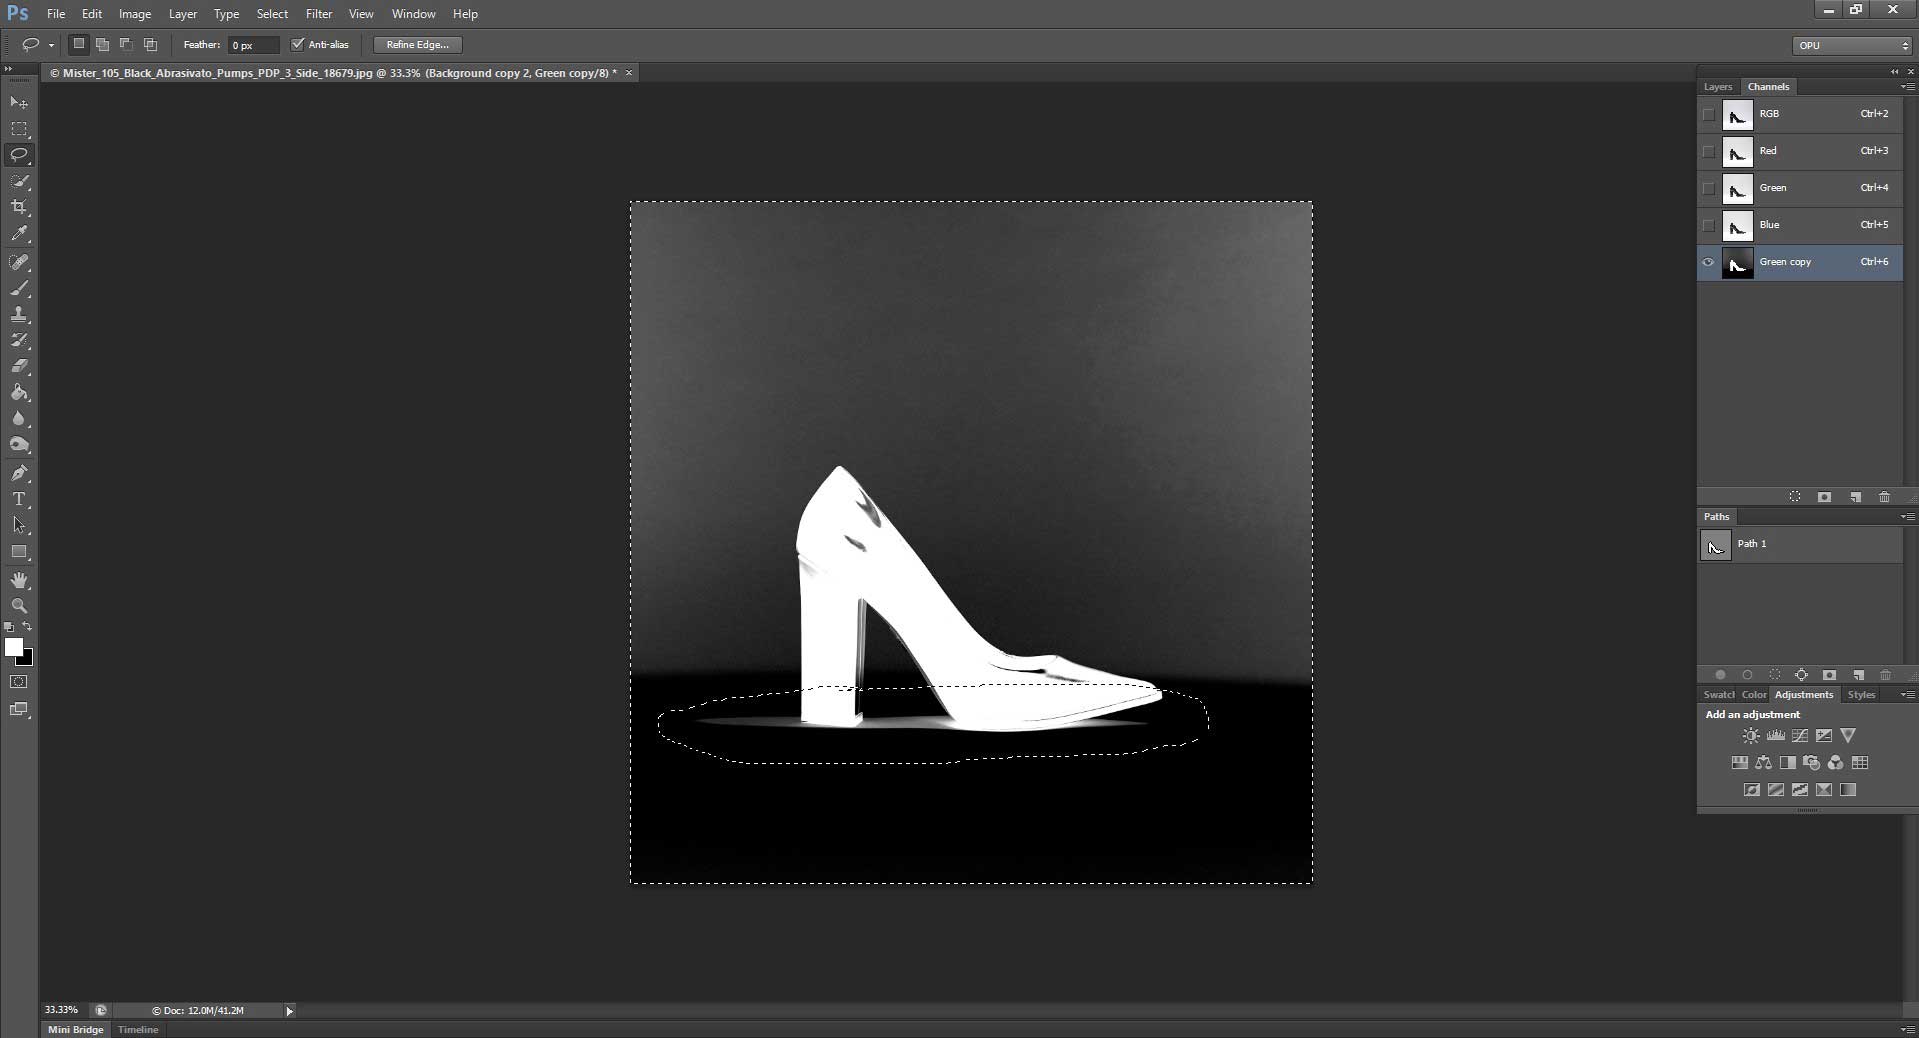
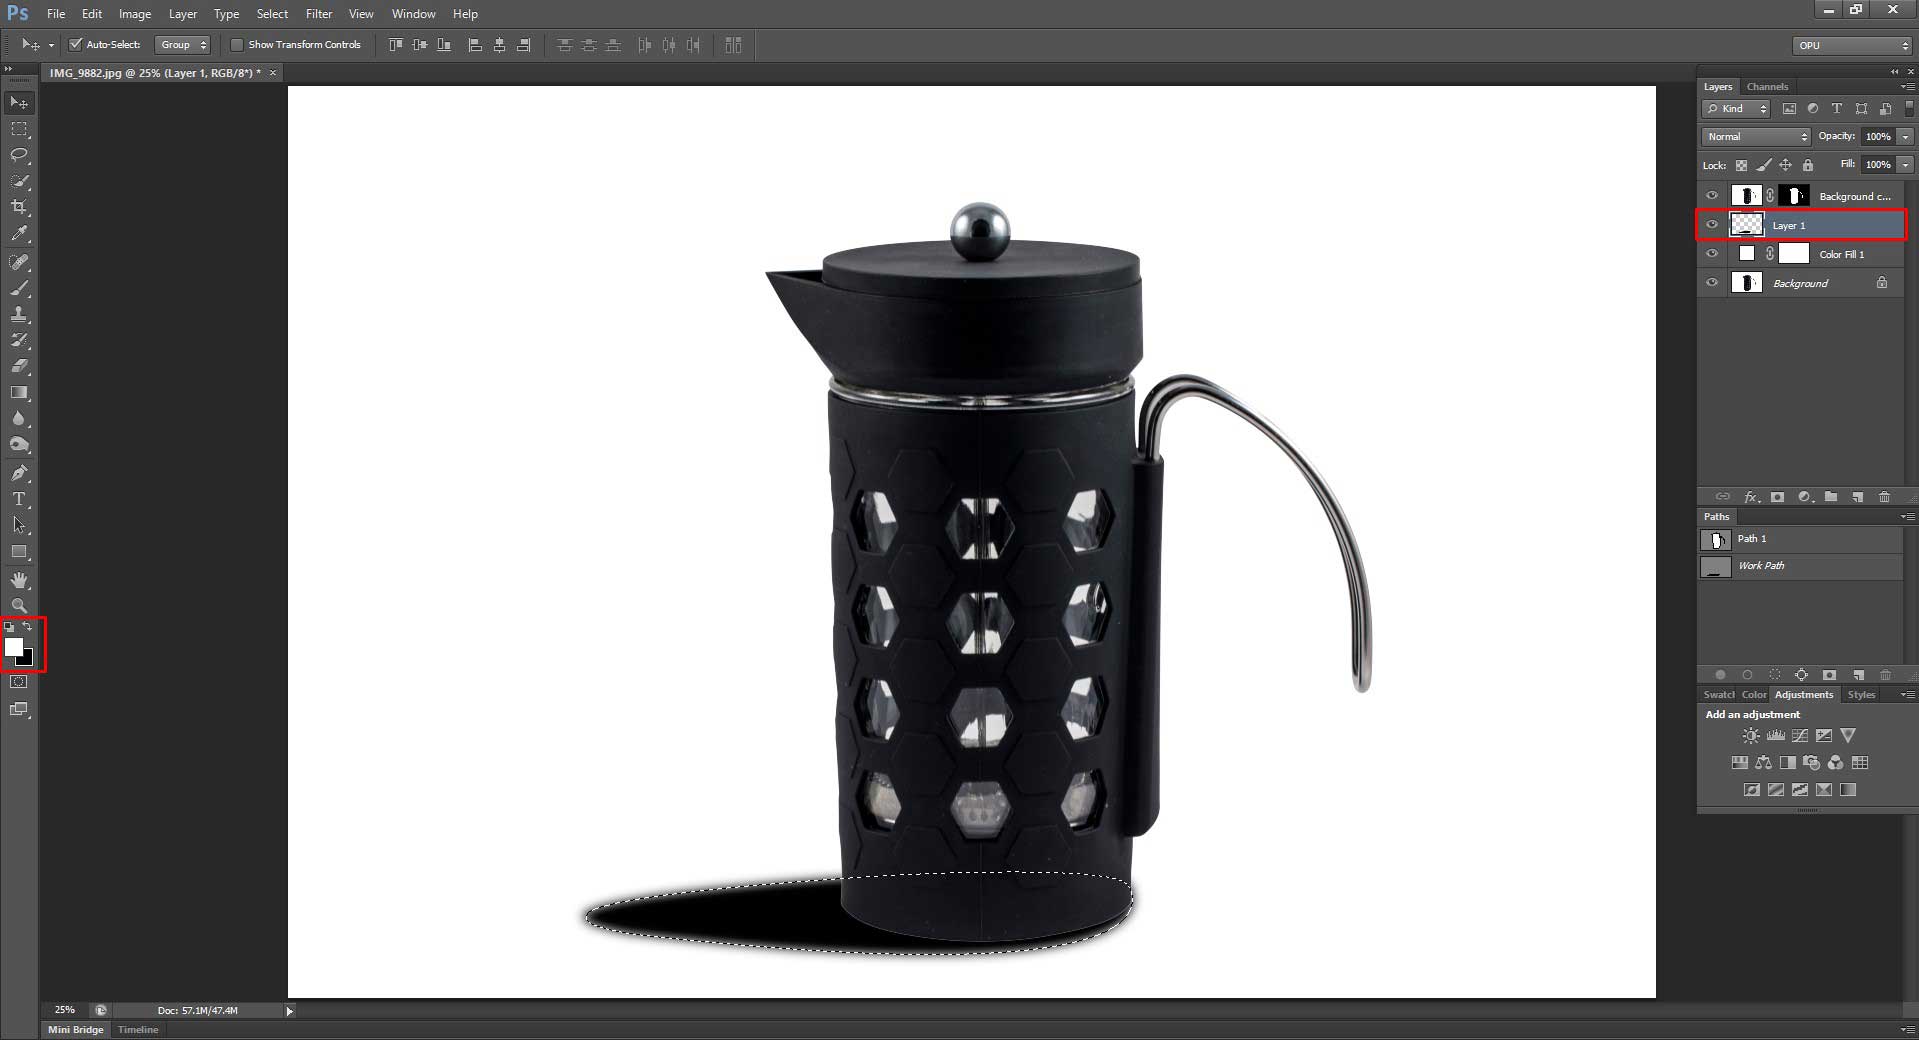
Step 15: Select shadow
Select shadow with Lasso Tool of Photoshop
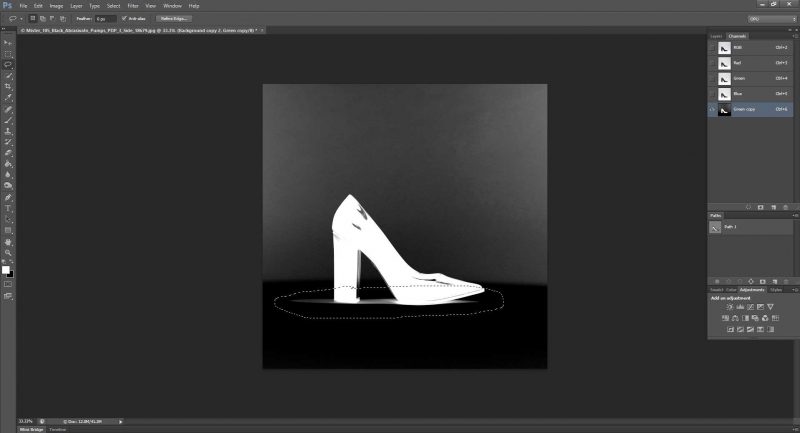
Step 16: Inverse the selection
Inverse the selection (shortcut: Ctrl+Shift+I)
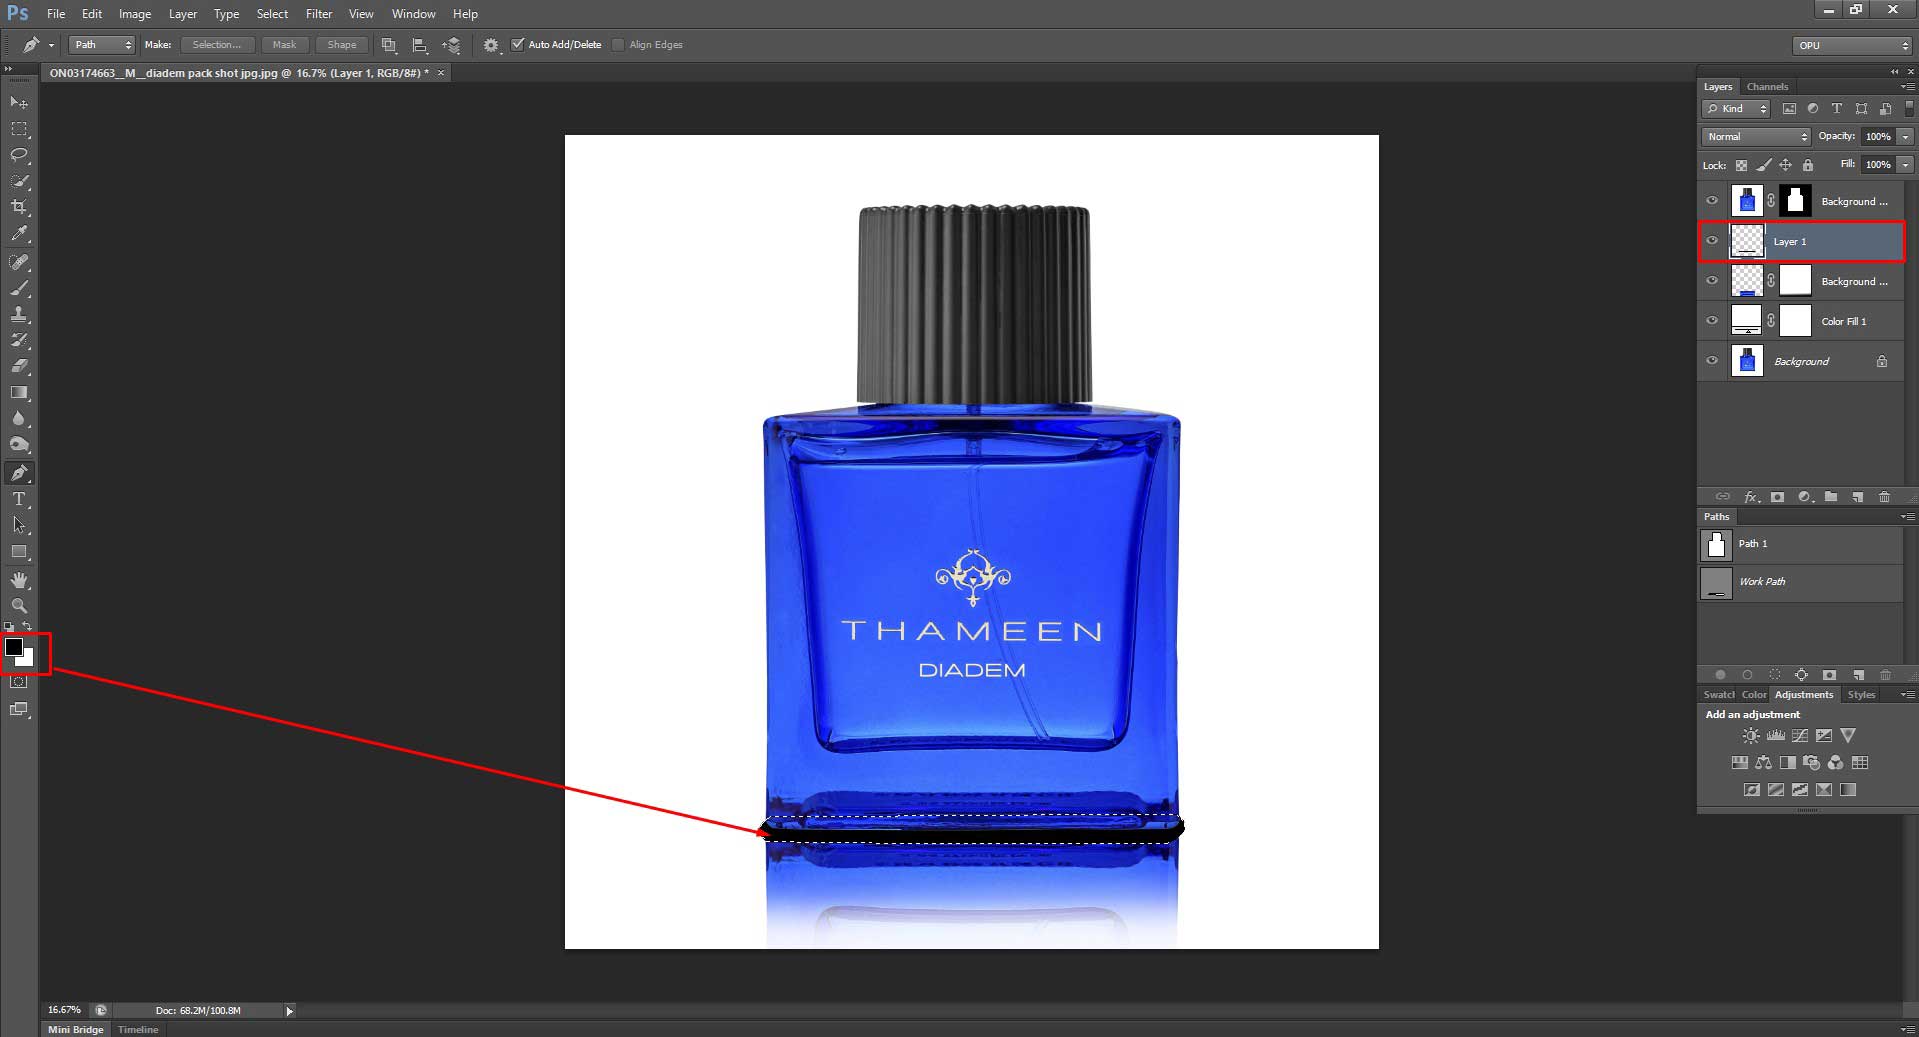
Step 17: Select color
Keep the default color black
Step 18: Delete the rest of the image
Delete the rest of the parts of your image leaving a shadow behind

Step 19: Deselect image
Now deselect the whole image (shortcut: Ctrl+D)

Step 20: Delete layer from channels
Select and delete the green copy layer
Step 21: Select the vector mask
Select the vector mask on the background copy layer
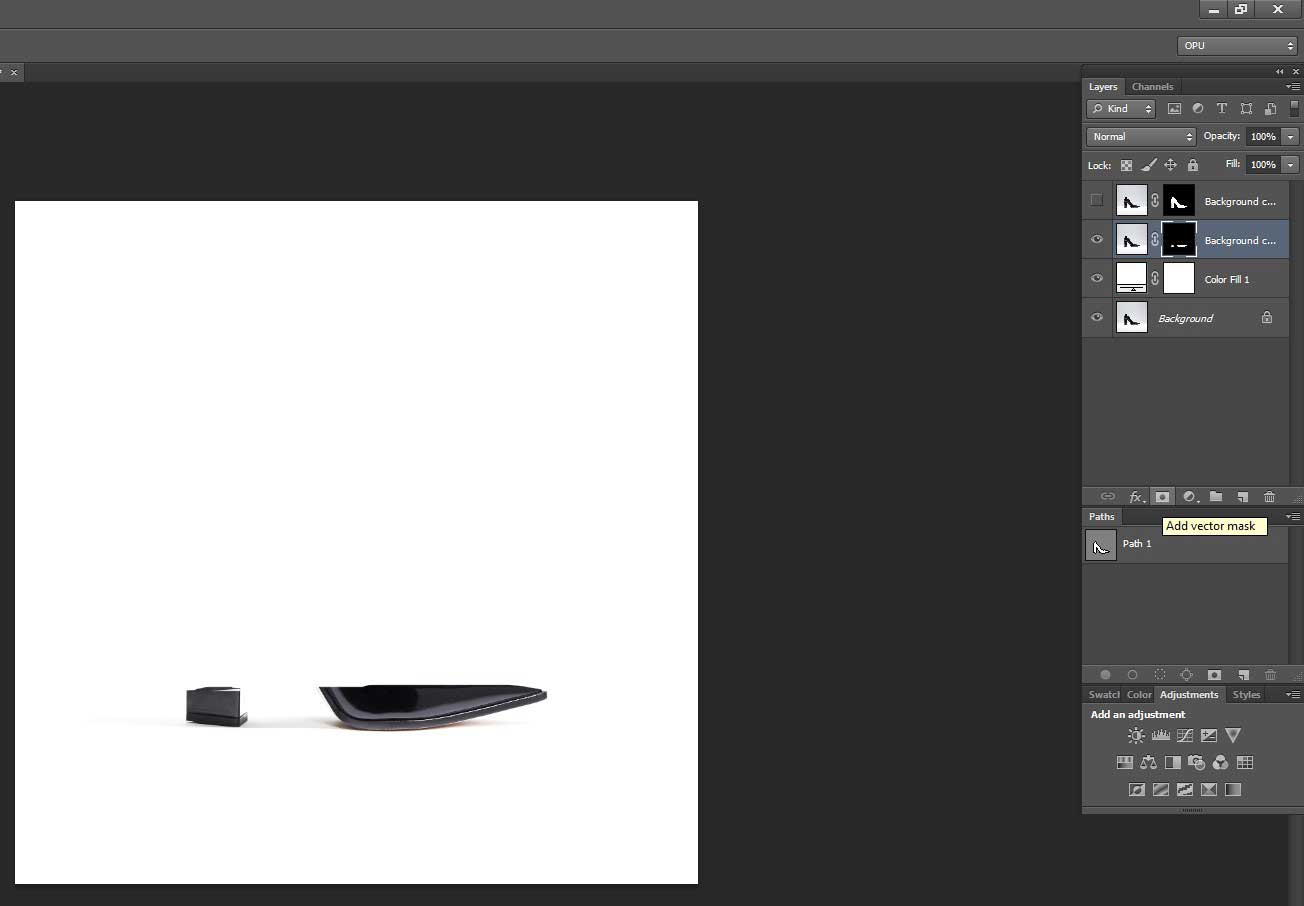
Step 22: Turn on the background copy
Turn on the background copy
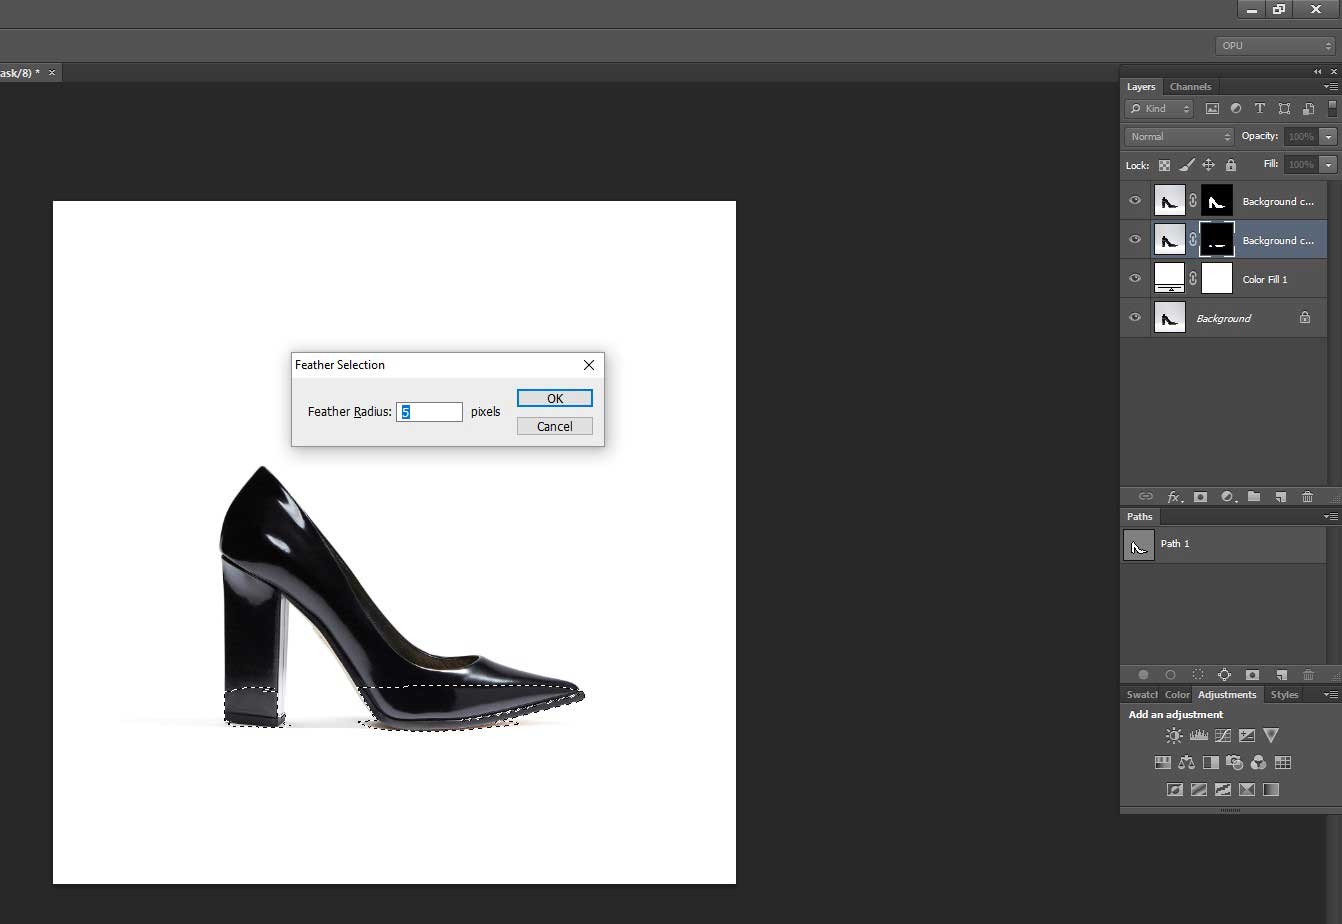
Step 23: Set feather
Set feather at 5 (shortcut: Ctrl+Alt+D)
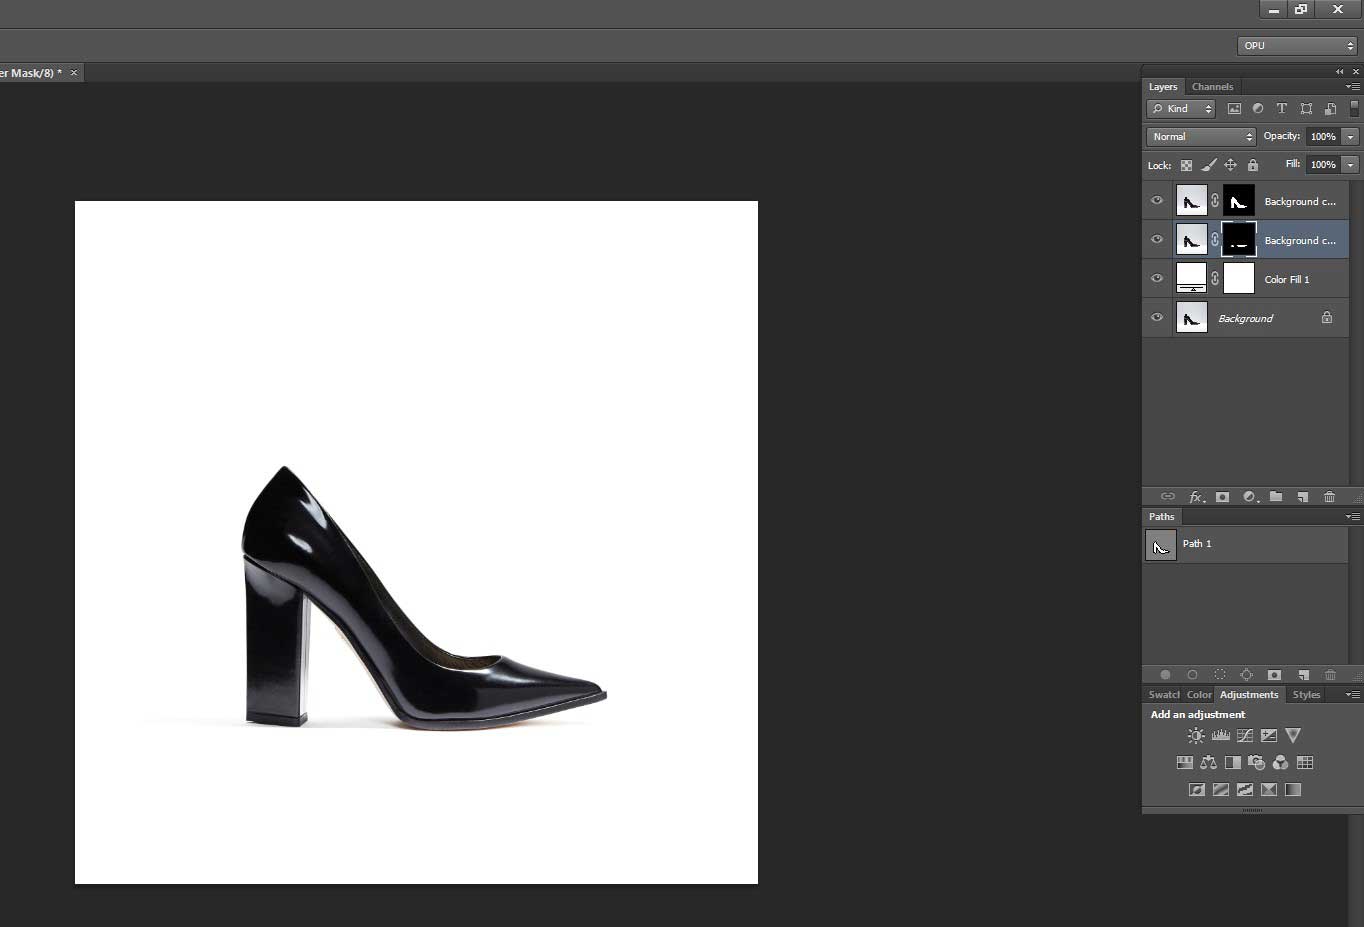
Step 24: Use brush tool
Select Brush Tool
Step 25: Increase shadow
Use the tool on the shadow area and increase shadow visibility
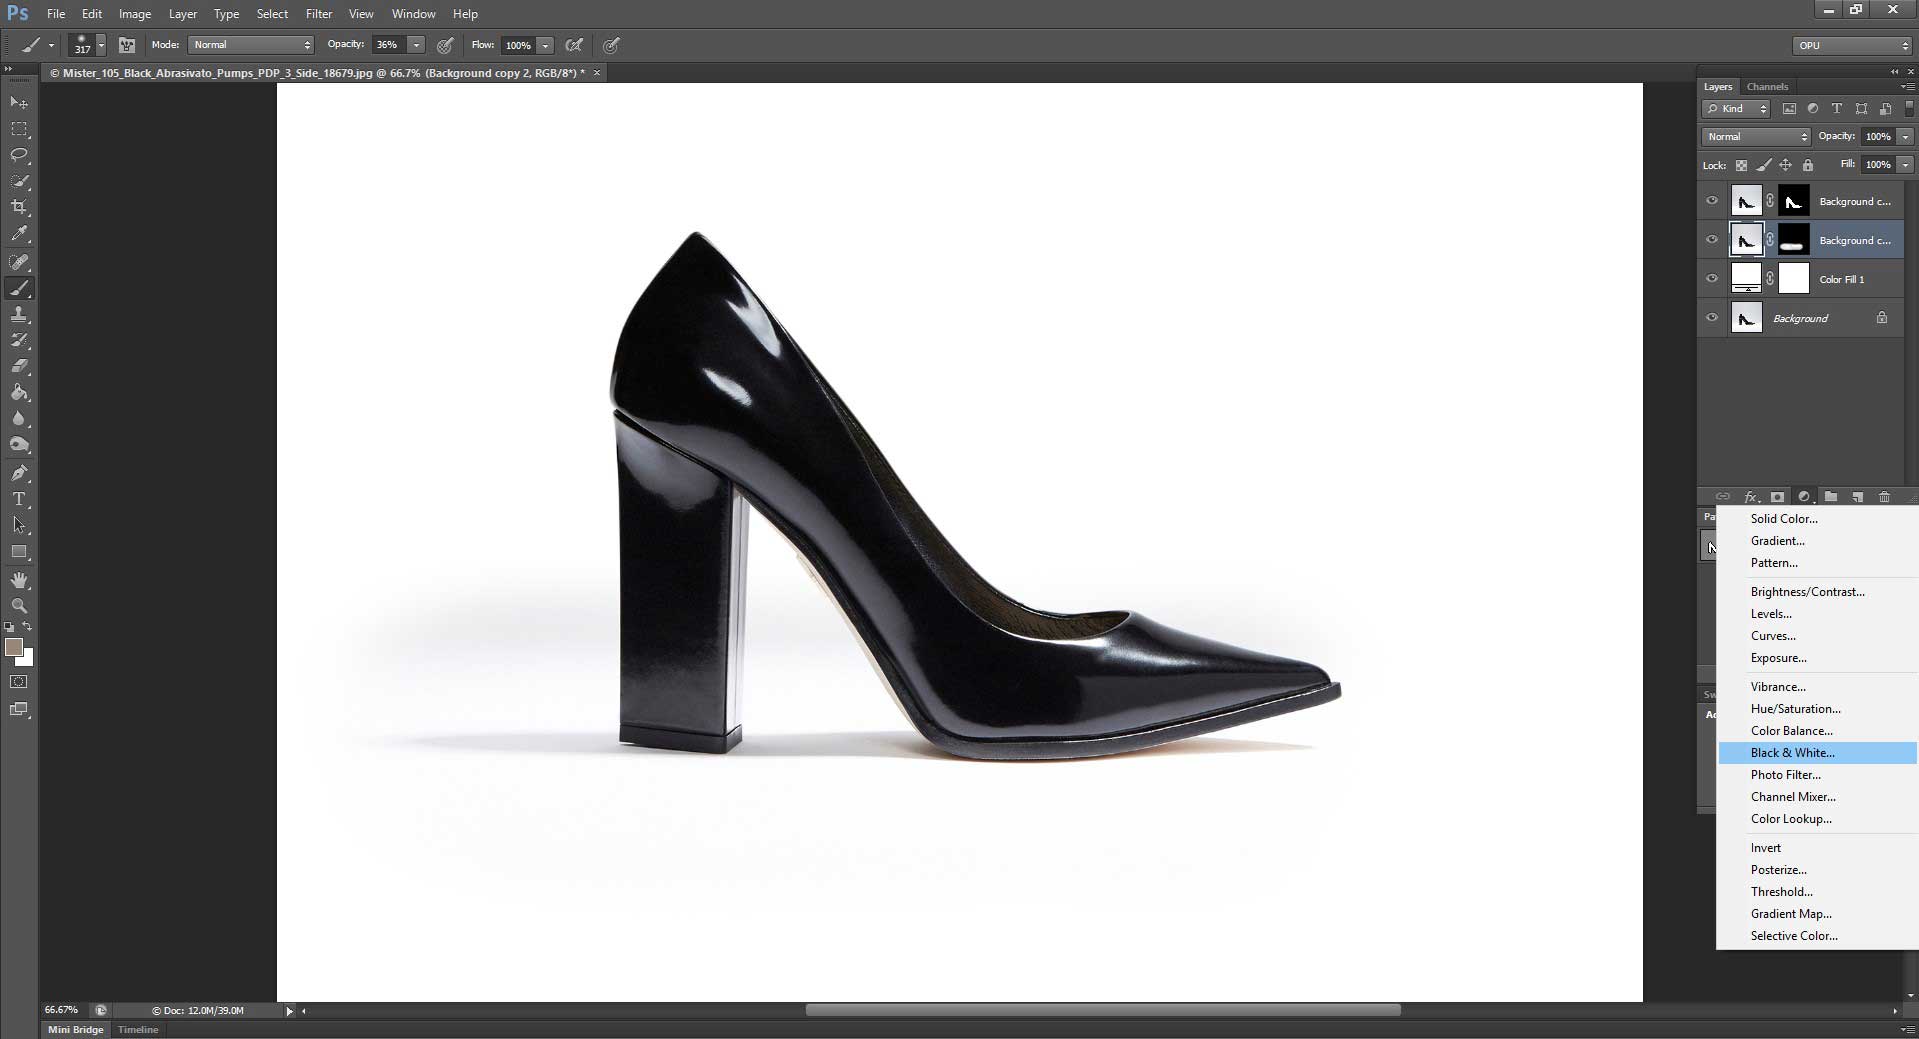
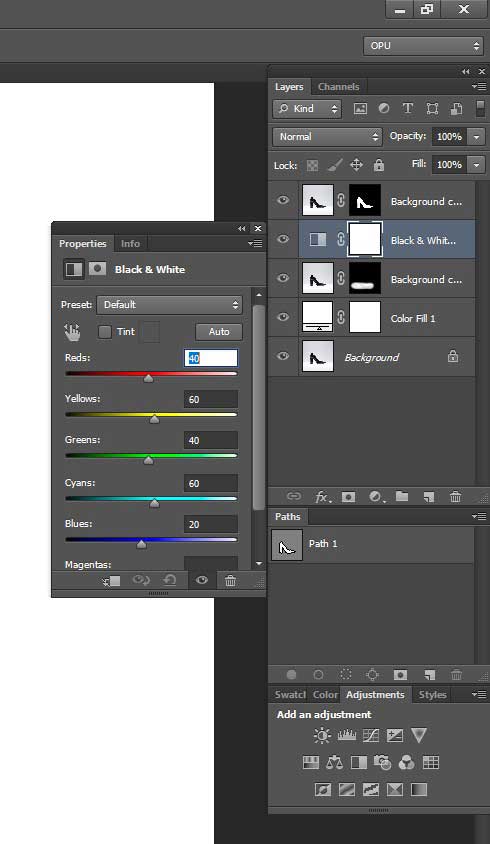
Step 26: Adjust layer
Adjust layer (Black and White)
Cross the flyout menu
Step 28: Save the file
Save the file and you’re good to go …

Video Tutorial: How to Create a Natural Shadow on Product Image
Tutorial: How to Add a Drop Shadow in Photoshop
Drop shadow is an artificial shadow that gets fixed in Photoshop. The main difference between natural and drop shadow is the layers of shadows. Most of the natural shadows have multiple layers which go darker to lighter as the shadow goes far from the source. However, a drop shadow is created with Photoshop and does not have multiple layers of shadow in it.
Drop shadow services mostly goes with product images.
Here is a step-by-step tutorial of Drop Shadow:
Step 1: Open image
Open your file first
Step 2: Copy the background layer
Copy the background layer of your file, select layer and go to Feather Radiation at 0.3% (Shortcut: Ctrl+Alt+D)
Step 3: Background Copy layer
Mask the Background Copy layer
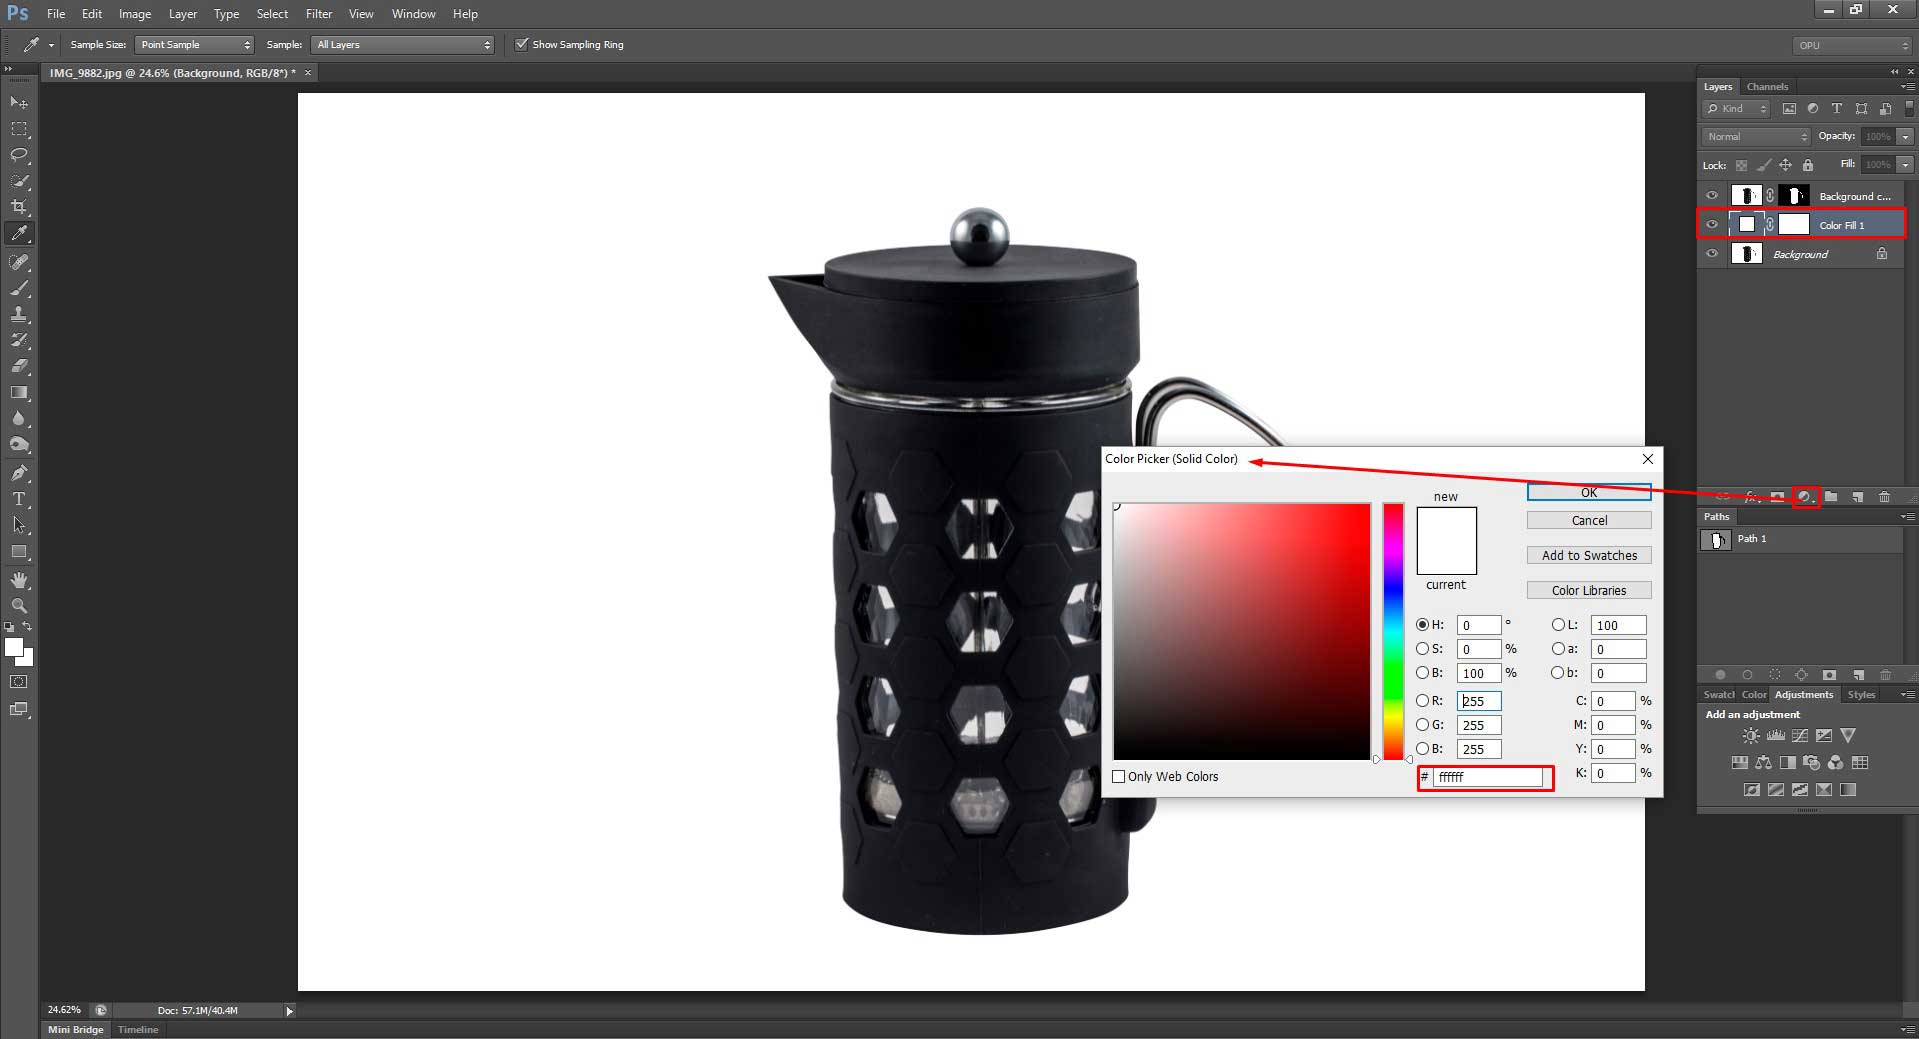
Step 4: Color Picker
Go to Color Picker and select a solid color in the background
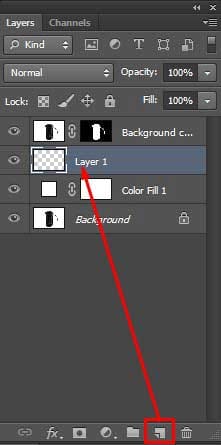
Step 5: Fresh layer
Create a fresh layer
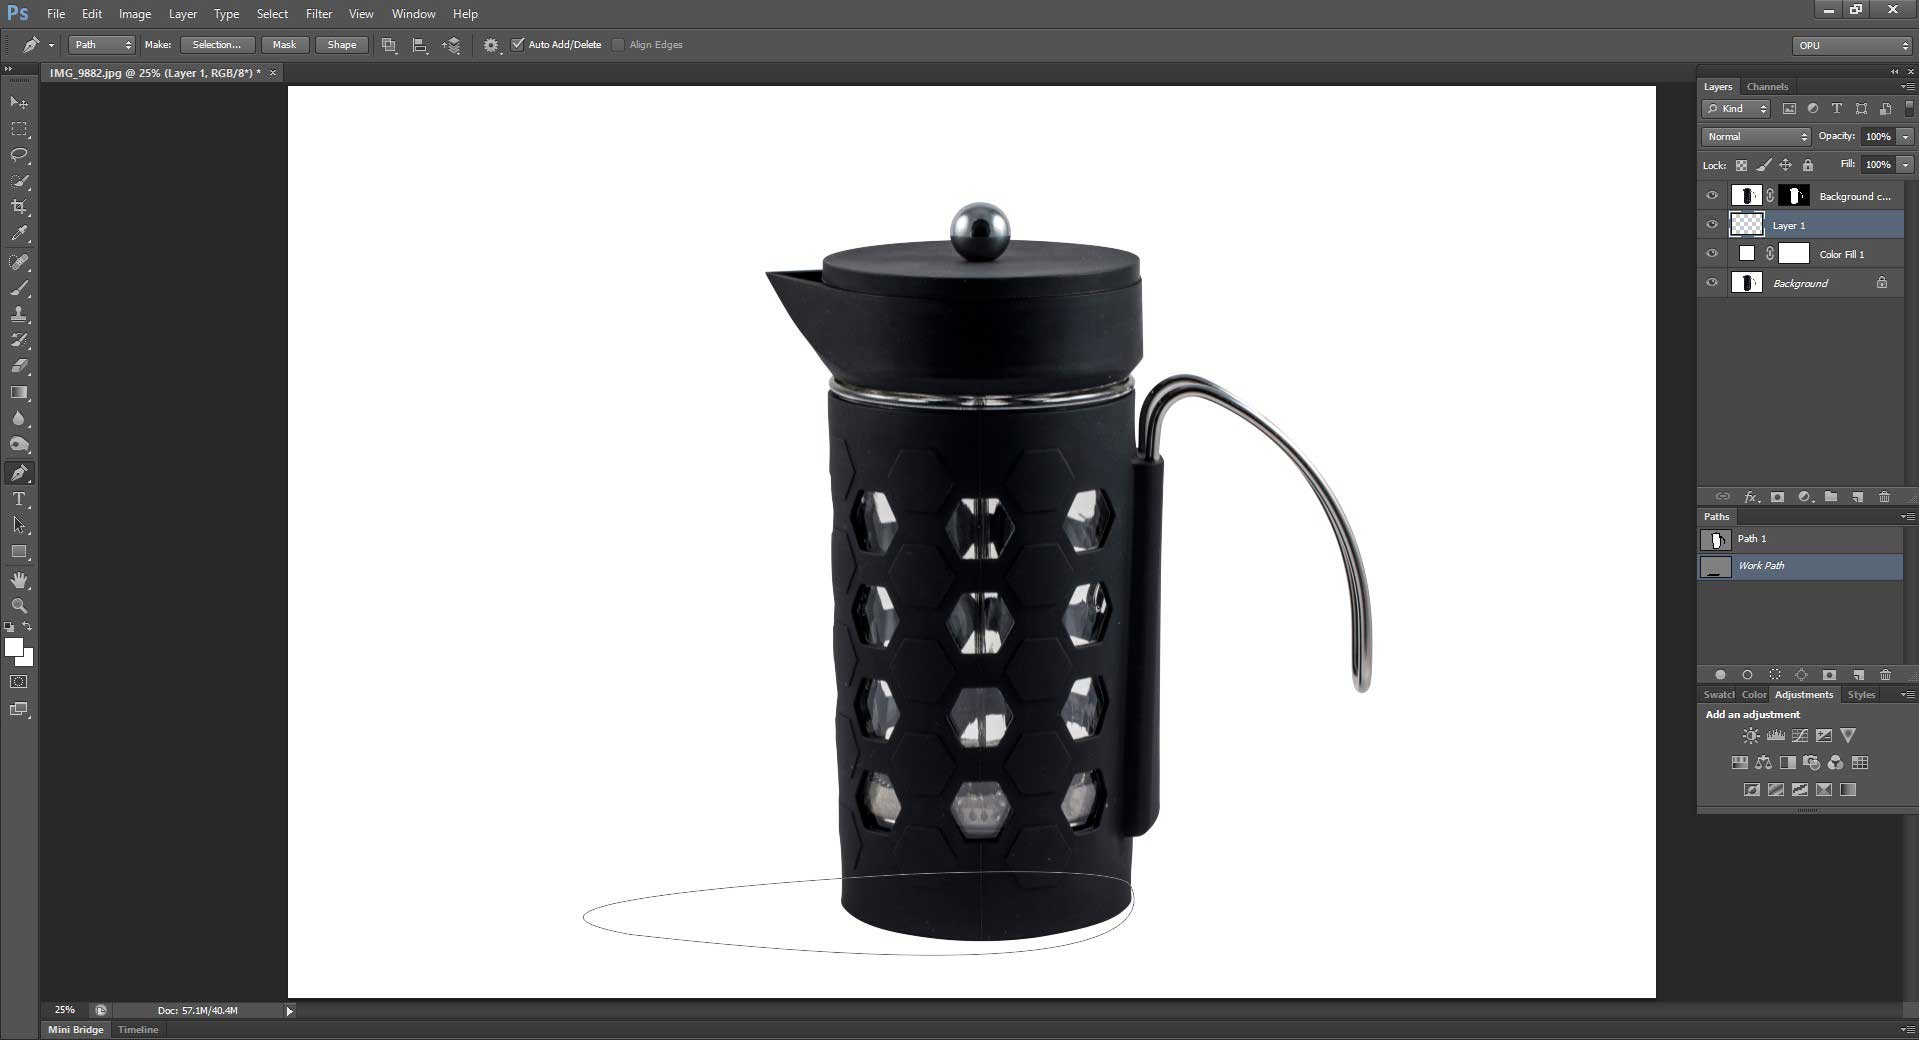
Step 6: Do path
Do path on the part of the image you want to add a shadow on the fresh layer
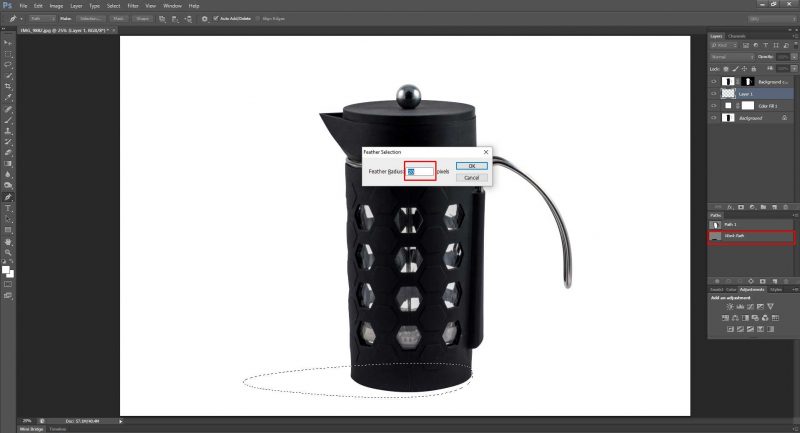
Step 7: Add Feather Radius
Copy the path and add Feather Radius at 20
Step 8: Set the background color
Select the path and set the background color black (Shortcut: Ctrl+Backspace)
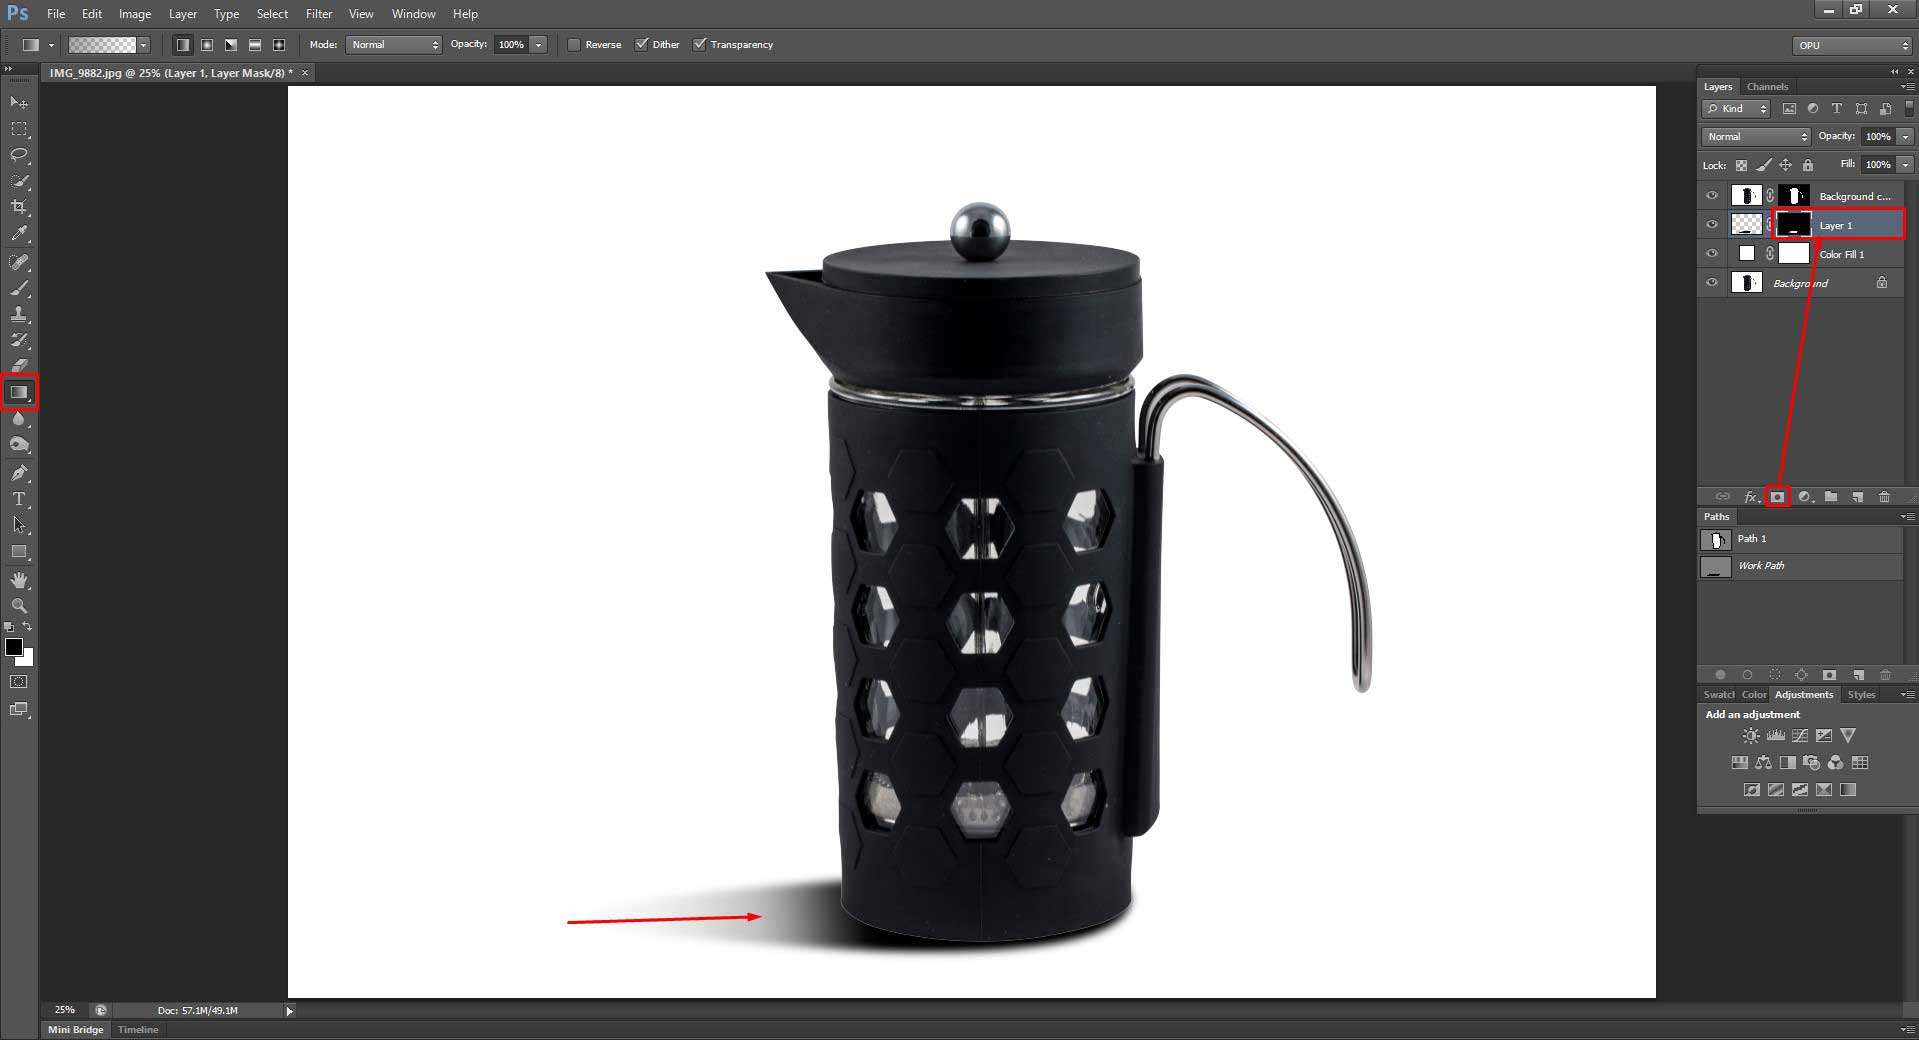
Step 9: Select the mask
Select the mask on the layer. Then select the Gradient Tool from the left toolbar (marked on the image) and fix the shadow
Step 10: Select the Brush Tool
Select the Brush Tool from the left toolbar and give the shadow a proper finishing

Step 11: Save the file
Save the file and you are good to go …

There are many alternatives to this technique. If you are interested in knowing one more technique then please read: how to add drop shadow in Photoshop.
Video Tutorial: How to create realistic drop shadow in Photoshop
Photoshop Tutorial: How to Create a Reflection Shadow
Reflection shadow is a kind of shadow that reflects the main material of your images. For example, if you send an image of glass made nail polish bottle for post-production work and want it to have reflection shadow on it then you would see a reflected bottle on your images.
Interestingly, reflection shadow goes with almost all kind of images. May it be model retouch, may it be apparel products or may it be wedding pictures. Depending on clients’ requirement, this can be applied to any image you have in your hands.
Here is how you can add reflection shadow to your images:
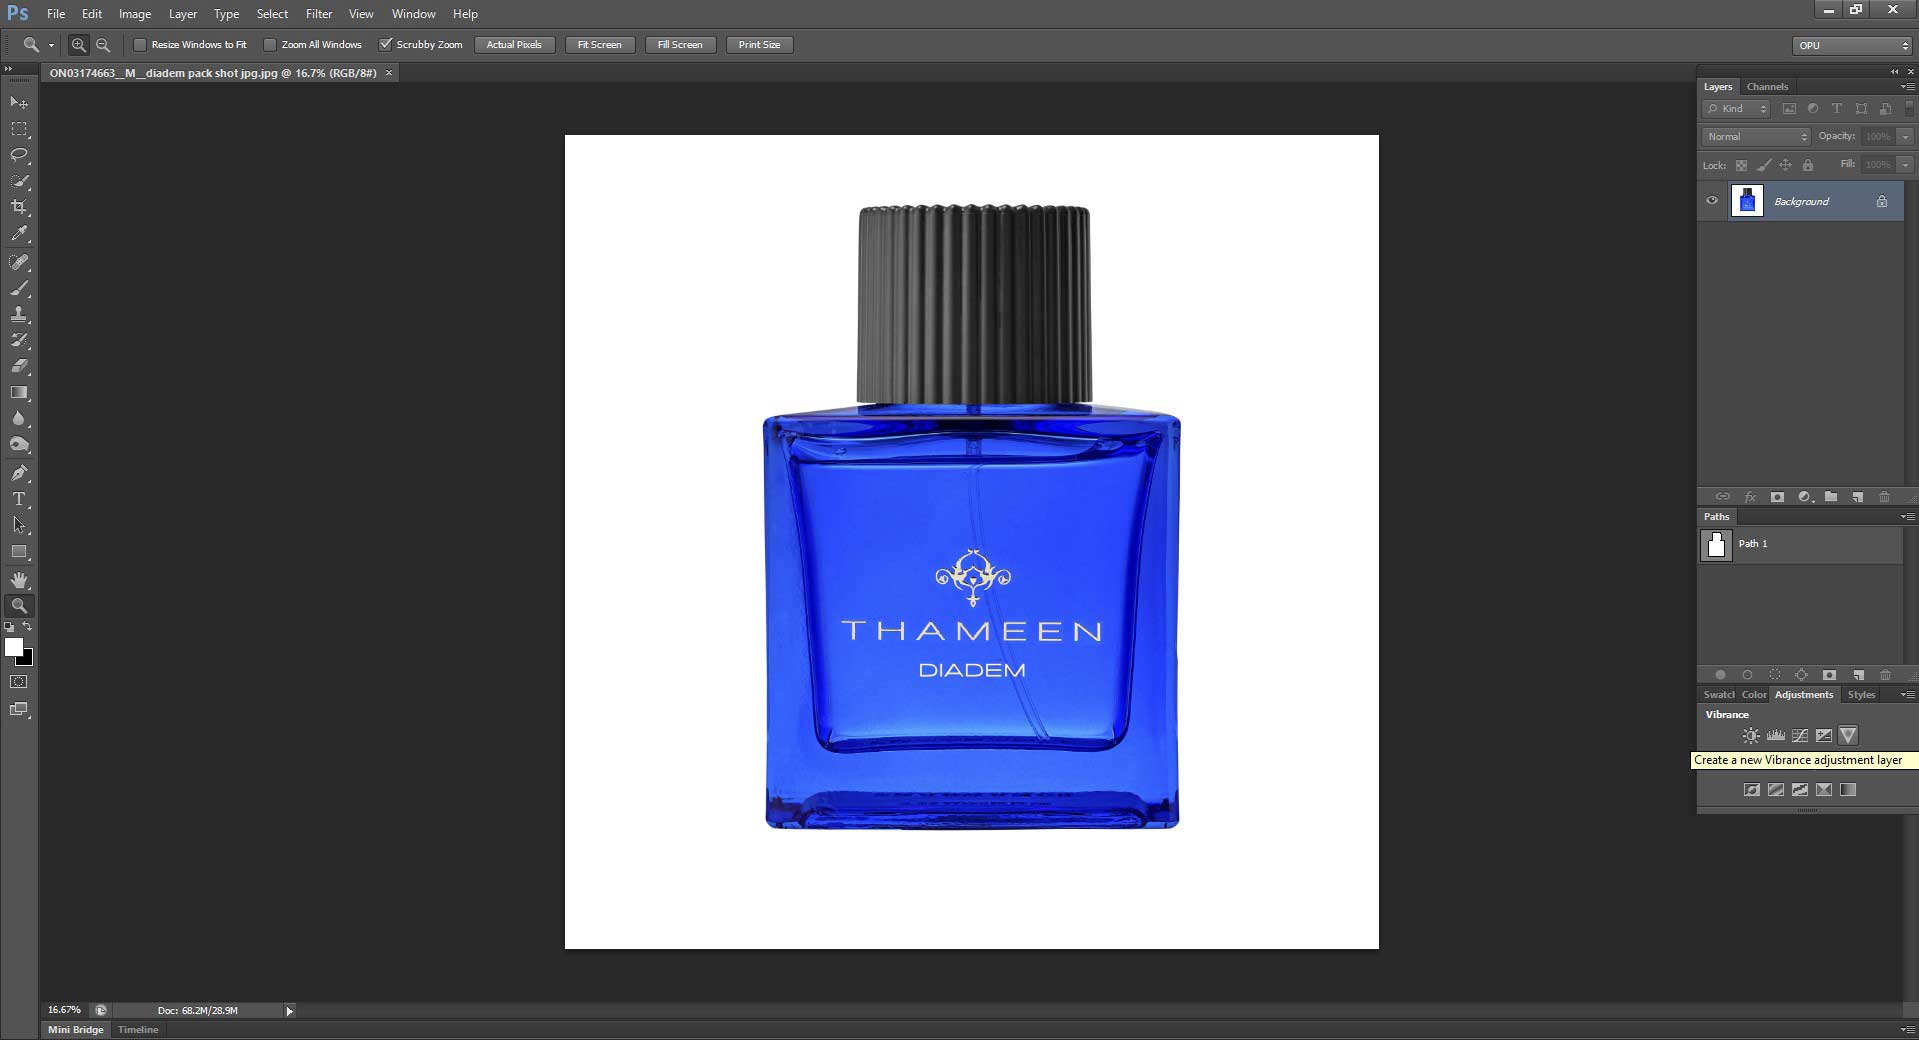
Step 1: Open your image
Open your image with Photoshop
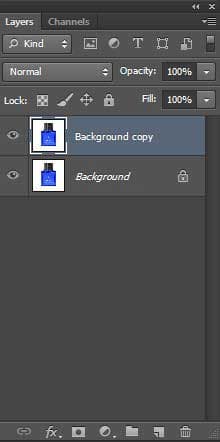
Step 2: Create a background copy
Create a background copy
Step 3: Select Path
Select Path and set the feather at 0.3 pixels (shortcut: Ctrl+Alt+D)
Step 4: Mask
Add mask
Step 5: Fill the background
Fill the background with a solid color (white preferred for product images)
Step 6: Copy the layer
Copy the layer with a mask
Step 7: Apply a layer mask
Apply layer mask
Step 8: Middle mark
Select the product (shortcut: Ctrl+T) and put the middle mark at the bottom of the product
Step 9: Flip Verticle
Click right button of your mouse on the mark and add Flip Verticle
Step 10: Mask Layer
Take a Mask Layer of the layer you were working on
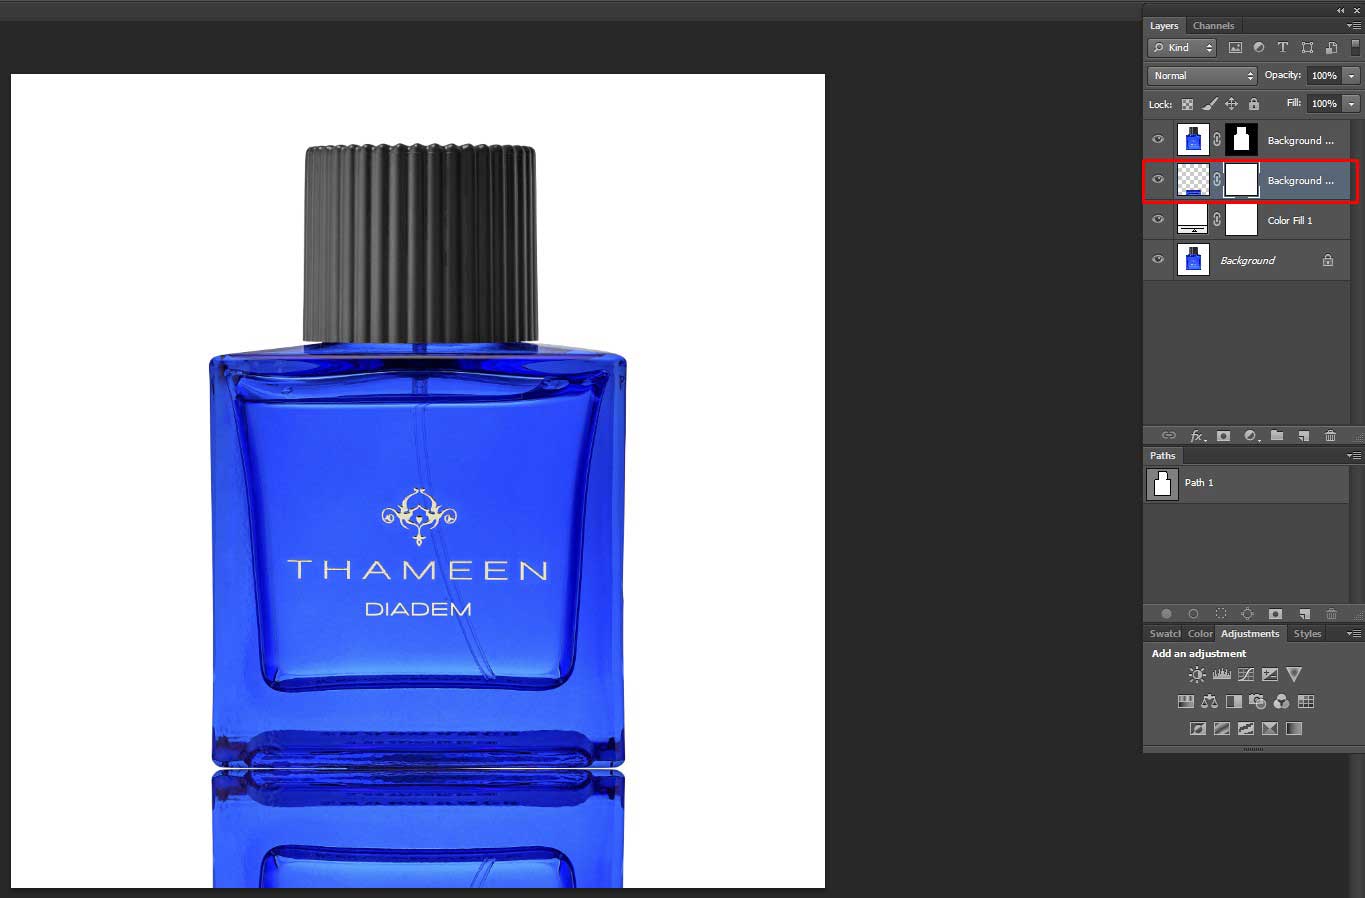
Step 11: Reflection of your product
Select the Gradient Tool and apply it to the reflection of your product

Step 12: New layer
Create a new layer
Step 13: Merges with reflection
Take the Pen Tool and select the part where your main product merges with reflection and Path
Step 14: Set the feather
Select the Path and set the feather at 5 (shortcut: Ctrl+Alt+T)
Step 15: Set default color
Set black as default color then press Ctrl+Backspace
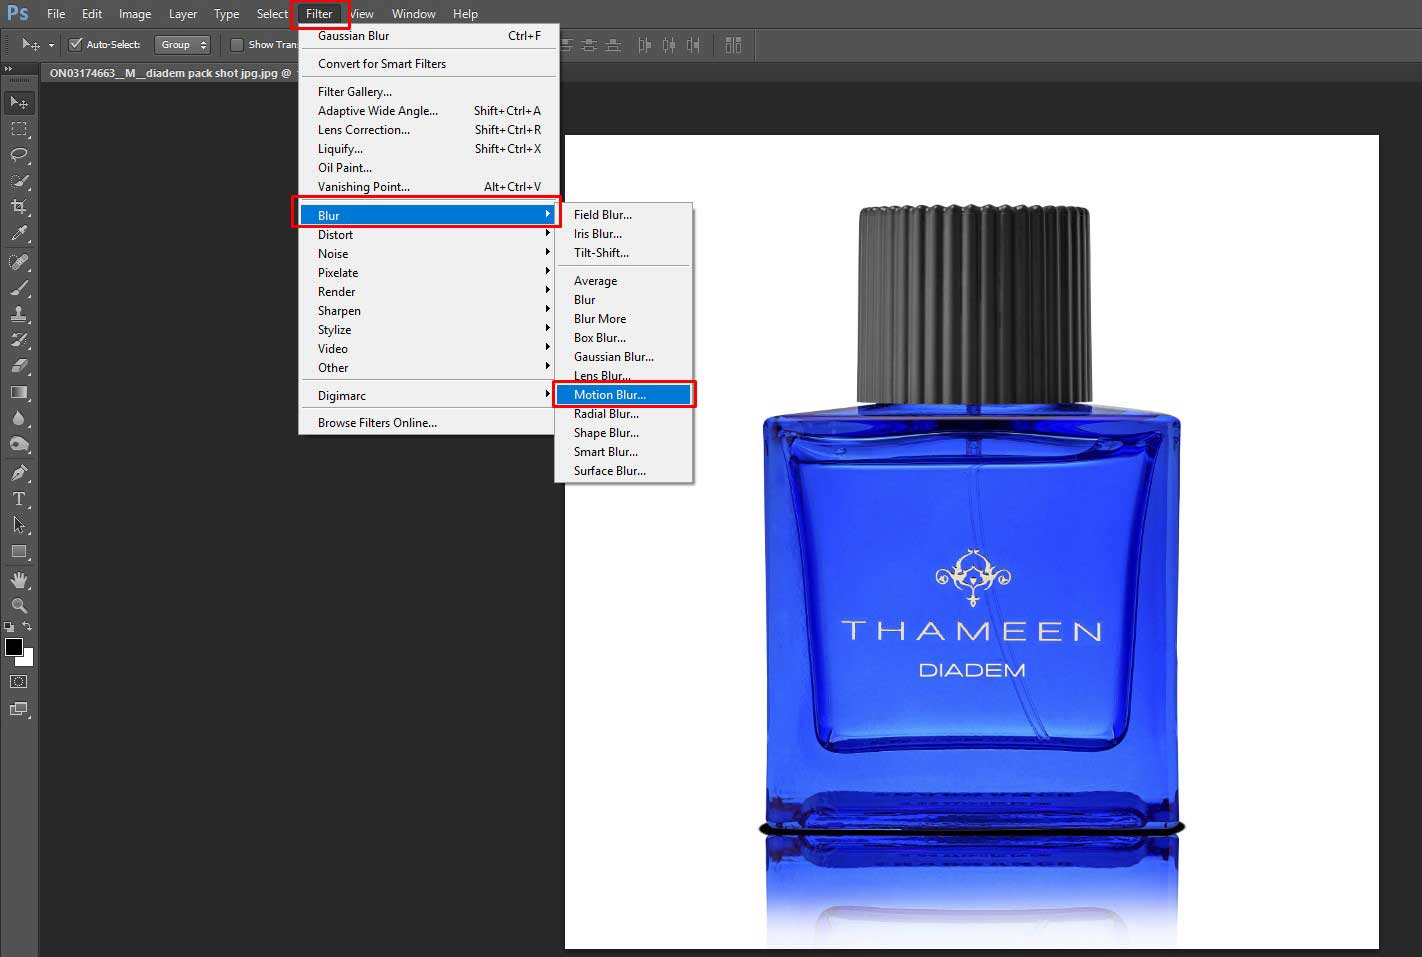
Step 16: Blend the shadow
Blend the shadow when the path is selected. To blend the shadow go to Filter>Blur> Motion Blur
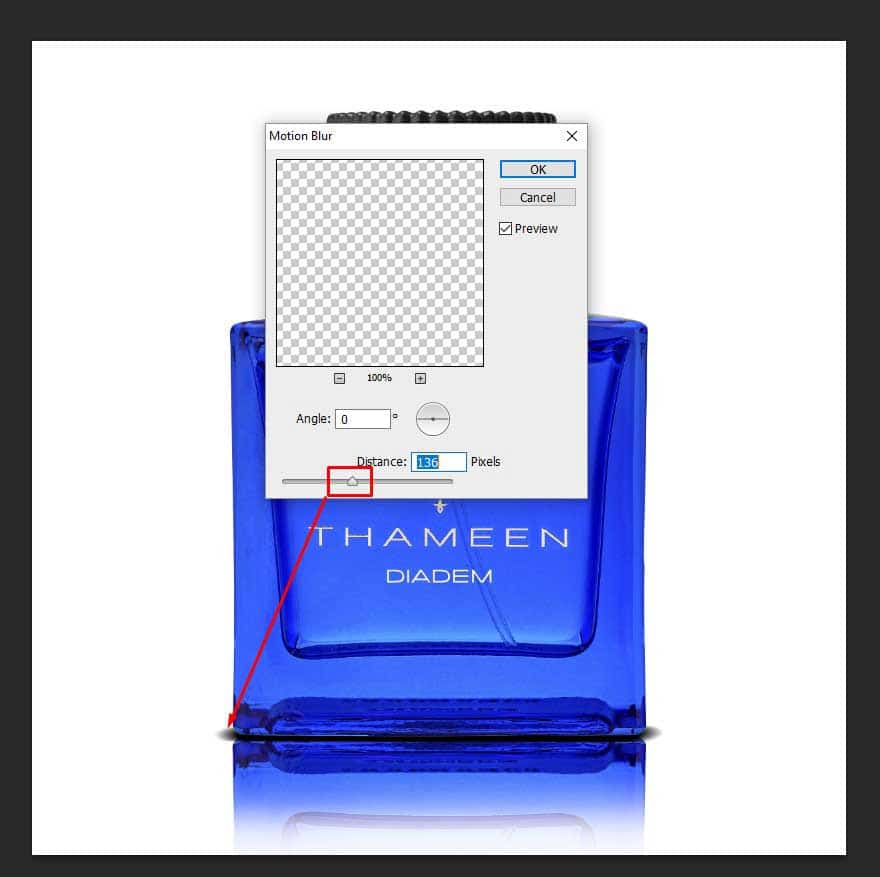
Step 17: Set the angle
Set the angle at 0 and distance at a relevant number
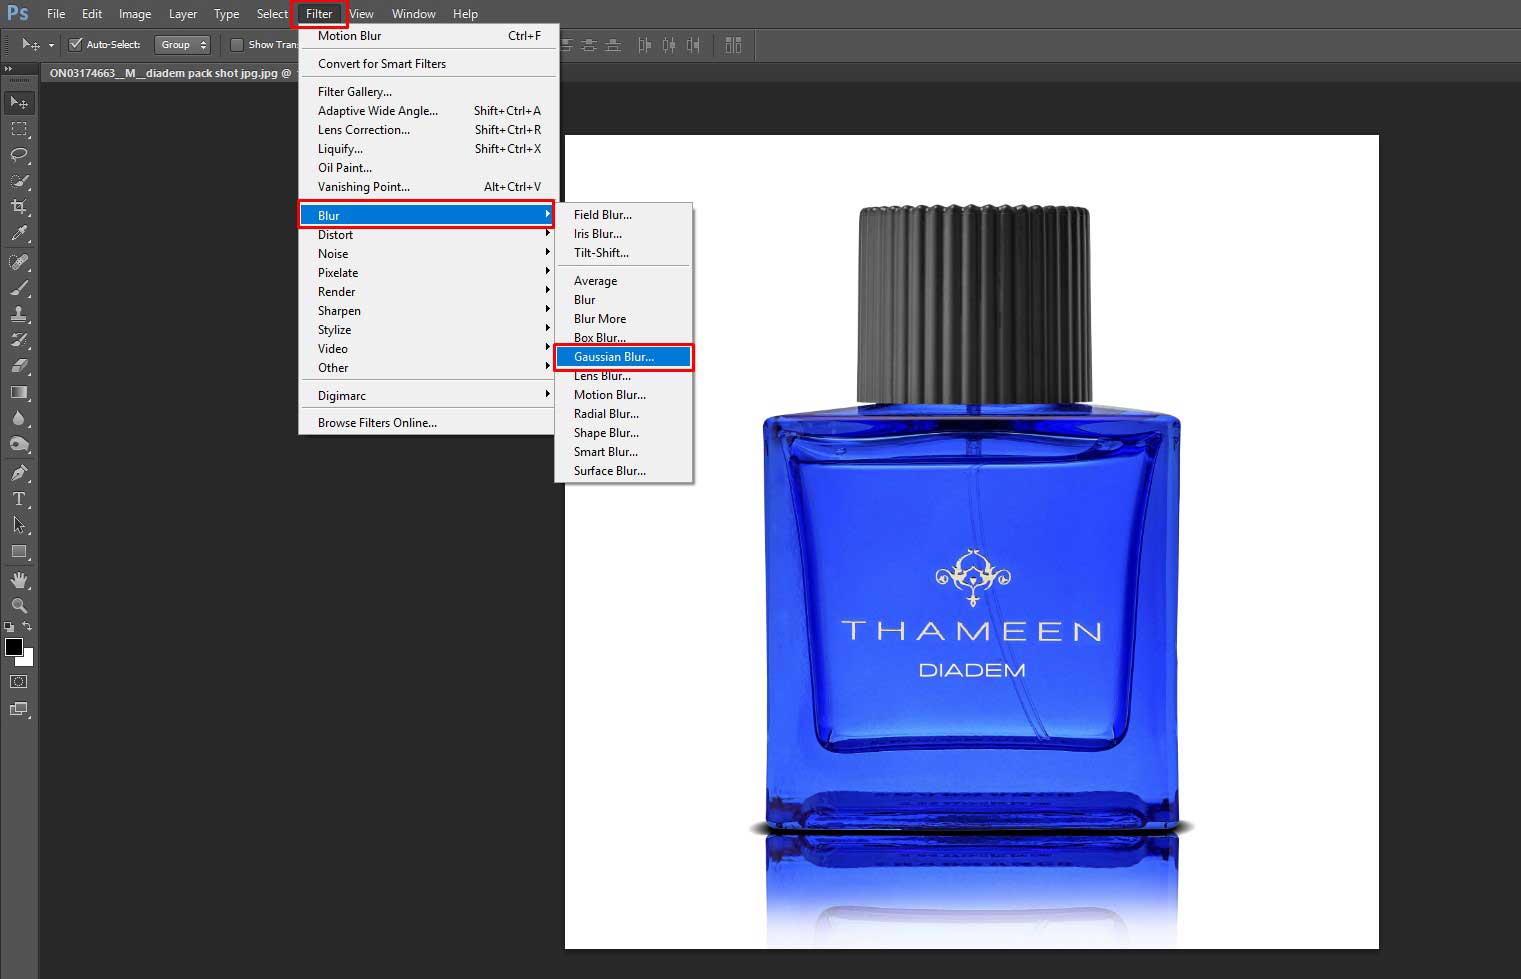
Step 18: Blend in the gradient
Now go to Filter>Blur>Gradient Blur to blend in the gradient
Step 19: Set opacity
Set the opacity at a relevant ratio

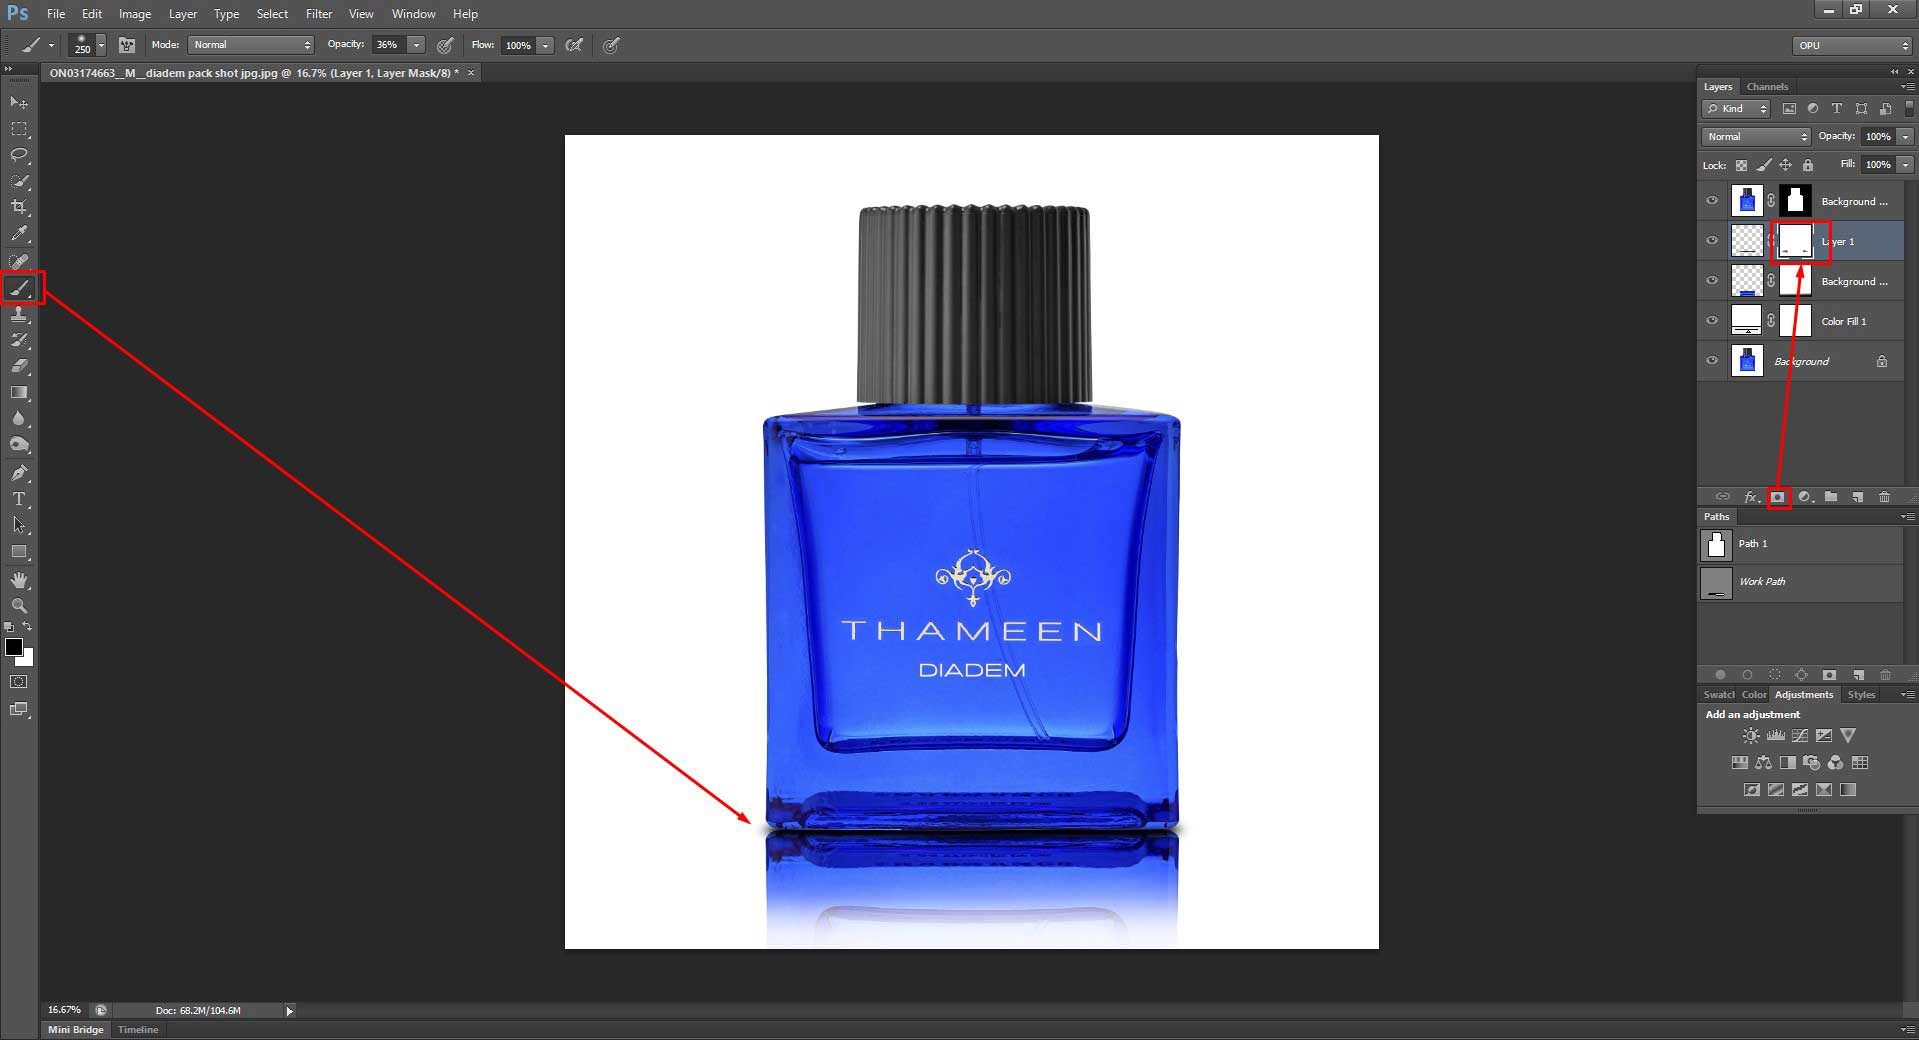
Step 20: Remove extra shadow
Create a mask layer and remove the extra shadow from it
Step 21: Save the file
And, you’re good to go … Your file is finished and you have a perfectly edited reflection shadow on your product image
I hope this would help you to create any kind of shadow on your product images.
Video Tutorial: How to Make Reflection Shadow of a Car Image
It is always better to get help from experts like Offshore Clipping for best possible results. However, if you want to do it by yourself then the way of adding shadow to your product images are mentioned above.
Please share this article so that more people see it and get benefited.
As always, please feel free to leave your questions in the comment section. I would love to answer them as early as possible. Besides, you may ask if you have any difficulty while editing your images.
Cheers!