Being able to clip out images by flawlessly Image Masking Techniques the background is a vital skill, without which it is impossible to achieve flawless photographs. Moreover, most editing projects require background removal and it is mandatory whether you’re designing artwork or for the print web.
If an aspiring designer is looking to tackle some Photoshop challenges, he must become familiar with some advanced techniques. Sometimes we are faced with a picture that has a complex background consisting of shapes.
If in this situation, the clients require only one item to be isolated the designer has no other way but masking methods. Thus, it is necessary for the designer to have sound knowledge about Image Masking in Post-production.
What you’ll learn in this article
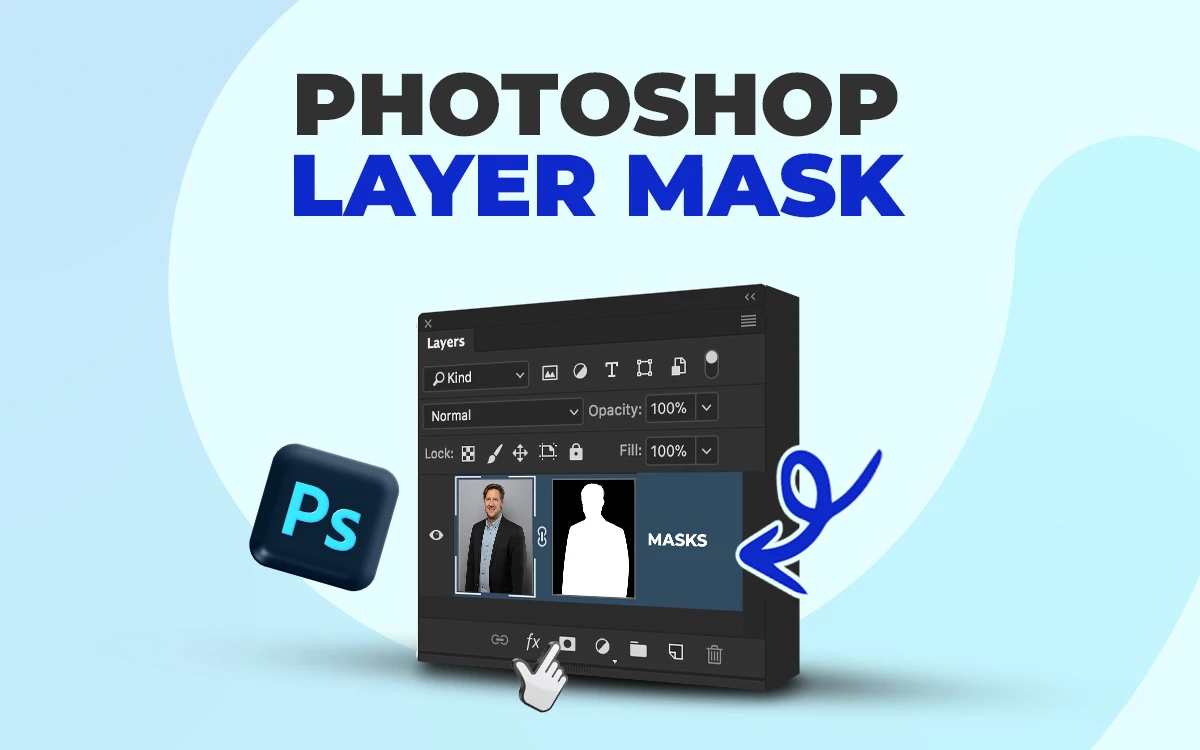
How to Use Layer Masks in Photoshop
Layer mask tool can be used as a substitute for the Eraser tool. The Layer Mask allows you to correct it or even remove it if you please, whereas the effects of the Eraser tool can be irreparable. The convenience that Layer Mask provides you is, all the Photoshop tools are accessible for creating your mask. Now that there is access to marquee selections, various brushes and gradient options help you to create the perfect mask.
Try using the brush tool for painting the background of your photo using the same motions as you would when using the eraser tool.
Photoshop Layer Masking tutorial:
Using the brush on a pen tablet allows the user to naturally select sections via pen pressure. The softness of your brush tip is of utmost importance in such cases.
Selection Tool
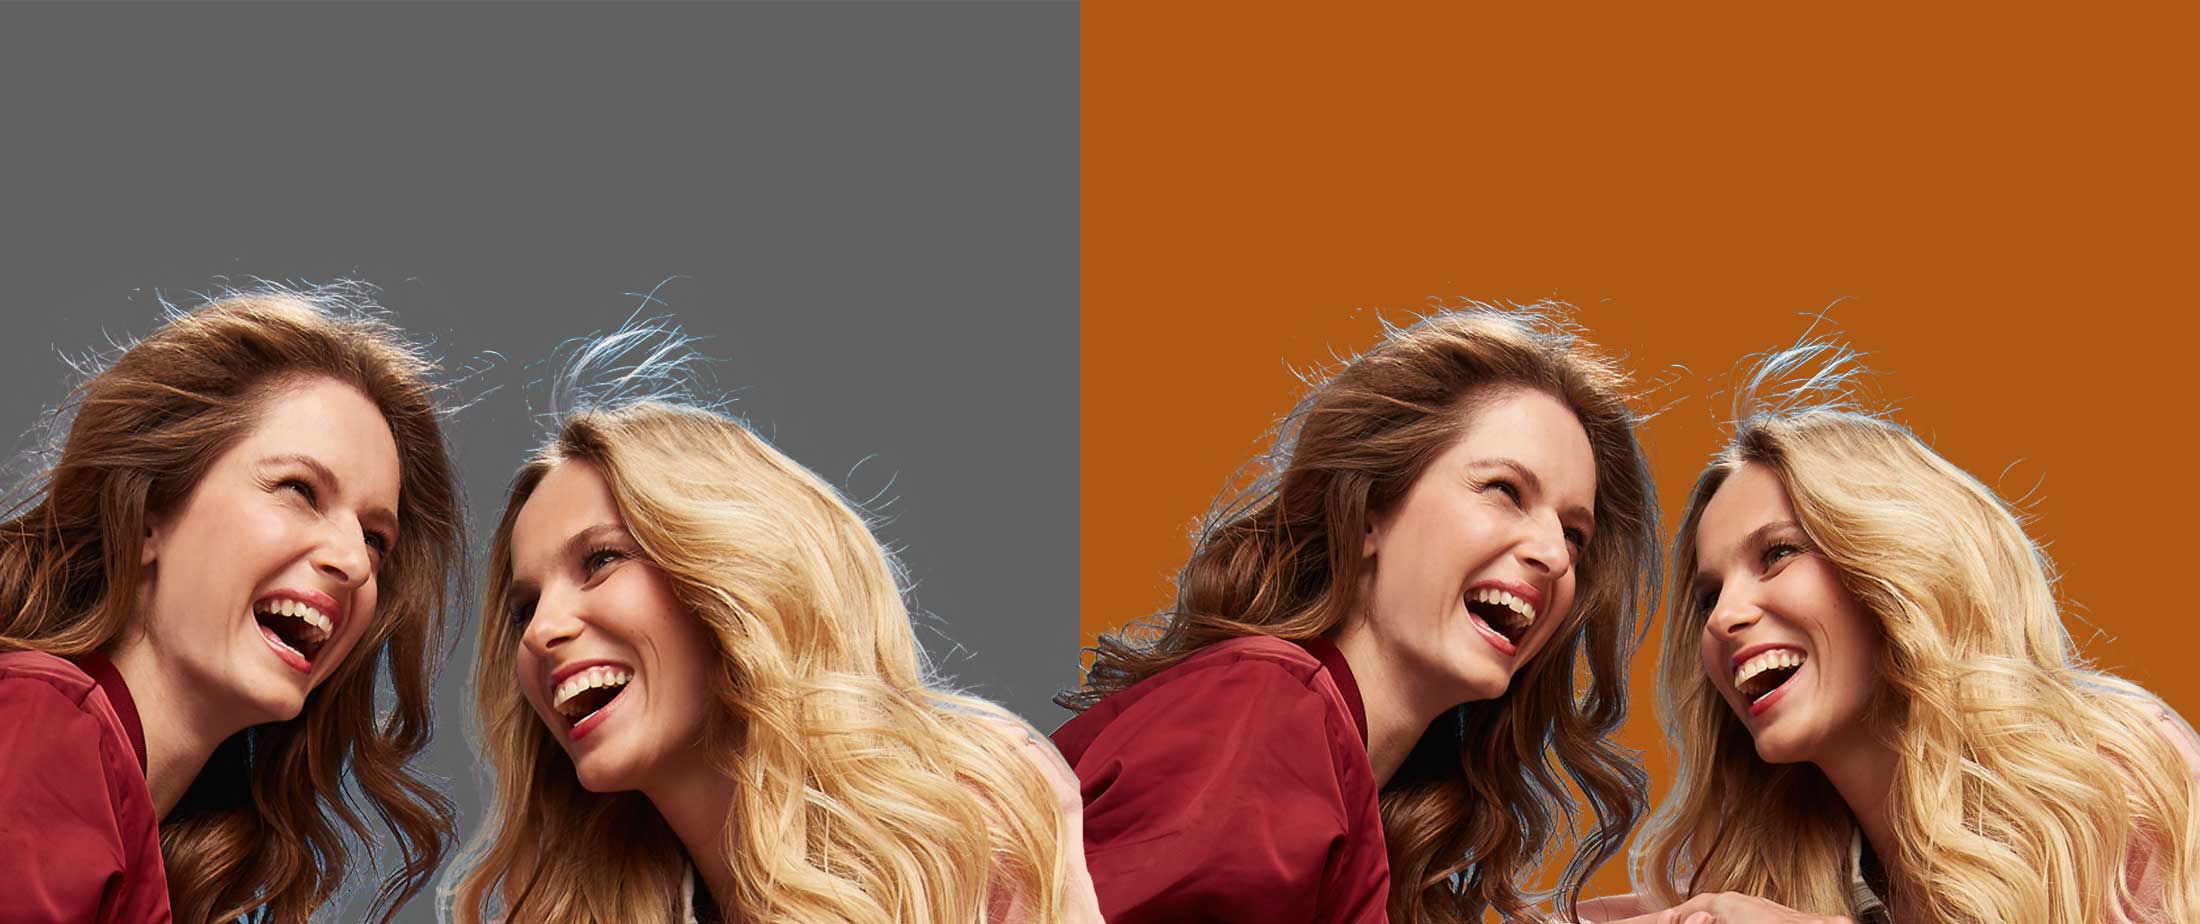
Using the selection tool can also come in handy when you need to mask the background. Once you have a selection you can make a layer mask from it. Instead of completely erasing the object you want to remove, you can easily mask it out. This lets the user modify the object to make the edges smooth.
This also means that the image details are still there in case you need to reverse the effects. Hence, this method allows you to experiment and explore options without permanently losing any image information.
Refine Edge Feature
Another little trick is to use the Refine Edge feature to create and be in command of the mask. With the help of sliders and settings to smoothen the rough edges of the image isolation, transitioning is improved.
Shifting edges and contrasting edge and background are some other advantages of using this tool. The output section is another remarkable option available in this image masking techniques function. Specific selection and the option of previewing and inverting masking effects make life easier.
Masking a photo’s background or deleting it helps the editor. It allows the user to smoothly and flawlessly combine images together. Image masking has so many more features which are producing top-notch photographs for all intents and purposes. To achieve that level of excellence, it is essential you speak with the right people.