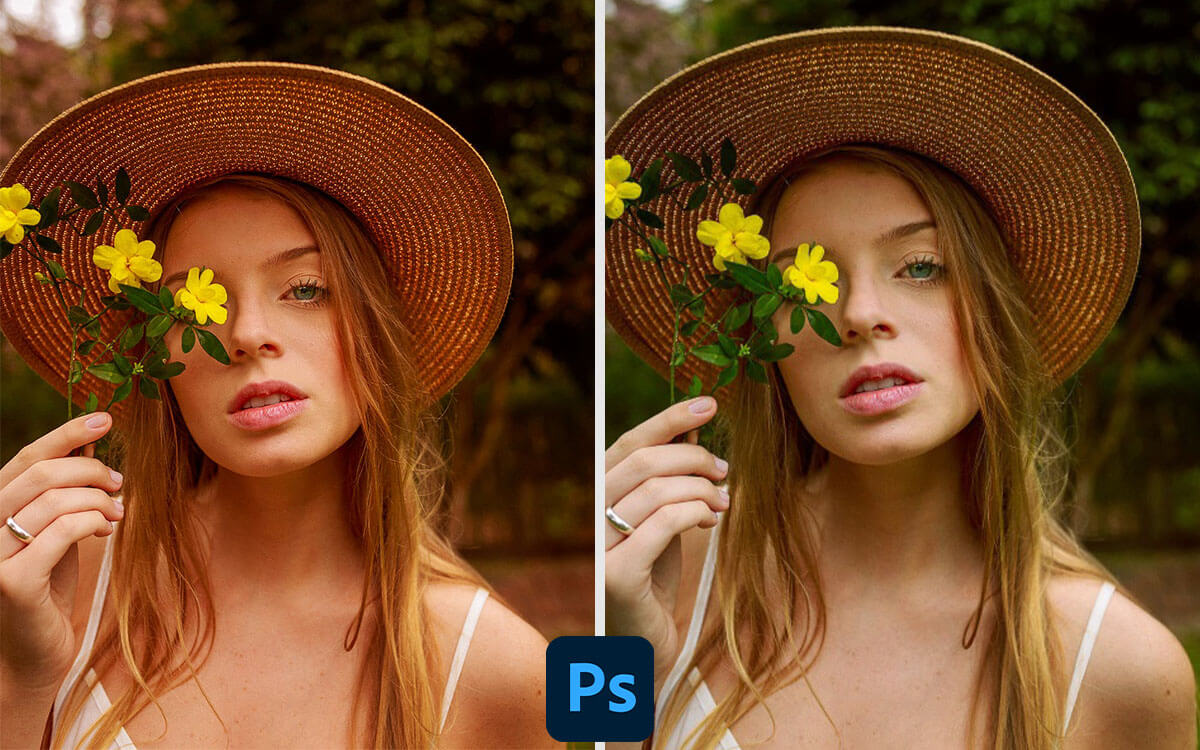
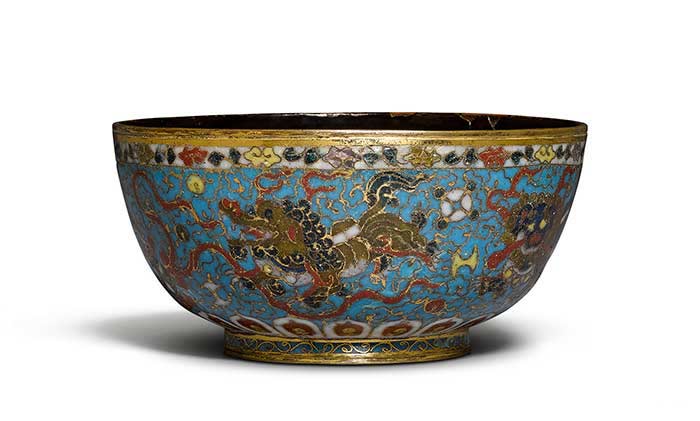
Product or e-commerce photography is probably the single most efficient element that works as a deciding factor while buying a product. For the most part, people rely on images to buy a product.
Though photo color correction sounds like a tough job, it isn’t that tough. Knowing how to do color correction in photoshop will let you create your images perfectly. Images speak louder than words. So why not make them more realistic?
What you’ll learn in this article
What is Color Correction in Photoshop?
Color correction is the process of bringing back the original color of an image. As we take photos with the camera, it can’t always capture the exact scene that our eyes see. Photoshop helps with this process to get back the original color of the image by doing color correction.
While taking photos outdoors, the lighting condition is not in our control most of the time. Light conditions change with time throughout the day. If you’re shooting for long hours, it’s almost obvious that your images won’t have the same color tone throughout the day. To keep the consistency, you’ll have to adjust the color in photoshop.
Color Grading vs Color Correction
Both the color correction and color grading processes work with correcting the color of an image. But they have some differences.
Color correction is basically about ‘correcting’ the color of an image to gain the original color of that image. While shooting, we might not always get the color of what we see. In that case, we might need to work with the color to get the original color of the subject.
On the other hand, color grading is about creating aesthetics. Sometimes we change the color tone of the image to create a different kind of essence of the image. This doesn’t look like the original image, but it gives an artistic look to the image. Color grading contributes to changing the mode of the image too.
How to Do Color Correction in Photoshop?
There are several ways to do color correction. Here, we’re going to describe the easiest and quickest way to do color correction.
Method 1: Color Correction by Picking Gray Color
This way works by finding the perfect gray color of an image. To correct the color of an image, we need to find out which part of the image should have been gray in real life. Then we’ll have to mark that color as a reference to photoshop.
If your photo doesn’t have any area which should have been gray in real life, then we’ll have to mark an area that is closest to gray. After finding that area, Photoshop will automatically adjust the other colors based on the reference of a gray color.
Need to save time on photo editing? Tired of time-consuming photo editing tasks? clipping path service provider are here to help. Whether you need photo color correction or photo cutouts, we can help.
Step 1: Open image in Photoshop
Go to File from the top menu and click on Open to open the file you want to work on.

Step 2 : Add Gray Layer
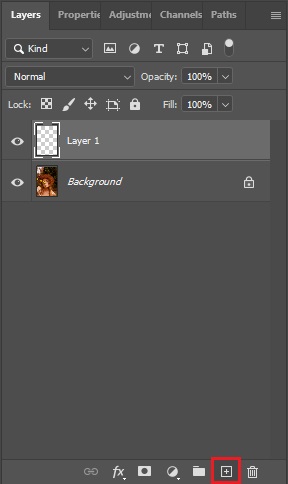
Now, we’ll have to pick the gray reference. From the Layer panel, add a new layer by clicking on the box with a plus sign.
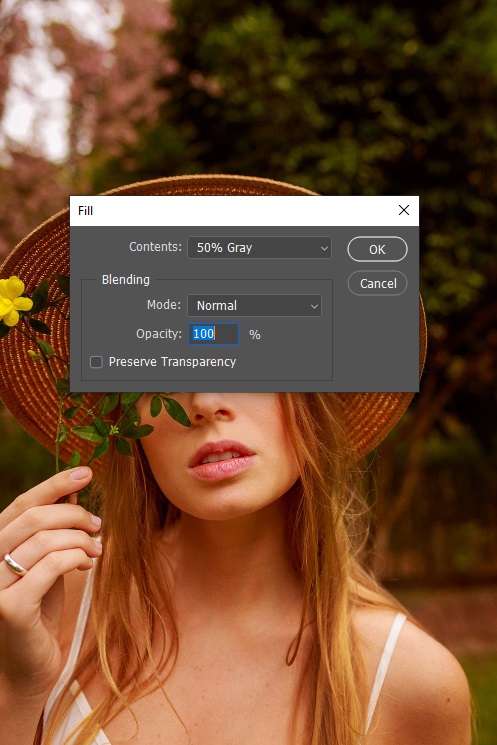
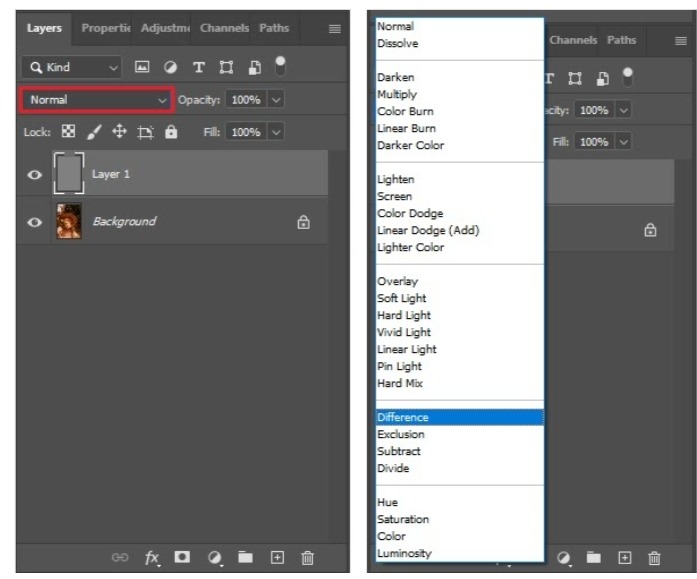
Now, press Shift+Backspace on your keyboard to turn the layer into gray. A box will pop up. Select 50% Gray on the Contents menu and click OK.
From the blending mode, select Difference.
Step 3 : Find the darkest area
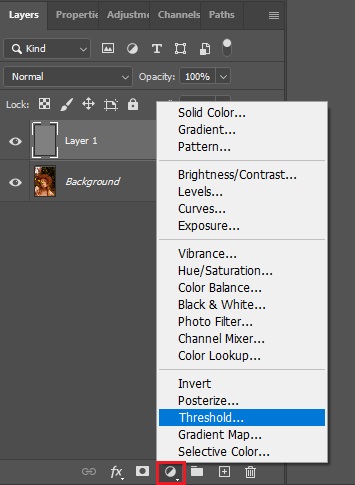
From the Adjustment Layer menu (right beside the Layer mask icon), choose Threshold. You’ll see a diagram.
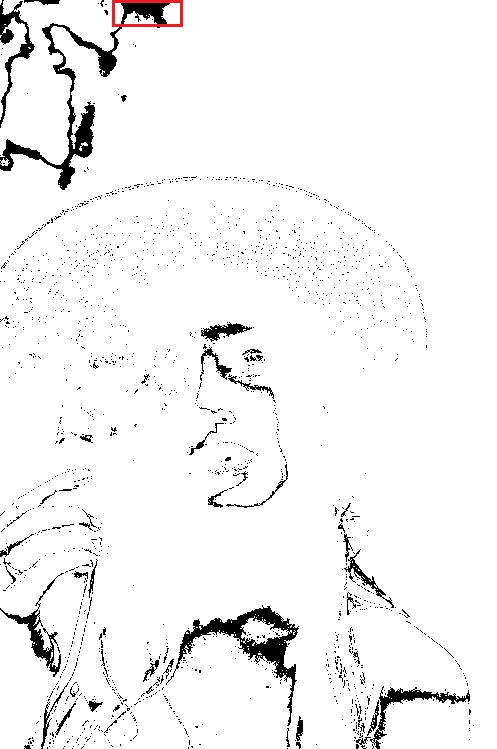
Move the slider and find out which area is the darkest.
Step 4 : Delete Layers
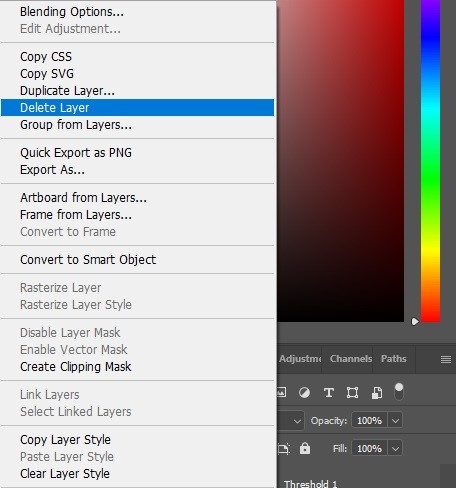
Now, delete all the other layers except the main layer. Right-click on the Layer and select Delete Layer.
Step 5 : Curves
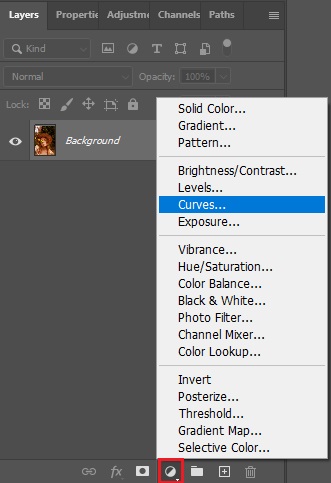
Go to the Adjustment Layer and select Curves.
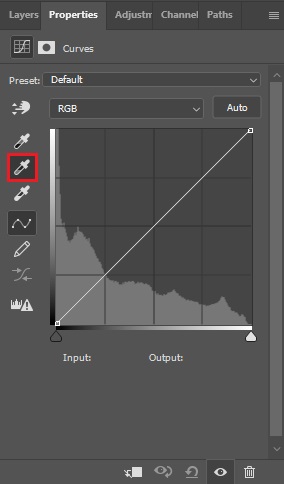
You’ll see there are three Eye-droppers right beside the curve. Now pick the middle Eye dropper which indicates the Gray point.
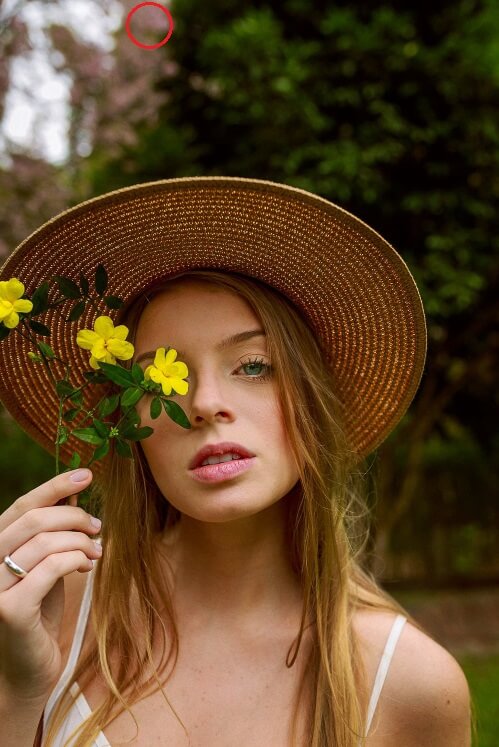
Click on the darkest area you found before.
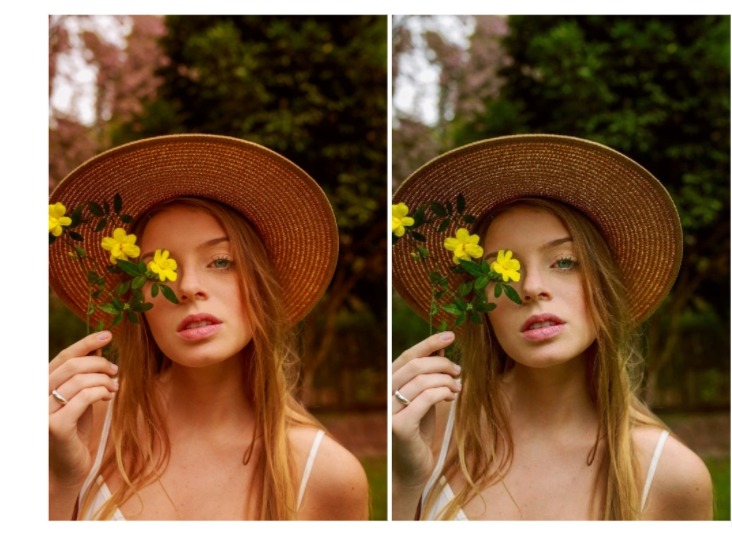
It’ll correct the color of the image. Remember this, though we’re working on the darkest area, it might not work for all images. In that case, you need to try some other points of the image. This depends on how you want to see the image. So, try and fix the color that you want.
Step 7 : Save
Go to File and select Save As to save the image.
Method 2: Color Correction with Color Balance
There is another way to do color correction. That is with the Color Balance option. To do this, you need to understand some basics of color. So, here, we’ll work with complementary colors.
If an image has a particular color cast (excessive amount of a particular color), we’ll have to change the amount of opposite color of that. First see, what are the complementary colors-
Red – Cyan
Green – Magenta
Blue – Yellow
So, suppose, one image has a red cast. As in, it has excessive red color in it. What will we do then? The opposite color of red is cyan. So, we’ll increase the cyan and it’ll cut the red.
Let’s check the process!
Step 1: Open
Go to File from the top menu and click on Open to open the file you want to work on.
Step 2: Duplicate Layer
Right-click on the Background Layer and select Duplicate Layer. Or just press Ctrl+J on your keyboard.

Step 3: Color Balance
From the Adjustment Layer menu (right beside the Layer mask icon), choose Color Balance.
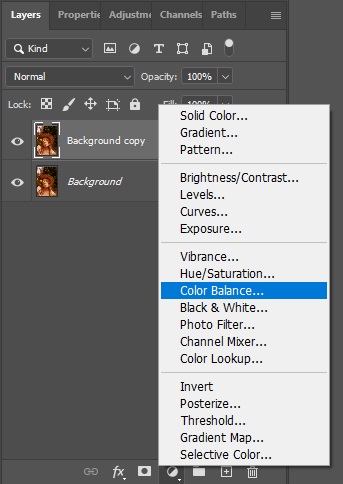
Step 4: Change Slider
Now, look at the image.

It’s clear that it has magenta cast. So, change the slider and increase green color. Stop when you’re done.
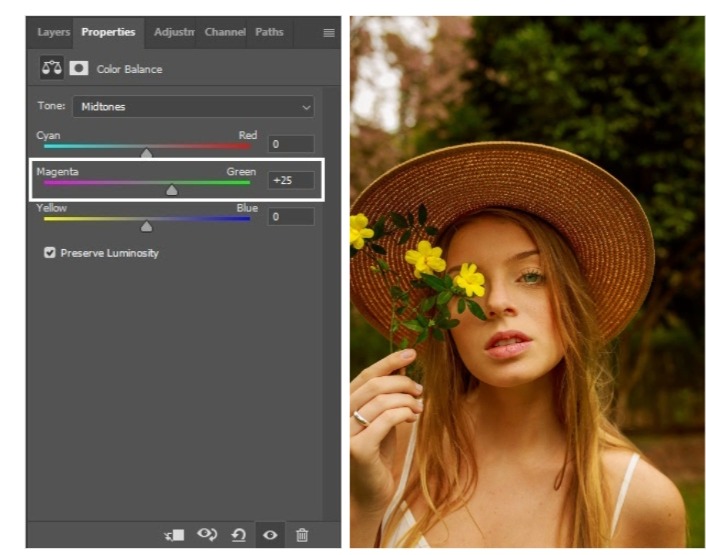
Now, it looks like there is yellow cast. So, we’ll increase the blue color too.
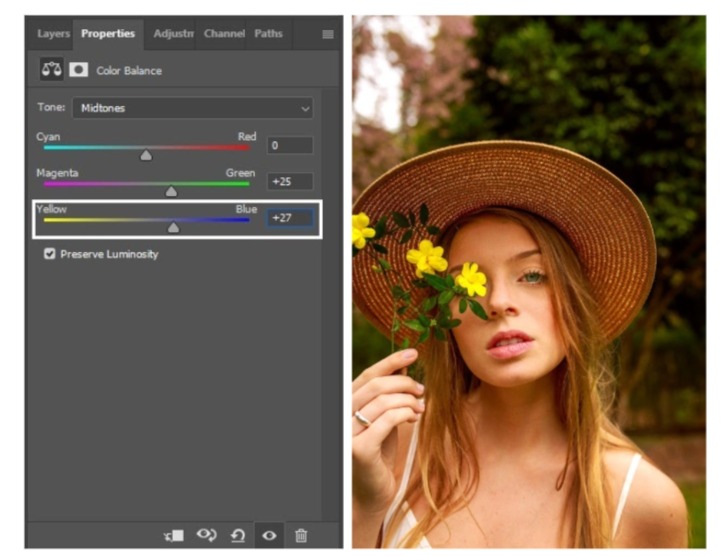
Step 5: Adjust Light
You can adjust the light of the image with Curves if you need.
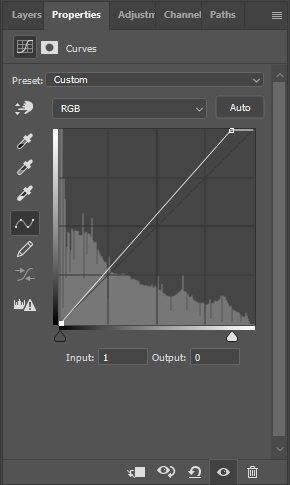
Step 6: Save
Go to File and select Save As to save the image.
Get hassle-free, professional grade color correction for your images from our clipping path specialists at a competitive price!
Final Thought
Color correction is always essential for any kind of product photography. Because if the image doesn’t show the real color of the product, customers will get confused after getting the product, and it’ll ruin the trust. So be as accurate as possible to give the right color tone to your image.
