In eCommerce businesses, customers have no physical interaction with the product. For this reason, they always prefer clear, detail-oriented, and eye-catchy product images.
That means high-quality images are the must thing. As per statistics, 67% of consumers prefer quality images before selecting and purchasing the product.
So, it is crucial to understand the online strategies, trends, and consumers’ demands that increase sales.
If you are searching for some shoe photography ideas along with
- How to take pictures of shoes to sell?
- How to position shoes for pictures?
- How to pose shoes that can boost business?
Then look no further! Your search end here.
With this article: the beginner’s guide to shoe product photography, you will achieve your goal.
Without further ado, let’s get started!
What you’ll learn in this article
- 1 How Do I Take Pictures of Shoes That Sell – Shoe Photography Tips and ideas
- 1.1 1. Prepare Your Shoes Before Shooting
- 1.2 2. Choose the Right Backgrounds for Footwear
- 1.3 3. Choose The Right Cameras and Settings
- 1.4 4. Best Lenses Shoes Photoshoot
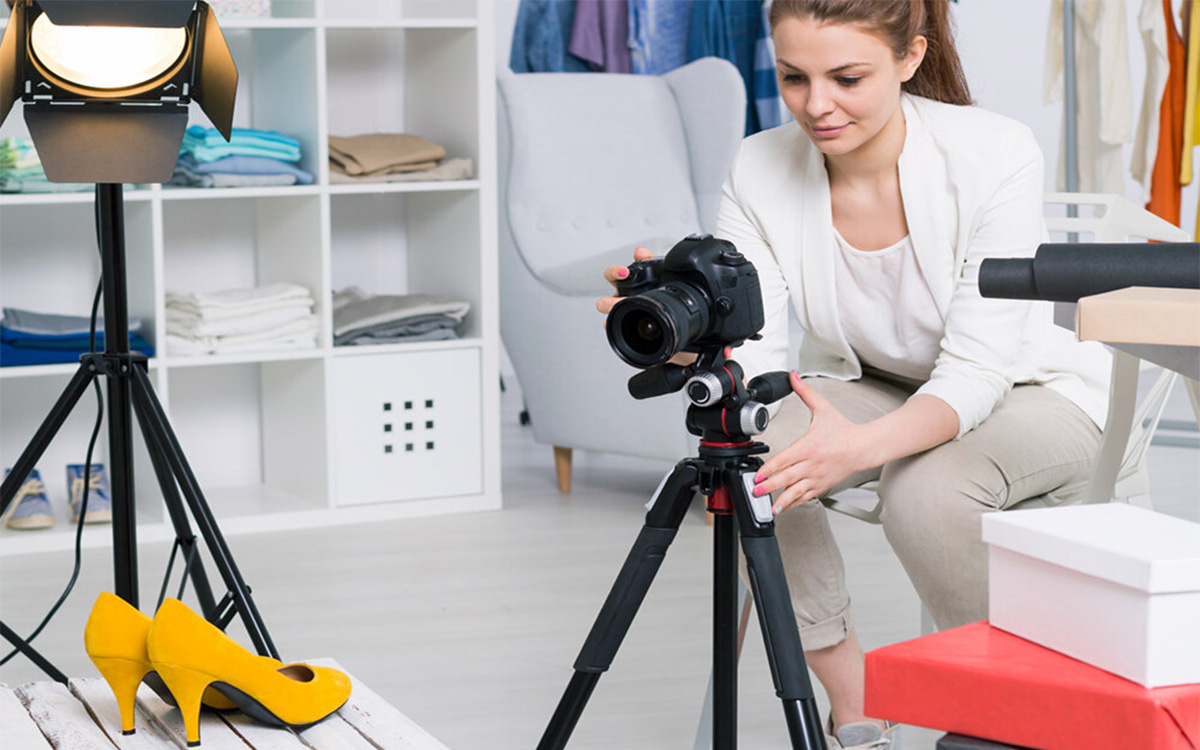
- 1.5 5. Use a Proper Tripod Stand
- 1.6 6. Ideal Lighting for Shoe Photography
- 1.7 7. Aim for Shooting Effective Angles
- 1.8 8. Get Perfect Focus and Reflection on Your Camera
- 1.9 9. Table Top Shoe Photography
- 1.10 10. Shoot Floating Products in Photography
- 1.11 11. Include Shoes With other Complementary Goods
- 1.12 12. Utilize Shoe Model Poses
- 1.13 13. Explore with 360 Degree Shoe Images
- 1.14 14. Do More Research and Keep Patience
- 2 4 Common Mistakes in Shoes Photoshoot and How to Avoid them
- 3 What Should I Charge For Shoe Product Photography?
- 4 FAQs on Shoe Photography Tips and ideas
- 5 Conclusion – Shoe Product Photography that Makes your Shoes Shine
How Do I Take Pictures of Shoes That Sell – Shoe Photography Tips and ideas
The main target of all eCommerce businesses is to impress the customer with eye-catchy and detailed product photos that can convert them to buy.
And for this, you need to know how to photoshoot a picture that is worth selling and increase more visibility.
Without further ado, let’s get started to know how you can win over the customer’s heart and mind with the perfect shot of shoes!
1. Prepare Your Shoes Before Shooting
Before capturing your shoe photos, make sure your subject is ready to give a pose. Yes, the first step is to decide on how to take pictures of shoes that fulfill online marketplace requirements and compete with any unexpected challenges.
And for this, you must prepare your shoes in pristine condition because none will beat a detailed photo. Also, good preparation can save your valuable time in post-production and help you to produce stunning pictures faster. So,
A). Make sure your selective shoe pairs are flickering and spotless so that you can capture their best photos in the appropriate lighting.
B). Keep all essential equipment for presenting their best shape and features while shooting like,
- Brushes
- Cloths for polishing
- Scissors (to remove loose fibers or other purposes)
- Tissue or paper for stuffing shoes
- Canned air (to remove dust particles and other impurities on the leather surface)
C). Capture some close-ups of your shoes to make a stronger impression on the buyer (if needed).
D). Never touch the shoes with bare hands because it may leave a fingerprint.
Like every genre of photography, shoe photography will require a keen eye to showcase its best shape and detail.
Pro Tip: You can use chopsticks to straighten the shoes like flats or boots.
2. Choose the Right Backgrounds for Footwear
Imagine a shoe photo with busy backgrounds or unwanted objects. Are these photos can entice targeted audiences? No, because without a clear focus, your audiences can distract from your shoe’s actual purpose.
For this reason, eCommerce platforms like Amazon, Etsy, and eBay prefer clean, matched, and white backgrounds that offer a better view and resulting high sales. So, to put your finest shoes forward, you need to –
- Select a background that is not too distracting and full of unwanted objects to enhance the photo quality.
- Use white background if they complement the shoe.
- Or, choose a neutral background that will allow your shoe products to come into the limelight.
- Pick a solid background with no patterns or a solid color background like the backdrop for shoe photography to give a stunning view.
- Avoid the harsh shadows; place your shoes in the right place.
- Avoid color background because it will seize the color of the shoes.
However, the well-matched background selection depends on the design, feature, or other styles to represent an eye-catching view to your consumers.
Want to know why you use a white background?
- Your shoes will look stylish and sleek.
- For cool shoe pictures, it will provide a natural and realistic shadow.
- Don’t need bright light while shooting.
- In post-processing, you don’t need to add or replace the background.
Pro Tip: White background is ideal for providing a nice contrast between the color of the shoes and the background.
3. Choose The Right Cameras and Settings
For creative shoe photography, the ideal camera settings impact your shoot’s outcome. If you want your commercial shoe photograph will reach thousands of people, you can pick a professional full-frame DSLR camera or other.
Want to shoot breathtaking pictures of shoes? Then your camera settings should be like this.
- ISO: Set ISO 100 to reduce noise and ensure a sharp image,
- Exposure: Adjust the exposure settings like 1/50 or 1/30s,
- Aperture: Use a higher aperture (like f/11) to highlight every detail of your shoes.
- Shutter Speed: Set shutter speed as per settings (if you use a tripod, then don’t get bothered on these settings),
- Flash: Keep the flash OFF or turn the high-quality image on,
- Focus: Avoid blurry and delicate focus.
If you want to test your luck, you can also try it on default mode. Remember, the more you practice, the more you learn.
Also, you can discover your photography style and the best camera settings for your shoe photography.
Pro Tip: You can get suggestions from experts or follow the camera reviews to pick the right one.
4. Best Lenses Shoes Photoshoot
Your shooting conditions determine which lens is the best pick for you. But in shoe photography, a shallow depth of field won’t play a vital role. For this reason, you can use any lens other than a prime one.
So, choose a lens about 15mm or above to highlight every detail. On the other hand, the wide-angle lenses can distort the product.
And you don’t want to showcase a distorted product by the lens you use. So, to avoid this make sure you have high enough f stop to get everything in focus. Also, pay attention to how this affects your depth of field (DOF).
Let’s look at widely used product photography lenses that experts prefer most –
- Prime Lens – ensure sharp & quality images.
- Wide-angle lens – suitable for outdoor shooting because it offers the highest aperture range.
- Macro Lens – excellent output and best for close shots.
Note: If you plan to shoot your sneakers or shoes outdoors, wide-angle lenses will give you a great view by blurring the background.
5. Use a Proper Tripod Stand
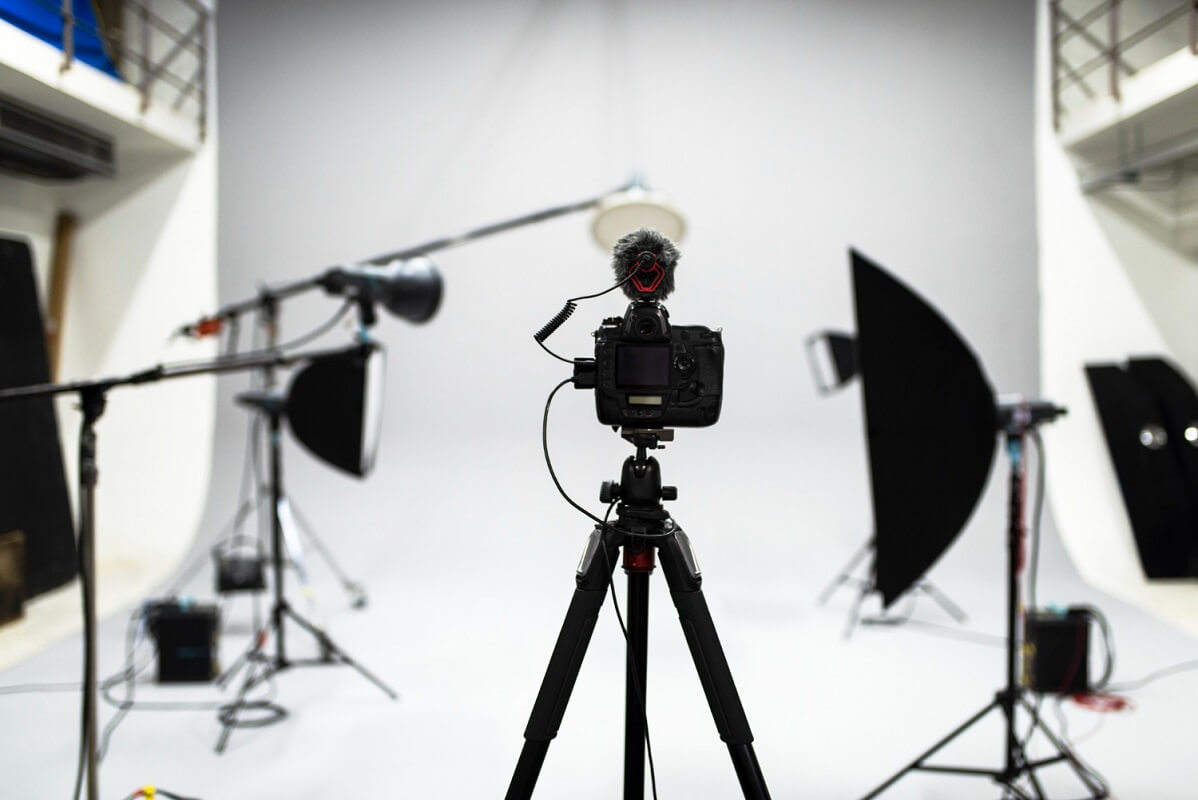
Tripod is the most popular and important factor for commercial photography. Also, it will help you to get the same images from similar distances.
Want to know more about its specialty?
Let’s look at some reasons below why you use a tripod?
- Avoid hand shakiness – multi-angle or multiple shoots require enough time where a tripod or c-stand helps you from hand-shaking & minor tremors.
- Give flexibility – using a tripod; you can choose any shutter speed that suits your product’s photography (after selecting a good f-stop, it won’t matter).
- Ensure sharp images – it will help reduce the ISO, so you don’t get a noisy picture.
- Different angles – allows you to move freely and adjust it from any angle of view.
You may set up the light sources with maximum strength to eliminate the dark areas from shoes.
But can’t achieve your goal!
Then you can use a tripod to decrease the shutter speed because it is worth trying to lower the power of the lights.
6. Ideal Lighting for Shoe Photography
Perfect lighting is a vital factor for shoe photoshoots because too bright or dull light creates bad snaps. For this reason, creating appealing imagery of footwear need a proper lighting setup.
So, you can utilize natural light (choose the golden hour) when the sunlight is soft, or you can take photos inside next to a large window. Otherwise, find a thickly shaded area to get even light in outdoor shooting.
Otherwise, you can use artificial light, a light-box, or a light tent along with a flash, an umbrella, or a reflector for even lighting. But pay attention to creating harsh lighting.
Take a look at some creative shoes photography ideas with lighting effects below:
- Place shoe pairs and set the light that generates light from all sides and shines on the shoe.
- Make sure to keep the contact shadow just at the bottom of your shoe.
- Design the lighting setup that won’t provide too harsh or too soft light (eliminate overexposed and underexposed effects from images).
- Also, you may use a white cart or reflector to focus the metal work of your shoes (if you have any).
- You can use lower exposure to eliminate brightness when you want to add the front fill and look for a wide reflector.
- To light the front part of your shoes without over-lighting, you can add a bit of light to the background. After that, focus and take the shot.
Pro Tip: For handling shiny shoes, observe the angle from which you can take the best shot and how the reflections work.
7. Aim for Shooting Effective Angles
Will you ever like to buy shoes that offer a monotonous view? No, because it lacks proper details like color, height, leather, sole, etc.
To avoid this situation, Repeatability is key! Why? In the online marketplace, customers buy those shoes that give them a perfect visual representation just like they wear and feel them.
And Instagram is the best example to observe different shoe angles with innovative image ideas. So, it is crucial to aim for shooting effective angles. But the angle selection depends on your requirements.
Now let’s discover a few key angles that can give your customers a good idea of what they’re purchasing.
- Single angle shot – you can take it from the side (photograph only one shoe) to end up with a profile shot.
- 3/4 shot – you need to add the second shoe for a diagonal angle and turn the pair of shoes slightly to the side. For taking this shot, you need to focus on the first shoe.
- Back 3/4 shot – this shot is known as the detailed shot that focuses on the front view of the shoe. So, make sure all shoe elements should be looking clean and nice.
- Front angle shot – You need to put the pair of shoes in one place and shoot them from the front by focusing on the first shoe.
Also, you can try the most demanding 360-degree shot that gives the customer an incredible view. Want to know more?
Scroll down and check out the brief about these techniques!
Pro Tip: Search for reference shoe pictures on the internet to know how photographers capture shoes to show them in the best light.
8. Get Perfect Focus and Reflection on Your Camera
Every product image can highlight its own uniqueness and features through quality photos. That means, as a product photographer, you need to think outside the box and find a creative way.
Buyers always prefer sharp product images rather than artistic ones, so you prohibit using soft focus or shallow depth of field.
Do you want to shoot an outstanding and sale-oriented shoe photograph? Follow the steps below:
- If you want to make a mirror image, place the shoe on the upper side of the product and pour some water down the product.
- You can place the shoes on top of a box or a solid color floor for interior photographs.
- Try to show off and focus on some features and potential uses to tempt the consumers.
- Include every color, feature, and style.
However, to make a reflection, you can make the shoe model stand in front of the water. Remember to concentrate on your shoe.
Also, you can activate autofocus mode and utilize a focal length lens to assist you.
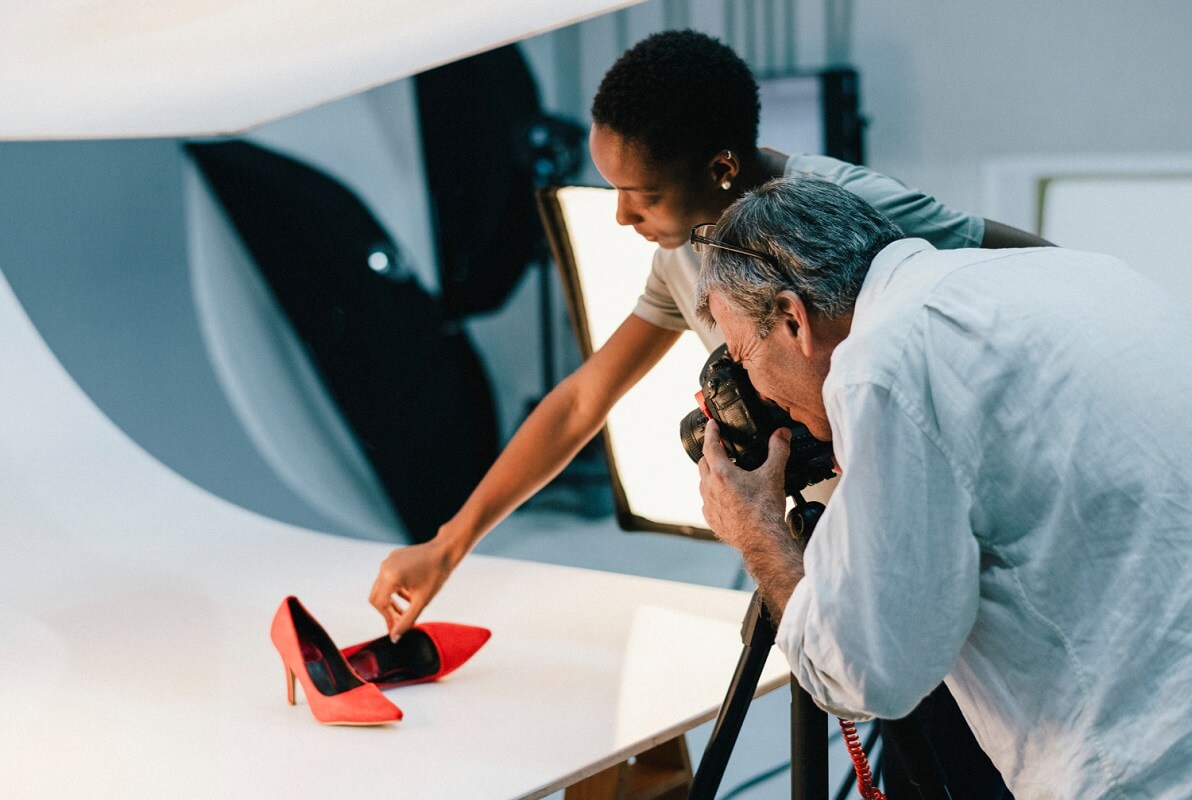
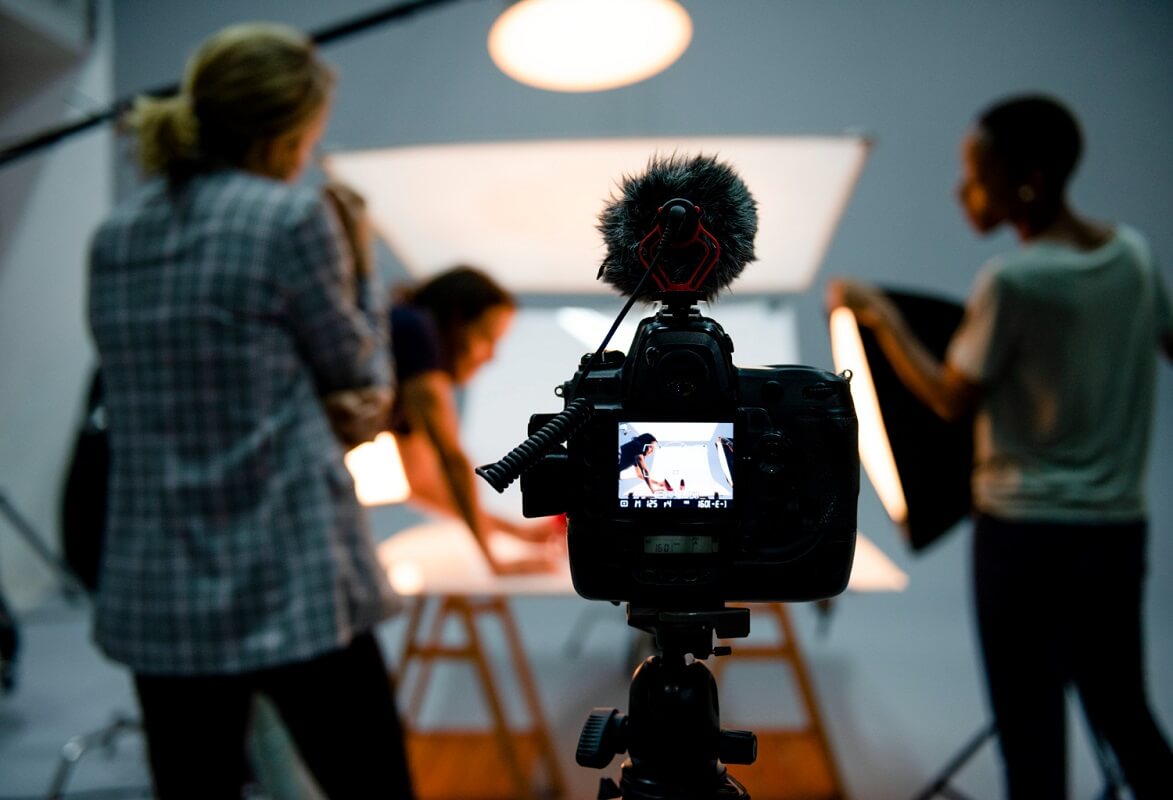
9. Table Top Shoe Photography
This photography is like a still life photography method that is the forefather of the art of taking product images, just like flat-lay manner or standing.
Every product photographer has unique styles and methods of doing this tabletop shoe photography like onset, pros settings, or routine.
However, to know more about how to shoot tabletop images, check out below:
- First, set up the table as per your themes, like a commercial styled or only a white background.
- Set up your camera using a tripod or c-stand and the cords for tethering.
- Before placing the shoe on the table, set up the lighting kit.
- Ensure which angle you need to shoot, then position the object and props.
- You can adjust the lights and effects using diffusers and reflectors (if required).
- To take different angles shots, you can adjust the composition.
Well, the overall scenario or process may differ from one photographer to another. But this is the standard process, to begin with, tabletop photography.
10. Shoot Floating Products in Photography
Want to do some fun with footwear? With the floating illusion, you can give any effect without any foot on it.
The floating shoe photography resembles something more creative and magical! And that is the main secret that unusual creative ads use to draw attention and make people wonder.
Let’s look at some attractive floating presentation tricks for your e-commerce!
- You can hang them on a transparent line (a fishing line will be perfect).
- To attach the lines build a simple rack just above the shoe.
- Try to photograph it from above.
- Or, you can use a mannequin to a flat plexiglass plate/backdrop and use it for upside-down shoe photography.
11. Include Shoes With other Complementary Goods
These types of shoe images are famous among Instagram sellers. Their creative shoe photography ideas are responsible for demonstrating an eye-catchy story that evokes consumers most.
So, don’t be afraid to mix up complementary goods with your shoe products. And for this, you can
- Use a variety of props and backgrounds that match your shoes, or
- Maintain the consistency between shoe styles or colors with other items.
However, these types of photos offer something new, different, and exciting purpose to the viewers. And when you aim to sell shoes via Instagram and social media channels, you won’t prefer a gallery full of stylish shoes on white background.
If the presentation is attractive and vibrant, the customers will be more inclined to buy.
12. Utilize Shoe Model Poses
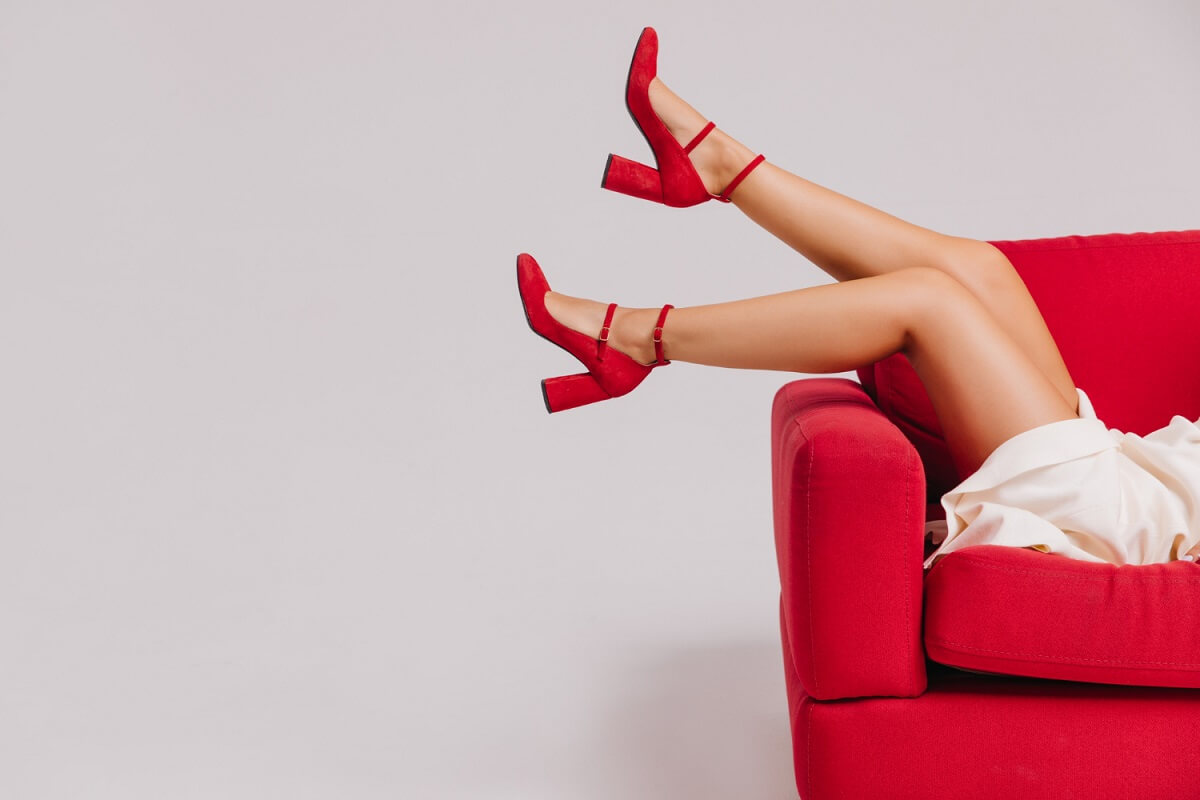
You can engage a model for shoe photography if you have the budget to hire one. Shooting shoes on someone’s foot will help increase customers’ interest because it gives them a real-life experience about their size and style of shoes.
So, with the various shoe model poses, you can add more appeal to your product. And when you hire a renowned figure, it will be like icing sugar on the cake.
Their fans or followers will feel more interested and encouraged to buy it. However, when shooting shoes with models, remember the below things –
- Select a middle-size foot or a model whose feet size match your shoes.
- Remember to focus only on shoes, not models. So, avoid shooting the whole body.
- Consider thin legs though it depends on your clients’ preferences.
- Try to capture action photos like walking, jumping, or other different movements.
- Keep harmony between shoes and attire.
13. Explore with 360 Degree Shoe Images
As per statistics, these techniques increase the conversion rates to 50% and online visitor duration to 25%. What do you think, then, are 360-degree product photography spins the end goal?
The answer is Yes. Why? Consumers love to experiment with different angles of shoes before buying. From the inside sole to the bottom layer, a shoe has many things to show to its consumer.
So, as a retailer, you must give them every possible detail with three-dimensional virtual spaces.
Let’s look at some tips about shooting 360-degree shoe pictures below:
- Before shooting, first place your product in the center of the turntable.
- Shoot appx. 25 frames for better-quality pictures.
- Avoid shooting the starting frame twice.
- Make sure that every angle is spaced equally.
- The first shot should always be the front side of your shoe product.
14. Do More Research and Keep Patience
Being experimental can guarantee you eye-catchy and quality images. That’s why you must plan before shooting and understand what you or your clients need to demonstrate.
And for this, you don’t need to sit for hours or experiment with camera settings. Only you need to answer the important phases like:
- How many pairs of shoes are they going to shoot for?
- What styles or angles do they prefer most?
- How many images do they demand per product?
- Which setups do you maintain per model/product?
- What sorts of photos do they look for? And many more.
If you point out these standard questions, you can get structure to your shoe photography. Also, you will have enough time to research and determine your expert level.
4 Common Mistakes in Shoes Photoshoot and How to Avoid them
We know every product photography niche has its own rules for streamlining your online store.
Here are some Do and Don’ts of Footwear Product Photography.
1. Don’t Lay Footwear Flat
The pictures of shoes can evoke your consumers to buy and make more effective visibility. But all these factors depend on your representation.
Do you ever purchase a shoe that won’t give you a real-life experience? Or, ever like limp, lifeless footwear photos? No, because they look boring and miss the core details and features of shoes.
If you want to highlight the excellent features and colors of your shoes,
- Try to create some illusion showing different angles that gives consumers a great visual experience.
- Show the shape and help the shoe stand alone,
- You can stuff the shoe with tissue or folded paper or tie dental floss to the shoe’s straps to hold them up in the frame.
Do you want to represent pictures in a way that someone has their foot in the shoe? Make sure each apparel looks excellent, like in brick-and-mortar stores.
2. Capturing Very Few Angles of The Product
Product photography’s most common and biggest mistake is displaying very few angles on the listing. To enhance more consumers, you want to show off all possible angles.
It’s a win-win situation that increases the purchase rate. Let’s look at some common angles that are essential for footwear photography:
- A full picture of footwear
- Left angle
- Right angle
- Top view of the shoe
- Close view to depict texture, material, color, etc.
- The product turned slightly left view.
Also, you can use a flattering angle at the same time.
3. Inconsistent Cropping Mistakes
Cropping is one of the most popular mistakes in digital photo editing. And customers will notice if some of your footwear images are more zoomed than others.
Also, it expresses the error of the distance between products from the camera is higher or lower than each other. It also reduces the quality and may change the lighting, focus, and other aspects of the image.
Want to avoid these mistakes? Then you should,
- Keep your shoe images consistent from frame to frame,
- Follow a cropping template (this will speed up your shooting and later in post-production work),
- Use consistent shooting.
After that, your portfolio or website looks organized like a professional photographer who always wants to evoke customers with their creative workflow.
4. Don’t Get Blurry and Soft Focus Right
The blurry and soft focus might offer an artistic view. But in footwear photography customers demand detail-oriented and sharp images.
Also, soft-focus will create only a blurry effect on footwear photos that distract your consumers from your actual purpose.
So, avoid using too redundant details and pay attention to the image focus. To achieve the goal, you can follow the camera settings mentioned earlier.
What Should I Charge For Shoe Product Photography?
The price of an eCommerce footwear product photo should be between $20-$90 per image, depending on the complexity and style.
But as a professional or custom freelance photographer, you may charge between $500 or above with other expenses depending on your skills.
However, as a beginner, you need to understand the product photography pricing plan first because the pricing models depend on two factors:
- Project size
- The market rate to cover overhead and expenses.
Also, clients may demand 360-degree or still image to showcase their products on several online marketplaces. Here, you need to consider:
- Multiple angles shoot pricing
- Per shoot according to per day or hour
- Motion videos (if demanded by clients)
- Or, you need to shoot in the studio with professionals (depends on clients requirements)
For this reason, you need to consider some essential factors before charging like,
- Professionalism
- Experience
- Creativity level &
- Additional Charges (styling, preparation, layout, and others).
FAQs on Shoe Photography Tips and ideas
Where will I go for the shoot?
No matter where you’re planning to shoot your product, choosing an equipment-rich and quality product photography studio is wise for better results.
Let’s look at the best & professional Shoe Product Photography studio in the USA below:
- Quixote Studios – the best photo studio in Los Angles with all types of image production: equipment, supplies, and even photo studios.
- DIAMOND SHOT STUDIO – the studio is rich in updated photography instruments, and the studio space is quite satisfactory.
- The Line Studios – are famous for their eCommerce imagery that drives sales.
- Squareshot – serves professional product photography with detailed services.
- SquareUp – you will get all types of product photography services at reasonable prices.
Which photographers can be the best?
To hire the best product photographers in the USA, always follow their portfolio to know their photography style and skill level.
Let’s look at top product photographers in the USA below:
- Yechiel Orgel – Professional & New York-based commercial photographer specializing in different fields.
- Wini Lao – Expert in motion, still life, fashion, and other product photography that brings life.
- David Newton – Has fame in beauty and luxury product photographer who expert in artistic and refined concepts.
- Jonathon Kambouris – Award-winning product photographer with expertise in motion videos, conceptual shoots, etc.
- Helen Koker – Expert in minimalist content for brands and loves to combine geometric and organic shapes to hero the products.
Why is a License and Usage Agreement Important for Photographer?
The photo license and usage agreement grant protection for both photographer and client, including
- Set specific terms on how to use the image.
- Help to avoid misunderstanding on using the photographers’ work.
- Offer the ability to control how, where, and when your work appears in SERP or any platform and format.
- Offer copyright protection on your every photographic work.
- Ensure a good source of revenue.
What if the Client Wants Copyrights?
Sometimes, clients may request thinking that they must have copyright ownership (image use license, etc.) to print. So, you need to examine their actual objective like:
- Inquire why they request copyright ownership.
- What is their purpose for owing it?
- Research correctly to confirm whether you’re “ok” with this or not.
- Formulate your response
- And after that, stand by it.
360 or Still Image, What Will Be The Best?
A still image will be the best option if you want to display specific views (one side or particular angle views) of shoe products.
But to give a mix or numerous image views (i.e. close-up, multi-angle), the most demanding technique is 360-degree. Also, these types of pictures increase visibility and consumer engagement.
Conclusion – Shoe Product Photography that Makes your Shoes Shine
What do you think after going through this article: shoe product photography?
Did you get a perfect solution to provide your consumers with an optimal shopping experience?
Well, we have mentioned some product photography guides & tips. We believe you can make your future shoe photography effective and more compelling if you go through the article perfectly.
But remember, perfection lies in proper practice. So, always represent an image that relates your consumers with reality.
Good luck!