Packshot retouching refers to the post-processing techniques performed on product images with packaging, labels, or branding. Packshot retouching is necessary for delivering accurate product information, increasing brand visibility, and credibility. Professional photo retouching includes background removal, masking, color correction, manipulation, and shadow creation, among others. To retouch packshot images, expert photo retouchers use Adobe Photoshop, Adobe Lightroom, Capture One, Affinity Photo, among others.
What you’ll learn in this article
What is Packshot Retouching?
Packshot retouching is the photo editing process where raw images with packaging, labels, and branding are enhanced and improved to appear as visually accurate and flawless. Packshot retouchers use targeted edits like color correction, shadow creation, logo and brand mark cleanup, surface polishing, and background editing to create a conversion-ready appearance.
Packshot retouching is used by different industries, including the following ones.
- E-commerce businesses to maintain consistent, high-end images
- Apparel businesses and fashion houses to showcase their branded offerings
- Product photographers to add value to their portfolios
- Online marketers to promote products professionally
What is the Difference Between Basic and Advanced Packshot Retouching?
The difference between basic and advanced packshot retouching is their execution depth; while basic retouching fixes simple and noticeable flaws in a less detailed way, advanced retouching transforms an image using complex techniques.
Other differences between basic and advanced packshot retouching are as follows.
| Topic | Basic Packshot Retouching | Advanced Packshot Retouching |
|---|---|---|
| Editing level | Minor fixes, such as dust removal, basic color correction, and background cleanup | Deep manipulation, such as frequency separation, shadow recreation, and compositing |
| Tools used | Spot healing brush, patch tool, basic clone stamp | Dodge and burn, color grading, content-aware fill, and liquify |
| Clarity | Basic sharpening of label text | Pixel-level enhancement |
| Editing Time | 3–4 minutes per image | 15–30 minutes per image, depending on complexity |
| Cost | $1–$2 per image | $2–$6+ per image |
| Best for | High-volume e-commerce catalogs need speed and consistency | Luxury brands, commercial campaigns, and advertising where every detail matters |
What is the Difference Between Packshot Retouching and Photo Editing?
The difference between packshot retouching and photo editing is their focus and scope. Packshot retouching involves precise enhancements to product images, especially packaging and labeling, whereas image editing covers all types of changes, including retouching, color correction, shadow creation, resizing, and more.
Other differences between packshot retouching and photo editing are as follows.
| Topic | Packshot Retouching | Photo Editing |
|---|---|---|
| Subject Matter | Exclusively product images with labels, branding, and packaging | All image types, personal, commercial, lifestyle, editorial |
| Focus | Packaging and labeling accuracy, product consistency, and brand alignment | Diverse aspects of the subject, including group shots, lifestyle shots, and scale shots |
| Applied Techniques | Surface cleaning, scratch removal, text enhancement, label clarity, distraction removal | Cropping, resizing, sky replacement, compositing, portrait work |
| Output | E-commerce product listings, online stores, and commercial advertisements | All images, from social media to editorial, architecture to events |
Why is Packshot Retouching Important?
Packshot retouching is important because it delivers accurate product information, increases brand visibility, builds buyers’ trust, and enhances credibility that directly impacts conversion. Consumers’ purchasing decisions are influenced by how appealing a product appears in images that’s why every small and large brand heavily relies on it.
Other importances of packshot retouching are as follows.
- Enhance Brand Credibility and Reputation: Packshot retouching accurately represents your product, building customer trust and strengthening brand reputation.
- Focus on Core Expertise and High Consistency: Retouched packshots signal business consistency and reinforce expertise, holding first-time visitor attention effectively.
- Increase Your Online Sales: Highlighting packaging and labeling details works as a trust signal that motivates buyers to make informed decisions and grow online sales.
- Improve Efficiency and Cut Advertising Costs: One polished image fulfills multiple marketing goals, making retouching a required, cost-saving investment for every brand.
- Get a High Return on Investment (ROI): The advantage of retouched packshots directly impacts sell-through rates, making this service necessary for measurable e-commerce ROI.
- Convert Leads Into Sales on Social Media: Accurate, attention-grabbing packshots are required to convert passive social media scrollers into active buyers across platforms.
- Enables Reuse of Images for Different Sales Channels: Professionally retouched packshot image becomes reusable across multiple platforms, campaigns, and e-commerce channels.
- Grow Your E-Commerce Businesses: Consistent, accurate packshot imagery is important for long-term brand growth, credibility, and expanding your customer base.
When to Apply Packshot Retouching on a Product?
Apply packshot retouching on a product when raw photos need color correction, light problems fixed, backgrounds fixed, and other issues resolved to make them customer-alluring. It is also required when marks or dust particles are visible, or when clipping and clean edges are needed for e-commerce platforms. Additionally, apply it before any catalog launch, Amazon listing, advertising campaign, or whenever the product needs to meet sharpness, contrast, and composition standards for print, banners, or infographics.
What is Included in a Packshot Retouching Service?
Professional packshot retouching service includes background removal, masking, color correction, shadow work, photo manipulation, e-commerce optimization, and 3D/360° editing, etc., to transform a raw product image into a commercial asset, eliminating specific visual problems and creating conversion-worthy images.
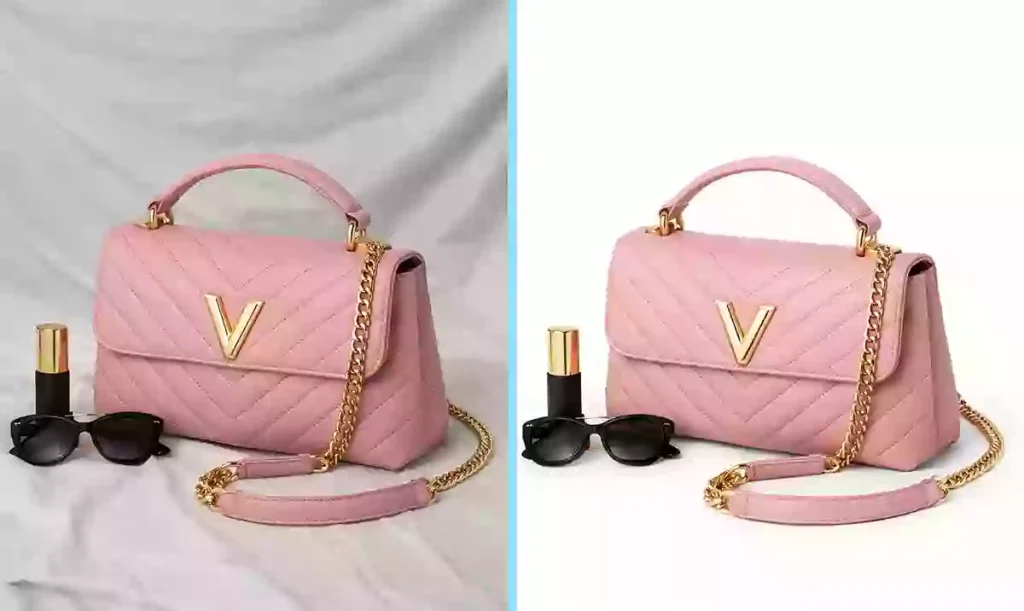
- Background Removal Service
Background removal is the process of isolating a product from its original shooting environment. It eliminates visual noise so the product stands alone, placeable on white, branded, or contextual backgrounds across any platform. Retouchers execute this using the Pen Tool for hard-edged products and channel-based selection for semi-transparent ones.

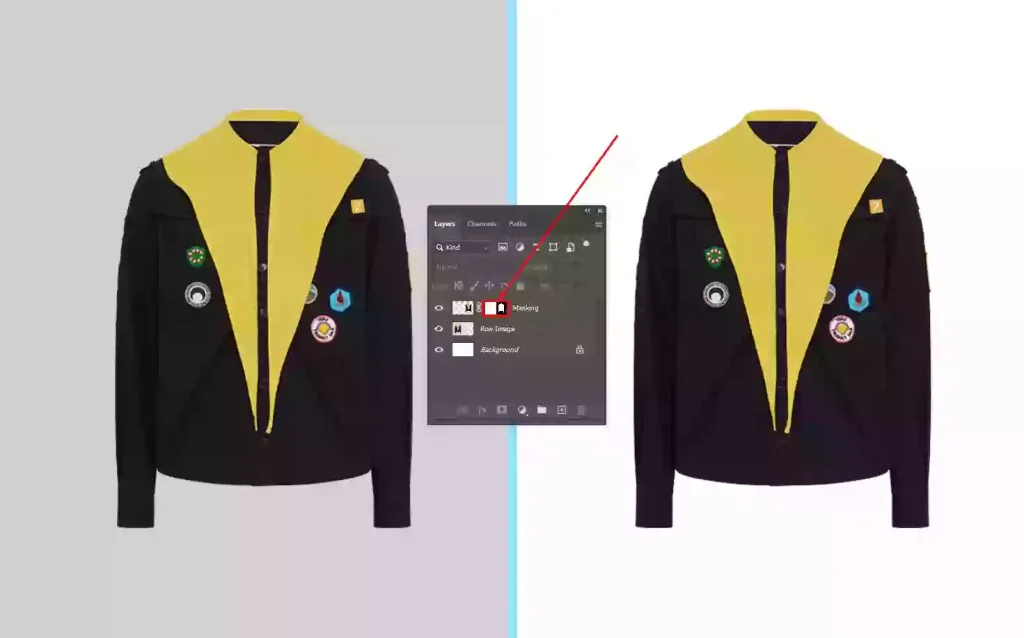
- Image Masking
Image masking is an edge-preservation technique applied when a product’s boundary is too complex for a clipping path. It retains soft, semi-transparent, or layered edges, fabric fraying, glass gradients, and cosmetic brush bristles that a hard path would destroy. Techniques include layer masking, alpha channel masking, and luminosity masking, depending on edge complexity.
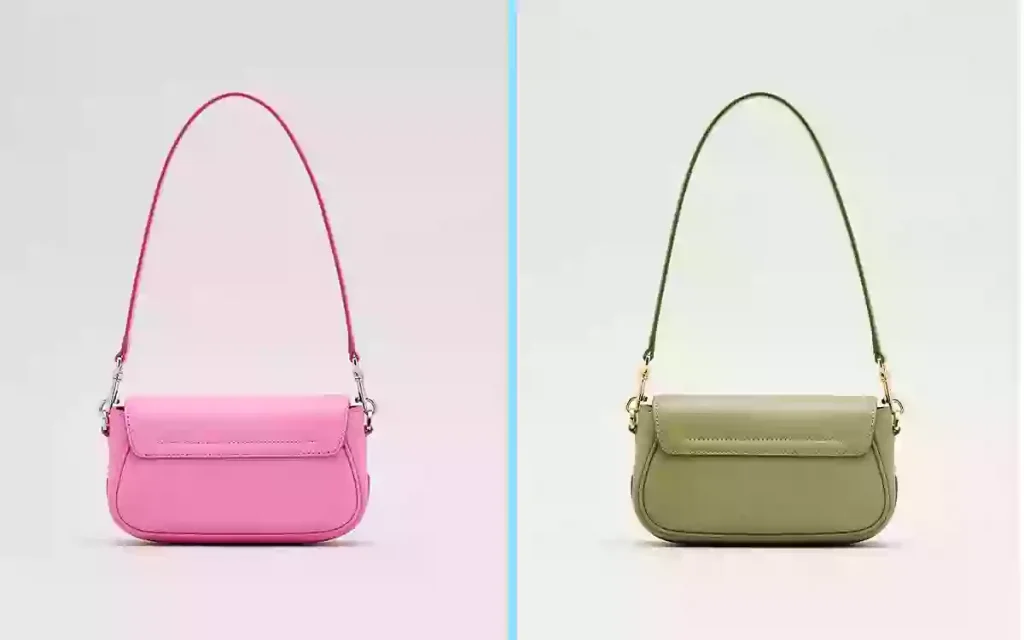
- Color Correction
Color correction is the process of realigning a product’s captured colors with its real-world appearance. It resolves the gap between what the camera recorded and what the product actually looks like. Retouchers use Curves, Levels, and targeted Hue/Saturation adjustments to neutralize casts, restore accurate hues, and balance exposure channel by channel.
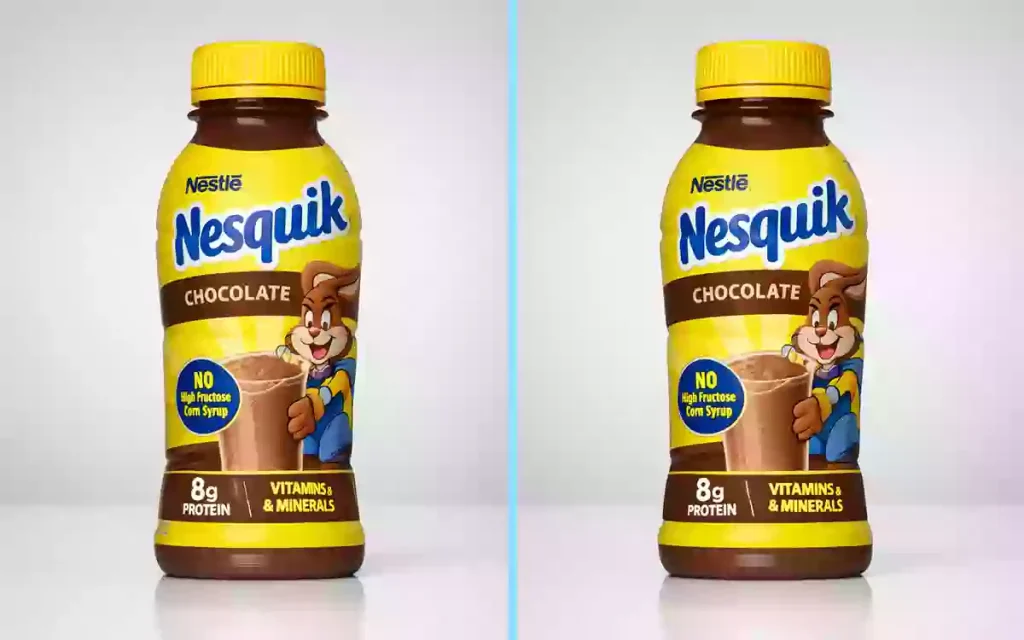
- E-commerce Image Editing
E-commerce image editing is platform-specific optimization applied to every packshot before it goes live. It ensures images meet the rigid technical requirements of Amazon, Shopify, and similar marketplaces — correct pixel dimensions, pure white backgrounds, and no distracting props. Techniques include background cleanup, cropping to spec, file compression, and metadata tagging.
- Photo Manipulation
Photo manipulation in packshot retouching involves correcting and reinforcing brand elements in the product image. It addresses label misalignment, logo distortion, and color drift that occur naturally under studio lighting. Retouchers use compositing, perspective correction, and color-matching techniques to ensure every brand element reads with commercial intentionality.
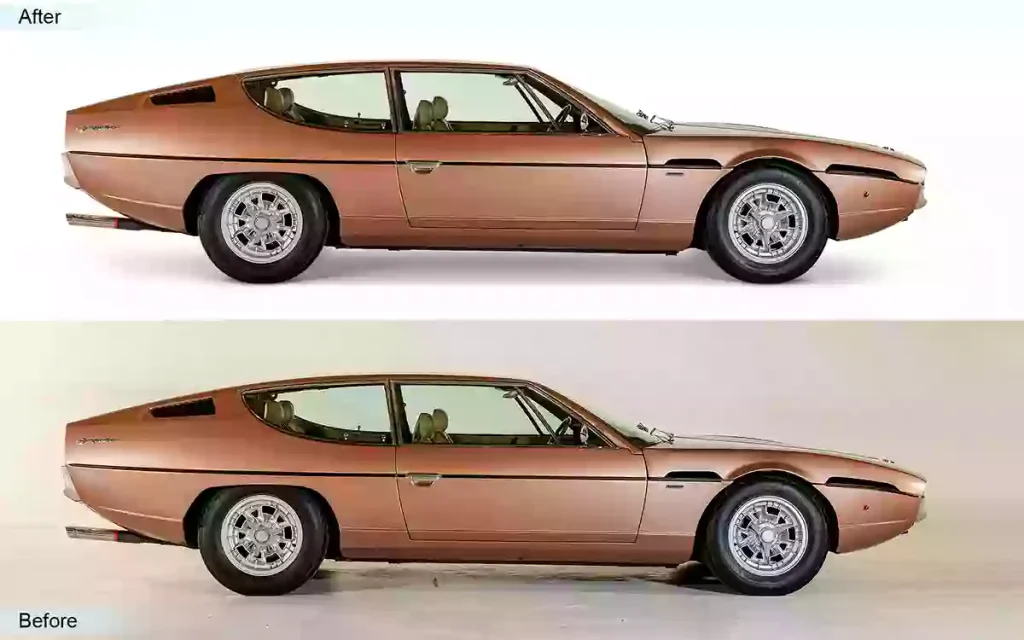
- Shadow Creation Service
Shadow creation is the process of building a product’s shadow entirely in post-production to replace or supplement what was lost during shooting. It gives the product visual weight, depth, and a sense of physical grounding within its environment. Retouchers construct drop shadows, natural shadows, and reflection shadows using layer styles, gradient mapping, and manual brush work calibrated to the product’s geometry.
- 3D/360° Packshot Editing & Retouching
3D/360° packshot editing is the frame-by-frame retouching of every angle captured in a multi-shot product sequence. Each frame must match its neighbors in color, exposure, and edge consistency to produce a seamless rotation. Retouchers apply batch color grading, per-frame dust removal, and edge alignment across the full sequence, a workflow that directly lifts add-to-cart rates and cuts return rates by eliminating the gap between expectation and reality.
What Tools are Used for Professional Packshot Retouching?
Professionals commonly use Adobe Photoshop, which has become the industry standard for precise, controlled post-production and packshot image editing. Beyond Photoshop, a combination of industry-standard software and cutting-edge AI tools makes up the complete professional retouching setup. Each tool serves a distinct function — from RAW processing and batch color management to frequency separation and surface-level detail work.
Here is a list of 8 tools that professionals use for packshot retouching.
1. Adobe Photoshop
Adobe Photoshop is the industry-standard tool used for pixel-level retouching. Its strengths lie in layer-based editing, allowing retouchers to work non-destructively. Best for surface cleaning, compositing, clipping paths, and advanced shadow creation.
2. Adobe Lightroom
Lightroom, another Adobe product, is also a powerful tool; its develop module is a powerful RAW processor, perfect for making initial global adjustments, and its batch editing capability applies the same edits across multiple product images.
3. Capture One Pro
Capture One Pro is famous for its excellent color profiles and image clarity. It supports a wide range of camera models and offers custom color calibration, making it the preferred choice for commercial studio photographers shooting tethered.
4. Affinity Photo
Affinity Photo offers frequency separation for precise surface work, along with Dodge & Burn, Clone, Patch, and Blemish removal tools. It also allows non-destructive export in AFPHOTO or PSD formats. A cost-effective Photoshop alternative for packshot retouchers.
5. ON1 Photo RAW
One1 Photo Raw gives retouchers healing brushes, content-aware fill, and AI tools to clean up skin, backgrounds, and objects. It is fast and intuitive, perfect for photographers who want good results without too much manual work.
6. DxO PhotoLab
DxO PhotoLab is recognized among professionals for its superior RAW conversion engine and best-in-class lens correction library. Its Prime noise reduction preserves fine product surface detail—critical for textured packshots such as leather, fabric, or metallic finishes.
7. GNU Image Manipulation Program (GIMP)
GIMP is an open source retouching software that carries core retouching capabilities, including clone stamp, healing tools, and layer-based editing. Used widely by independent photographers and small e-commerce operators managing packshot workflows without software subscription budgets.
How Do You Retouch Packshot Photos in Photoshop?
To retouch packshot Photos in Photoshop, duplicate the layer of the image, remove flaws and visible flaws with the Healing Brush, adjust the brightness and contrast, color correct the photos, and clean and extend the background. After that, apply sharpening and surface detail. When done, resize and export your images to JPEG or PNG. Keep the master PSD saved before closing.
Here are the detailed steps to retouch packshot photos in Photoshop.
Step 1: Open and Duplicate the Layer
Open your packshot image in Photoshop. Then, go to the Layers panel.
- Right-click the background layer.
- Select Duplicate Layer.
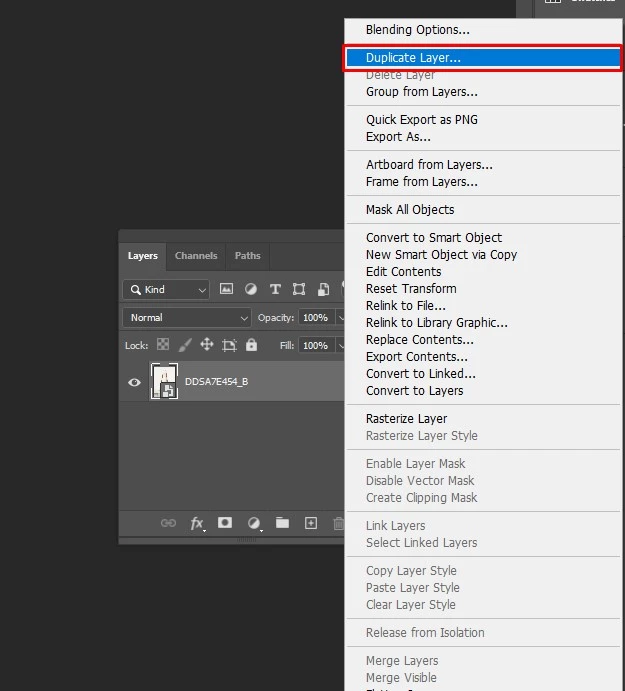
This locks your original. Now work exclusively on the duplicate to keep every edit fully reversible.
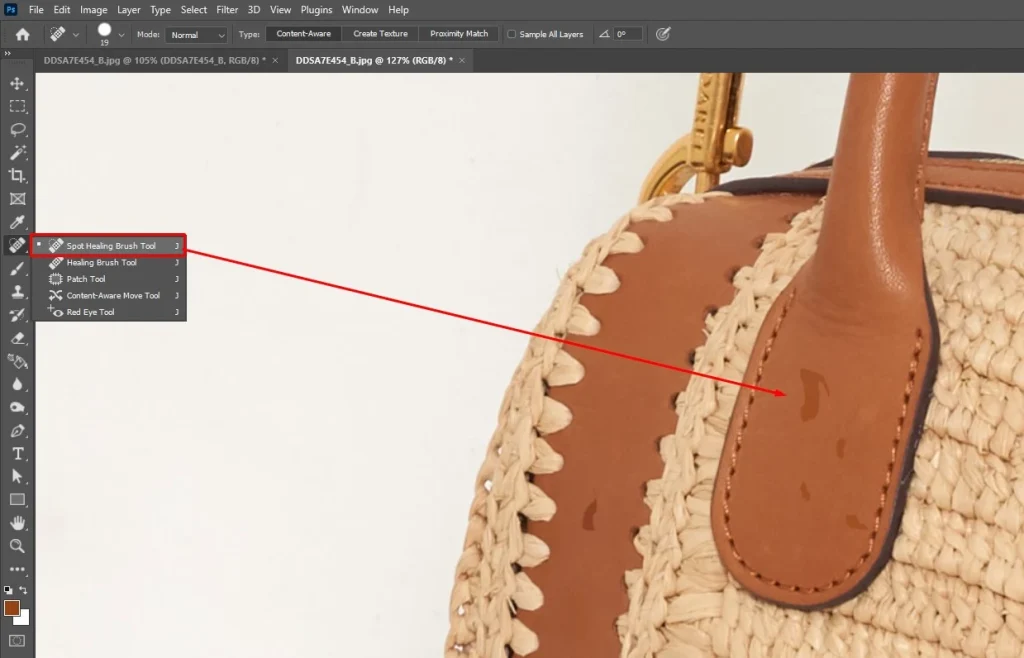
Step 2: Remove Flaws and Surface Imperfections
Go to the toolbar and select the Spot Healing Brush. Then, from the top options bar, click Content-Aware tool, which will instruct Photoshop to sample surrounding pixels automatically for seamless corrections. Zoom into 100–200% and brush directly over each dust particle, scratch, or surface blemish.
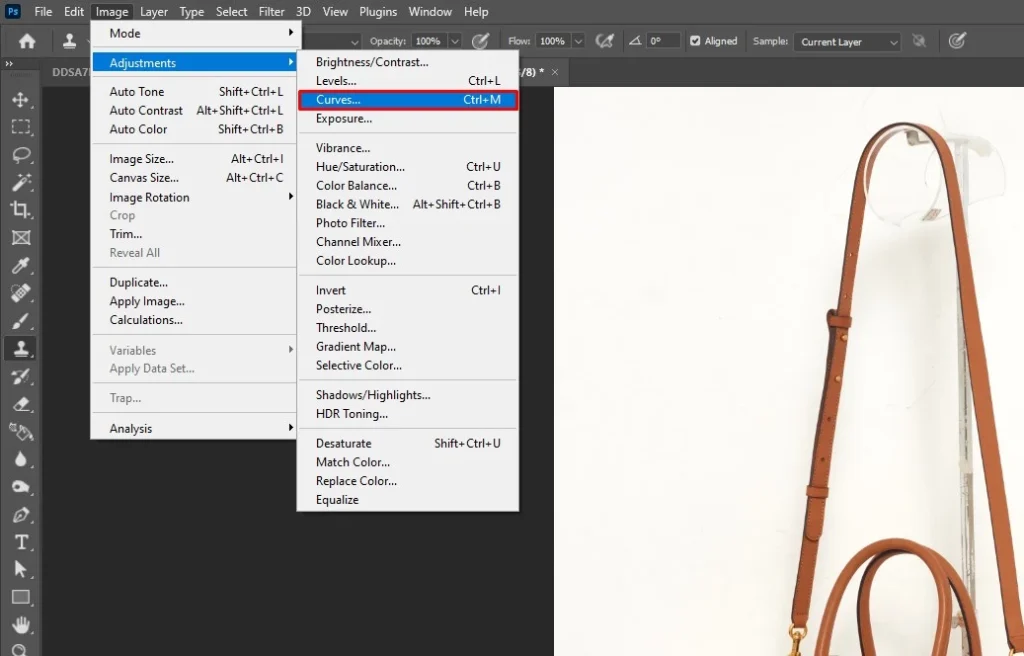
Step 3: Fix Brightness and Contrast
Go to Image, and then go to Adjustments. Click Curves and pull the highlights up and shadows down to add depth. Then open Levels, drag the white point inward until the background reads pure white. Check your histogram, make sure no channel is clipping on either end.
Step 4: Color Correct the Packshot
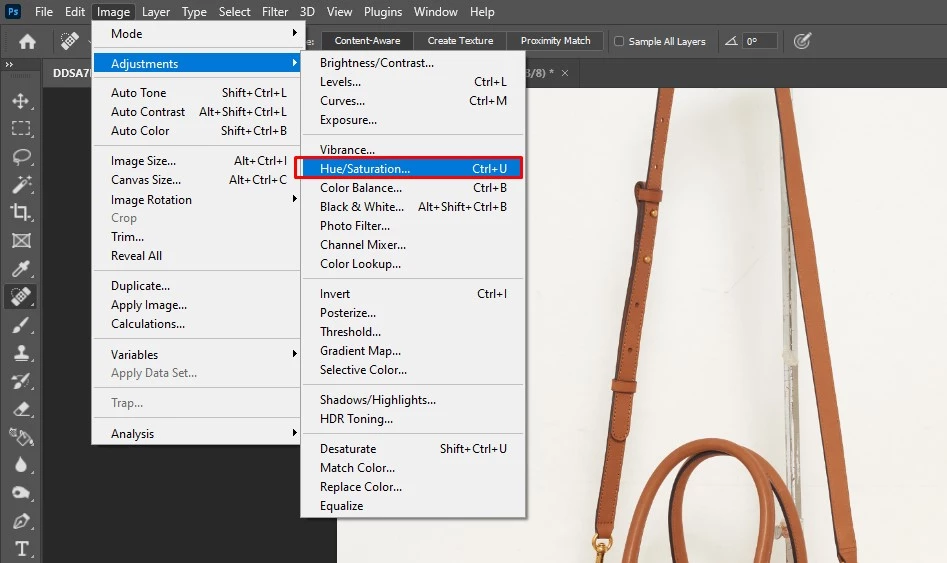
Go to Image, click Adjustments, and then click Color Balance to shift the midtone sliders to neutralize any warm or cool cast on the product surface. Then open a Hue/Saturation adjustment layer, click the targeted channel dropdown, and correct each color in the label or packaging separately.
Step 5: Clean and Extend the Background
Select the Pen Tool, draw a precise path around the product, and right-click to Make Selection. Invert the selection, then press Delete to remove the background. Create a new white fill layer beneath, and drag it below your product layer. For edge gaps, go to Edit → Content-Aware Fill to patch them cleanly.

Step 6: Apply Sharpening and Final Surface Detail
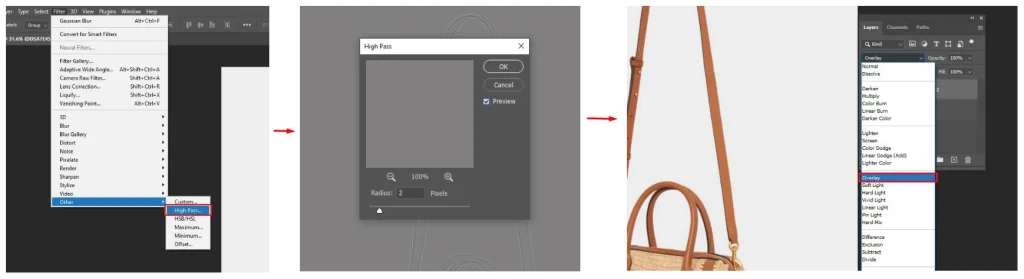
Go to Filter, click Other, and then click High Pass, set radius to 2–4px, then set that layer to Overlay blend mode. This sharpens edges without affecting flat color areas. For surface texture work, apply Frequency Separation by duplicating the layer twice: run Gaussian Blur on the low-frequency layer and paint corrections on the high-frequency layer to sculpt highlights and refine texture.
Step 7: Resize, Crop, and Export
Go to Image, Click canvas size, Center the product, and set dimensions to your platform’s required specifications, 2000×2000px for Amazon, 800×800px minimum for most e-commerce.
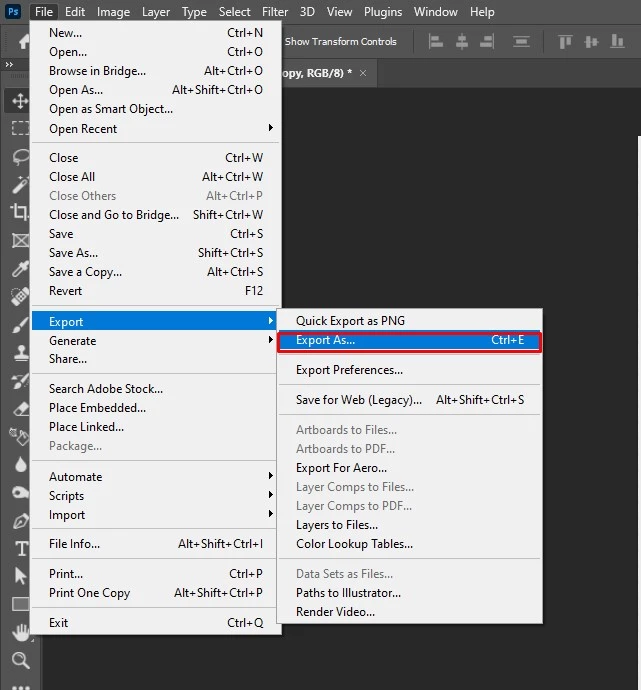
- Go to File.
- Click Export.
- Click Export As and select JPEG at 80–90% quality for web or PNG for transparency. Always save a master PSD before closing.
How Do You Choose the Packshot Photo Retouching Company?
To choose the right packshot photo retouching company, evaluate three core factors: quality, consistency, and cost. Beyond pricing, the right company must demonstrate technical expertise, fast turnaround, verified client satisfaction, and the ability to maintain brand guideline consistency across all commercial platforms.
1. Analyze the Retouching Company’s Efficiency and Experience: Check the company’s About Us page for years of experience, client history, and skill sets. Long-standing expertise signals familiarity with complex, commercially demanding retouching techniques.
2. Creative Work Samples and Testimonials: Review the gallery or sample work page to assess retouching style and quality. High-caliber samples confirm the retoucher can align packshot images consistently with your brand across all platforms.
3. Give the Free Trial a Shot: Always use the free trial option before committing. It reveals the company’s actual quality, adherence to brand guidelines, turnaround speed, and overall professionalism, before any financial investment is made.
4. Faster in Service Delivery: Ask directly about standard and expedited turnaround times. A reliable packshot retouching company must handle both daily volume and urgent commercial deadlines without compromising on output quality or pricing transparency.
5. Review of Client Satisfaction: Cross-check Trustpilot, Google Business Reviews, and industry forums. Verified client feedback exposes real service consistency, communication quality, and whether the company reliably meets commercial retouching expectations at scale.
6. Providing 24/7 Customer Support: Prioritize companies offering round-the-clock support. Since clients operate across time zones and face urgent campaign deadlines, 24/7 availability is a non-negotiable indicator of a professionally run retouching operation.
How Much Does Packshot Retouching Cost in The USA?
The average cost of packshot retouching in the USA starts around $0.60 per image at basic editing in 24 hours. It varies by complexity, project volume, turnaround, level of editing required, types of services, etc. A higher volume of product images comes with a cut price, making it affordable for the clients.
Here is a chart of the packshot retouching price and what it includes at Offshore Clipping.
| Retouching Level | What It Includes | Cost per Image |
|---|---|---|
| Basic/simple packshot retouching | Resizing & cropping, color adjustment, background removal, product clean up, brightness & exposure, basic shadow, flaws removal, etc. | $0.60 to $1.00 |
Medium/professional packshot retouching | Dodge and burn, product retouch, shape adjustment, model beauty retouch, frequency separation, advanced color grading, photo masking, and photo clipping. | $1.0 to $1.5 |
Complex/advanced packshot retouching | Complex retouching, creative compositing, advanced shadow and lighting, 3D or 360-degree image creation, advanced sharpening and detail enhancement, and brand-specific customized retouching solutions. | $1.5 to $2.0 |
How Long Does Packshot Retouching Take?
Packshot retouching takes from 10 minutes to 1 business day for one photo, and a bulk project may take over 1 week to complete. Basic editing takes 10 to 30 minutes per photo, medium edits take 1 hour to 1 to 4 hours, and complex retouching takes more than 1 business day.
FAQ’s
How do you remove dust and scratches in packshot retouching?
To remove dust and scratches in packshot retouching, use the Spot Healing Brush, Healing Brush, Content-Aware Fill, Patch tool, and the Dust & Scratches filter in Photoshop. Always convert the layer to a Smart Object first to allow non-destructive editing and preserve texture while removing imperfections.
How do you fix lighting and shadows in packshot images?
To fix lighting and shadows in packshot images, create a Brightness/Contrast or Curves adjustment layer, then use the layer mask and paint with a soft black brush on areas you want to leave untouched. For reflective surfaces, control light and shadows to bring more dimensionality to the product, ensuring depth without artificial-looking highlights.
What are common mistakes in packshot retouching?
Common mistakes in packshot retouching include using aggressive noise reduction or overusing frequency separation, which erases essential texture details and makes products like leather, fabric, or metal look flat and unnatural. Over-retouching is equally damaging; surfaces that look “too perfect” immediately draw attention and raise doubt in a potential buyer.
What file format is best after packshot retouching for web use?
WebP is now the most recommended format for e-commerce; it offers an excellent balance of visual quality, reduced file weight, and loading speed, and also improves SEO. A compressed JPEG remains the best fallback, as it is compatible with almost all websites, marketplaces, and social media platforms.