In 2026, car photo editing is mostly about clean realism, platform-ready visuals, and accurate colors. Modern editing nowadays is not only about making images look appealing but also about making them consistent, trustworthy, and real.
Editors use AI tools like Adobe Photoshop (with Firefly), Luminar Neo, and Lightroom to expedite the editing process. Background replacement sharpens focus, photo color correction restores true paint tones, retouching removes flaws, and balanced lighting adds depth. Advanced image manipulation techniques often support this.
Editors can work faster with the revolution of AI tools and smarter workflows while maintaining high quality. But manual skills and attention to detail remain essential to achieve a professional finish.
This essential guide covers everything, including basics to advanced techniques, workflows, tools, and common mistakes.
What you’ll learn in this article
- 1 What is Car Photo Editing?
- 2 What is the Best Car Photo Editing Software?
- 3 How Do You Edit a Car Photo in Photoshop?
- 4 Use of the Dodge Tool in Editing Car Photos
- 5 Why is Car Photo Editing Important?
- 6 Let’s Use Shadow Techniques in Editing Car Photos
- 7 Color Correction Techniques in Car Photo Editing
- 8 Car Reflection Techniques to Edit Car Photos
- 9 Cinematic Background Techniques to Edit Car Photos
- 10 Why High-Quality Car Photography Matters Before Editing
- 11 Bottom Lines
- 12 Frequently Asked Questions
- 12.1 Which software is best for car photo editing?
- 12.2 What color correction techniques are used?
- 12.3 How long does car photo editing take to make it professional?
- 12.4 What file format is best for car photo editing?
- 12.5 What is the ideal background for car photos?
- 12.6 What mistakes should an editor avoid in car photo editing?
- 12.7 What is the difference between color grading and color correction?
What is Car Photo Editing?
Car photo editing refers to the process of editing vehicle images using professional software. Often including photo retouching techniques and advanced adjustments.
Car photo editing is the process of enhancing vehicle images using professional software. It brings into contact improved lighting, adjusted colors, removed unwanted objects, corrected reflections, refined details, and is sometimes supported by image masking for precise selection.
The main goal is to convert the car into a clean, sharp, and attractive way for websites, social media, online sales listings, or ads.
The primary goal is to present the vehicle for online sales listings, websites, social media, and advertisements in a tidy, eye-catching, and appealing manner.
The following applications widely utilize car photo editing:
- Dealership websites
- Online car listings
- Promotional campaigns
- Automotive marketplaces
- Social media ads
A well-edited image helps highlight the car’s design, condition, and features. However, it may not be suitable when raw, unedited photos are required for legal or inspection purposes.
Advantages:
- Makes the car look more attractive
- Increases buyer attention
- Improves brand image
Disadvantages:
- Unrealistic colors can mislead buyers
- Over-editing can reduce trust
What is the Best Car Photo Editing Software?
Adobe Photoshop, Lightroom, Carify, Capture One, Croppy AI, and Car Editor are considered the best car photo editing software in 2026. Qualified car image editing software lets editors improve images with precision, enhance lighting, adjust color, remove distractions, and generate a professional look.
But you have to keep one thing in mind. Select software based on your skills, workflow, and the device you need to use.
- Adobe Lightroom: This is perfect for quick edits. Lightroom handles color correction, exposure, contrast, and batch processing efficiently.
- Adobe Photoshop: One of the most professional and industry-standard. Best for high-end and detailed editing like retouching, object removal, compositing, and advanced image manipulation workflows.
- Capture One: Popular among professionals. Offers advanced color grading and strong RAW editing features. It helps car photos look detailed and rich.
- Luminar Neo: AI-powered software that speeds up editing tasks like sky replacement, color enhancement, and lighting fixes. This software makes it easy to get a polished look quickly.
- Spyne AI (Web Tool): Spyne AI is designed for automotive editing. It offers automatic background replacement and reflection correction.
- Affinity Photo: This is a professional and powerful tool alternative to Photoshop. Also highly effective for car photo editing. This is suitable for those who prefer a single-time purchase over a subscription.
- GIMP: This software is an open-source alternative if you have a tight budget. It has powerful tools but requires more manual effort.
How Do You Edit a Car Photo in Photoshop?
There are structured workflows and continuity to edit a car photo in Photoshop. Generally, it starts by opening the actual file, then adjusting exposure, white balance, and contrast in Camera Raw.
Then duplicate the layer and cut out the object or car using the Pen tool for a precise selection. This process is often supported by image masking techniques for cleaner and more accurate edges. Complete it by correcting colors, sharpening details, and improving lighting to make the car look eye-catching and bold.
Modern editing focuses on realism, accuracy, and subtle enhancement. Take a look at some simple modern steps to complete car photo editing below:
Step 1: Open and Prepare the Image
Run your Photoshop on your device and open the desired car photo.
Click File > Open
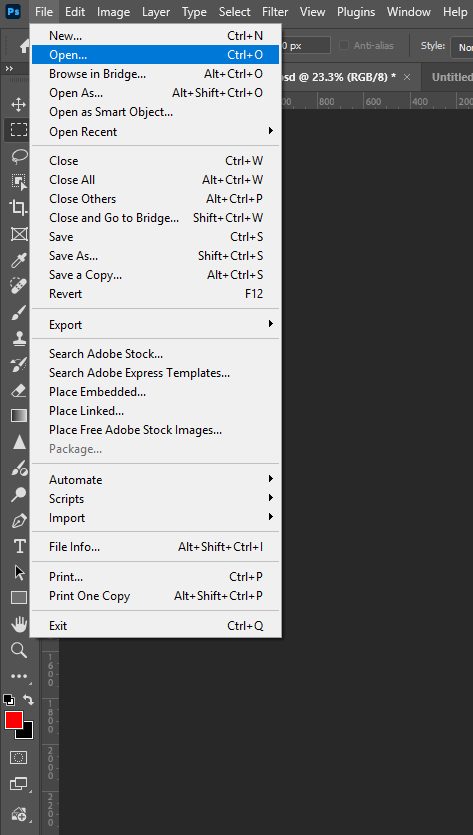
Use Ctrl + J or Command + J (Mac) to duplicate the background layer. You can also duplicate the layer by right-clicking on the layer from the layer window. This allows your original image to be kept safe.
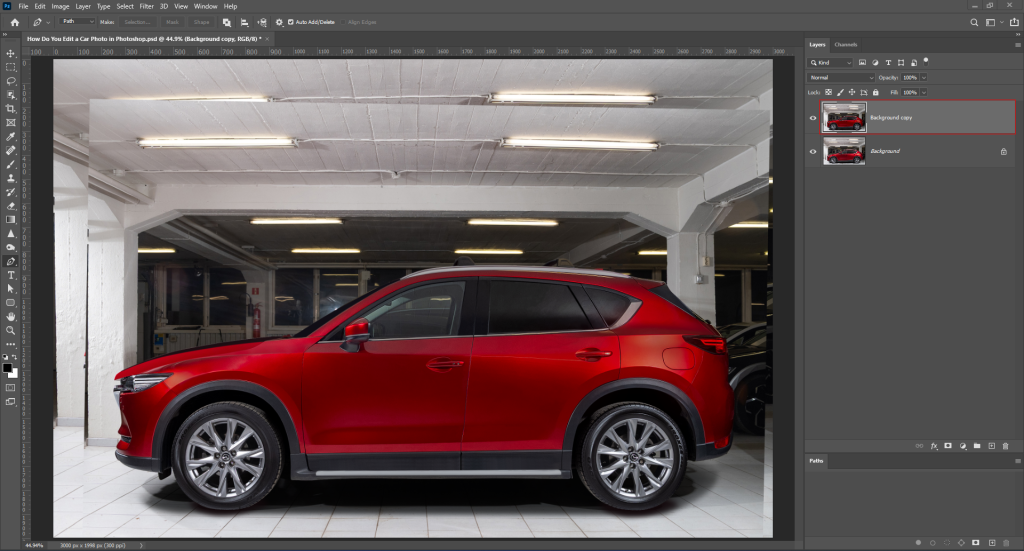
Step 2: Select and Isolate the Car
Then hide the background layer by clicking the eye icon beside the layer.
Select the car with the Object Selection Tool and refine the edges carefully. Then apply a mask to the layer. This procedure lets you edit the car and background separately.
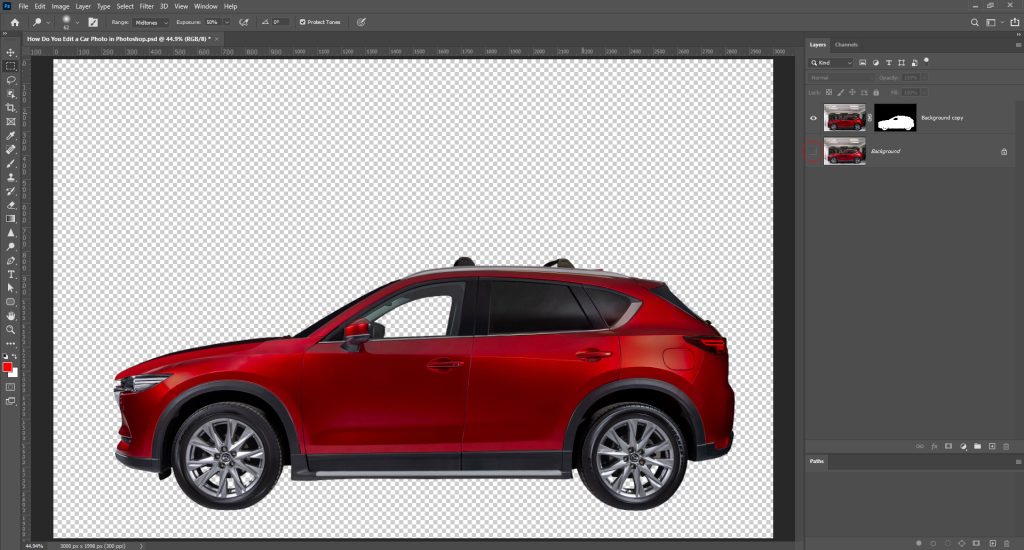
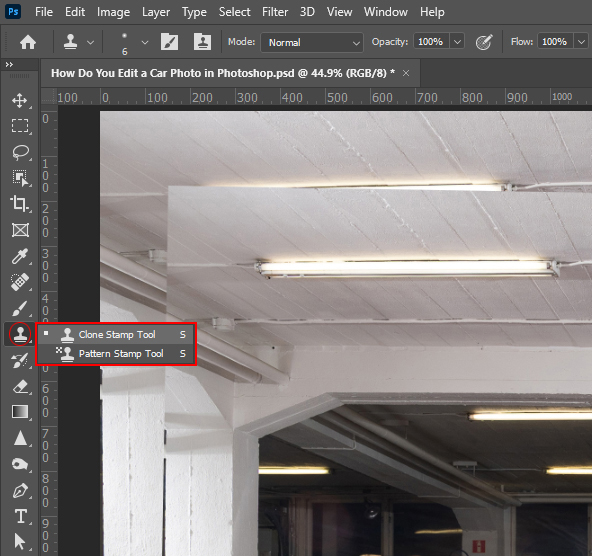
Step 3: Clean the Car
Select the Spot Healing Brush Tool to clean unwanted and unnecessary objects from the car. Click on scratches, dust, or small distractions to remove them. Hover over the small dust and scratches with brushes to remove all the flaws or spots.
Use the Clone Stamp Tool to remove large unwanted spots. Zoom in to see if the marks are properly gone or not. Then zoom out to see the full image.
Step 4: Enhance the Car Paint
Use the Dodge Tool on the bright areas lightly to highlight. Use the Burn Tool on the dark areas to deepen shadows.
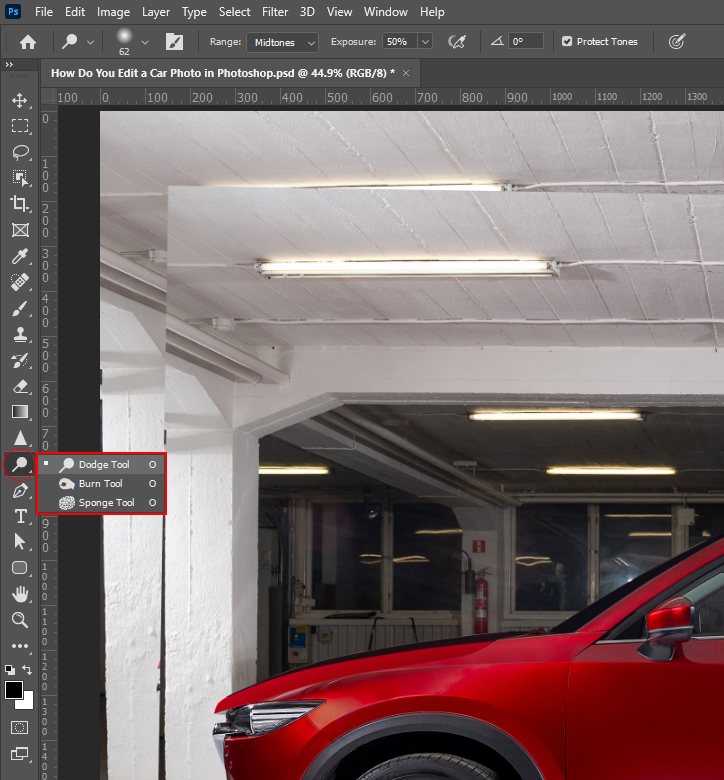
Try to follow the natural light direction. Because overusing can give it a distorted perspective in the image, which makes the car look unrealistic.
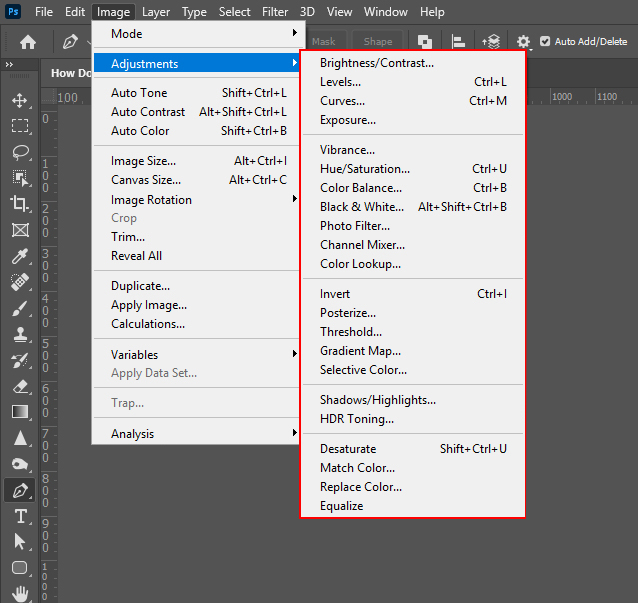
Step 5: Adjust Brightness and Color
Open the Camera Raw Filter. Then adjust:
- Exposure
- Contrast
- Highlight
- Shadows
Slightly increase clarity to bring out details and keep colors natural and accurate.
Step 6: Add Final Sharpening
Go to Filter > Sharpen > Unsharp Mask.
Apply lightly to enhance details without adding noise.

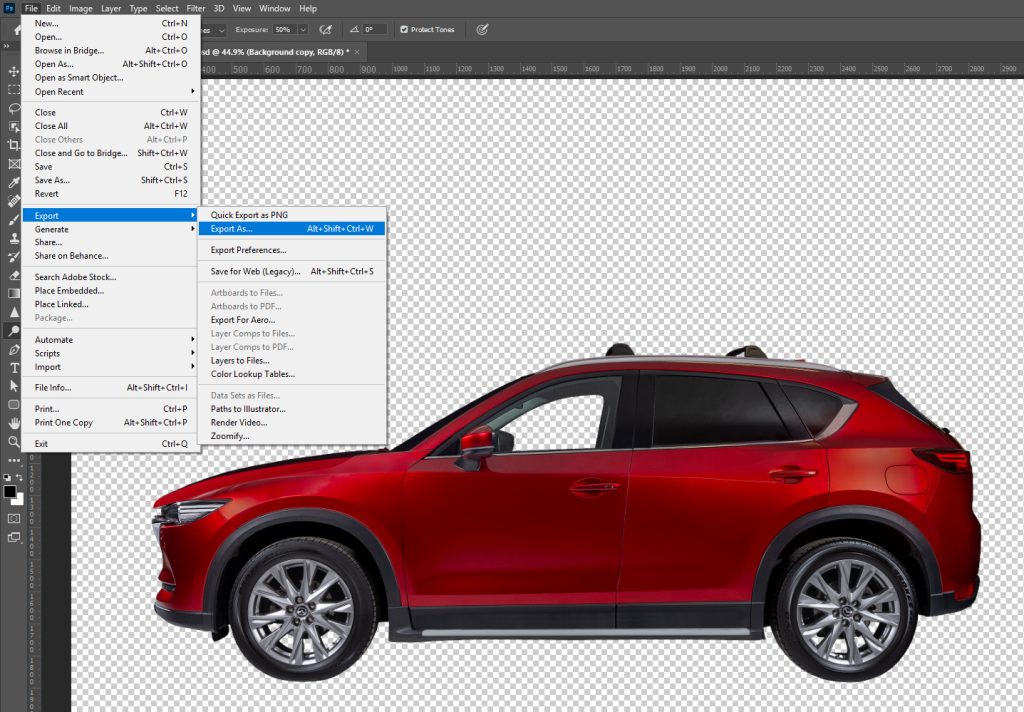
Step 7: Save the Final Image
It’s about to give the final touch to your workflow. Export the image in JPEG or PNG format. Then optimize the file for web or platform use.
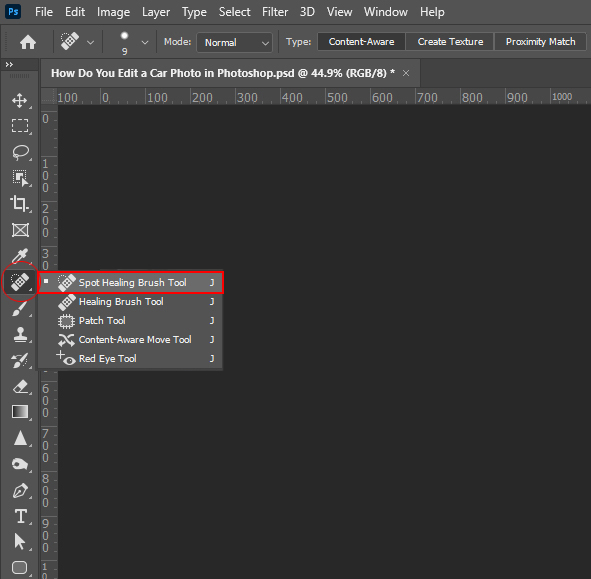
Use of the Dodge Tool in Editing Car Photos
The Dodge tool is used to brighten specific areas in a car photo. It helps increase highlights and bring out details such as curves, edges, and reflections. It increases reflection in the car body and makes the headlights brighter.
Select the Dodge Tool (O) from the toolbar on the left to use it. Set a low exposure around 5-10%. Gently brush over the areas like the hood, roof, and side panels. This enhances brightness without changing the entire image.
For better results, always follow the original light direction to maintain realism. Don’t overuse the tool, as too much brightness can wash the details out.
Why is Car Photo Editing Important?
Car photo editing transforms the raw visual into a bright, clean, and professional image. It takes aside distractions, solves lighting issues, and highlights key details. Thus, it builds trust and makes the vehicle more stunning.
These days, buyers base their decisions primarily on pictures. They are driven by strong visuals. This builds trust, supports faster decisions, and helps listings stand out in the competitive marketplaces. Before reading specs or price, they look at images.
The key reasons are listed below:
- Increases Sales and Engagement: High-quality images attract more clicks. Better visuals often lead to more inquiries and conversions.
- Enhances Visual Appeal: Editing improves lighting, reflections, and color accuracy. This makes the car look premium and well-maintained.
- Removes Distractions: Background clutter, unwanted objects, or reflections can reduce focus. Editing removes these distractions.
- Builds Trust and Professionalism: Clean and consistent images create a strong brand impression. Buyers trust professional-looking listings.
- Saves Time and Cost: Editing reduces the need for reshooting. It saves time. Proper editing can enhance even average photos.
- Ensures Consistency: Using a consistent style across all images helps create a recognizable brand identity.
We’re concerned about whether you can remember this whole procedure! And it’s also embarrassing to keep coming back to this blog for every step. For this salvation, we are offering you a PDF version of this blog that you can keep as long as you want!
Let’s Use Shadow Techniques in Editing Car Photos
While making a car photo look grounded and realistic, shadows play an important role. You can improve natural shadows or create new ones to enhance depth in editing.
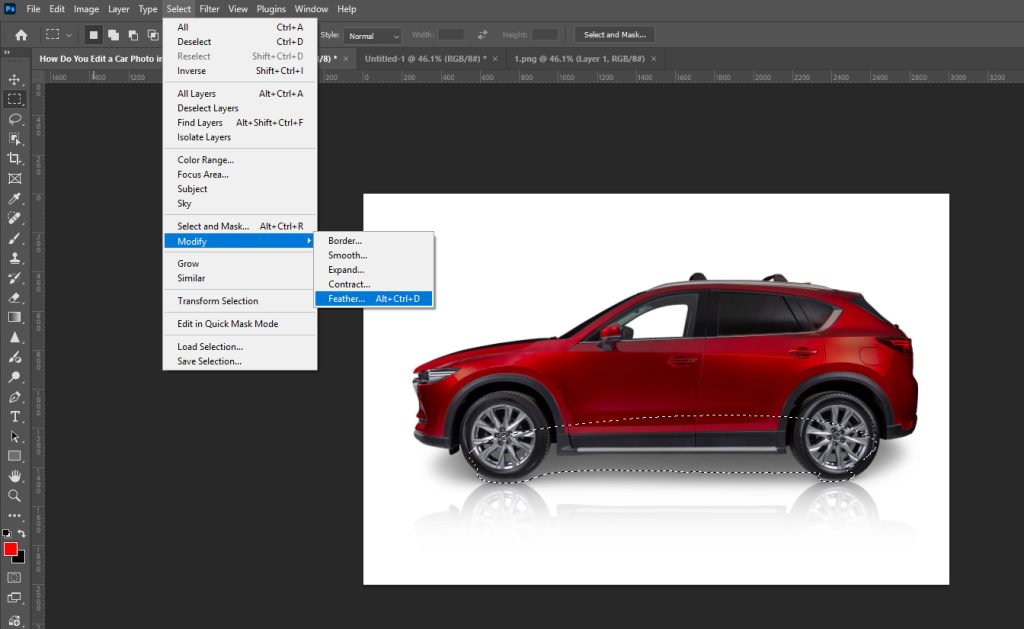
Step-1: Select the bottom
Click on the eye icon of the background layer to make it visible. Then select the Object Selection Tool and select the bottom part of the car.
Then go to “Select” from the bar at the top. Then “Modify” and select “Feather.”
Select > Modify > Feather
Select Feather Radius with your desired pixels.
Step 2: Copy the Background Layer
Copy the background layer manually or just by pressing CTRL + J.
This is where you will create the shadow without affecting the original image.
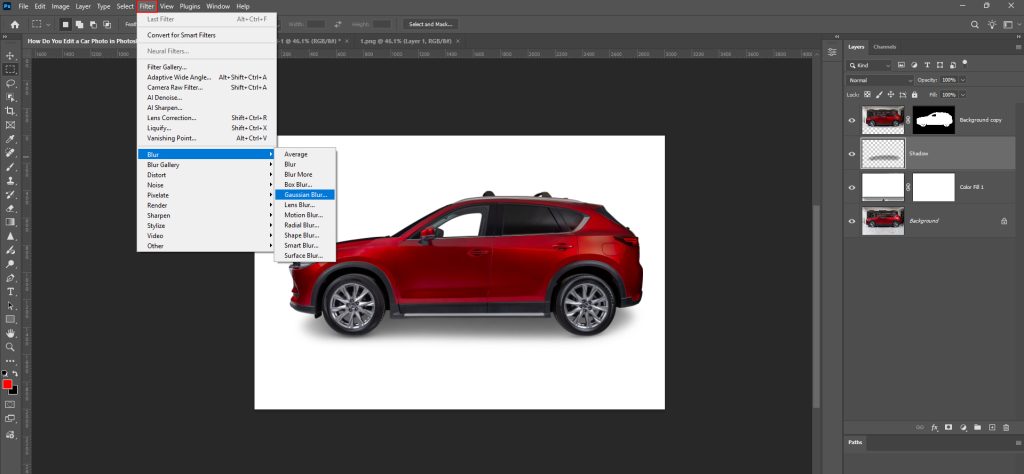
Step 3: Blur the Shadow
Go to the top bar and click on Filter. Go to the Blur and select the Gaussian Blur, and put your desired Radius pixel.
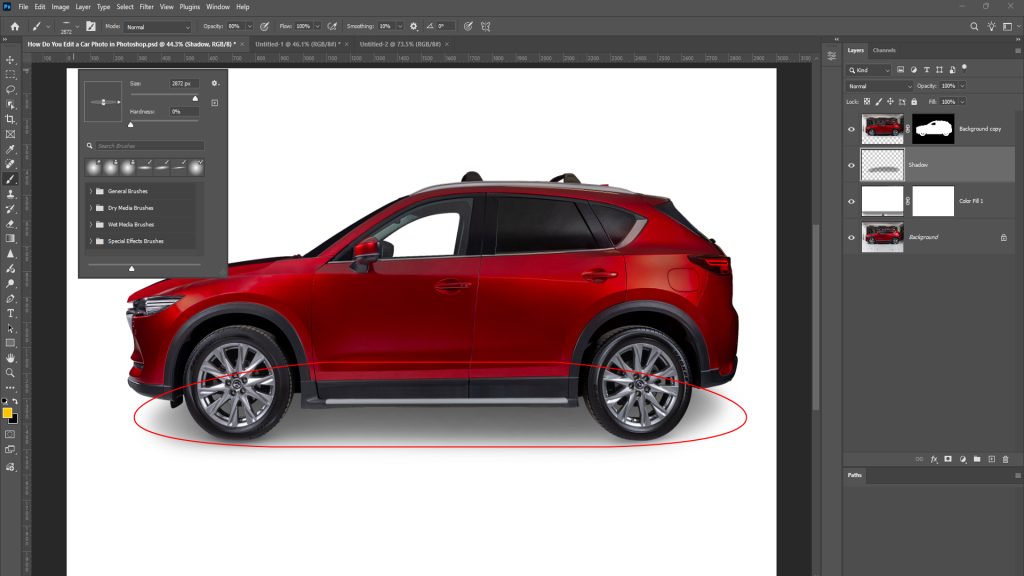
Step 4: Use the Brush Tool
Then select the Brush tool and a round brush with low opacity. Customize it for the perfect use for adding shadow. Paint dark shadows under the car with the brush, especially beneath the two visible tires in this picture. Then check the before-and-after by clicking the eye icon in the layer panel.
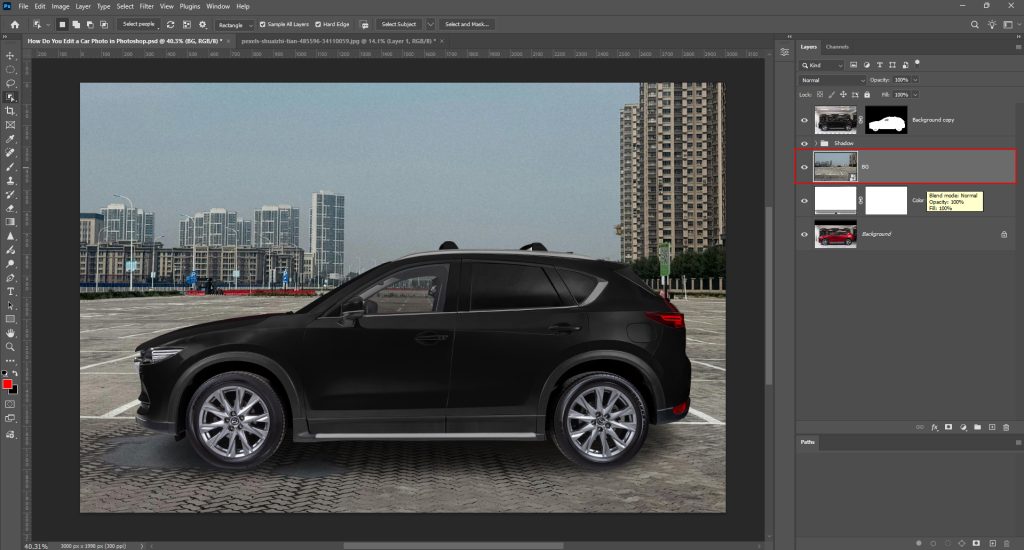
Step 5: Give it a Color
Go to the Create new fill or adjustment layer in the bottom-right panel of the layer. And give it a solid color for the background.
Color Correction Techniques in Car Photo Editing
Color correction is important to make a car look natural and visually appealing. It helps to maintain accurate paint color.
1. Choose your desired color:
Take a rectangular shape with the Rectangular Marquee tool and give it a Solid color you want to apply to your car. This will guide your adjustments.
2. Create a Group and Add Mask:
Create a Group from the layer panel and add a Layer mask to separate the car area.
3. Make Precise Selection:
Select the color area across the car with the Pen tool to ensure a clean and accurate color application. Zoom in while making a precise selection for the red areas. You can see the pathwork in the bottom-right of the interface.
4. Refine the Mask:
Delete the existing mask if needed and reapply a clean Layer Mask based on your selection. This will improve edge accuracy.
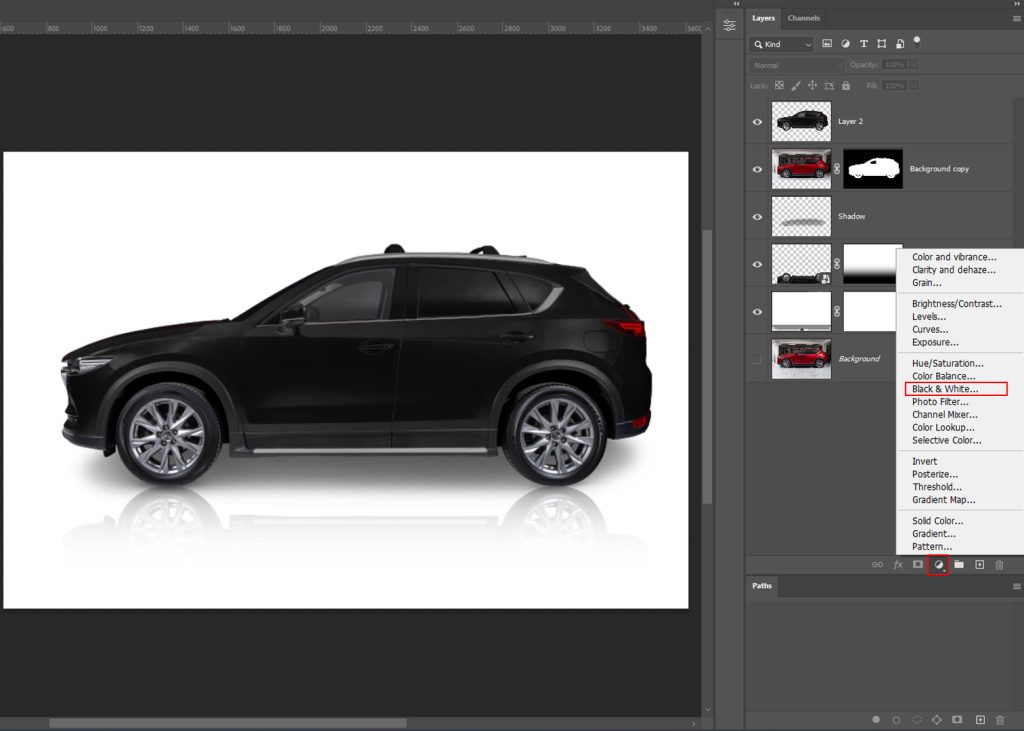
5. Base Color Adjustment:
Click on adjustment layer and select Black & White. Then enable the Tint checkbox. Choose the black color in the top-left you selected for your ease.
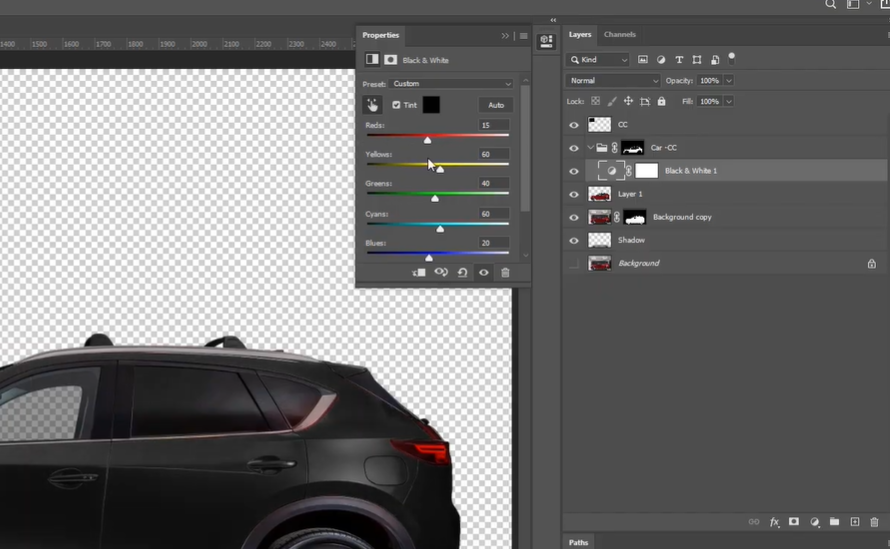
6. Adjust Exposure and Contrast:
Use the sliders to adjust exposure and contrast for a balanced visual. There are multiple sliders like Red, Green, Yellow, Cyan, and Blue.
Adjust every color with the slider precisely. Check which adjustment suits your car picture best. This will make cars look eye-catching.
7. Remove Extra Color:
Create another group from the layer panel. This is to remove extra color. You will see a box at the top of the layer window by default. Click here and select the Color mode. Then go to the toolbar on the left and select the Brush tool.
8. Final Solid Color Layer:
Go to the adjustment layer in the bottom bar of the layer panel. You will see multiple tools here. You can color with all the tools here.
Car Reflection Techniques to Edit Car Photos
It looks like you’ve successfully completed the color correction for your car photo. Besides, Proper reflection editing enhances depth and gives a premium finish. If you want to make a reflection of your car in Photoshop, here are the steps:
1. Duplicate the Car Layer
Select the color-corrected car layer and duplicate it (CTRL + J, or for Mac – CMD + J). You can name it Reflection. Drag the layer down just before the background layer.
2. Convert to Smart Object
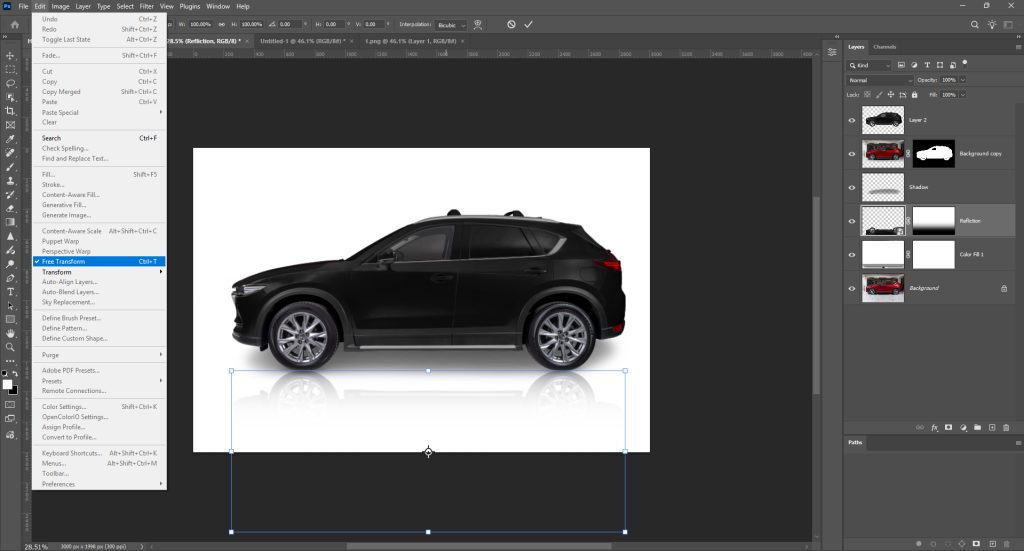
Right-click the Reflection layer and select the Convert to Smart Object option.

Then, Free Transform the layer. You can do it from the Edit in the top bar. Click on Edit and then select Free Transform.
3. Flip the Reflection Vertically
Right-click on the object and select Flip Vertical. After that, add a White mask on that layer from the Add mask icon at the bottom of the layer panel.
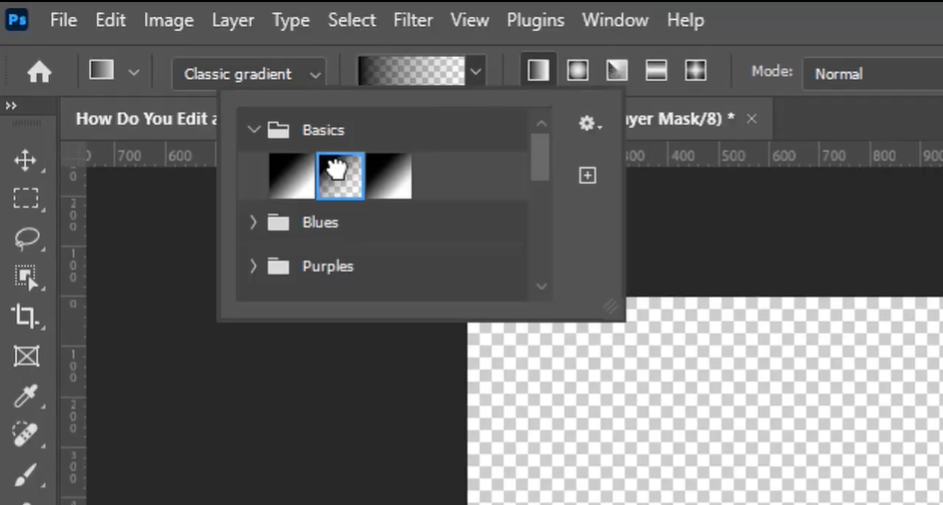
4. Add Gradient
Go to the Toolbar on the left and select Gradient. Then go to the top and click on the Classic gradient. Here, you have to select the Basics gradient. Click on the Foreground to transparent gradient.
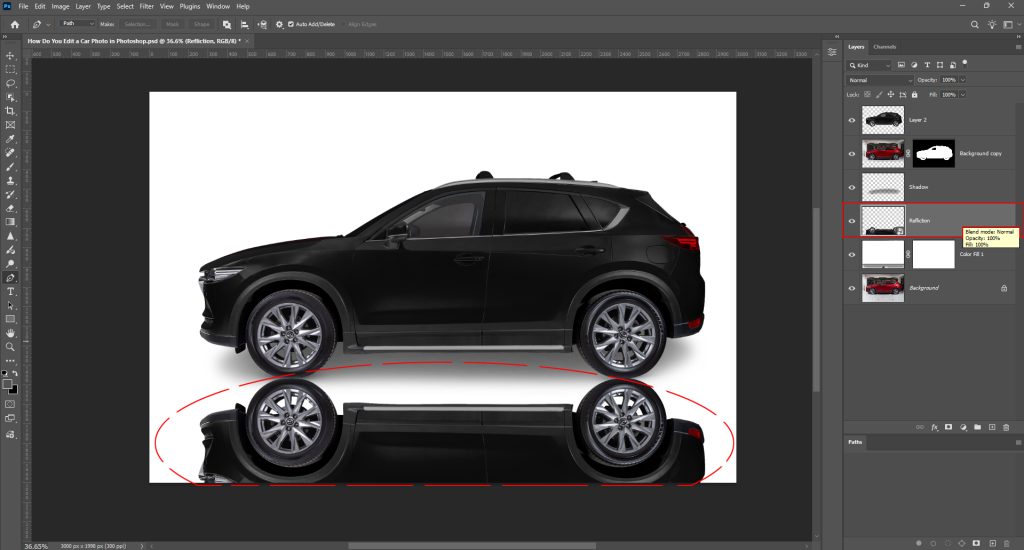
5. Optimize the Gradient
Now go to the Foreground Color and choose black. Select the Reflection layer and drag from bottom to top to create a smooth fade effect.
6. Apply a Solid Background for Preview
Apply a solid background color to understand the reflection properly. Go to New Fill Layer or Adjustment layer and choose the Solid color you want to put in.
It’s done. Now you can check the before and after by clicking the eye icon in the layer panel.
Cinematic Background Techniques to Edit Car Photos
A cinematic background can turn a simple car photo into stunning visuals. It easily captures users’ attention. It also adds depth, mood, and a professional look. Here are the steps for adding a cinematic background while editing car photos:
Step 1: Add the Background Image
Drag and drop your background into Photoshop or go to File > Place Embedded. Resize it using Ctrl + T (Windows) / Cmd + T (Mac) to fit the frame.
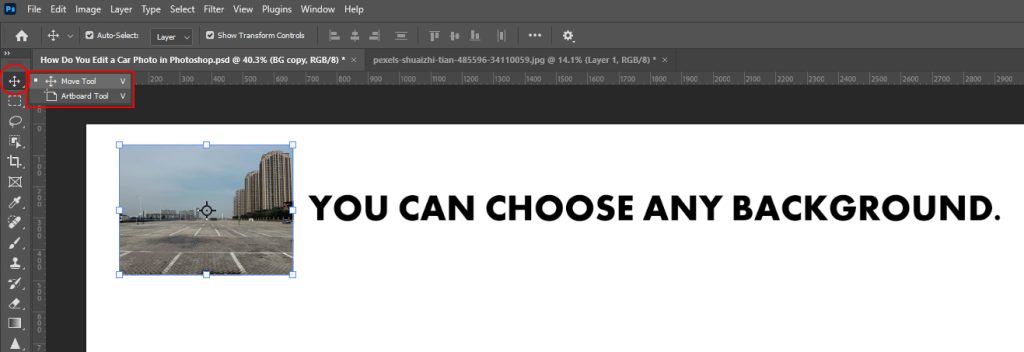
Step 2: Arrange the Layers Properly
Place the background layer below the “shadow layer” in the Layers panel. This ensures the car and its shadow remain visible and natural.
Step 3: Enhance the Shadow for Depth
Duplicate the shadow layer by pressing Ctrl + J (Windows) or Cmd + J (Mac). This makes the shadow stronger and helps the car sit naturally in the scene.
Step 5: Save the Final ImageGo to File > Export > Export As. Choose your format (JPEG/PNG), adjust quality, size, and scale, then click Export to save the final image.
Why High-Quality Car Photography Matters Before Editing
Before editing, high-quality car product photography is crucial because a strong photo serves as the foundation for the editing process. If the original image is blurry, poorly lit, or badly framed, no amount of editing can fully fix it.
A proper camera setting with good photography captures sharp details, true colors, and proper angles.
Here are the key reasons why high-quality car product photography matters before editing.
- Reduces Uncertainty: Clear and detailed photos answer common buyer questions upfront and reduce doubts about the vehicle’s condition.
- Builds Credibility: High-quality images make your brand or dealership look trustworthy and serious about presentation.
- Accurate Representation: Good photography shows the true color, shape, and features of the car without misleading the viewer.
- Instant Impact: Sharp and well-framed shots grab attention immediately in crowded listings or ads.
- Increased Visibility: Attractive images encourage more clicks, shares, and engagement across websites and social platforms.
- Showcasing Details: Close-up and properly lit shots highlight key features like wheels, interiors, and headlights clearly.
- Easier Postproduction: Clean, well-exposed photos require fewer corrections, saving time during editing.
Managing Reflections: Proper angles and lighting help control unwanted reflections on glossy car surfaces.
Car Photo Editing vs Car Photo Retouching
The difference between car photo editing and car photo retouching is that car photo editing focuses on basic adjustments to the entire image, such as color correction, brightness, contrast, and cropping.
Car photo retouching goes further by refining fine details, removing imperfections, enhancing reflections, and perfecting the car’s appearance to achieve a polished, high-end look.
| Feature | Car Photo Editing | Car Photo Retouching |
|---|---|---|
| Purpose | Improve the overall image | Perfect small details |
| Focus | Whole photo | Specific parts of the car |
| Work Type | Basic corrections and adjustments | Detailed flaw removal and enhancement |
| Tasks | Brightness, contrast, color correction, cropping, and background change | Removing scratches, dents, dust, and reflections |
| Time | Usually faster | Takes more time and precision |
| Skill Level | Basic to intermediate | Advanced and detail-focused |
| Result | Clean and professional look | Polished, flawless, premium look |
Amazon Photo Editing vs Standard Car Photo Editing
The difference between Amazon photo editing and standard car photo editing lies in purpose and rules. Amazon photo editing follows strict guidelines, including a pure white background, correct sizing, and clear product visibility.
Standard car photo editing focuses on enhancing the vehicle’s appearance by improving lighting, colors, background, and fine details for marketing and presentation use.
| Feature | Amazon Photo Editing | Standard Car Photo Editing |
|---|---|---|
| Main Goal | Meet Amazon’s strict image guidelines | Improve overall photo quality |
| Background | Pure white background required | Any background allowed |
| Image Rules | Must follow Amazon size, margin, and format rules | No strict platform rules |
| Editing Focus | Clean cut-out, shadow control, accurate colors | Lighting, color correction, angle adjustment |
| Retouching Level | Limited, the product must look realistic | More freedom to enhance the look |
| Creative Freedom | Very limited | Flexible and creative |
| Usage | Amazon product listings | Dealerships, ads, social media, websites |
| Compliance | Must avoid over-editing or misleading changes | No platform-based restrictions |
How Do You Find a Professional Car Photo Editing Company?
First of all, search for the experience you require in car photography and a strong portfolio. Then check client reviews for quality and reliability. You must ensure they offer the services you need.
Check for the necessary services, like background removal and retouching, and also confirm turnaround times. Try to connect with them through emails or phone calls. Compare pricing, not only cost but also value.
Necessary steps to follow to find a company that specializes in professional car photo editing:
Step-1: Research Online
If you want car photo editing, look for companies specialized in automotive photo editing. Explore their websites, portfolio, and services to check if their services meet your expectations.
Step-2: Check Reviews
Read client reviews on their website or from third-party platforms to scale reliability and quality.
Step-3: Review Portfolio
Explore their previous and recent work carefully. Try to find cleanliness, attention to detail, consistency, and realistic enhancements in car photo editing.
Step-4: Compare Pricing and Packages
Ask for quotes and compare pricing ranges. Make sure they provide the services fitting your budget and without compromising work quality.
Step-5: Request a Sample
Test their service before committing to them. Ask and send them a few images for trial edits. This will help you to find out their turnaround time, communication, and quality.
Step-6: Check Communication
Ensure they offer clear communication, revisions, and support. A responsive team makes the editing process smoother.
How Much Does Car Photo Editing Cost?
Costs for professional car editing vary depending on service level and complexity. The cheaper one offers edits like lighting adjustment, color correction, and minor cleanup.
While expensive services include retouching, such as removing scratches, improving shine, or changing the background. On the other hand, companies offer a lower price per photo for bulk packages.
| Packages | Services Included | Typical Cost per Image |
|---|---|---|
| Basic | Color correction, contrast/brightness, minor fixes | $2–$5 |
| Standard | Background adjustment, shadow addition, minor retouching | $5–$15 |
| Advanced | Scratch removal, dent repair, shine enhancement, full retouching | $15–$30+ |
| Bulk Packages | Multiple images with any level of editing | Lower rate per image depending on volume |
Bottom Lines
In 2026, exceptional car photo editing requires balance. The concept and goal is to make the image look realistic, clean, and professional, not artificial.
You can convert ordinary photos into high-quality visuals with the right tools and by following a well-structured workflow. This will attract buyers and build trust.
It is suggested to acquire knowledge of car photo and video editing due to its exploding demand. Mastering car photo editing can give you a strong advantage in the automotive industry.
Frequently Asked Questions
Which software is best for car photo editing?
To be honest, Adobe Photoshop is the leading answer in terms of retouching. Lightroom for quick color adjustments. The rest of the software, such as Capture One, Affinity One, etc are also being used widely.
What color correction techniques are used?
Contrast tuning, white balance, exposure adjustment, and selective color correction are commonly used in car photo editing.
How long does car photo editing take to make it professional?
Professional car photo editing takes 24-72 hours in general. Simple edit takes less time, while detailed retouching or batch image processing may take a long time, depending on complexity and volume.
What file format is best for car photo editing?
The RAW format is best for editing. It retains maximum detail and allows better control over exposure, color, and lighting adjustments.
What is the ideal background for car photos?
Clean, distraction-free backgrounds like white, studio setups, or natural outdoor scenes are ideal. This depends on the platform and purpose.
What mistakes should an editor avoid in car photo editing?
Mistakes like over-editing, incorrect colors, poor cutouts, harsh shadows, over-sharpening, ignoring lighting direction, unrealistic effects, etc should be avoided.
What is the difference between color grading and color correction?
Color correction adjusts colors to make them accurate. Color grading enhances the overall mood and tone of the image.