Removing a background in Adobe Photoshop can be done in several quick ways, depending on the image and the level of detail you need. The Remove Background tool works fast for simple photos. Selecting a subject with layer masks helps refine edges. The Quick Selection tool gives more manual control, while the Pen Tool is best for precise cut-outs.
Each method solves a different problem. Automatic background removal is perfect for product photos or quick edits. Selection tools help isolate people, objects, or messy edges. The Pen Tool creates clean paths for logos or sharp objects. Using the right method speeds up editing and keeps the final image looking natural.
If you need this guide for a long time, you can download the PDF version, where you will get 4 different methods!
What you’ll learn in this article
How to Remove Background in Photoshop Using Different Tools
To remove background in Adobe Photoshop, use different tools such as Quick Selection, Magic Wand, Background Eraser, and Select Focus Area. Each tool works in a slightly different way. Some tools remove the background automatically, while others give you more control to clean edges and select specific objects.
Here are the methods that show how each tool helps remove the background using different tools in Adobe Photoshop.
1. Quick Selection: Uses a brush to quickly select the subject. It detects edges automatically and separates the object from the background with just a few strokes.
2. Magic Wand: Selects areas based on similar colors. It works best when the background has a solid or consistent color.
3. Background Eraser: Removes the background while keeping the subject edges safe. It samples colors and erases only the background pixels around the object.
4. Select Focus Area: Detects the sharp subject in the image and selects it automatically, making it easier to separate the focused object from the background.
Method 1: How to Remove Background Using the Quick Selection Tool
To remove background using the Quick Selection Tool in Adobe Photoshop, select the tool and brush over the subject. Photoshop detects edges and expands the selection automatically. Once the subject is selected, apply a layer mask or delete the background to isolate the object cleanly.
Here is a detailed step-by-step process of removing background using the quick selection tool:
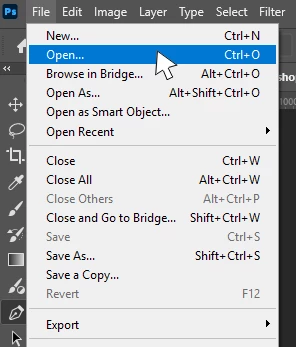
Step 1: Open the Image
- Go to the file.
- Click on Open to the file you want to edit.
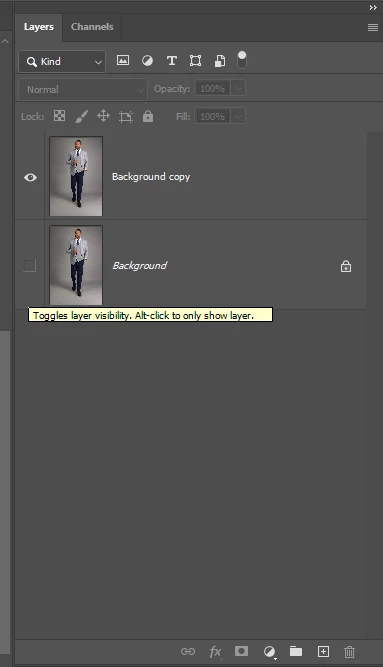
Step 2: Duplicate Layer
- Right-click on the background layer.
- Select a duplicate layer or press Ctrl + J on the keyboard.
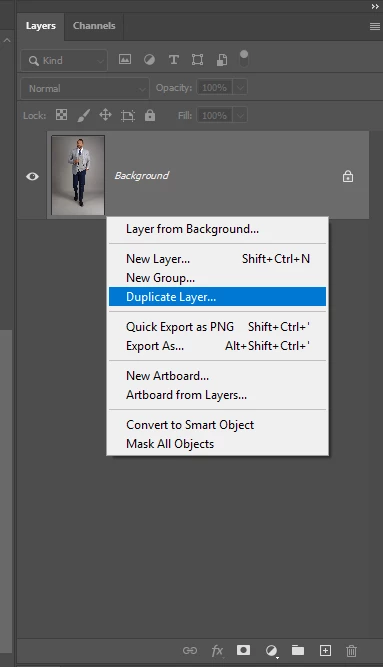
This is for safety. Hide the background layer by clicking on the eye icon beside the layer.
Step 3: Take the Tool from The Toolbar Menu
- Select the Quick Selection Tool from the toolbar.

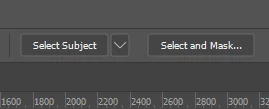
Step 4: Select Subject
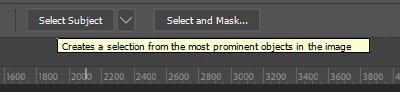
Photoshop automatically detects edges and expands the selection.
- Click Select Subject from the top menu.
- Click and drag over areas to include in the selection.
- Use Add (+) or Subtract (−) to fix over-selected or missed spots, or use hold Alt (Windows)/Option (Mac).
- Adjust the brush size to have better control over the unwanted selection.
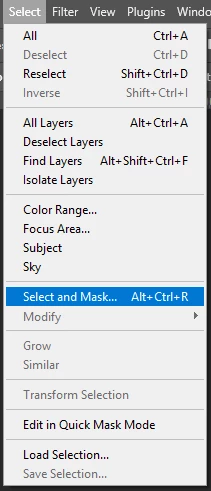
- At the top menu, click Select and Mask.
- Here you can smooth edges, feather slightly, and improve hair or fine details.


Step 5: Add Layer Mask
When you’re satisfied with the selection.
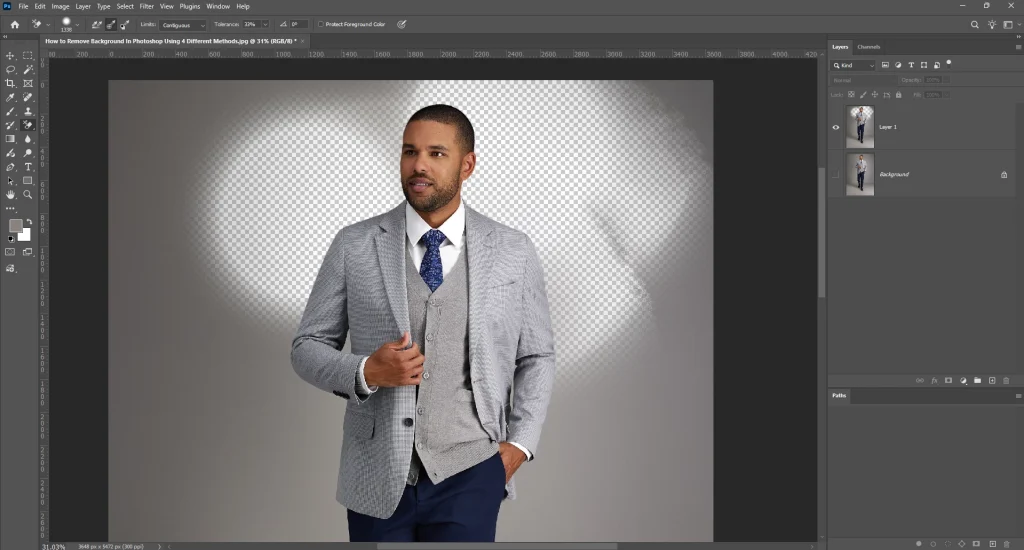
- Go to the layer panel.
- Click on the layer mask to add the mask.
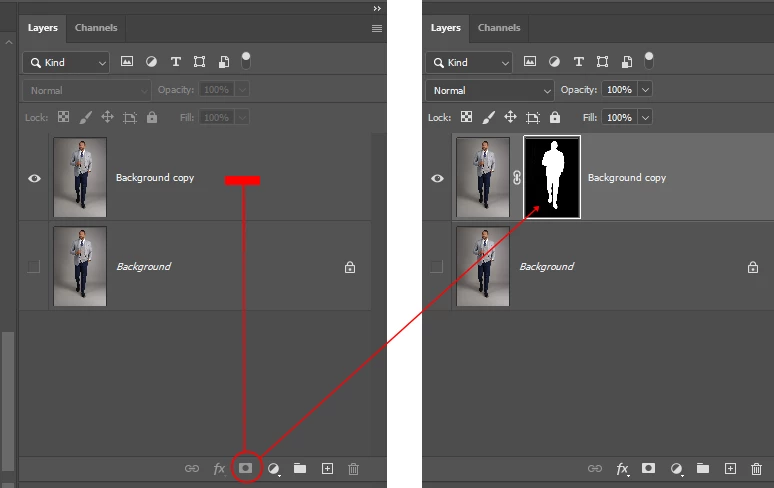

After adding the layer mask, your background will be removed, and you can add another image or color layer behind the subject to create a new background.
Step 6: Save the Work
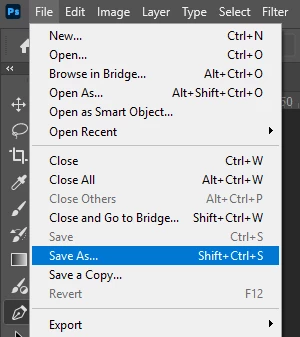
- Go to the file > click on Save As.
To save the image and ensure it’s saved in both JPEG and PSD files for future work.
Method 2: How to Remove Background Using the Magic Wand Tool
To remove background using the Magic Wand Tool in Adobe Photoshop, select the tool and click on the background area. Photoshop selects pixels with similar colors automatically. Adjust the tolerance level to control the selection and remove the background while keeping the main subject intact.
Follow these simple steps to select the background accurately and remove it using the Magic Wand Tool:
Step 1: Open the Image
- Go to the file.
- Click on Open to the file you want to edit.
Make sure the layer is unlocked by double-clicking it in the Layers panel.
Step 2: Duplicate Layer
- Right-click the layer and choose Duplicate Layer.
This preserves your original image and allows non-destructive editing.
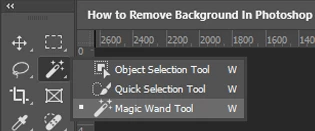
Step 3: Take the Magic Wand Tool
- Choose the Magic Wand Tool or press “W.”
- If it’s hidden under the Quick Selection Tool, click and hold to reveal it.

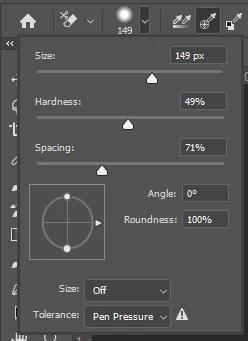
Step 4: Adjust the Options
In the top options bar, adjust the option to get a better selection.
- Tolerance: Determines the color range the tool selects. Lower values select colors closer to the clicked pixel, higher values select a broader range.
- Contiguous: Selects only adjacent pixels of similar color.
- Anti-Alias: The silicon will smooth the area and give it a natural look.
- Sample All Layers: Applies the selection across all layers if multiple exist; leave unchecked for just the active layer.

Step 5: Configure the Tool
Click on the background you want to remove.
- Hold Shift and click additional areas if the background isn’t uniform.
- Select > Modify > Expand to grow the selection slightly.
- Select > Modify > Feather (1–2 px) to smooth edges.
Step 6: Select and Mask
Once your selection is ready:
- Go to Select > Select and Mask.
- Click Invert if the subject is hidden.
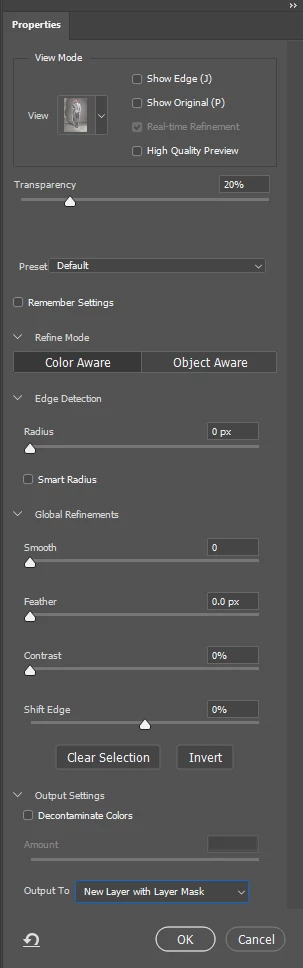
- Adjust sliders like Smooth, Feather, and Contrast to refine edges.
- From Output Settings, choose New Layer with Layer Mask and click OK.
Step 7: Refine Edges
Use a soft brush on the layer mask to clean any leftover background or smooth tricky edges, such as hair or intricate objects.
Step 6: Save the Work
- Go to File > Save As.
Save your image as a PSD file to keep the mask editable, or export as a PNG with a transparent background.
Method 3: How to Remove Background Using Background Eraser Tools
To remove background using the Background Eraser Tool in Adobe Photoshop, select the tool and brush over the background you want to erase. It samples colors and removes only the background while preserving the subject edges for precise editing.
Follow these steps to remove the background using the Eraser Tool:
Step 1: Open
- Go to the file.
- Click on Open to the file you want to edit.
- Unlock the background layer by double-clicking it in the Layers panel.
Step 2: Duplicate Layer
- Right-click the layer and select Duplicate Layer or press Ctrl + J.
- Hide the original layer for safety by clicking the eye icon.

Step 3: Take the Background Eraser Tool
From the top toolbar menu:
- Click and hold the Eraser Tool to reveal the Background Eraser Tool.
- Select it.
Step 4: Adjust the options
Configure the tool to protect your subject while erasing:

1. Sampling Options: Pick the sample every time you drag the brush. Once it picks the color you click at first, it removes only that color.
2. Background swatch: It will erase only the background color. You can give a sample of the color, and this removes that particular color only.
3. Limits Contiguous: it will only pick the pixels that are touching the pixel under the plus sign.
4 Tolerance: Determines the sensitivity of the brush, if the subject and the background are the same color, keep the tolerance level low.
5. Protect Foreground Color: Give Photoshop a sample of your foreground color, and it won’t erase that color while brushing.

Step 5: Set the Brush Size
Start brushing on the background of your image. Be careful not to brush on your subject.
Step 6: Erase the Background
- Click and drag over the background.
Photoshop removes pixels of the sampled color while preserving the subject edges. Zoom in for detailed areas and adjust brush size as needed.
Step 7: Save the Work
- Go to File > Save As.
Save a PSD to keep layers editable and a PNG if you want a transparent background.
Method 4: How to Remove Background Using Select Focus Area
To remove background using the Select Focus Area Tool in Adobe Photoshop, Photoshop automatically detects the sharpest subject in your image. This method isolates the focused object, making it easy to separate it from blurred or complex backgrounds.
Follow these steps to remove the background using the select focus area:
Step 1: Open
- Go to File > Open and open your image.
Unlock the background layer by double-clicking it in the Layers panel.
Step 2: Duplicate Layer
- Right-click the layer and select Duplicate Layer or press Ctrl + J.

Hide the original layer by clicking the eye icon so you can work safely without affecting the original image.

Step 3: Take the Tool
- Select the Quick selection or Magic Wand tool from the toolbar.
- Go to the select menu from the top bar.
- Click on the Select subject.
- If you’re satisfied with the selection, go to the layer panel and click on layer mask to add the mask.
Step 4: Select Focus Area
Photoshop will create a selection based on the area of focus in the image.
- Add (+) or subtract (−) brush to include or remove areas from the selection until the subject is properly highlighted.
Step 5: Adjust the Options
Refine the selection using the Focus Area settings:
- In-Focus Range: Move the slider to include more or less of the sharp subject.
- Show Focus Mask: Displays the selected area in red to see what’s included.
- Add/Subtract Tools: Correct areas that were missed or over-selected for a cleaner result.
Once the selection looks accurate, click OK, then go to the Layers panel and click the Layer Mask icon to remove the background.
Step 6: Save the Work
- Go to File > Save As.
Save a PSD file to keep the layers editable and export a PNG file if you need a transparent background.
Offshore Clipping Removes Image Background as Per Your Need
Offshore Clipping provides a precise background removal service as per your needs. Ensuring you have clean, professional images every time. Whether you need product photos for eCommerce, portraits, or complex compositions, their team tailors each edit to match your specifications. This ensures subjects stay intact, edges are smooth, and backgrounds are removed or replaced exactly as required, saving time and maintaining high-quality results.
Here are the key reasons to choose Offshore Clipping for image background removal:
- High Precision Editing: Professional editors carefully remove backgrounds while keeping edges sharp and natural. This ensures the subject remains clean and detailed.
- Consistent Quality: Every image is edited with a consistent standard, making your product photos or marketing visuals look uniform and professional.
- Time-Saving Solution: Outsourcing background removal saves hours of manual work. This allows businesses to focus on core tasks instead of spending time on editing.
- Supports Bulk Image Processing: Offshore Clipping can handle large volumes of images quickly. This is useful for e-commerce stores, photographers, and marketing teams.
- Customized Editing Options: Backgrounds can be removed, replaced, or made transparent based on your requirements. Editors follow your specific instructions for each image.
- Cost-Effective Service: Using a professional service often costs less than maintaining an in-house editing team while still delivering high-quality results.
FAQ’s
How do i remove a white background in Photoshop?
The most common solution to remove a white background by using Photoshop is using the Magic Wand Tool (shortcut: W) with a moderate tolerance (around 32) to select the white area, then pressing Delete.
Where is the “remove background” tool in the Photoshop 2026 version?
The remove background tool in Photoshop 2026 version stays in the Contextual Task Bar (the floating bar below your subject) or under Quick Actions in the Properties panel.
Can i remove a background for free without Photoshop?
Yes, you can remove a background for free without Photoshop with popular tools like Adobe Express, Remove.bg, or built-in smartphone features (like long-pressing a subject in iOS Photos). But the results might not always come as sharp or consistent, which may hamper marketing or advertising work. Using dedicated photo editing software or hiring expert photo editors is a rather safe option.
Does removing the background reduce image quality?
Removing background reduces image quality if you use a free app because of the lower-resolution output (allows high-res only in premium). Removing the background doesn’t reduce image quality if you are using hiring experts or using Photoshop. The process involves using layer masks to hide pixels rather than deleting them, preserving every bit of original data.