Jewelry photo editing sharpens details, enhances shine, and balances colors, making each piece look more luxurious and appealing. Professional editing removes distractions, corrects lighting, and highlights craftsmanship, creating flawless images.
These polished visuals grab attention, build trust, and encourage buyers to engage, explore, and purchase, turning ordinary photos into a powerful tool for boosting online jewelry sales.
What you’ll learn in this article
What is Jewelry Photo Editing?
Jewelry photo editing is a specialized process of enhancing, cleaning, and refining jewelry images using software like Adobe Photoshop. It focuses on correcting flaws and improving visual quality, so each piece looks sharp, bright, and high-end.
This type of editing is widely used for online stores, catalogs, advertisements, and social media. When jewelry photos look cheap, the product feels cheap. Clean, professional edits build trust and help sell the piece.
The main goal is simple. Make the jewelry look flawless while keeping it true to life.
A Jewelry Photo Editor Typically Handles:
- Removing dust, scratches, and smudges
- Adjusting brightness, contrast, and color so metals look natural
- Enhancing diamonds and gemstones for realistic sparkle, not glare
- Correcting reflections and balancing shadows
- Creating clean backgrounds, often pure white or transparent
- Ensuring the final image is polished without being over-edited
Why Jewelry Photo Editing is Important?
Jewelry photo editing is important because it transforms raw images into polished, eye-catching visuals. High-quality photos grab attention, build trust, and directly influence buying decisions. Since customers cannot touch or try jewelry online, images must do the selling.
The main purpose of jewelry photo editing and retouching is to correct imperfections like dust, scratches, uneven lighting, and color issues while keeping the product true to life. It also helps maintain a consistent and professional look across an entire e-commerce platform.
Here are the Key Reasons Why Jewelry Photo Editing Matters:
- Enhances Visual Appeal and Sparkle: Careful editing brings out the brilliance of metals and gemstones, making jewelry look vibrant and premium without appearing overdone.
- Removes Visible Flaws: Dust, scratches, fingerprints, and tiny marks are cleaned up to present a flawless final image.
- Builds Customer Trust and Increases Sales: Clear, realistic, and professional photos make buyers feel confident about what they are purchasing, which leads to higher conversions.
- Maintains Brand Consistency: Consistent lighting, colors, and backgrounds help create a unified brand image across product pages and marketing channels.
- Highlights Fine Details: Editing sharpens edges and enhances textures; small design elements, settings, and stone cuts are easy to see.
- Corrects Exposure and Lighting: Proper brightness and balanced lighting ensure the jewelry looks natural, well-defined, and visually appealing on any screen.
Why is Jewelry Photo Editing Important for Fashion Photo Editing?
Jewelry photo editing is important for fashion photo editing because jewelry completes the look. If it looks dull or messy, the entire outfit suffers and create a impactful visual that increases sales.
Fashion photography is about style, mood, and detail. Jewelry plays a key role in that story. Raw photos often fail to capture shine, texture, and balance. Editing brings those elements back without stealing focus from the model or clothing.
Here’s Why It Matters in Fashion Photo Editing:
- Keeps the Look Polished: Clean, refined jewelry images elevate the overall fashion shot and prevent small flaws from distracting the viewer.
- Balances Jewelry with Outfit and Model: Editing controls brightness, reflections, and contrast so jewelry enhances the outfit instead of overpowering it.
- Maintains Color Accuracy: Correct colors ensure metals and gemstones match the brand’s aesthetic and work with the fashion palette.
- Highlights Design Without Overdoing It: Subtle enhancement adds sparkle and clarity while keeping the jewelry natural and wearable.
- Supports Brand and Style Consistency: Consistent jewelry edits help fashion brands maintain a cohesive visual identity across campaigns, lookbooks, and social media.
- Improves Editorial and Commercial Impact: Well-edited jewelry adds a luxury feel, making fashion images more striking and market-ready.
Why is Jewelry Photo Editing Important for Wedding Photo Editing?
Jewelry photo editing is important for wedding photo editing because jewelry carries emotion, meaning, and memory. Rings, necklaces, bangles, and heirloom pieces are not just accessories. They tell the story of the day.
Wedding photos are meant to last a lifetime. Small flaws like dust, dull shine, or harsh reflections can distract from moments that matter. Editing removes those distractions while keeping everything real and timeless.
Here’s Why Jewelry Photo Editing Matters in Wedding Photography:
- Preserves Emotional Value: Wedding jewelry often has deep personal meaning. Clean editing ensures these pieces look as special as they felt on the day.
- Enhances Details in Close-Up Shots: Rings, hand poses, and bridal portraits need sharp details. Editing brings out fine textures and stone clarity.
- Maintains a Soft, Elegant Look: Proper editing balances sparkle and softness so jewelry complements the romantic mood, not overpowering it.
- Corrects Lighting and Reflections: Wedding lighting can be unpredictable. Editing fixes uneven exposure and unwanted reflections without changing the moment.
- Keeps Photos Timeless: Natural, subtle edits prevent jewelry from looking over-processed or trendy years later.
- Completes the Wedding Story: Well-edited jewelry ties together the dress, makeup, and emotions, making the album feel complete.
Why is Jewelry Photo Editing Important for Commercial Photo Editing?
Jewelry photo editing is important for commercial photo editing because it directly affects how a product is perceived and how well it sells. In commercial work, images are not just visuals. They are sales tools.
Raw jewelry photos often show dust, dull metal, harsh reflections, and uneven lighting. In a commercial setting, those flaws lower perceived value. Editing removes them and presents the product at its best while keeping it realistic.
Here’s Why Jewelry Photo Editing Matters in Commercial Photography:
- Strengthens Product Appeal: Clean, sharp edits make jewelry look premium and desirable, which is essential for ads, catalogs, and e-commerce.
- Builds Brand Trust: Consistent, high-quality images signal professionalism. Customers trust brands that present products clearly and honestly.
- Increases Conversion Rates: Well-edited jewelry images reduce hesitation by showing accurate details, sparkle, and finish, helping buyers decide faster.
- Maintains Visual Consistency: Commercial campaigns require uniform lighting, color, and background across many images. Editing ensures consistency at scale.
- Highlights Craftsmanship and Value: Editing enhances fine details like stone cuts, settings, and metal texture, reinforcing the product’s worth.
- Prepares Images for Multiple Platforms: Commercial photos must work across websites, print ads, social media, and marketplaces. Editing ensures each image meets platform standards.
How Do You Do Jewelry Photo Editing?
Jewelry photo editing is a detailed process that involves cleaning, enhancing, and refining jewelry images using professional jewelry photo editing tools such as Adobe Photoshop, Lightroom, and AI-based editing software. These tools help transform raw jewelry photos into visuals that look bright, clean, sharp, and luxurious.
The goal is not to change the jewelry, but to present it in its best possible form by correcting flaws, improving clarity, and enhancing details while keeping everything realistic.
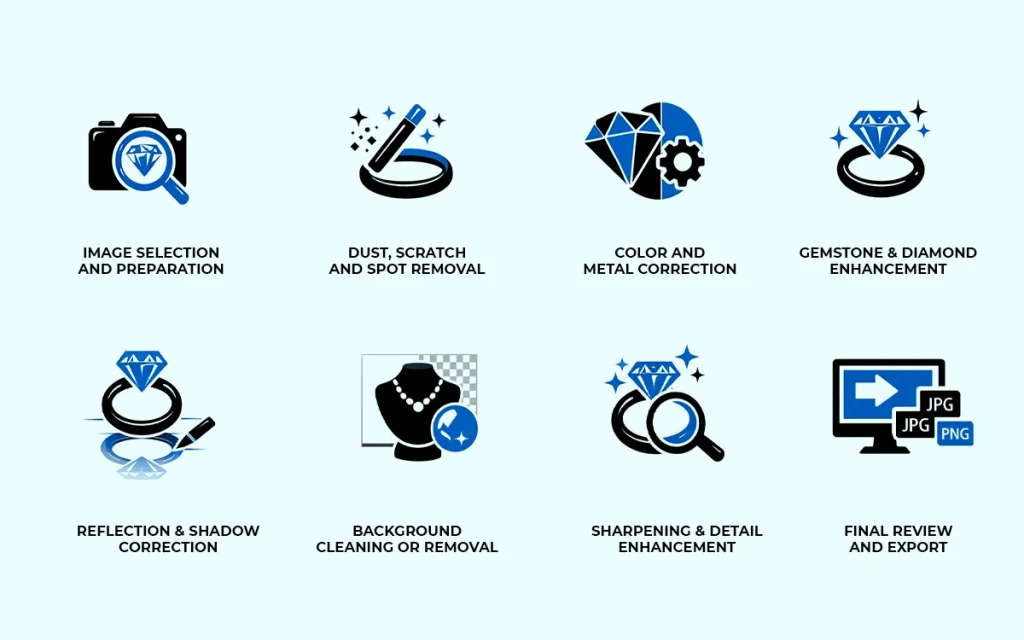
Below are the Essential Steps Involved in Jewelry Photo Editing:
1. Image Selection and Preparation: Choose the sharpest image with proper focus and lighting. A strong base image makes precise editing possible.
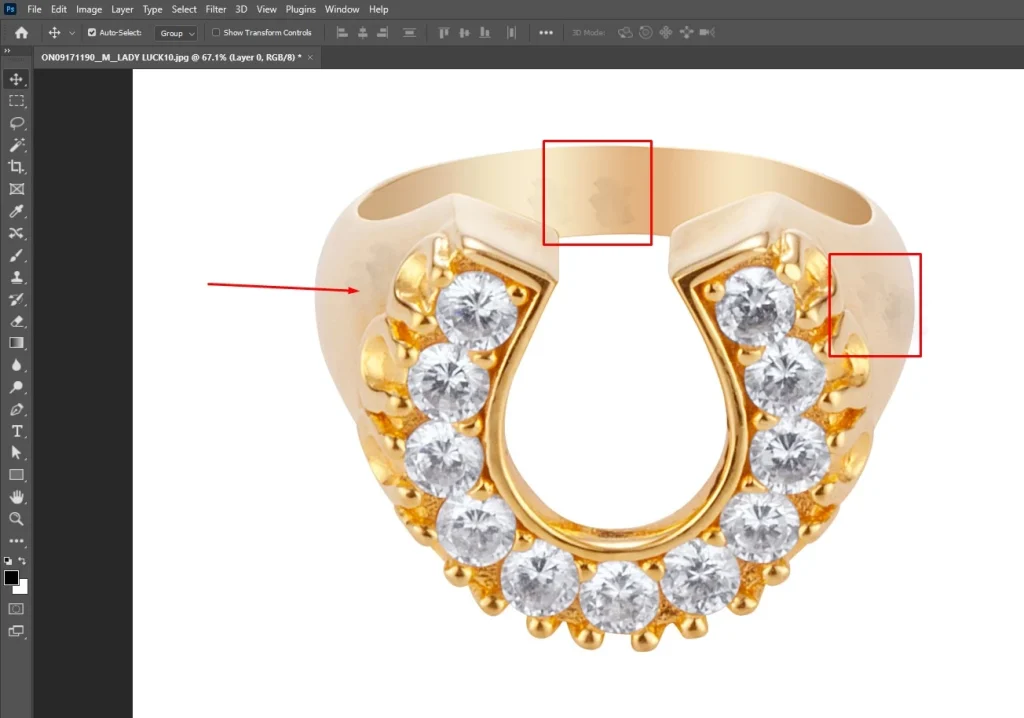
2. Dust, Scratch, and Spot Removal: Remove dust, scratches, fingerprints, and tiny imperfections that are visible in high-resolution jewelry photos.
3. Color and Metal Correction: Adjust white balance, brightness, contrast, and tones so metals and gemstones appear natural and accurate.
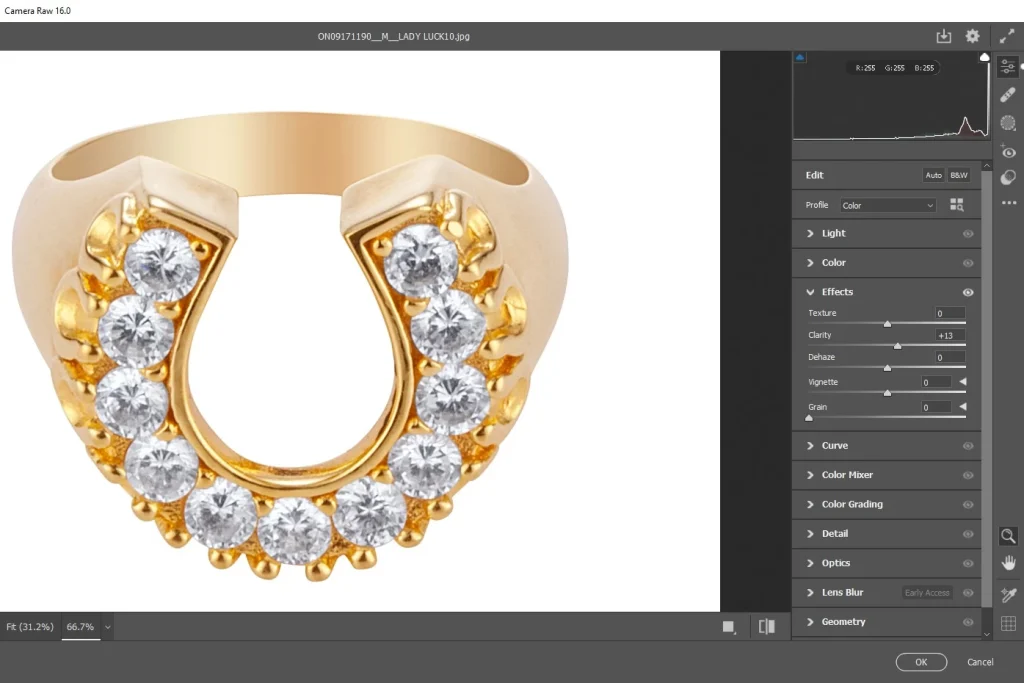
4. Gemstone and Diamond Enhancement: Enhance clarity and sparkle carefully to highlight brilliance without making stones look artificial.
5. Reflection and Shadow Correction: Control harsh reflections and balance shadows to give the jewelry depth and dimension.
6. Background Cleaning or Removal: Create a clean background, often white or transparent, to keep the focus on the jewelry.
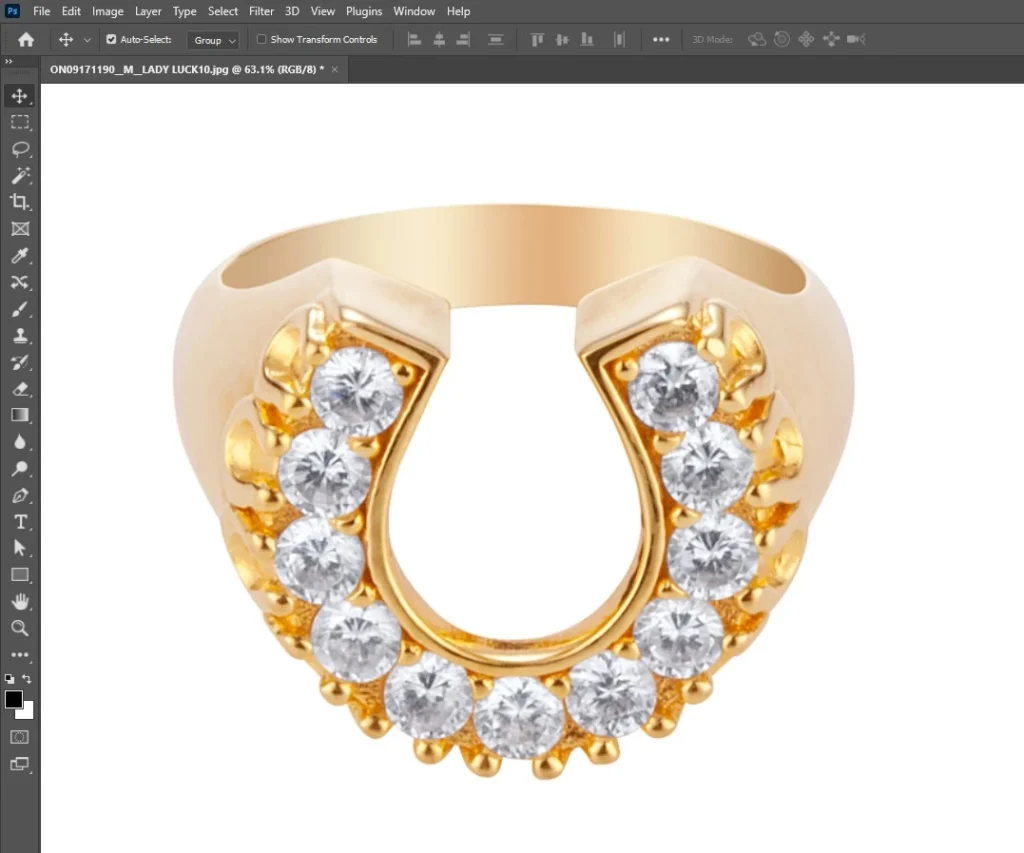
7. Sharpening and Detail Enhancement: Apply subtle sharpening to highlight fine craftsmanship, textures, and stone settings.
8. Final Review and Export: Check the image at full size for realism and consistency, then export it in the correct format for web, print, or advertising.
How Do You Do Jewelry Clipping Path?
To do jewelry clipping path, the editor needs to follow a precise process used to cut jewelry out from its background so it can be placed on any background cleanly. Because jewelry has complex shapes, curves, and tiny details, this work is done by hand, not with one-click tools.
Below are the Essential Steps Involved in Jewelry Clipping Path:
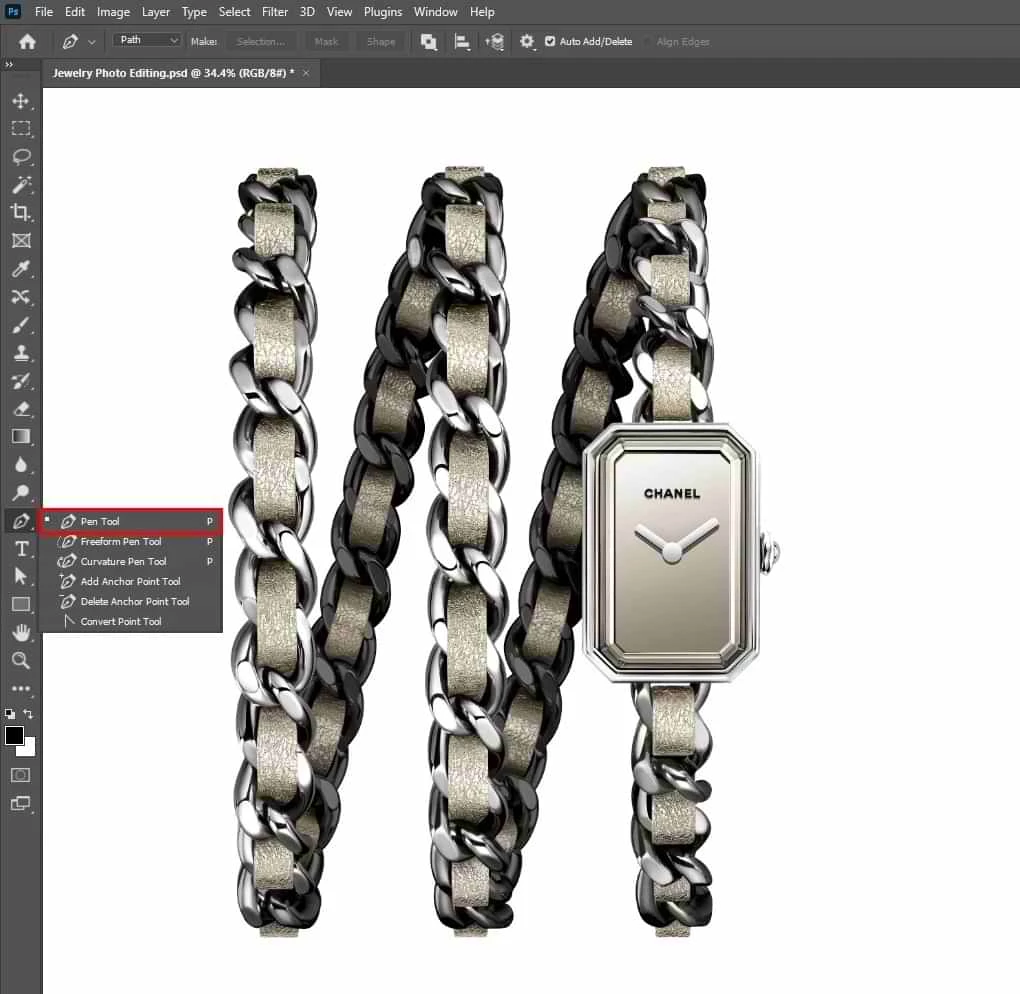
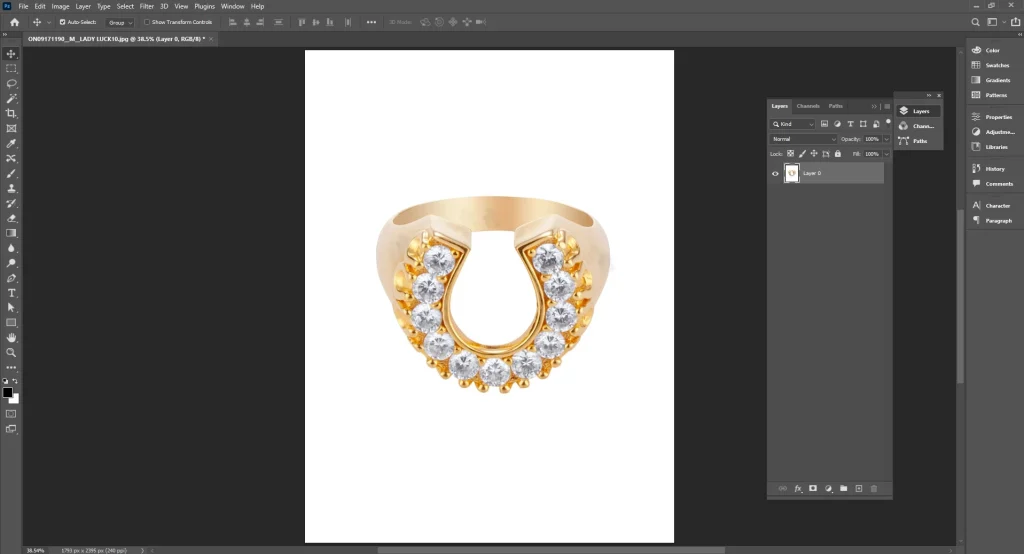
Step 1: Open the Image and Zoom In
Start in Adobe Photoshop. Zoom in close. Jewelry edges are small and detailed, so precision matters.
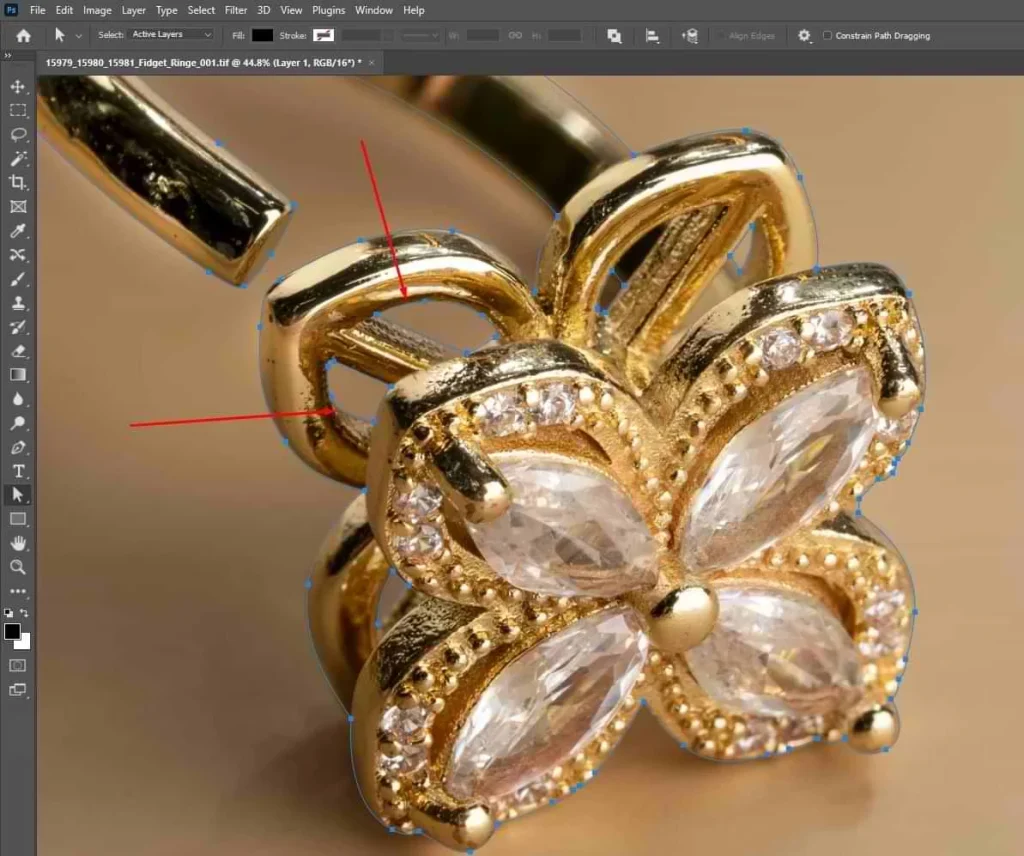
Step 2: Use the Pen Tool
Create a path around the jewelry using the Pen Tool. Follow every curve, prong, and edge carefully. Avoid shortcuts. Automatic tools don’t work well for jewelry.
Step 3: Handle Complex Areas
Pay extra attention to stones, chains, holes, and sharp corners. Smooth curves should stay smooth. Hard edges should stay crisp.
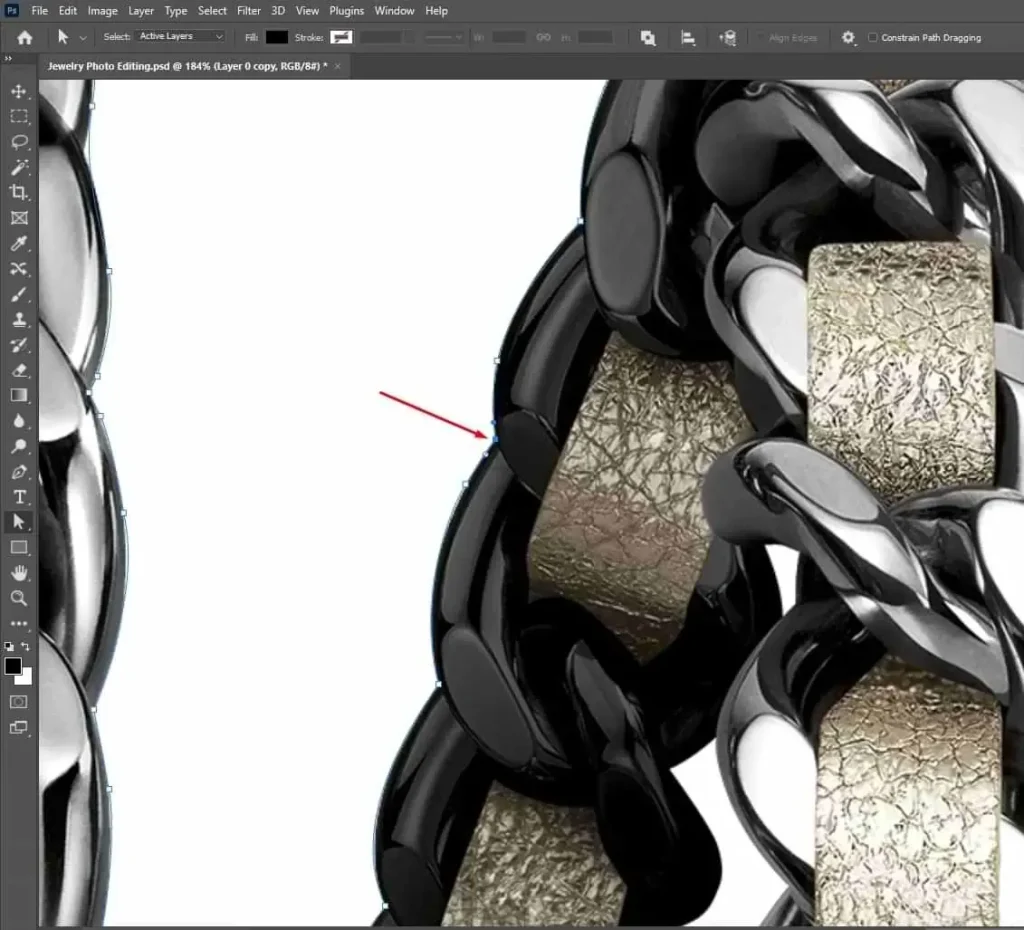
Step 4: Close the Path Properly
Complete the path by connecting the final anchor point to the starting point. A clean, closed path is essential.
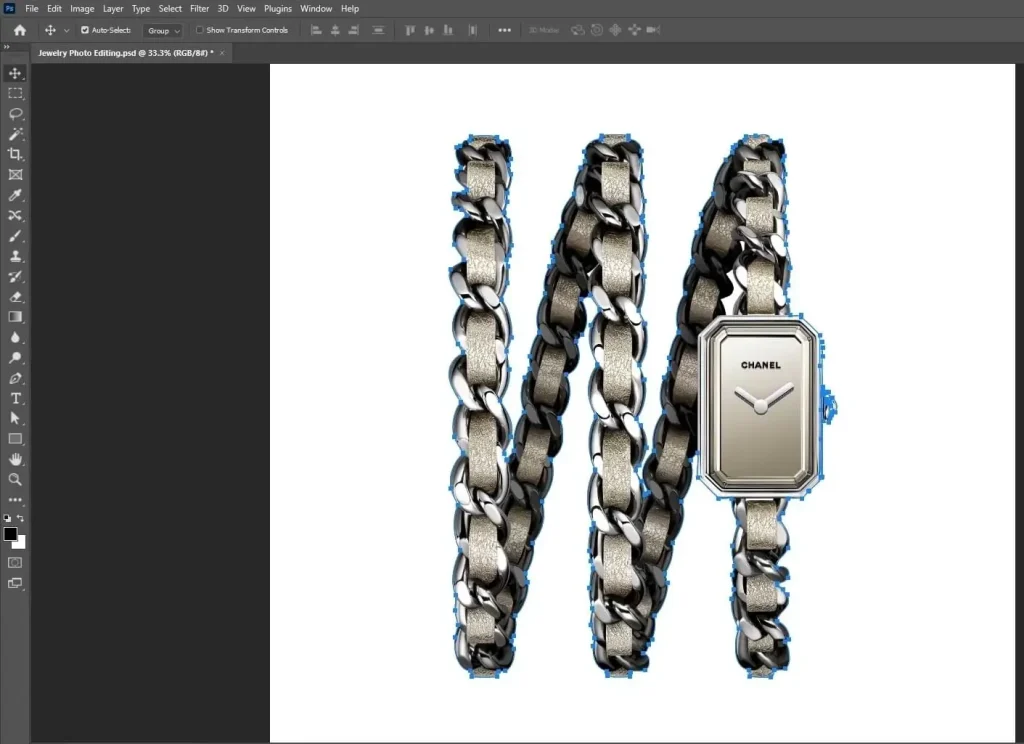
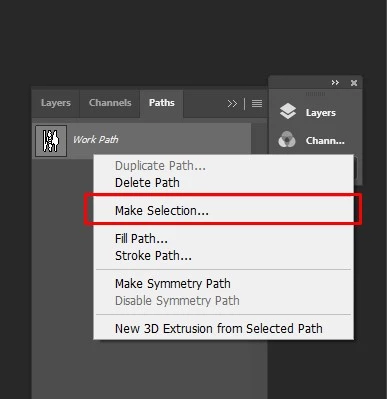
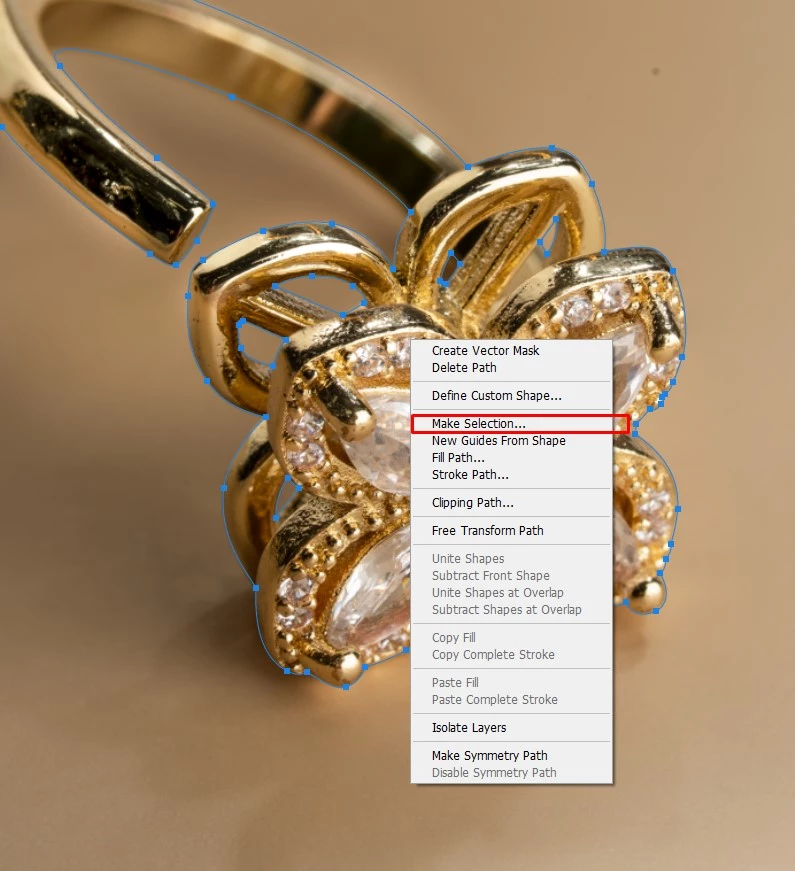
Step 5: Convert Path to Selection
Turn the path into a selection. Check the edges to make sure nothing is cut off or included by mistake.
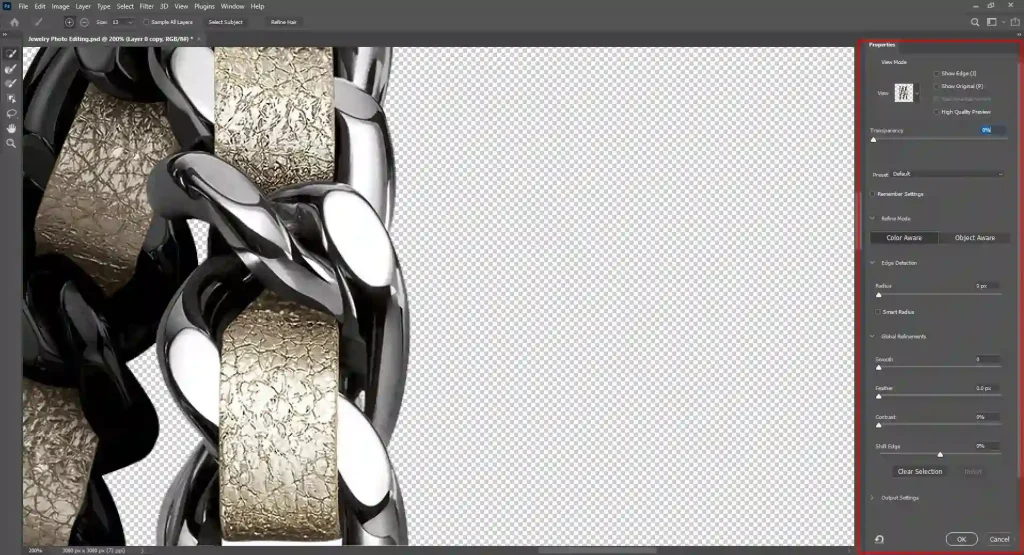
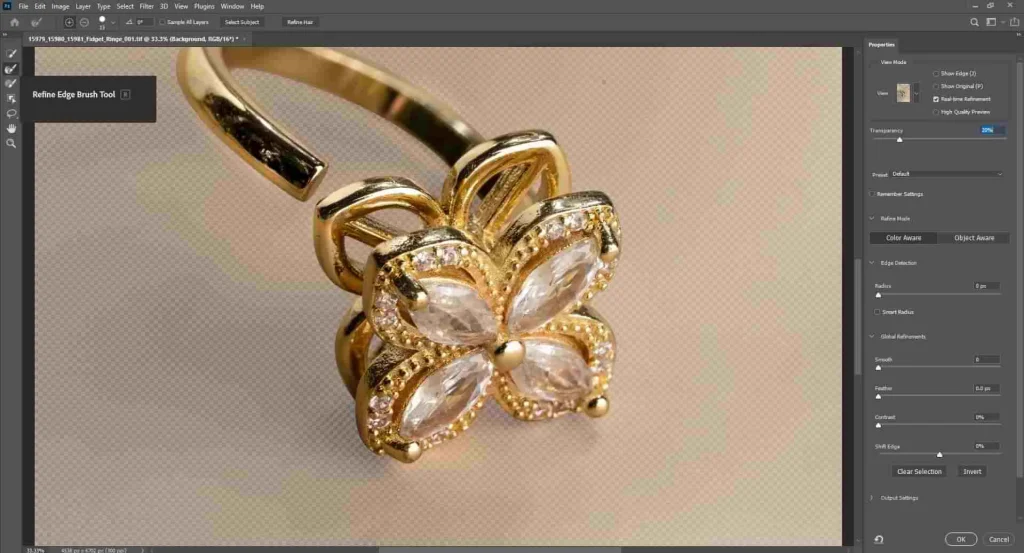
Step 6: Refine the Edges
Make small adjustments to ensure the edges look natural, not jagged or rough.
Step 7: Remove or Replace the Background
Once the clipping path is perfect, remove the background or place the jewelry on a white, transparent, or any custom background.
Step 8: Final Check and Save
Zoom in again and inspect all edges. Save the file in the required format, such as PNG, PSD, or TIFF.
How Do You Do Jewelry Background Removal?
The jewelry background removal process starts with separating jewelry from its background so it looks clean and professional. Because jewelry has fine edges and reflective surfaces, this work needs precision, not shortcuts.
Below are the Essential Steps Involved in Jewelry Background Removal:
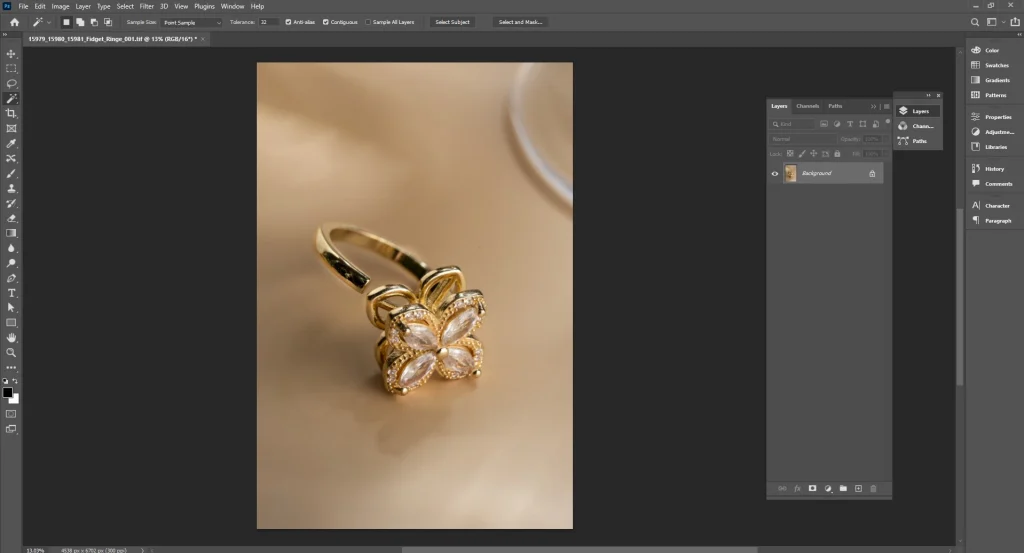
Step 1: Open the Image and Inspect It
Open the photo in Photoshop. Zoom in and study the edges, reflections, and tiny details.
Step 2: Choose the Right Method
For most jewelry, use a manual clipping path with the Pen Tool. For soft shadows or complex edges, combine it with layer masks. Automatic tools rarely work well for jewelry.

Step 3: Create a Precise Path
Carefully trace around the jewelry, following every curve, prong, and stone setting. Accuracy here defines the final quality.
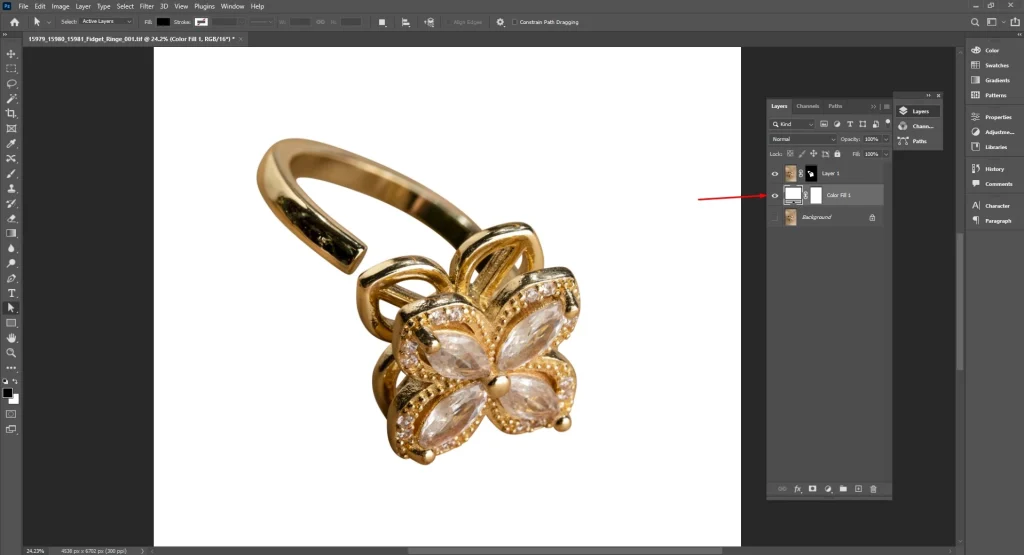
Step 4: Convert Path to Selection
Turn the path into a selection and apply it to a layer mask. This keeps the original image safe and editable.
Step 5: Refine Edges and Details
Clean rough edges, fix cut areas, and restore tiny gaps or holes so the jewelry looks natural.
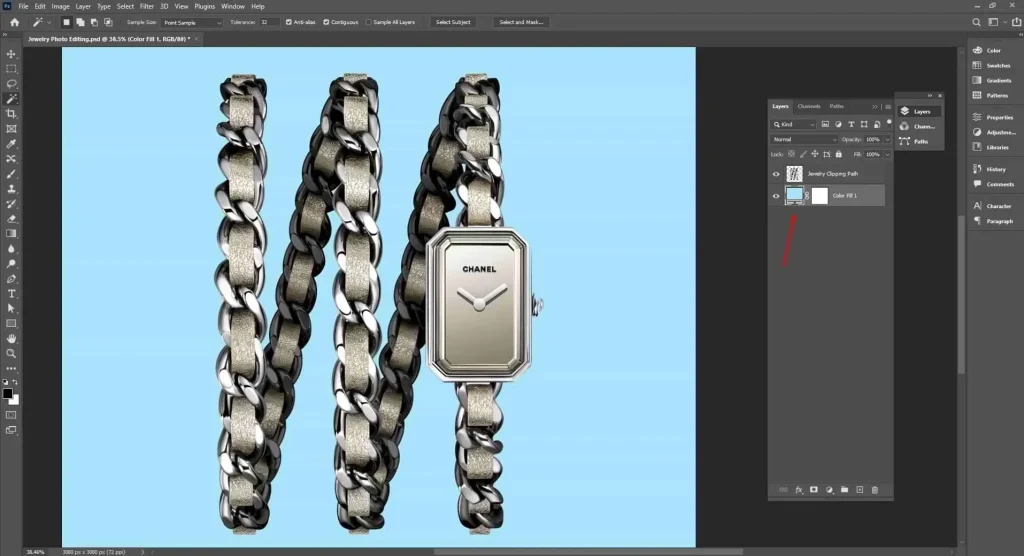
Step 6: Remove or Replace the Background
Delete the background or replace it with white, transparent, or a custom color based on where the image will be used.
Step 7: Fix Shadows and Reflections
Add or adjust natural shadows so the jewelry doesn’t look flat or floating.

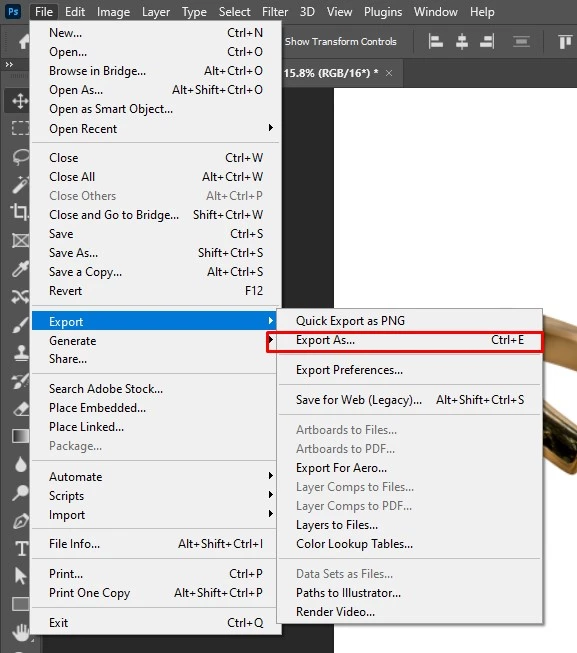
Step 8: Final Review and Export
Zoom in for a final check, then export in the required format like PNG, PSD, or JPEG.
How Do You Do Jewelry Photo Retouching?
Jewelry photo retouching is the process of refining and correcting jewelry images using professional jewelry photo editing software such as Adobe Photoshop, along with other photo-editing tools. The goal is to remove flaws, enhance details, and present the jewelry in a clean, sharp, and high-end way without changing its true appearance.
Below are the Essential Steps Involved in Jewelry Photo Retouching:
Step 1: Start with a High-Quality Image
Select a sharp photo with proper lighting and focus. Even the best tools, including Photoshop, work best with a strong base image.
Step 2: Remove Dust and Scratches
Using Photoshop tools like the Healing Brush and Clone Stamp, remove dust, scratches, fingerprints, and small surface flaws.
Step 3: Smooth Metal Surfaces
Refine metal areas to reduce uneven texture while keeping the natural shine and grain of the metal intact.
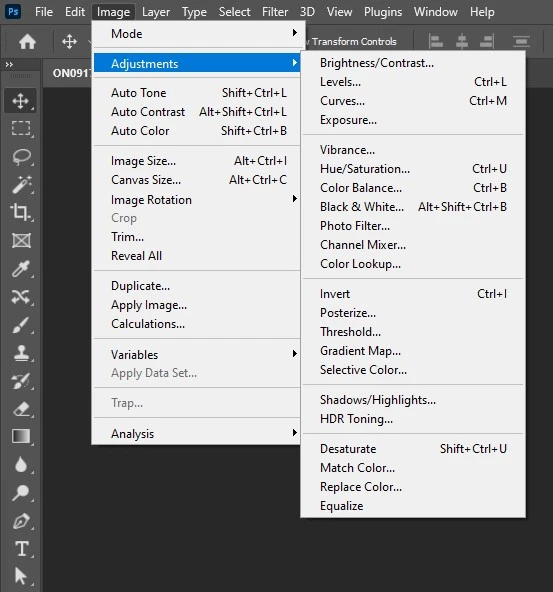
Step 4: Correct Color and Tone
Adjust white balance, brightness, contrast, and color levels in Photoshop so metals and gemstones look accurate and realistic.
Step 5: Enhance Diamonds and Gemstones
Increase clarity and sparkle carefully using layer adjustments, ensuring stones look brilliant but not over-edited.
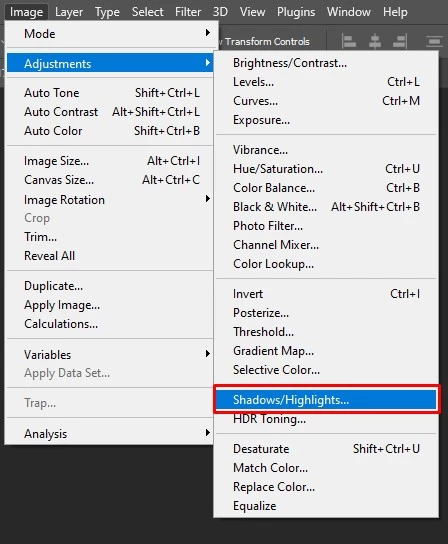
Step 6: Fix Reflections and Highlights
Control harsh reflections and balance highlights to maintain depth and shape.
Step 7: Sharpen Fine Details
Apply controlled sharpening to edges, prongs, and stone cuts to emphasize craftsmanship.
Step 8: Final Review and Export
Review the image at full resolution, then export it in the required format for e-commerce, print, or advertising.
How Do You Do Jewelry Product Drop Shadow?
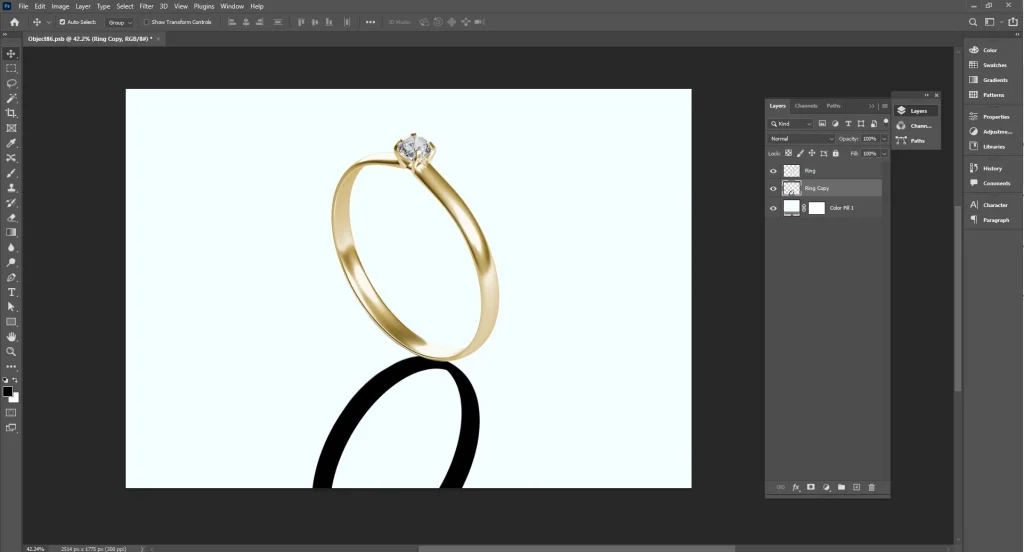
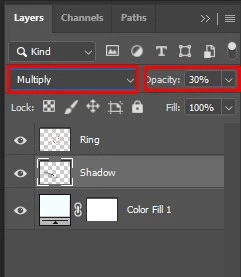
Jewelry product drop shadow is created in Adobe Photoshop by duplicating the jewelry layer, transforming it, and placing it beneath the original image. The shadow is softened using Gaussian Blur, blended with Multiply mode, and refined with masks. Opacity and direction are adjusted so the shadow appears natural and only where the jewelry touches the surface.
Below are the Essential Steps Involved in Jewelry Product Drop Shadow:
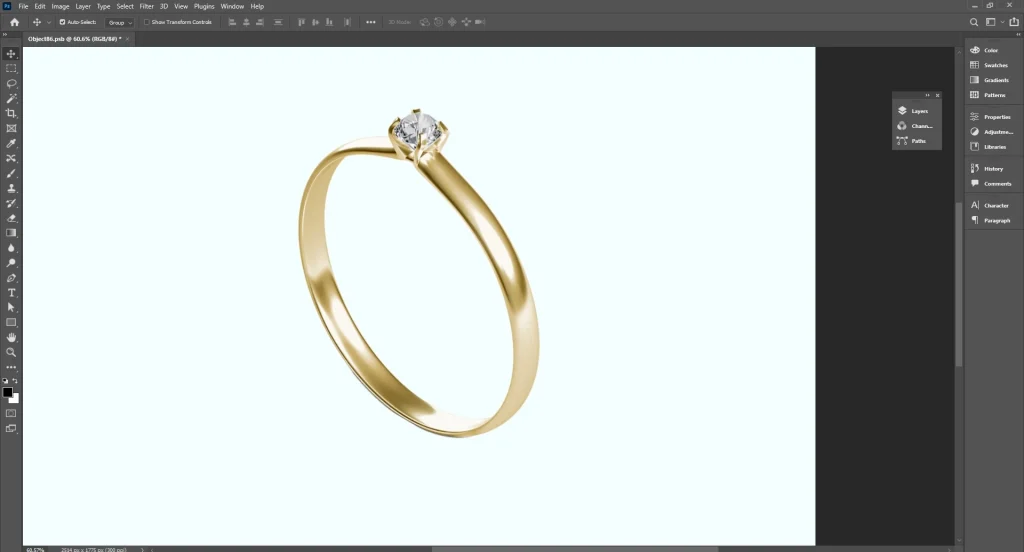
Step 1: Start with a Clean Cut-Out
Make sure the jewelry is already separated from the background with clean edges. Shadows come after clipping or background removal.
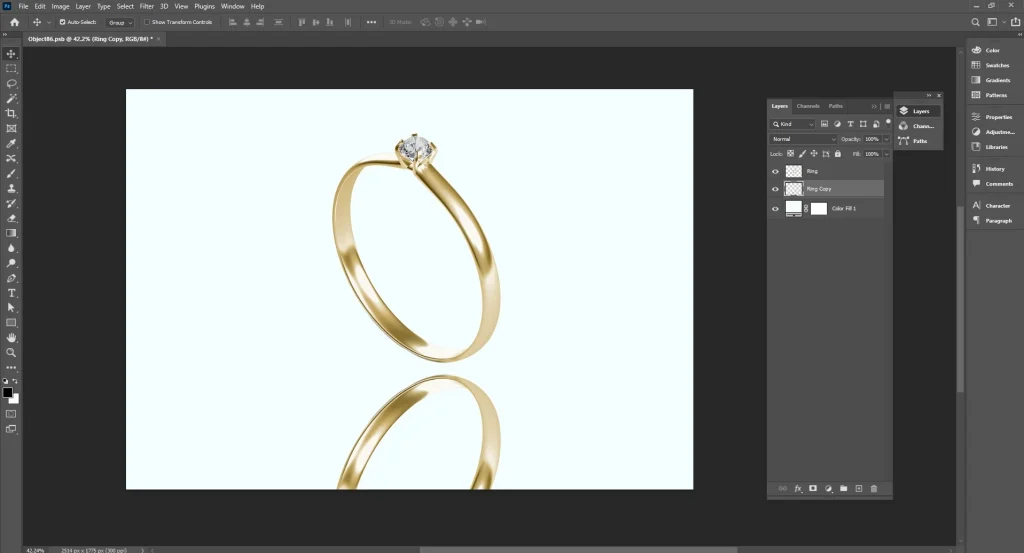
Step 2: Duplicate the Jewelry Layer
Create a copy of the jewelry layer and place it underneath the original. This layer will act as the base for the shadow.

Step 3: Transform the Shadow Shape
Flip or distort the duplicated layer so it follows the direction of the light source. Shadows should extend away from the jewelry, not surround it evenly.
Step 4: Darken the Shadow
Fill or adjust the duplicated layer so it appears darker than the background. Keep it subtle. Heavy shadows look fake.
Step 5: Soften the Edges
Apply blur to remove hard edges. Jewelry shadows should be soft and smooth, especially on flat surfaces.
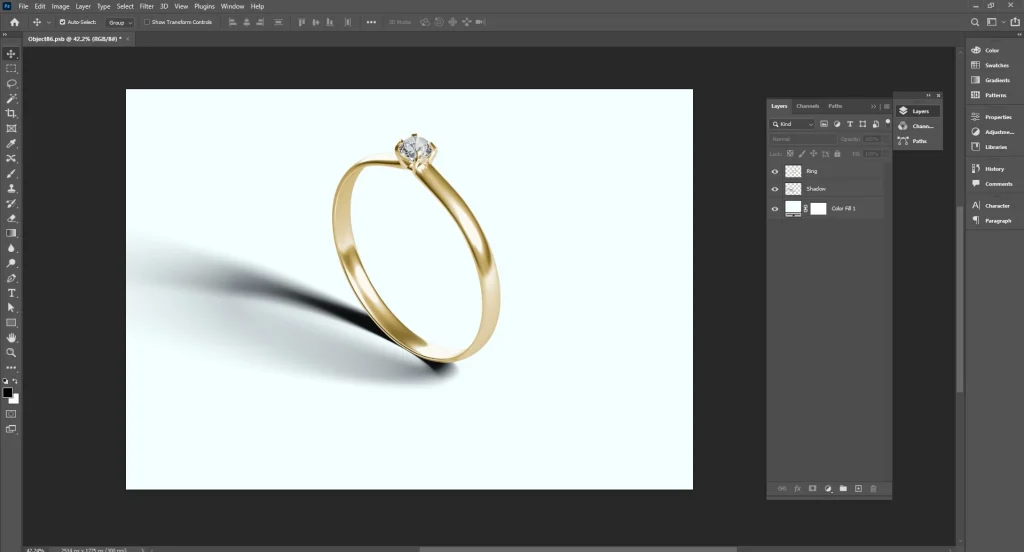
Step 6: Set the Blend Mode
Change the layer blend mode so the shadow blends naturally with the background. Reduce opacity until it looks realistic.
Step 7: Refine with Layer Masks
Use masks to remove unwanted shadow areas. The strongest shadow should appear where the jewelry touches the surface and fade outward.
Step 8: Final Review
Zoom out and check the balance. The shadow should support the product, not steal attention.
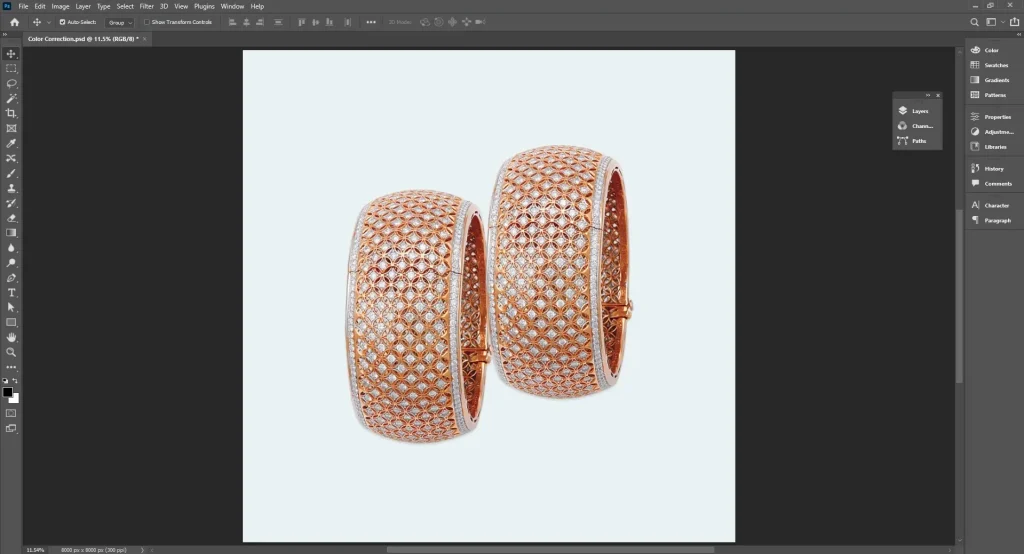
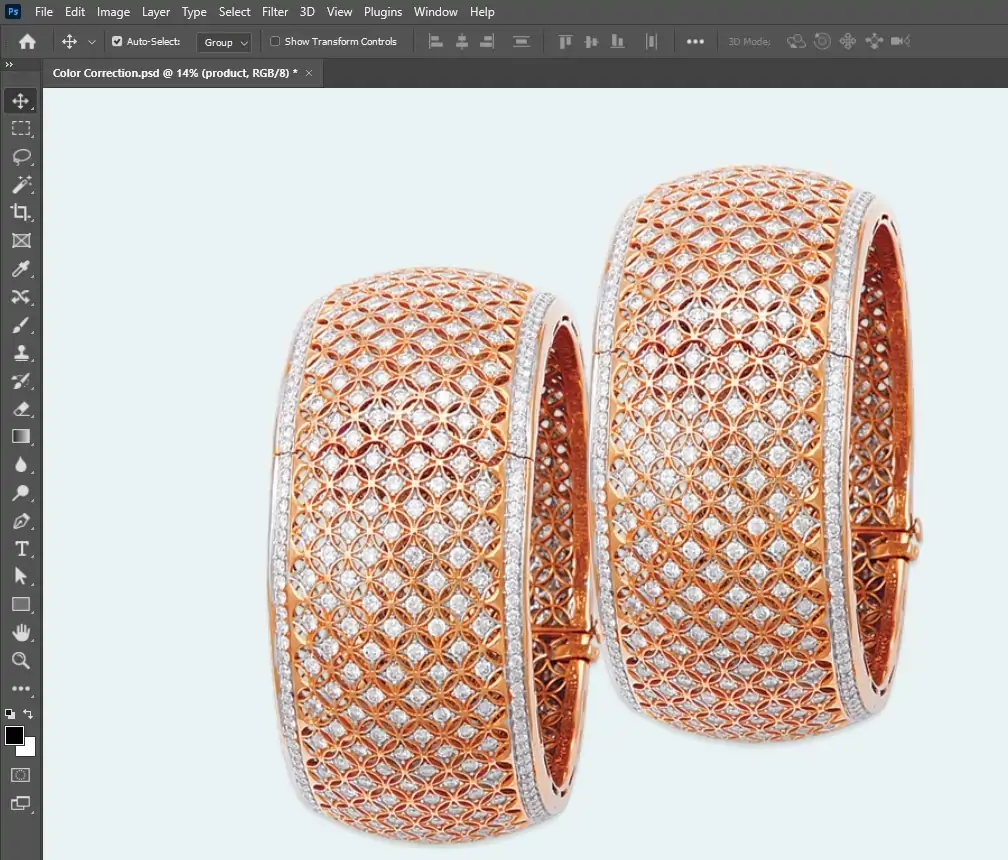
How Do You Do Color Correction on a Jewelry Product?
The color correction process for jewelry product photo editing begins by removing unwanted color casts, correcting white balance, and refining saturation using professional software such as Adobe Photoshop or Lightroom. This process ensures metals and gemstones appear accurate, natural, and visually consistent, helping the jewelry look true to life across all product images.
Below are the Essential Steps Involved in Color Correction on A Jewelry Product
Step 1: Open and Inspect the Image
Start by opening the jewelry photo and examining it closely. Look for color casts, uneven tones, or lighting issues that make metals or gemstones look dull or inaccurate.
Step 2: Correct White Balance
Adjust the white balance to remove unwanted color tints caused by lighting. This step ensures that gold, silver, platinum, and gemstones appear as they do in real life.
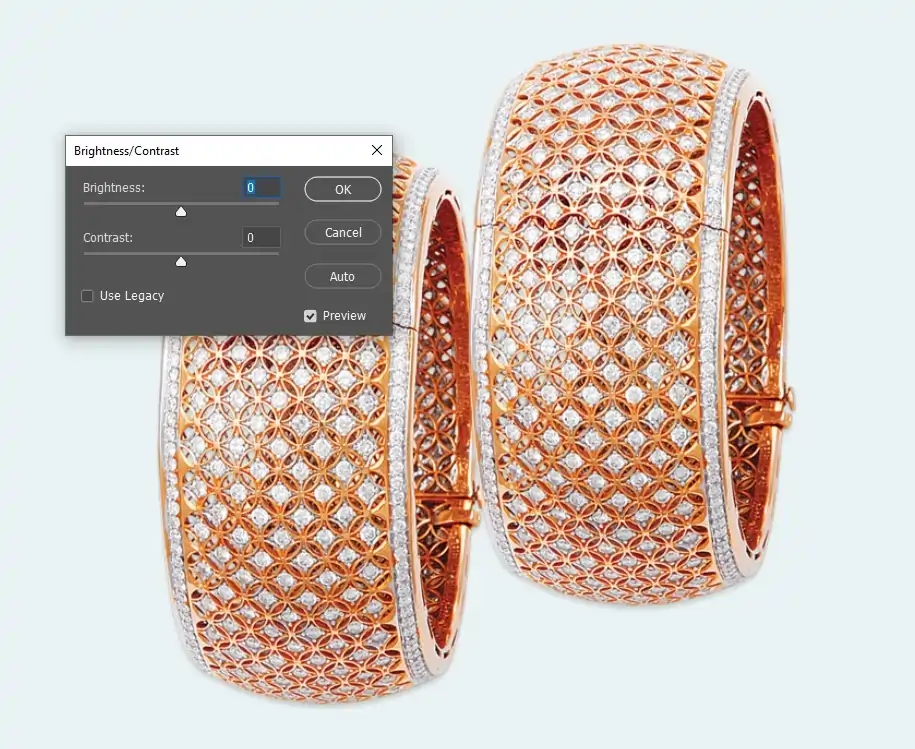
Step 3: Adjust Exposure and Contrast
Balance brightness and contrast to enhance details. Proper exposure ensures highlights aren’t blown out, and shadows reveal textures and edges of stones and metalwork.
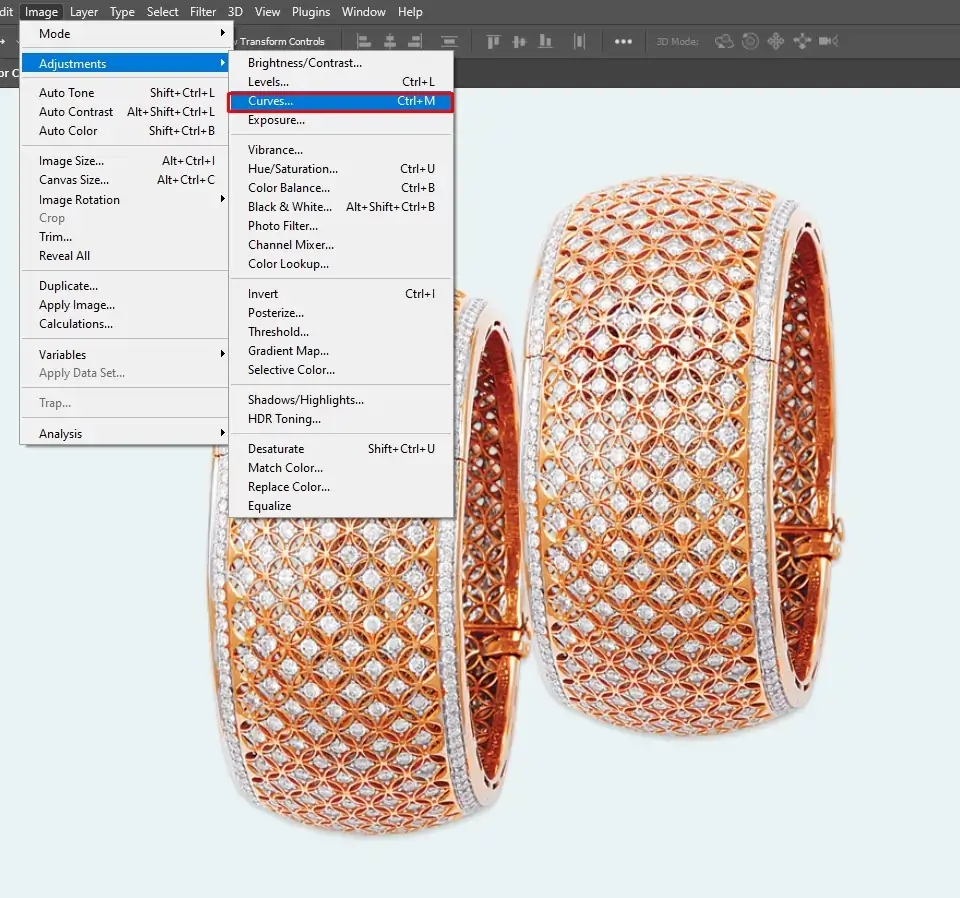
Step 4: Refine Metal Tones
Use selective color adjustment or curves to perfect metal shades. For example, make gold richer, silver brighter, and platinum neutral, while keeping the surface texture natural.
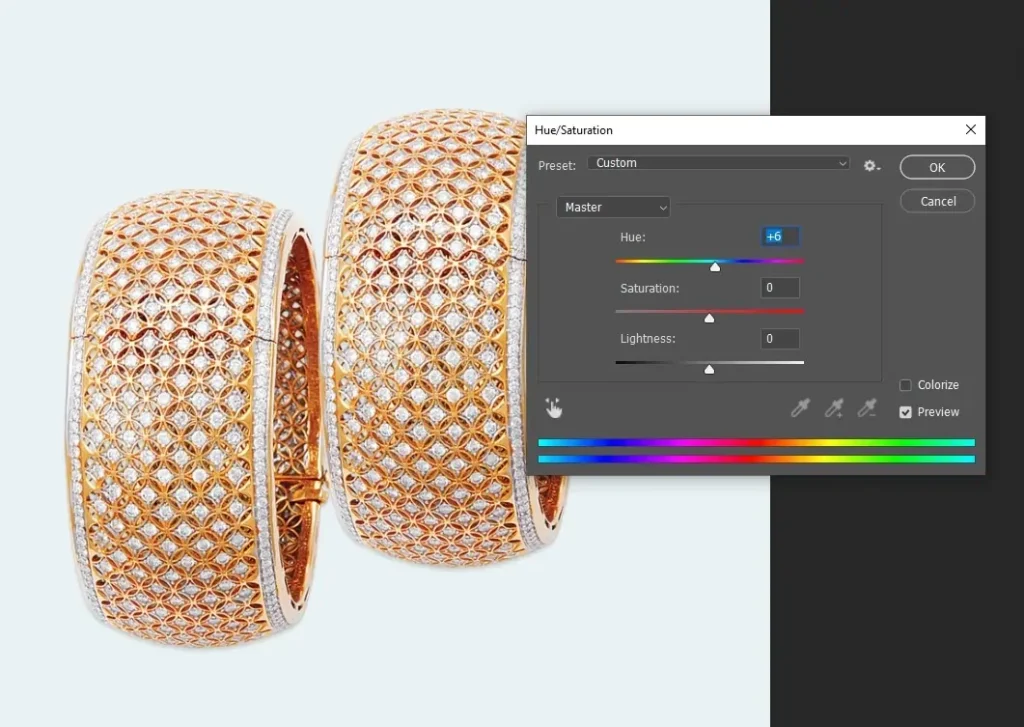
Step 5: Enhance Gemstone Colors
Carefully tweak hue, saturation, and vibrance to bring out the natural color of diamonds, rubies, sapphires, or other stones. Avoid over-saturation, which makes the product look fake.
Step 6: Balance Highlights and Shadows
Control overexposed areas and lift shadows where needed to maintain depth, sparkle, and realistic reflection on gemstones and metal surfaces.
Step 7: Match Consistency Across Images
For e-commerce or catalogs, ensure all jewelry images in a collection have consistent color, brightness, and tone. This creates a professional and cohesive look.
Step 8: Final Review and Export
Zoom in to inspect details and ensure colors look natural on different screens. Save the corrected image in the required format for web, print, or advertising.
How to Choose the Best Jewelry Photo Editing Company?
To choose the best jewelry photo editing company, consider key criteria such as specialized expertise in jewelry editing, a strong portfolio with high-resolution before-and-after examples, the availability of free trials, fast turnaround times (24–48 hours), affordable pricing, and strict confidentiality in handling your data.
Below Are the Essential Steps to Evaluate and Select the Best Jewelry Photo Editing Company:
Step 1: Identify Your Editing Needs
Determine exactly what you need: background removal, retouching, color correction, shadow creation, or full jewelry enhancement. Knowing your requirements helps you find a company that specializes in those services.
Step 2: Look for Jewelry-Specific Experience
Editing jewelry is highly detailed because of reflections, gemstones, and metal textures. Choose a company with proven experience in jewelry editing, rather than general photo editing.
Step 3: Review Their Portfolio
Examine sample work or case studies. Pay attention to edge precision, color accuracy, natural shine, sparkle in gemstones, and overall consistency across multiple products.
Step 4: Evaluate Quality and Consistency
High-quality work must be consistent across all images. Check if their previous clients have uniform results in bulk orders; consistency is key for e-commerce catalogs and advertising.
Step 5: Understand Their Tools and Techniques
Ask which software they use: Adobe Photoshop, Lightroom, or specialized AI tools. Advanced software ensures professional results like precise clipping paths, retouching, and color correction.
Step 6: Check Turnaround Time
Jewelry editing is detail-oriented. Ensure the company can meet your deadlines without compromising quality. Ask for average delivery times for standard batches.
Step 7: Look for Customization Options
Your brand may need specific styles, pure white backgrounds, soft drop shadows, reflections, or high-end glamour retouching. The company should be able to adjust its workflow to match your brand’s aesthetic.
Step 8: Evaluate Pricing vs. Value
Compare pricing among several companies. Look beyond cost, consider the quality, speed, and included services to determine the best value for your investment.
Step 9: Read Client Reviews and Testimonials
Research what past clients say about reliability, professionalism, and communication. Consistent positive feedback is a strong indicator of quality service.
Step 10: Check Revision and Support Policies
Good companies offer revisions if edits don’t meet your expectations. Make sure their revision policy is clear, and that support is responsive.
Step 11: Test with a Sample Project
Before committing to bulk orders, run a test project. Evaluate the results for accuracy, natural look, and attention to detail.
Step 12: Final Decision and Onboarding
Once satisfied, discuss workflow, file formats, and delivery schedules. Clear communication upfront ensures smooth long-term collaboration.
Where to Outsource Jewelry Photo Editing Services?
The top companies to outsource jewelry photo editing services include Clipping Path Studio, Color Expert International, PicsMatic, Studio Metrodesk, and Flatworld Solutions. These companies specialize in high-end retouching, drop shadow creation, color correction, and background removal. They consistently deliver polished, flawless jewelry image editing, ensuring your products look professional, luxurious, and ready for e-commerce or advertising.
Clipping Path Studio
Clipping Path Studio is a professional image editing company known for detailed Photoshop work tailored to e-commerce and product photography.
They offer services like manual clipping paths, background removal, color correction, shadow creation, image masking, and retouching.
Their pricing is tiered by task complexity; simple clipping and background removal start around $0.29 per image. In contrast, complex jewelry-related tasks can be higher, around $7 per image for detailed clipping or background work. They also provide affordable options for multi-layer clipping and advanced color correction with quick turnaround times.
Color Experts International
Color Experts International is a global image editing and graphic design company with over 30 years of experience in post-production services.
They handle jewelry photo retouching, color correction, background removal, clipping paths, shadow effects, and more using professional Photoshop techniques. CEI serves photographers, e-commerce brands, ad agencies, and publishers worldwide with tailored editing workflows and bulk discounts.
Pricing varies by service and complexity, with basic clipping paths starting from around $0.49 per image and advanced jewelry retouching services typically higher.
PicsMatic
PicsMatic is an experienced photo editing company offering a broad range of services for product and jewelry image editing.
They focus on high-end jewelry photo editing, background removal, color adjustments, reflection handling, and detail enhancement to improve visual appeal for catalogs and e-commerce. They also cover other categories like fashion, portraits, and real estate.
Their workflow combines skilled human editors with AI tools to deliver results quickly, often within 12–24 hours, with flexible turnaround based on volume and priority.
Studio Metrodesk
Studio Metrodesk is a well‑established photo editing and post‑production partner with over two decades of experience and thousands of global clients.
They offer full‑spectrum services including clipping paths, background removal, jewelry retouching, color correction, shadow creation, and advanced product enhancements. Their services are built to scale from small batches to large catalogs, with express and standard turnaround options (sometimes as fast as 1 hour for urgent needs).
Pricing is transparent and package‑based, with starting rates often around $0.49 per image for basic edits and discounts for larger volumes. Free test edits and 24/7 support are common features.
Flatworld Solutions
Flatworld Solutions is a global outsourcing provider offering professional image editing among a wide range of visual services.
Their photo editing includes color correction, exposure adjustment, object removal, premium retouching, background work, jewelry photo editing, and retouching as part of broader product editing services. They serve diverse industries and support large batch projects with quality checks and secure delivery.
Pricing is often offered per project or hourly, with entry options around $7/hour for comprehensive editing work, and tailored quotes based on scope and volume.
What Are the Jewelry Photo Editing Pricing Factors?
Jewelry photo editing pricing depends on the complexity of the project and the number of images. The process typically includes detailed metal polishing, gemstone enhancement, background removal, and drop shadow creation to ensure each piece looks flawless and high-end.
Below are the Jewelry Photo Editing Pricing Factors:
1. Type of Editing Service
Different Services Have Different Costs, for Example:
- Background removal or clipping paths are generally cheaper.
- Retouching, color correction, drop shadows, and reflection effects cost more because they take more time and skill.
2. Complexity of the Jewelry
Intricate designs, multiple gemstones, delicate chains, or highly reflective surfaces require more time and precision, increasing the price.
3. Image Resolution and Size
High-resolution images demand careful attention to detail and more processing time, affecting pricing.
4. Quantity of Images
Bulk orders often reduce per-image costs, while small batches may be more expensive per image.
5. Turnaround Time
Faster delivery typically comes at a premium. Standard turnaround is cheaper, while 24–48-hour express edits cost more.
6. Level of Customization
Custom requirements such as soft shadows, reflections, or high-end magazine-style retouching increase cost.
7. Software and Expertise Used
Professional tools like Adobe Photoshop and Lightroom, plus skilled jewelry-specific editors, can affect pricing.
8. Revision and Quality Assurance
Companies offering multiple revisions or thorough quality checks may charge more, but ensure polished, flawless results.
How Much Does a Jewelry Photo Editing Service Cost in the USA?
A jewelry photo editing service costs in the USA range from $0.25 to $ 25 per image. High-quality retouching image for e-commerce usually costs from $5 to $ 10 per image.
Check out The Detailed Pricing Range Below:
- Basic Editing: around $2–$5 per image for simple tasks like background removal or basic cleanup.
- Standard Editing: often $5–$15 per image for color correction, dust removal, and shadow adjustments.
- Advanced Editing: typically $15–$40 per image for gemstone enhancement, reflections, and high‑end retouching.
- Luxury/Custom Editing: can exceed $50 per image for magazine‑quality edits or very detailed work.
- Volume Pricing: Bulk orders often come with discounts (20–40%) depending on the number of images. The more images you submit, the lower the per-image cost can be.
FAQ’s
What problems are fixed during jewelry photo editing?
Jewellery photo editing fixes poor lighting, dull shine, color imbalance, dust, scratches, reflections, blurred details, weak contrast, background issues, and sizing errors. It enhances sparkle, clarity, and accuracy so pieces look clean, sharp, realistic, and ready for catalogs and ads.
Is background removal necessary?
Background removal is not required. If your image already looks clean and clear, you can use it as is. Remove the background only if it helps the subject stand out or enhances the image’s usability.
How long does jewelry photo editing take?
Most jewelry photo edits are delivered within 24 to 72 hours. Simple fixes finish faster, while detailed retouching or large batches take longer. We confirm timelines before starting, so you always know when your final images will be ready for delivery.
Is jewelry retouching expensive?
Jewelry retouching is not always expensive. Pricing depends on image quality, detail level, and how much work is needed. Simple fixes cost less, while great detail edits cost more. Many studios offer flexible options for different budgets and project needs.
Can jewelry photo editing increase sales?
Yes, professional jewellery photo editing makes pieces look brighter, sharper, and more luxurious. Clear details build trust, stop scrolling shoppers, and help buyers imagine owning the product, which increases clicks, confidence, and overall sales across online stores and global marketplaces.