Layer Mask in Adobe Photoshop hides or reveals parts of an image without deleting pixels. It keeps edits flexible, protects original details, and makes changes easy to adjust anytime. Black conceals, white reveals, and gray controls transparency for smooth blends.
Layer masks refine edges, fix backgrounds, blend images, and handle complex areas like hair. They support non-destructive editing, cleaner compositions, and precise control over every adjustment, making them essential for professional photo editing and design work.
What you’ll learn in this article
What is a Layer Mask in Photoshop?
A layer mask in Photoshop is a non-destructive editing tool that hides or reveals parts of a layer without deleting anything. It lets you control what shows and what stays hidden, while keeping the original image safe.
Black on the mask hides pixels. White reveals them. Gray shows them partially. This gives you smooth blends, clean cutouts, and full editing control without damaging your work.
What Does a Layer Mask Do in Photoshop?
A layer mask in Adobe Photoshop controls which parts of a layer are visible and which are hidden. It works without erasing anything, so your original image stays safe.
By painting with black, white, or gray, you can create smooth blends, clean edits, and precise adjustments. It helps refine edges, combine photos, and target specific areas with total flexibility.
What is the Difference Between Black and White in a Layer Mask?
The difference between black and white in a layer mask is simple: black hides parts of the layer, while white reveals them.
Using shades of gray creates partial transparency, letting you blend areas smoothly. This gives precise control over visibility without permanently altering the original image.
Here’s a clear table showing the difference:
| Color | Effect on Layer | Use Case |
|---|---|---|
| Black | Hides parts of the layer | Removing unwanted areas or masking objects |
| White | Reveals parts of the layer | Restoring visibility of hidden areas |
| Gray | Partially hides (transparency) | Smooth blending or soft transitions |
Why is a Layer Mask Used in Photoshop?
A layer mask is used in Photoshop, as it is used for non-destructive editing and lets you hide or reveal parts of a layer without deleting anything. It gives you control over edits, blends images smoothly, and keeps your work flexible so you can adjust changes anytime.
Here are the reasons why the layer mask is used in Photoshop:
- Keeps your original image safe by hiding parts instead of deleting them, so you can fix or change edits anytime.
- Helps combine images and remove backgrounds cleanly without harming the main subject.
- Lets you adjust brightness, color, or effects on specific areas only.
- Gives detailed control using black, white, and gray to fine-tune visibility.
- Blends images or effects naturally with soft and gradual edges.
How Do You Create a Photoshop Layer Mask?
To create a Photoshop layer mask, select the layer in the Layers panel and click the Add Layer Mask icon. A white thumbnail will appear. Use the Brush tool with black or white to hide or reveal parts of the image.
Here’s how you create a Photoshop layer mask in simple steps:
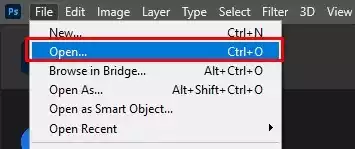
Step 1: Open Your Image
Open the image you want to edit in Adobe Photoshop.
- Go to File
- Open and select the file from your computer
Once the image loads, it will appear in the workspace along with the Layers panel.
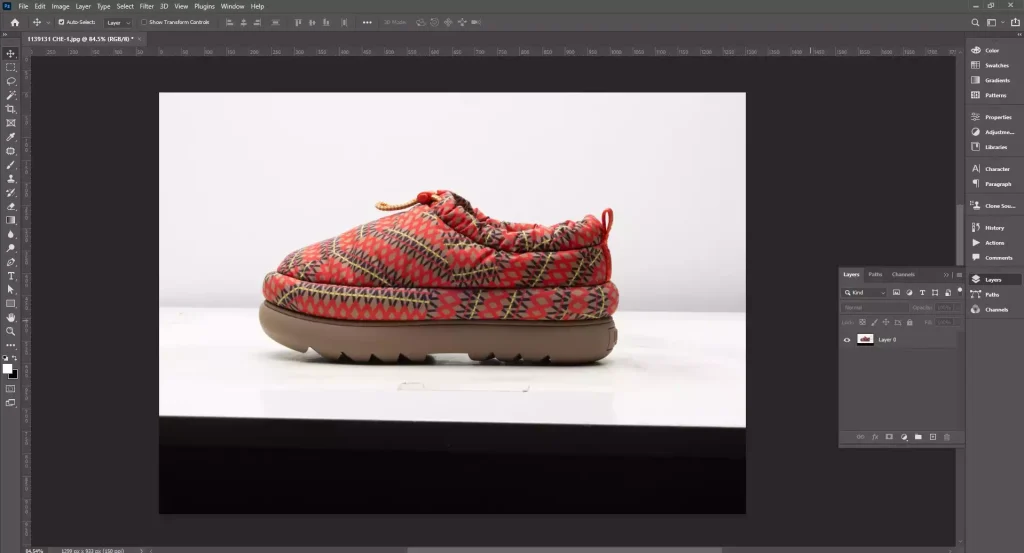
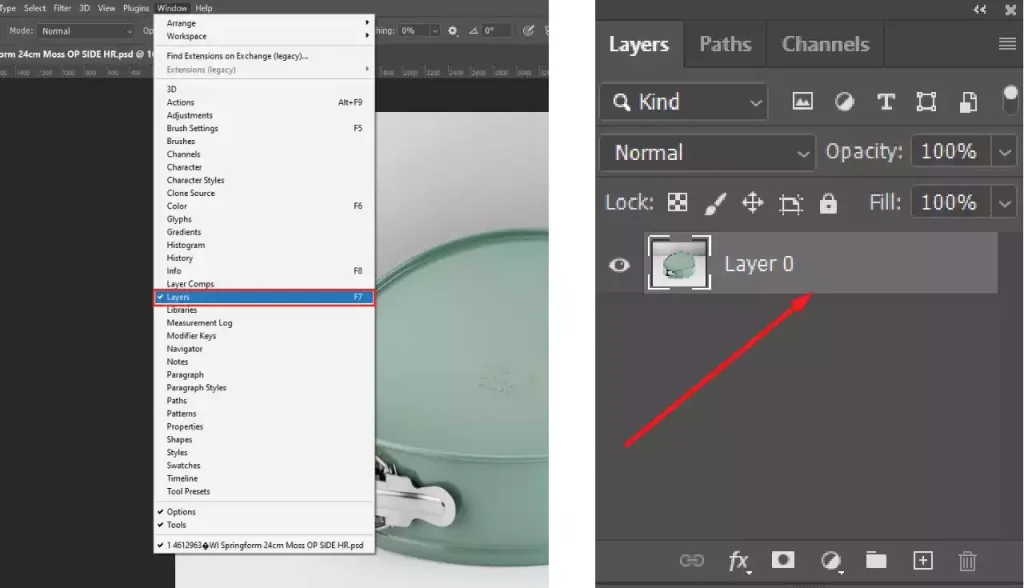
Step 2: Select the Layer
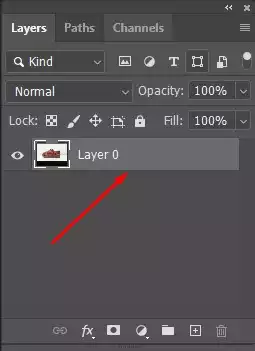
In the Layers panel, click the layer you want to apply the mask to. The selected layer will be highlighted. This step is important because the layer mask will only affect the active layer.
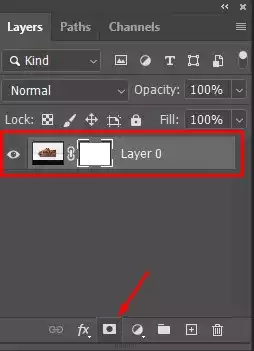
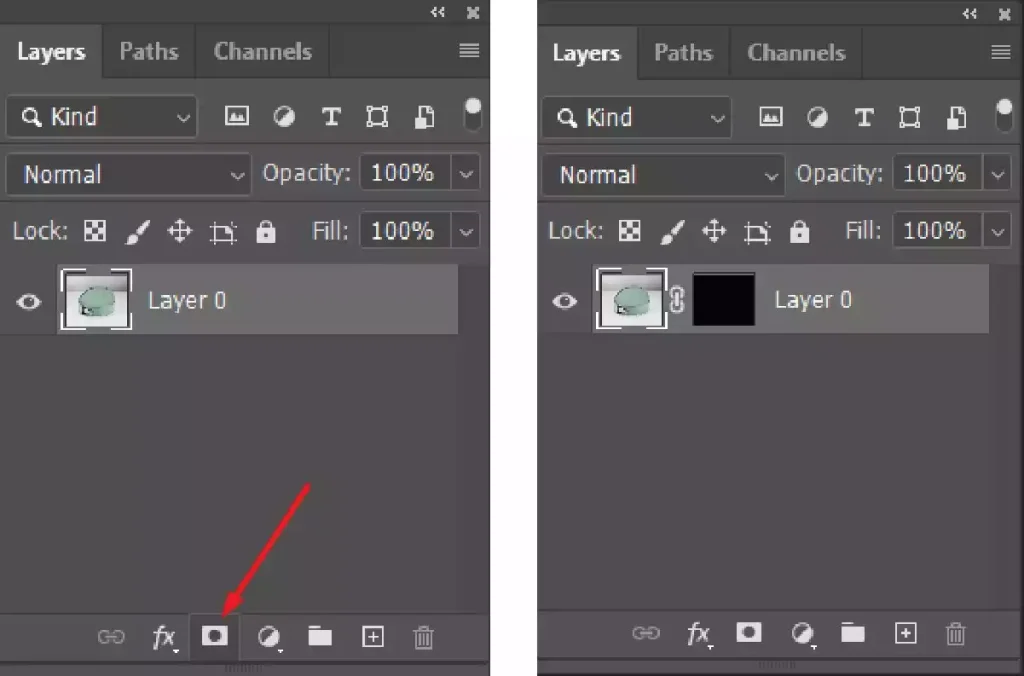
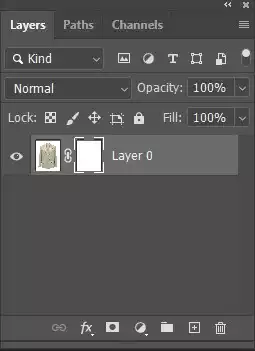
Step 3: Add the Layer Mask
Click the Add Layer Mask button at the bottom of the Layers panel. The icon looks like a rectangle with a circle inside it. After clicking it, a white thumbnail will appear next to the layer thumbnail. This white thumbnail represents the mask.
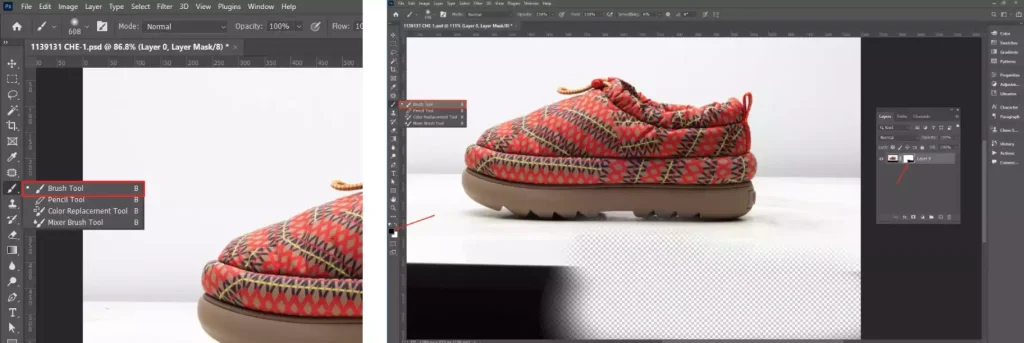
Step 4: Use the Brush Tool to Edit the Mask
Select the Brush Tool from the toolbar. Paint on the mask using black to hide parts of the layer and white to reveal them again. This allows you to control which areas of the layer remain visible.
Step 5: Refine the Mask
Adjust the mask as needed by switching between black, white, and gray. Black hides, white reveals, and gray creates partial transparency. This helps you make smoother transitions and more precise edits.
How Do You Set a Layer as a Layer Mask?
To set a layer as a layer mask, you convert a selected layer or channel into a mask that controls another layer’s visibility using pixel-based grayscale values, enabling non-destructive editing, precise compositing, selective adjustments, and smooth transitions between visible and hidden areas.
Here’s how you set a layer as a layer mask in simple steps:
Step 1: Open Your Image
Open the image you want to edit in Adobe Photoshop.
- Go to File > Open, or press Ctrl+O (Cmd+O on Mac).
- Supported formats include PSD, TIFF, JPEG, PNG, and RAW files.
Make sure the image is in a layer-enabled document; background layers need to be converted to normal layers (Layer > New > Layer from Background) to allow masking.
Step 2: Select the Targeted Layer
Select the layer you want to work on before applying a mask.
- Open the Layers panel via Window > Layers.
- Click the target layer to highlight it. Only pixel-based layers or smart objects allow editable masks.
Adjustment layers, shape layers, and text layers also support masks, but they use vector masks instead of pixel masks, which behave differently.
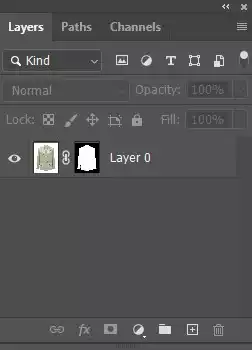
Step 3: Create Black Layer Mask
Create a black layer mask to hide your layer initially.
- Click the Add Layer Mask button (rectangle with a circle) at the bottom of the Layers panel.
- Hold Alt (Windows) / Option (Mac) while clicking to fill the mask with black, hiding the layer.
Layer masks are non-destructive, keeping the original pixels intact so you can reveal them later.
Step 4: Use the Brush Tool with Black to Hide Pixels
Refine your layer mask using the Brush tool to control which parts of the layer are visible.
- Select the Brush Tool (B).
- Adjust hardness, opacity, and flow in the Options bar at the top.
- Paint with black (RGB 0,0,0) to hide layer content, white (RGB 255,255,255) to reveal it, and gray for partial transparency based on brightness.
Use soft brushes for smooth transitions, and open Window > Brush Settings to fine-tune brush dynamics like opacity, jitter, or scattering.
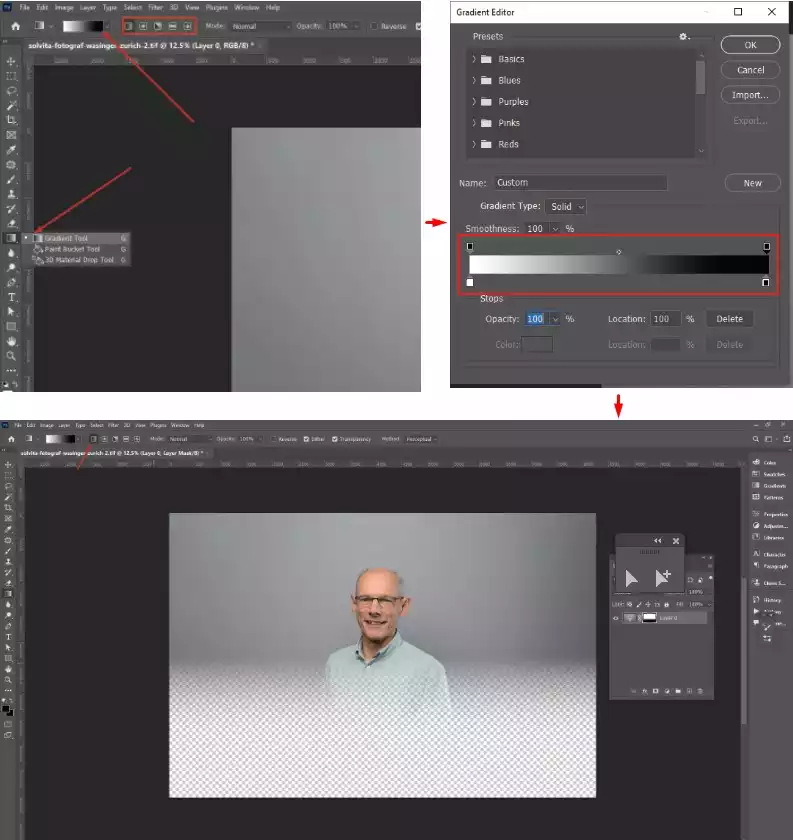
Step 5: Apply Gradient/Selection/Channel
Refine your mask using gradients, selections, or channels for more control.
- Gradients: Select the Gradient Tool (G) and drag on the mask to fade areas. Linear, radial, and angle gradients blend differently.
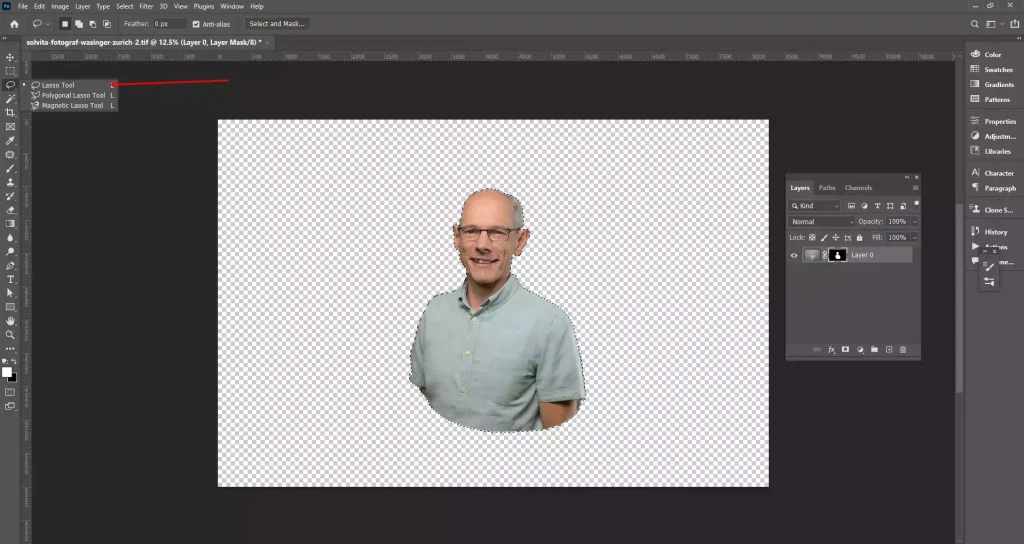
- Selections: Make a selection with tools like the Lasso or Quick Selection, then click the mask button to apply it.
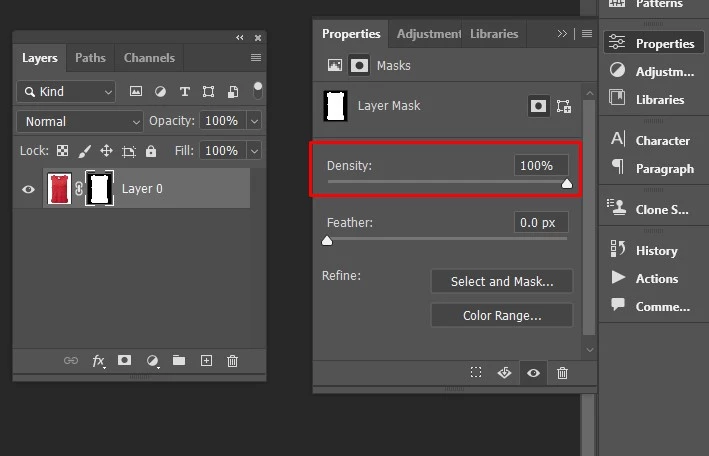
Step 6: Refine the Mask Using Properties
- Select the mask thumbnail.
- Go to Properties (Window > Properties).
Feather softens edges by blurring mask boundaries values are in pixels, and density reduces mask opacity without painting, useful for semi-transparent effects. Use Mask Edge/Select and Mask for advanced refinements: adjust Contrast, Smooth, Shift Edge, and Decontaminate Colors for cleaner results.
How Do You Invert a Layer Mask in Photoshop?
Here are the steps to quickly invert a layer mask.
Step 1: Create a Layer Mask
Select the layer you want to add a mask to in the layers panel. Click the layer mask icon; it will appear as a white rectangle with a black circle inside.

Step 2: Select the Layer Mask
Use the Select and Mask workspace to place you rmask over one area of your image. Alternatively, use the Brush tool to paint on your mask with black (to hide) or white (to reveal).
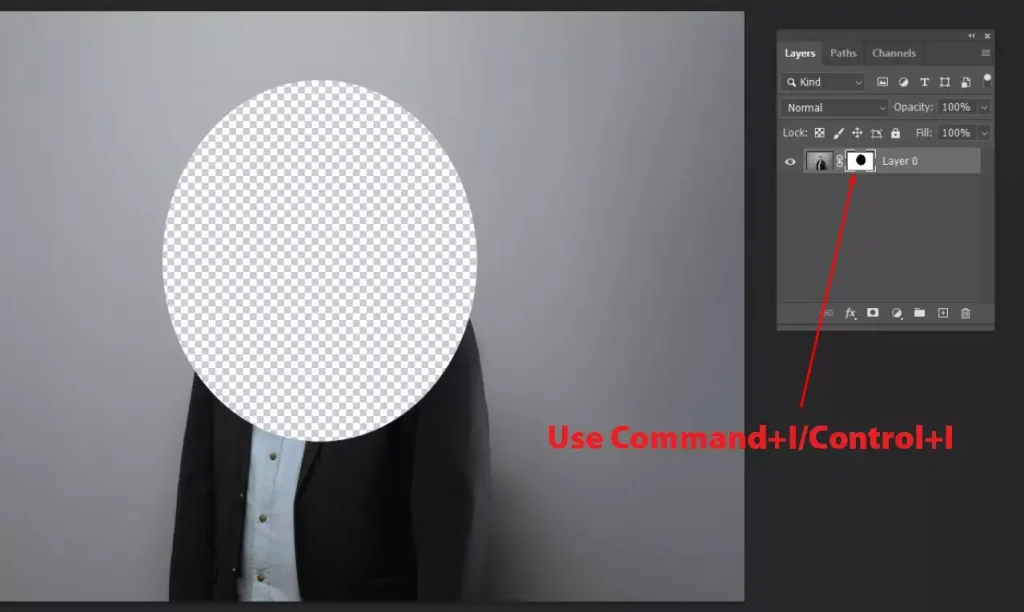
Step 3: Invert the Layer Mask
Use Command+I/Control+I to invert the mask, rendering its opposite. Alternatively, use image, click Adjustments, then Invert.
How Do You Remove a Layer Mask in Photoshop?
To remove a layer mask in Photoshop, delete the mask from a layer, eliminating the linked pixel-based grayscale data that controls visibility, either discarding it entirely or applying it permanently to preserve its effects, maintaining control over non-destructive editing workflows.
Here’s how you remove a layer mask in Photoshop in simple steps:
Step 1: Open Your Image
Start by opening your image in Photoshop to prepare for masking.
- Go to File > Open and select your image.

Ensure your image has multiple layers or a layer with a mask, since Photoshop stores masks as linked grayscale channels that control transparency without changing the original pixels.
Step 2: Select the Targeted Layer
Select the layer that contains the mask to start editing.
- Click the layer with the mask.
You’ll see both the layer thumbnail (image) and the mask thumbnail (grayscale mask). This selects the layer node, where the mask is stored as a separate channel.
Step 3: Activate the Layer Mask
Activate the layer mask before editing to protect your image.
- Click the mask thumbnail so it’s highlighted with a border.
This ensures any adjustments or brush work affect the mask channel and not the actual pixels, preventing accidental changes to the image.
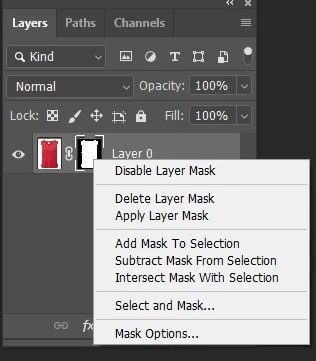
Step 4: Remove or Apply the Layer Mask
Manage your layer mask using the context menu for different results.
Right-click the mask thumbnail to open options:
- Delete Layer Mask: removes the mask entirely, reverting the layer to fully visible pixels. This is irreversible unless undone immediately.
- Apply Layer Mask: permanently merges the mask’s effect into the layer pixels, deleting the mask but preserving the visible result.

Step 5: Verify the Layer After Mask Action
- Check the layer to confirm the result.
- If you delete the mask, the original content is fully visible.
- If you applied the mask, the layer retains the masked effects permanently.

Internally, Photoshop either discards the mask channel or merges it into the layer’s RGB pixel data.
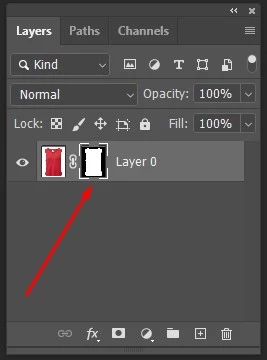
How to Change the Layer Mask Color in Photoshop?
To change the layer mask color in Photoshop, you adjust the mask’s overlay color to make it easier to see which areas are hidden or revealed, helping with precision and workflow during non-destructive editing.
Here’s how you change the layer mask color in Photoshop in simple steps:
Step 1: Open Your Image
Open your image in Photoshop to work with masks.
- Open the file containing the layer mask.

Keep in mind that masks are stored as linked grayscale channels, so changing the overlay color only affects the visual display; it does not modify the actual pixel data.
Step 2: Select the Targeted Layer
- Click the target layer in the Layers panel to select it.
Ensure the correct layer is active so any adjustments to the mask color apply to its associated mask channel.
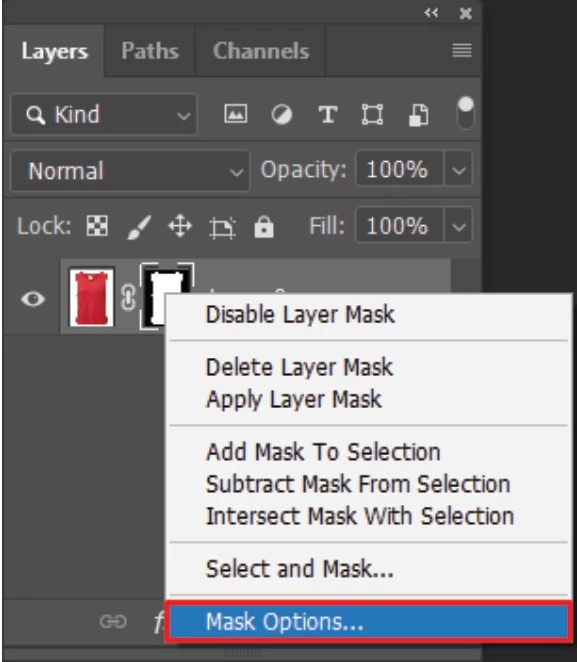
Step 3: Access Mask Options
- Right-click the layer mask thumbnail in the Layers panel.
Use the context menu to adjust mask-specific properties, like color overlays, without altering the underlying pixels.
Step 4: Choose “Mask Options”
- Choose “Mask Options” (or “Mask Color”, depending on your version).
- This opens a dialog where you can change the mask overlay color, density, and opacity.
Photoshop uses a non-destructive overlay, which shows color without changing the mask’s grayscale transparency values.
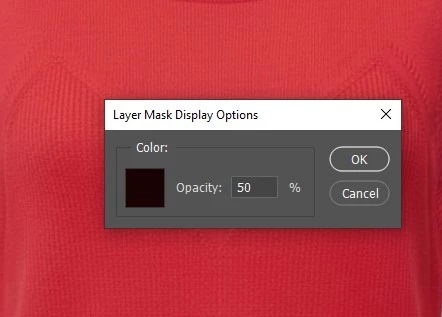
Step 5: Pick a New Overlay Color
Change the mask overlay color to better see hidden and visible areas.
- Click the color swatch and pick a new color.
Photoshop applies this as an overlay on the masked areas. It doesn’t affect the layer’s pixels but helps distinguish areas while working on complex masks.
Step 6: Adjust the Mask Density
- Drag the Density slider to change the mask overlay’s opacity.
Increase or decrease the slider to make the overlay more prominent or subtler while keeping the underlying grayscale mask channel unchanged.
Step 7: Apply Mask Settings
- Click OK to apply the changes.
View the updated mask overlay color and density on the canvas and in the Layers panel for improved visual feedback.
What is the Difference Between Clipping Path vs Image Masking vs Layer Mask?
The difference between Clipping Path vs Image Masking vs Layer Mask lies in how they isolate or hide parts of an image: Clipping Path uses vector outlines, Image Masking uses pixel-based transparency, and Layer Mask controls visibility non-destructively within Photoshop.
Here is a breakdown table showcasing the difference between Clipping Path vs Image Masking vs Layer Mask:
| Feature | Clipping Path | Image Masking | Layer Mask |
|---|---|---|---|
| Definition | A vector outline is used to cut out objects from the background. | A technique to isolate complex objects using pixel-based selections (like hair or fur). | A non-destructive grayscale mask applied to a layer to hide or reveal parts. |
| Method | Created using the Pen Tool to draw a precise path. | Uses channels, selections, or masking tools for detailed edges. | Uses black, white, and gray on a layer mask to control visibility. |
| Complexity | Simple shapes or objects with clear edges. | Complex objects with fine details and transparency. | Flexible edits on any layer, suitable for blending and adjustments. |
| Editing Flexibility | Less flexible once the path is set. | More flexible, can refine edges, but harder to adjust globally. | Highly flexible; can adjust the mask anytime without affecting the original pixels. |
| Best For | Clean, simple cutouts (e.g., products for e-commerce). | Detailed, intricate objects like hair, smoke, or semi-transparent areas. | Non-destructive editing, selective adjustments, and smooth transitions in compositions. |
When Should You Use Image Masking Instead of a Layer Mask?
You should use image masking instead of a layer mask when there is a requirement for handling complex projects, elaborate subjects that require soft edges, and pixel-level precision.
Image masking accurately preserves fine details, semi-transparent areas, and intricate textures, making it ideal for hair, fur, smoke, or translucent objects, while ensuring high-quality compositing and professional background removal.
Here’s a polished breakdown of when to use image masking based on the type of subject or task:
- Intricate Details (Hair, Fur, Smoke): Captures fine textures and soft edges that layer masks alone can’t isolate accurately.
- Transparent Objects (Glass, Mesh, Bottles): Preserves semi-transparent areas and subtle reflections for realistic results.
- Sharp, Precise Edges (Geometric Shapes, Vehicles): Maintains clean, crisp edges while separating objects from backgrounds.
- Complex Compositing: Combines multiple elements seamlessly without losing detail or edge quality.
- Background Removal on High-Volume Jobs: Efficiently handles detailed selections across many images while maintaining accuracy and consistency.
How Professional Layer Masking Improves Product Photo Quality?
The way a professional layer masking improves product photo quality is by giving precise control over which parts of an image are visible, allowing for clean backgrounds, accurate edge detail, and seamless blending. It preserves original image data, ensures consistent lighting, and highlights product features without destructive edits, making images look polished and ready for e-commerce or marketing.
Here is how a professional layer masking improves product photo quality:
- Allows changes without altering original pixels so that edits can be refined anytime.
- Isolates products cleanly for a clear, distraction-free presentation.
- Captures intricate details like hair, fabric textures, or transparent elements accurately.
- Lets you adjust specific areas for color, brightness, or sharpness without affecting the whole image.
- Adds depth and dimension, making products appear more natural.
- Ensures a uniform look across multiple images for professional marketing.
- Combines multiple elements seamlessly while maintaining edge quality and fine details.
Where to Get Professional Layer Masking Service in the USA?
Professional layer masking services in the USA include Offshore Clipping, Clipping USA, Clipping Path Studio, PathEdits, and Deepetch. All of these specialize in precise, high-quality Photoshop masking for complex projects.
Here is a list of professional layer masking services in the USA:
- Offshore Clipping: Provides Photoshop image masking, clipping path, background removal, and retouching services. Often used for e-commerce images that need precise cut-outs and consistent editing.
- Clipping USA: Provides masking, clipping path, background removal, and retouching services. Support is available around the clock through a US-based team.
- Clipping Path Studio: Offers image masking for complex subjects such as hair, fur, and transparent objects. Services also include clipping path, shadow creation, and basic retouching.
- Path Edits: Offers hand-edited image masking and retouching services. The company works with eCommerce and photography businesses that need consistent editing for large batches of images.
- Deepetch: Focuses on Photoshop masking, including alpha channel and layer masks. Known for handling detailed edges like hair and fur with relatively quick turnaround times.
FAQ’s
What is the Photoshop layer mask shortcut?
The Photoshop layer mask shortcut is Alt + click on the Add Layer Mask button to create a black mask that hides everything, or simply click the mask icon to add a white mask that reveals everything on the selected layer.
Where is the layer mask in Photoshop?
The layer mask in Photoshop is found in the Layers panel. Select your layer, then click the small rectangle with a circle inside at the bottom of the panel. A white thumbnail appears next to your layer, showing that the mask is active and ready to edit.
What is the layer mask icon in Photoshop?
The layer mask icon in Photoshop lets you hide or reveal parts of a layer without deleting anything. It adds a white thumbnail next to your layer. Paint with black to hide, white to show, and gray for soft transparency. It’s fully reversible.
Is a layer mask non-destructive in Photoshop?
Yes. A layer mask is non-destructive in Adobe Photoshop because it hides or reveals parts of a layer without deleting any pixels. You can edit, disable, or remove the mask at any time, so your original image stays intact and fully recoverable.
Can you use a layer mask for hair and complex edges?
Yes. A layer mask works great for hair and tricky edges. The key is using the right selection tools first, like Refine Edge or Select and Mask. Then paint on the mask with a soft brush to clean up fine strands.