Are piles of images overwhelming you? You are struggling when you need to find the essential ones. The solution is to use the best way to organize photos.
Organizing photos is a way to systematically put the images in a way so that every time you see them, you understand their differences right away. It can be done in many ways. This article will describe different ways to help you organize photos so that you can access and use them easily anytime.
Let’s get started.
What you’ll learn in this article
- 1 What are the Benefits of Organizing Your Digital Photos?
- 2 Best Way to Organize Photos for Efficient Editing With 10 Tips
- 2.1 1. Create a Parent Folder to Pull All Images
- 2.2 2. Make a Folder Structure to Organize Photos
- 2.3 3. Implement Advanced Image File Management Techniques
- 2.4 4. Choose Meaningful and Consistent Photo Names
- 2.5 5. Add Image Metadata, Tag and Label
- 2.6 6. Set Priority to Organize Your Digital Photo Albums
- 2.7 7. Use Digital Photo Organizing Software
- 2.8 8. Make a Routine on Your Calendar
- 2.9 9. Photo Culling or Deleting Unwanted Photos
- 2.10 10. Edit the Photos Before Creating a Photo Album
- 3 How to Further Improve Your Digital Photo Organization on a Computer or Laptop?
- 4 Step 1: Storing Pictures from Diverse Locations
- 5 How Do Professional Photographers Make Their Digital Photos Look so Good?
- 6 FAQs about the Best Way to Organize Photos
- 6.1 What to do with printed photos?
- 6.2 How to Sort Photos?
- 6.3 What is the top photo-organizing software?
- 6.4 What to do with thousands of digital photos?
- 6.5 How to create an organized image library for your business?
- 6.6 How often should I back up my photos?
- 6.7 Where should I store my digital photos?
- 6.8 What is the best way to handle duplicate photos?
- 6.9 Should I use cloud storage to organize photos?
- 7 Conclusion
What are the Benefits of Organizing Your Digital Photos?
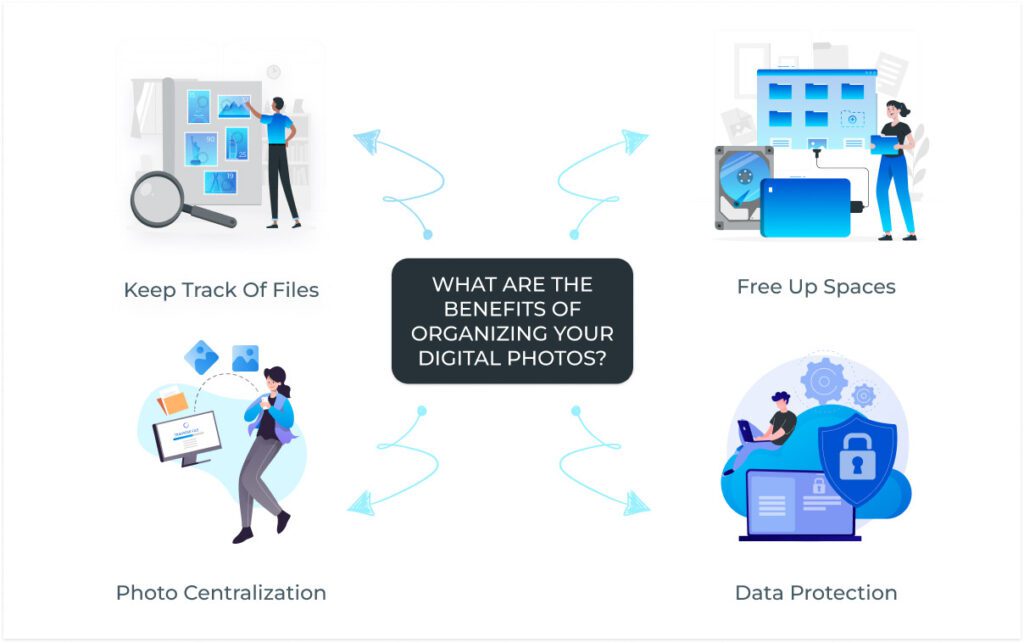
Nowadays, photos are a vital digital asset for every professional and business. So, they look for ways to safekeep images in the most convenient way possible. The purpose of organizing photos is that it saves time, cuts down on hassle, streamlines, and simplifies workflow. By organizing your digital photos, you can reap the following benefits.
Keep Track of Files
By organizing photos, you get to check all types of images that were stored in different locations, you can sort out the important and less important ones. By saving them on one single storage under different names, you can thus track your images whenever you need, instead of brainstorming where you have put them.
Free up Spaces
Systematic sorting out images helps you find a lot of memories, and purpose in your images. As a result, you can both accumulate them, freeing up spaces that those images occupy in different locations.
Photo Centralization
To ensure systematic working, everyone wants their equipment, resources, and necessary items accumulated as close as possible. The same goes for the photos, by organizing you can centralize all the photos into a single platform or storage and then sub-categorize them as you see fit. Still, you have them umbrellaed into one platform, that’s a big step to facilitate the work process.
Data Protection
Images stored here and there can risk the arbitrary access of unauthorized persons. If you are an ecommerce business owner or professional photographer, you don’t want the images to tarnish the reputation in the market. Data organizing plays a vital role in ensuring security.
Best Way to Organize Photos for Efficient Editing With 10 Tips

These 10 best ways aren’t surefire ways to keep photos organized forever, but these are some most popular and efficient ones that professional photographers use. Here are those.
1. Create a Parent Folder to Pull All Images
Up until now, if you have stored photos on different devices and locations, you need all of those for different purposes from time to time. Wouldn’t it be better to centralize them? If this thought has come to your mind, it’s time to upgrade to solid storage.
For larger volumes of images, it’s better to seek a cloud-based photo storage solution:
- Google Photos
- Dropbox
- OneDrive
- Amazon Photos etc.
Otherwise, use an external drive. If you have enough space after storing all your images in one place, you can use it as a backup.
2. Make a Folder Structure to Organize Photos
The concept of folder structure is to make a serial or your images into a folder that will be based on purpose, events, or action. When you categorize the photo folders in this way, it gets easier to understand which folder you need to work on. Then they create sub-folders as required.
For example, large photography studios categorize their folders based on department or purpose, such as event photos, marketing photos, product photos, consistent naming, etc. So, the users only have access to the images they require to work on.
On the flip side, photographers working solo or with a small team categorize their images based on events or photo sessions, grouping, locations, etc.
3. Implement Advanced Image File Management Techniques
Basic folder management has many advantages with several risks and limitations, such as extensive libraries, limited searching, data loss risk, and so on. Advanced image managing techniques have become an essential solution that addresses all of those.
With features like facial recognition, cloud storage integration, metadata tagging, and editing tools in implementation during picture organization, you can overcome traditional limitations and make picture organizing easy, smooth, and protected from anywhere.
4. Choose Meaningful and Consistent Photo Names
Organizing photos doesn’t have any specific rule that is mandatory or suitable for everyone. You will find a wide variety among those who are in charge of the organizing process. One of which is consistent & meaningful photo naming.
So, what they do during naming is use slight differences so that the state of the photos is easily understandable. Here are some naming tips for that.
- Capitalize the first letter of each word.
- Avoid using special characters as they cause compatibility issues, but hyphens or underscores are okay.
- Avoid using spaces inside photo naming.
- Use keyword, date, month, location, etc for the main file.
- Got a series of photos? Serialize those based on alphabets.
5. Add Image Metadata, Tag and Label
Has the simple naming or serial made dozens of folders and it’s more complicated now? If so, then you can make some changes in your organizing process. Here are some ways.
- Metadata: Add details like time, date, location, camera settings, etc. You can find images quickly with such details as well as edit them for sub-categories.
- Tags and labels: Use keywords as tasks for labels, so when you search for the keyword, regardless of organizing, only those images will be visible.
- Digital Asset Management or DAM Software: A powerful image-organizing solution provider. It can auto-tag, allows customized metadata organizing, advanced searching easily, face recognition, storing, and so on.
6. Set Priority to Organize Your Digital Photo Albums
When you are organizing your image folders serially, do it on a priority basis. As mentioned already, you won’t be needing all the images. The ones you do need sensitive collections as well so that as soon as you take a glance, you understand what’s left.
I saw many photographers categorize their folders by naming them, such as ‘Edited’ for the final ones, ‘Need to Edit’ for the unfinished ones’ ‘Checking’ for the ones that are being sorted out, etc.
7. Use Digital Photo Organizing Software
Software or apps offer the finest and fastest solution for any task. As for digital photo organizing, every OS has a designated package. Those offer solutions from moderate functionality to full-fledged high-end solutions.
Digital Asset Management, to name one, handles a robust range of workflow relating to photos. Other than that, designated software is in the market available both in free and paid versions that benefit from automatic image backup solutions.
8. Make a Routine on Your Calendar
Truth to be told, organizing photos doesn’t work for a day or some days. It requires consistent and continuous activities. Why? The number of images will increase in the future, and you will need to create space for the upcoming images. So, develop a habit of checking up on your folders through recurring events.
You can make a routine and use Google Calendar-like tools to remind you of the task. Take tiny steps while checking weekly, quarterly, monthly, and yearly. Off chance you need to use any images, don’t delete them right away unless those are old and won’t have any purpose in the future.
9. Photo Culling or Deleting Unwanted Photos
While organizing, you will come across hundreds of pictures that aren’t necessary, some not now, some ever. The images that may not be required ever again, go to the trash folder, and the rest of the images to be archived.
Photo culling is the process of sorting images from a large selection, based on their look or perfection. If you do the culling from best to bad, then it is culling in, and if you cull from bad to best, then it is culling out.
Do a schedule review for the images that you have archived, because the archive is going to get bigger and you need to free up the space.
10. Edit the Photos Before Creating a Photo Album
When you are organizing all your photos and aiming for a photo album, you don’t want to go back and forth with it. So, a smart decision is to get all things done for an album. When there is a specific album, gather all the photos and make sure to edit them. Getting all the images edited is worth it because, next time when you visit the album, there won’t be any heavy workload left.
The task may look burdensome, if there are thousands or more photos for an album and you need to edit all those images, then hire professional photo editing service providers who offer secure, speedy, and reliable services. Also, this type of agency works with global clients, they are skilled enough to perform the job with precision.
Edit Your Photos Before Creating the Album
How to Further Improve Your Digital Photo Organization on a Computer or Laptop?

Now that you know different ways to organize your photos, let’s take a look at how to improve the process. Take a look at the following techniques to streamline the organizing process so that the collection for use becomes seamless and uninterrupted.
Step 1: Storing Pictures from Diverse Locations
You need to gather all the scattered pictures into one folder for accommodating. Now the challenge is how to gather all images from different locations, here are some solutions:
- Old photos: If you have hard copies of old photos, scan them to get the digital copy.
- Social photos: Most social platforms offer a way to download content. You can search the detailed guidelines through blogs or videos.
- Auto-upload: For online storage apps, keep the ‘auto-upload’ feature on.
- External drive: While connecting the external drive to your device, use Lightroom or the Operating System to import photos.
Step 2: Create a Dedicated Editing Folder
You may keep all your raw images in one big one and edit the other ones. In my case, my organization processes mostly edited photos as it saves most of my time. Also, for unedited photos, make sure to use a non-destructive editing process.
Step 3: Have Cloud Storage Integration
Cloud-based services are the most reliable and top-notch ones to organize Google Photos. While using it, make sure to do a backup, and check accessibility, security, and regulations, so that you have control and flexibility of your photo managing process.
Step 4: Create Albums if Needed
If you have several events (family program, wedding, hangout, party, travel, etc) images, you can consider creating albums for thematic collections. This offers a structural way of organizing photos and the sharing process is rather fast, and simple.
How Do Professional Photographers Make Their Digital Photos Look so Good?
Due to passing the learning curves, veteran photographers know how to make a photo look good with a few tweaks here and there. However, the task is way more challenging for new photographers. To ensure digital photos have a good appearance, they take 2 types of conscious ways.
1. Preparation During Photoshoot

There is a lot to prepare during a photoshoot session. It may take a few changes on some parts to make all the difference between a good photo and an e-commerce-worthy photo. Here are some common preparations listed down.
Setup Preparation
Regardless of the subject, your setup needs to be accurate. The right equipment, background, and scene help portray the scene accurately. If the scene is indoors, you will have much control over how it turns out. Also, experiments with angles, composition, etc so that you understand the best view of the frame.
Frame to Focus
As your scenery is ready, you need to check if the focus is right. The camera’s autofocus mode does a pretty smart job, even so, during movements, it’s better to work with manual focus.
Color Correction
After positioning the camera frame, check the color, hue, and white balance and customize them to find the right look. Right color correction can help images create a surreal look, natural look even aesthetic look.
Lighting
The impact light has on an image is beyond imaginable. Not just highlighting the main subject, but also emphasizing which viewers should pay heed to. Here is a trick I know from somewhere to understand lighting well, is to follow paintings of old eras, such as Victorian painting.
2. Photography Post-Production
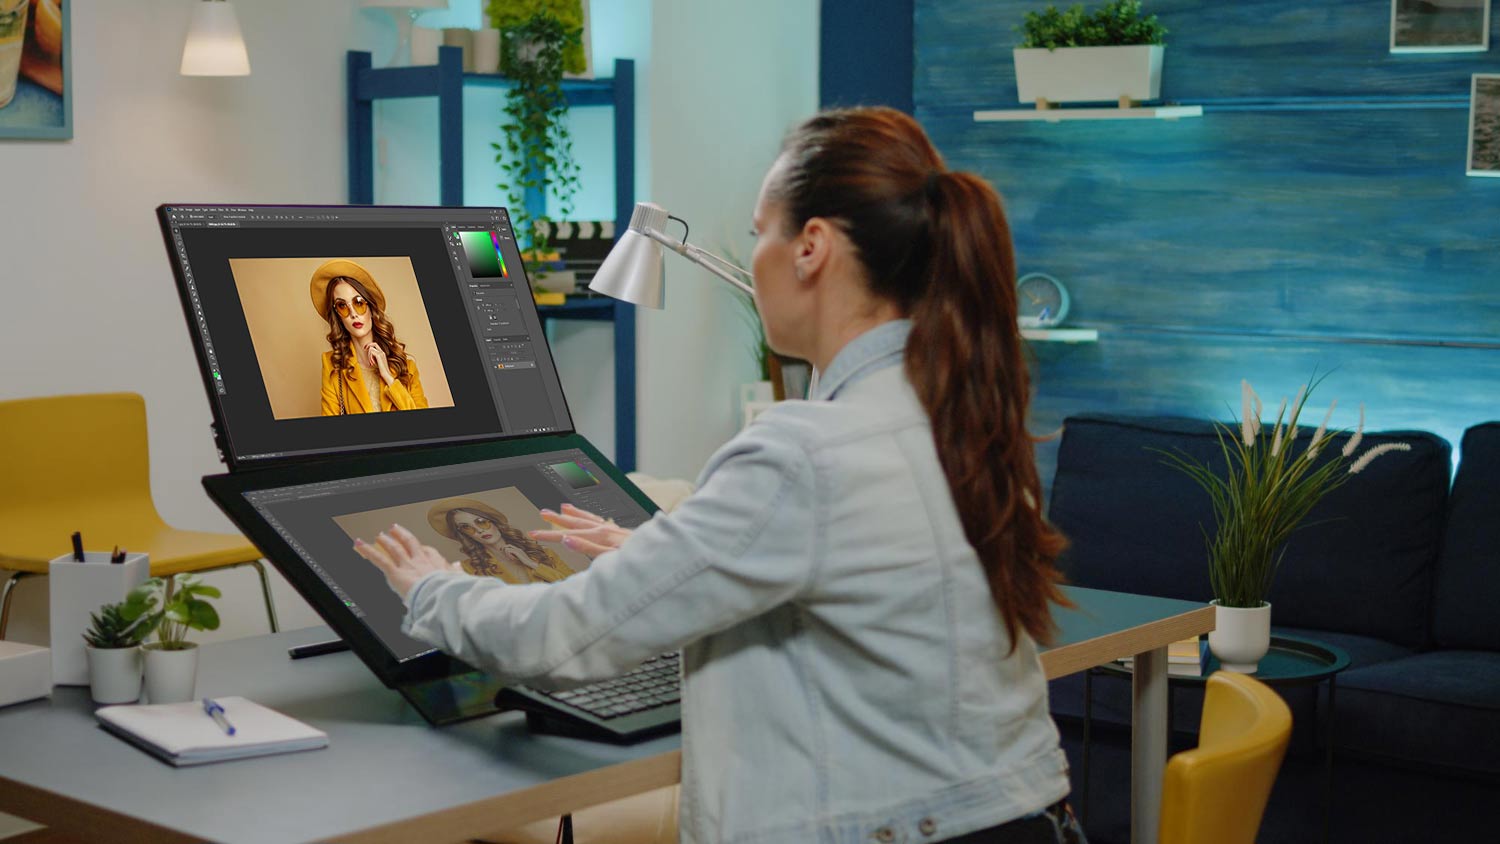
Photography post-production may seem like the last resort, but it’s the most important, similar to the photo-taking session. Nowadays, every photo you see online has some touchup before getting published. Natural photos don’t appeal as glamorous as the edited ones.
That’s why post-production works are mostly demanded by ecommerce business owners, professional photographers, studio photographers, art directors, and so on to prove their skills and expertise in front of audiences.
You don’t always have to do the work by yourself. Outsourcing photo editing services has a history of providing reliable, fast, and secure services. Check their samples, reviews, and turnarounds to find which agency better suits your needs.
FAQs about the Best Way to Organize Photos
What to do with printed photos?
After having your digital backup on an external drive, cloud or both, take special measures to keep your printed photos. Make sure the place you are storing those are acid-free archival boxes.
How to Sort Photos?
Photo sorting isn’t very difficult after uploading or transferring to a designated location. Prioritize your needs. Here is my sorting process for images. Year⇾ Month⇾ Events that happened on a specific month. You can include whatever you find convenient, from the main folder to the subfolder, and you can categorize based on the date, location, or photo session of a particular week, etc.
What is the top photo-organizing software?
Some popular photo-organizing software both free and paid versions are Darktable, Microsoft Photos, Google Photos, Adobe Lightroom, Dropbox, Amazon Photos, Adobe Bridge, etc.
What to do with thousands of digital photos?
If you have thousands of digital photos, first make a backup for future use. Then, sort it out based on requirements, you will find what’s necessary and what’s not. After storing the images, you can share, display, and use them whenever necessary.
How to create an organized image library for your business?
Step 1: To create an organized image library, accumulate all your images in one location, a file cloud or other tools, etc.
Step 2: Then do the culling process to filter images. You will find many unnecessary images to get rid of.
Step 3: When you have found the required images, save them in different folders, maintaining a standard folder structure. Subfolders under the main folders, and rename it strategically, so that a glance is easy to understand. Use metadata for naming folders.
Step 4: Check from time to time, delete duplicate and unnecessary images, update metadata, backup, etc.
How often should I back up my photos?
The frequency of the times you should back up depends on our work volume and image, it’s better to make it frequent and regular such as daily, weekly, and monthly.
Where should I store my digital photos?
You can store your digital photos on platforms like external hard drives, cloud-based storage, DAM, Network Attached Storage (NAS), etc, these are the most popular and widely used.
What is the best way to handle duplicate photos?
You can handle duplicate photos in several ways:
1. Do periodic checks, manually search for them, and delete them.
2. Set those for auto-deletion through photo management software or photo-finding tools.
3. Take advantage of the duplicate deleting feature of cloud storage.
Should I use cloud storage to organize photos?
Yes, it is a wise decision. Cloud storage offers robust solutions for storing, managing, and using photos with backup, security, accessibility with control, sharing space, and lots of other features.
Conclusion
We are about to conclude the article. We hope this article helps you find the right systematic way to organize images and work efficiently so that you can use your potential to the max on your job. These methods we’ve mentioned are popular among photographers and other professionals, you are always welcome to use any idea of organizing photos.
That’s the end of this article. Keep checking our blogs for further educational articles to enhance your skills. Till then, keep practicing.