The winning shot can disappear in less than a second. A striker scores, a runner crosses the finish line, or two players collide, but you capture a blurred, dark, or wrong-focused subject. By the time you notice the problem, the moment is gone and cannot be repeated.
This is why choosing the right camera settings for sports photography matters before the action begins. For most fast sports, start with a shutter speed of at least 1/1000s, an aperture between f/2.8 and f/4, Auto ISO, continuous autofocus, and high-speed burst mode. Together, these settings help freeze movement, maintain focus, and respond to changing light.
However, no single setup works for every game. Indoor courts, outdoor fields, night matches, slower sports, different camera brands, and iPhone photography each require specific adjustments. This guide explains exactly what camera settings a sports photographer should have, and how to prepare the camera.
Is high ISO noise and harsh stadium lighting ruining strong shots? Our Professional Photoshop Service makes them clean and consistent.
Quick Settings Cheat Sheet for Sports Photography
These are basics of a sports shooting setting, not fixed rules. A Formula racing car crossing the frame needs a different shutter speed from an archer pausing before release. The best camera setting for sports photography that assists in capturing the actual movement and conditions in front of you.
| Setting | Recommended starting point |
|---|---|
| Shutter speed | 1/1000s or faster |
| Aperture | f/2.8 to f/4 |
| ISO | Auto ISO, with a practical upper limit |
| Autofocus | Continuous AF |
| Canon AF mode | Servo AF or AI Servo |
| Nikon and Sony AF mode | AF-C |
| Drive mode | High-speed continuous |
| Shooting mode | Shutter Priority or Manual with Auto ISO |
| Metering | Evaluative, Matrix, or Multi |
| White balance | Auto for RAW, venue-specific for JPEG |
| File format | RAW or compressed RAW for important work |
| Starting outdoor setup | 1/1600s, f/4, Auto ISO |
| Starting indoor setup | 1/800s, f/2.8, Auto ISO |
| Starting night setup | 1/800s, f/2.8, Auto ISO |
Understanding the Core Camera Settings for Sports Photography
Sports photography is all about how well you prepare your camera to capture the fast sports action. The action photography settings include shutter speed, which controls movement; aperture, which handles light and depth of field; ISO completes the exposure; and autofocus keeps the athlete sharp as the distance changes.
Shutter Speed: The first priority
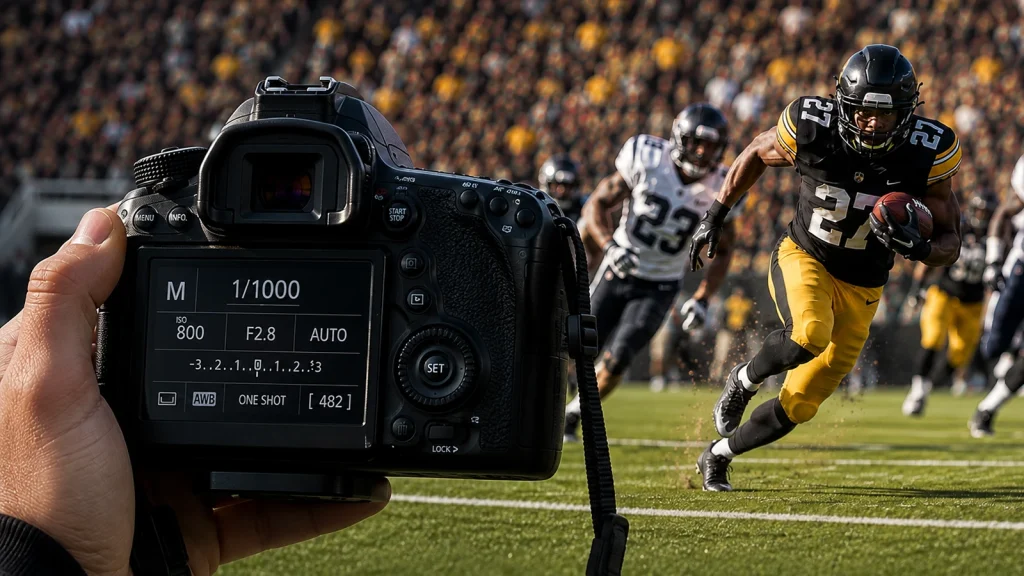
Shutter speed determines whether fast action looks sharp or blurred, so set it first. Start at 1/1000s for football, basketball, volleyball, hockey, and running. Increase to 1/1600s, 1/2000s, or faster for close action, fast balls, motorsports, and explosive track events.
Slower activities do not always need 1/1000s. Golf, snooker, archery, chess, static holds, and stretching can often be captured at 1/250s to 1/500s. Match the setting to the subject’s actual speed instead of using one rule for every sport.
Beginners can use Shutter Priority, marked Tv on Canon and S on Nikon, while experienced photographers can use Manual mode with Auto ISO for steadier exposure control. For more detail, read our digital camera shutter speed guide across different shooting situations.
When to Use a Slow Shutter
Not every action shot needs frozen movement. Panning or intentional motion blur keeps the athlete sharp while the background blurs.
- Shoot in the 1/60s to 1/125s range while tracking the moving subject
- Keep the camera moving smoothly with the athlete throughout the shot, not just at the moment of capture
- Produces a striking, dynamic look that conveys speed and motion
- Requires practice to nail consistently. Missed timing or inconsistent tracking speed results in a fully blurred subject instead of a sharp one
- Best suited for subjects moving in a predictable, lateral path; such as cyclists, runners, motorsports rather than erratic, multidirectional movement
Aperture: Light, Speed, and Background Blur
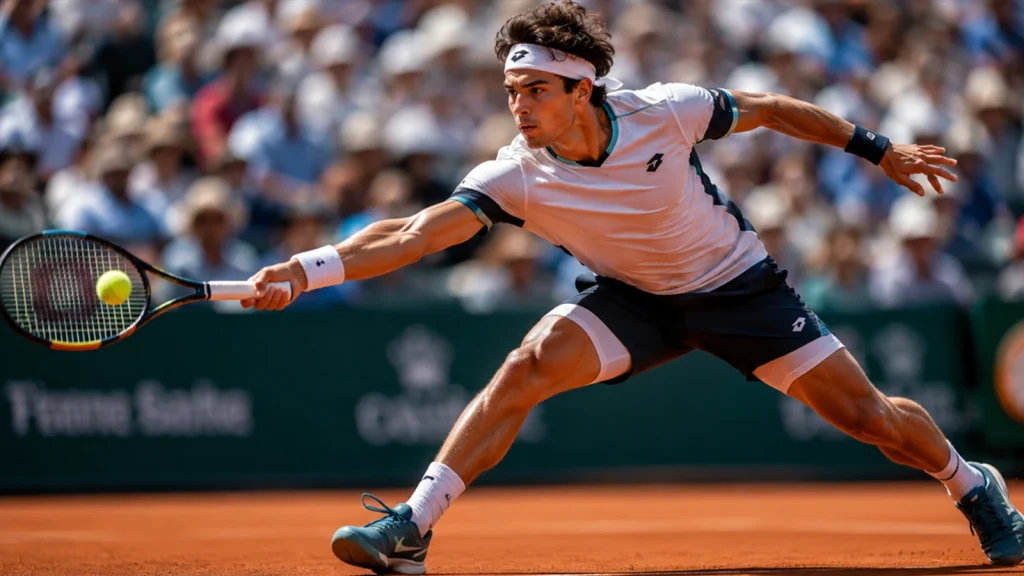
A wide aperture between f/2.8 and f/4 is suitable for many sports. It lets more light reach the sensor, supports a faster shutter speed, and softens distracting spectators, advertising boards, seats, and fences behind the athlete. Digital photography aperture explains this trade-off in more depth if you’re still building intuition for it.
There are a couple of exceptions worth knowing before you’re in the moment, not after:
- Multiple athletes in the same frame (a tackle, a jump ball, a photo finish): Stop down to f/5.6–f/8. This deepens your focus plane so more of the frame stays sharp. You’re trading background separation for group sharpness, so decide which one you need before the shot happens.
- Distant group or field sports with a 300mm+ lens: Some sports photographers prefer a narrower working range, closer to f/3–f/5, since the extra depth helps keep a scattered group in acceptable focus at range.
- General action work: Avoid going below f/5.6 when you have the choice. The background gets busier and more distracting, and you pay for it with a higher ISO.
Which range you land on depends on how many subjects you need sharp and how far away they are. Indoor and outdoor venues handle aperture differently too, covered in more detail later in this guide.
ISO: Balancing Light Sensitivity and Noise
Set ISO only after choosing the shutter speed and aperture. Its job is to complete the exposure without forcing you to slow the shutter and introduce motion blur.
| Lighting condition | Typical ISO range |
|---|---|
| Bright sunlight | ISO 100–400 |
| Cloudy outdoor light | ISO 400–1600 |
| Bright professional arena | ISO 800–3200 |
| Average indoor gym | ISO 1600–6400 |
| Night field | ISO 3200–12800+ |
For most sports, Auto ISO is the easiest option. It lets the camera raise sensitivity as the light drops while you keep the shutter speed required to freeze the action.
Do not treat ISO 6400 as a fixed limit. A sharp image with visible grain is usually more usable than a clean image with motion blur. Noise reduction can improve a high-ISO file, but it cannot fully recover a blurred face, ball, or uniform.
Check out the ISO photography guide, as it provides a fuller explanation of Auto ISO, exposure, and digital noise.
Autofocus Mode: The Hidden Game-Changer
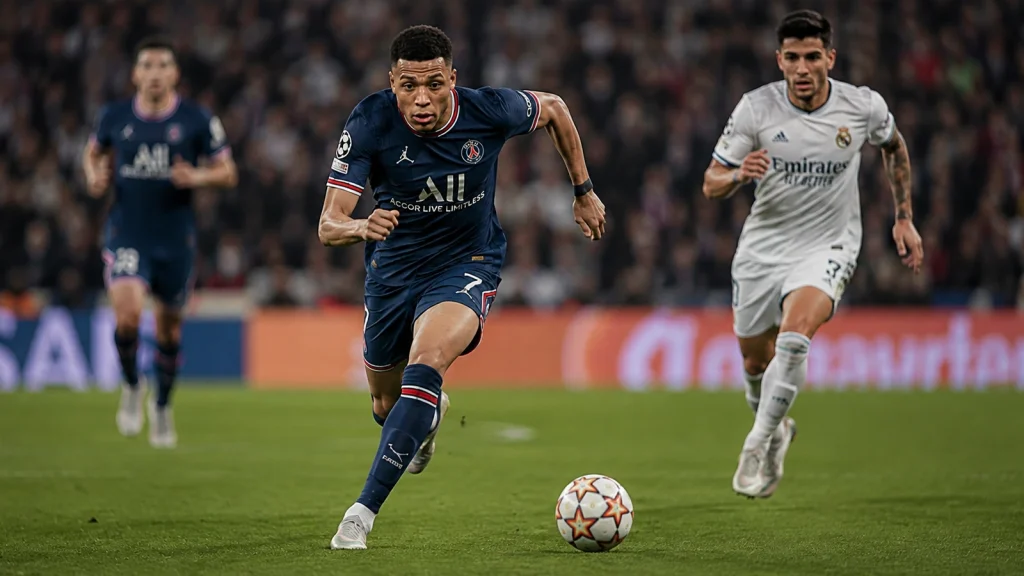
Single autofocus modes such as One-Shot AF and AF-S lock focus at one distance. They suit static subjects but often fail when an athlete runs toward or away from the camera.
Use continuous autofocus instead:
| Brand | Continuous autofocus name |
|---|---|
| Canon | Servo AF or AI Servo AF |
| Nikon | AF-C |
| Sony | AF-C |
| Fujifilm | AF-C |
| Panasonic | AFC |
| OM System | C-AF |
Use continuous autofocus for sports because it keeps updating focus while you track a moving athlete. Canon calls it AI Servo AF, while Nikon, Sony, and Fujifilm call it AF-C.
Choose the AF area based on subject size, movement, and shooting distance. Use a single point for one clear athlete, a zone or expanded area for unpredictable action, and subject tracking on compatible mirrorless cameras.
Back-button focus separates autofocus from the shutter button, giving you more control over when tracking starts and stops. It is most useful once you are comfortable using continuous AF.
Burst Mode, Buffer Control, and File Format
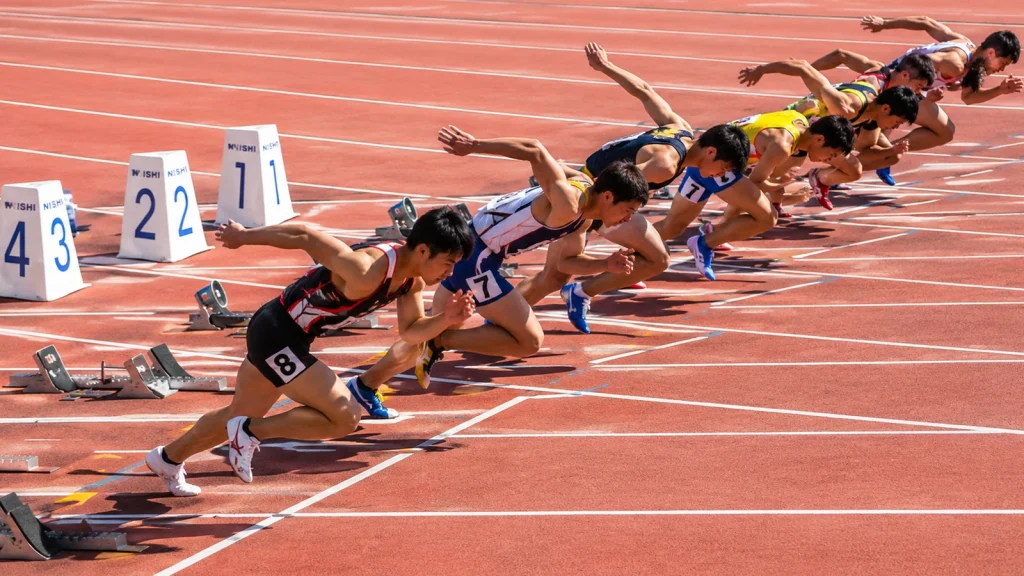
Set the drive mode to High-Speed Continuous and fire short bursts of five to ten frames around peak action. This is usually enough to capture ball contact, tackles, jumps, or finish-line reactions without filling the buffer.
Avoid holding the shutter through the entire play. Predict the decisive moment, start shooting just before it happens, and stop once the action passes to reduce unnecessary files and editing time.
Great action shot ruined by sweat glare, harsh floodlights, or distracting crowds? Our Photo Retouching Service cleans the frame while keeping the moment natural.
Choose the File Format Based on the Assignment
Before the event, test your chosen file format, memory card, burst rate, and buffer depth. This prevents the camera from slowing down during the most important sequence.
| File format | Best suited for | Main trade-off |
|---|---|---|
| RAW | Night games, mixed lighting, paid assignments, heavy editing | Larger files and shorter sustained bursts |
| JPEG | Fast delivery, social media, long bursts, limited editing | Less exposure and color recovery |
| Medium JPEG | Maximum burst duration and smaller file sizes | Reduced resolution and cropping freedom |
| C-RAW or Compressed RAW | Quality-focused sports work with better buffer performance | Availability and compression vary by camera |
- RAW files retain more highlight, shadow, and color information, which makes them safer for indoor or night sports.
- JPEG files write faster and clear the buffer sooner, making them useful when delivery speed matters more than extensive post-processing.
- Compressed RAW or C-RAW provides a practical middle ground on compatible Canon cameras.
A reliable outdoor starting point, validated across the sports photography community: ISO 800, f/4, 1/2000s, Auto ISO, and a 10fps burst. Dial in from there once you know your specific sport.
Camera Settings for Sports Photography on Canon
Configure the exposure, autofocus, and burst settings before the event begins. Canon menu names vary by model, but the following setup works across most EOS DSLRs and EOS R mirrorless cameras.
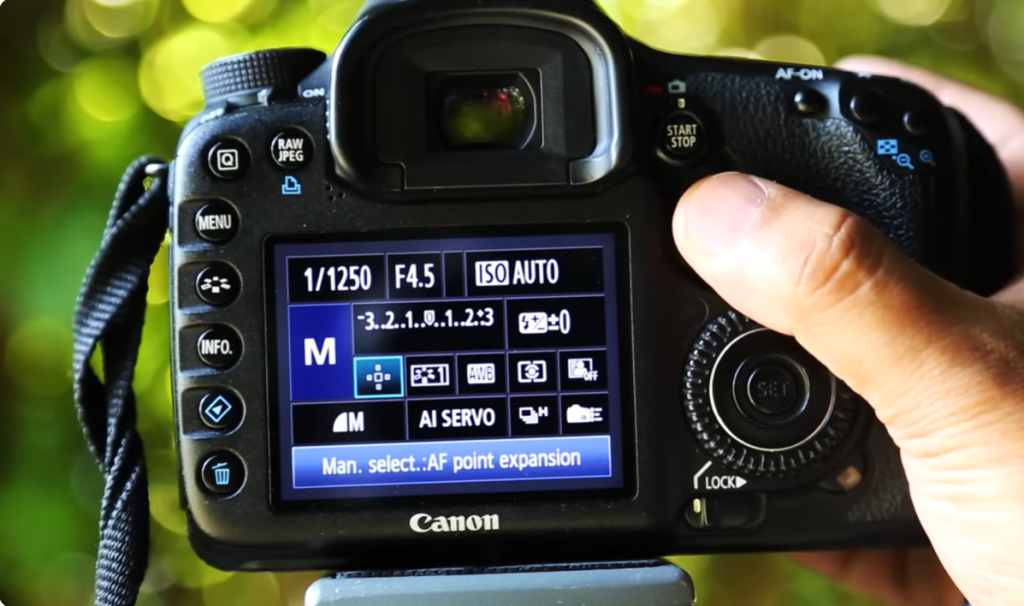
Setup: Turn on camera → set to Manual mode → press Q button to access settings
Shutter speed: Keep high — 1/1250 to 1/2000+
Aperture (f-stop): Keep low (wide opening) — f/3 to f/5, ideally around f/4.5. Requires a 300mm+ lens to support this at distance
ISO: Leave on Auto
Exposure compensation: Adjust based on location
- Outdoor/good light: reduce slightly for lower tint
- Floodlights/Night sports: Slightly decrease exposure compensation to prevent overexposure, don’t change ISO
Flash
- If no flash is attached, set Flash Exposure Compensation to 0.
- Only adjust flash exposure when using an external flash.
Image Size
- Recommended to choose Medium image size, not Large.
- Reason: Smaller files allow the camera to maintain longer burst sequences before the buffer fills.
Picture Style
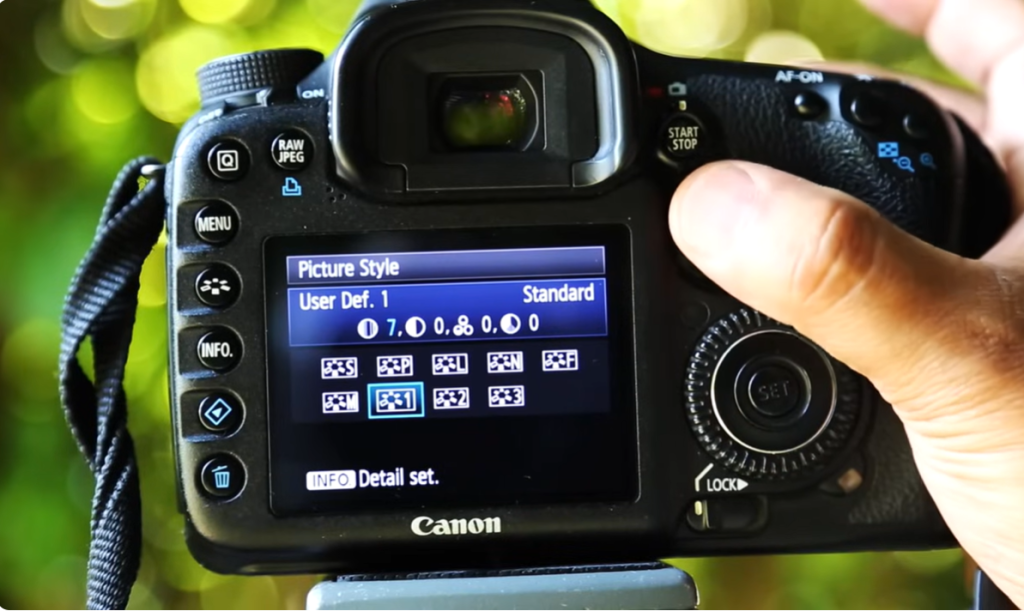
- Use User Defined Picture Style 1.
- Increase Sharpness to Level 7.
Reason: Helps make fast-moving subjects appear sharper straight out of the camera.
Auto White Balance
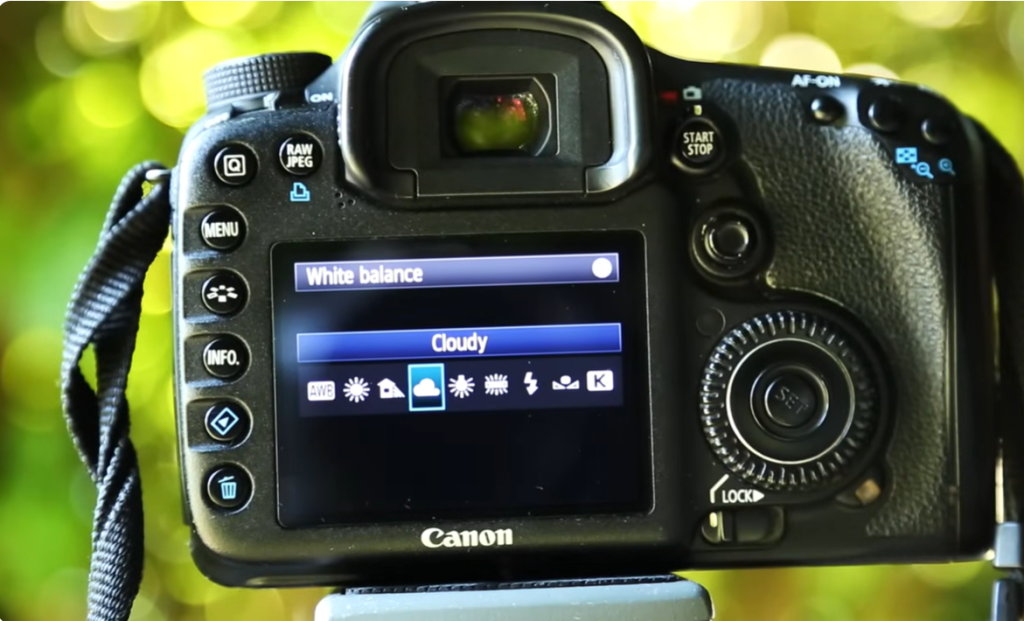
- Cloudy adds slightly warmer, richer colors.
- Alternatively, use a higher Kelvin value if you want more warmth.
Metering
- Use Evaluative Metering, since you are picking up within the frame.
- Choose “Spot Metering”, since sports scenes contain multiple moving subjects rather than a single stationary subject.
Drive mode: High continuous shooting (not low continuous)
Autofocus mode: Must on “AI Servo” to get One Shot because it continuously tracks focus. Out of 50 burst shots, expect roughly 40 in focus
Autofocus Settings
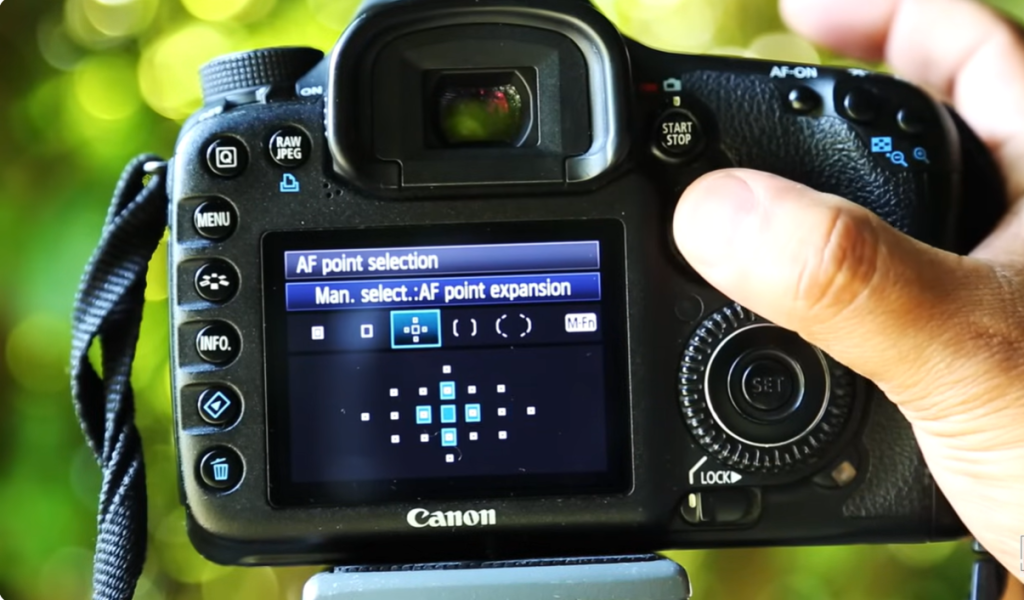
Choose the AF area based on the number of subjects and how they move.
- Single athlete (golf, track, etc.): Spot AF or Single-Point AF for precise focus on one subject.
- Team sports (football, basketball, boxing, etc.): AF Expansion / Expanded AF Area to keep multiple moving players in focus.
- Distant subjects: Use AF Point Expansion to improve focus tracking when shooting from the stands or across the field.
Outdoor Sports Settings
Use these settings in daylight to freeze fast action while maintaining sharp, well-exposed images.
- Mode: Manual
- Shutter Speed: 1/1250 to 1/2000 sec
- Aperture: f/3 to f/5
- ISO: Auto
- White Balance: Auto or Cloudy
- Metering: Evaluative
- Drive Mode: High-Speed Continuous
- AF Mode: AI Servo
- Exposure Compensation: Slightly increase if the image looks too dark.
Night Sports / Floodlights
These settings help control bright stadium lights while keeping moving subjects sharp.
- ISO: Auto
- Exposure Compensation: Slightly reduced to avoid blown highlights from floodlights.
- White Balance: Auto (adjust later if needed when shooting RAW).
- AI Servo: On for continuous subject tracking.
- High-Speed Continuous: On to capture multiple frames during fast action.
Stadium lighting turning white jerseys grey and skin tones orange? Our Photo Color Correction Services bring back accurate, consistent colour.
Camera Settings for Sports Photography on Nikon
Build a dedicated Nikon sports configuration around AF-C, Dynamic-Area AF, continuous drive, and controlled metering. Menu options differ between older DSLRs and newer Z-series cameras, so apply only the settings supported by your model.
Camera setup: Set to AF-C (continuous autofocus), shooting mode set to continuous/burst
Custom setting bank: Create a new bank for sports (keep Bank A as “normal bank”, use Bank B for “sports”) so you can switch fast
AF area mode:
- Spot or Single-point: Tight, clear shot on subject, example close shot soccer ball
- Faster action: Dynamic Area AF
- Avoid using Auto-area AF: it uses 3D tracking and focuses on whatever’s closest to the lens, not necessarily your subject. For instance, a ball crossing the frame gets focus somewhere else instead of the player’s face, knee, hand, or bat)
Metering:
- First understand what types of lighting you’re in.
- Don’t choose the Matrix metering,when shooting ground level.
- The center-weighted area size is 8mm for sports, when you’re in stadium lights or bright sun.
Framing rule: Keep the subject centered in the viewfinder, shoot tight. Loose or distant shots, for example: a player’s arms visible mid-field with no ball in view; won’t sell, tight, clean shots do.
AF-C priority selection (Release vs. Focus):
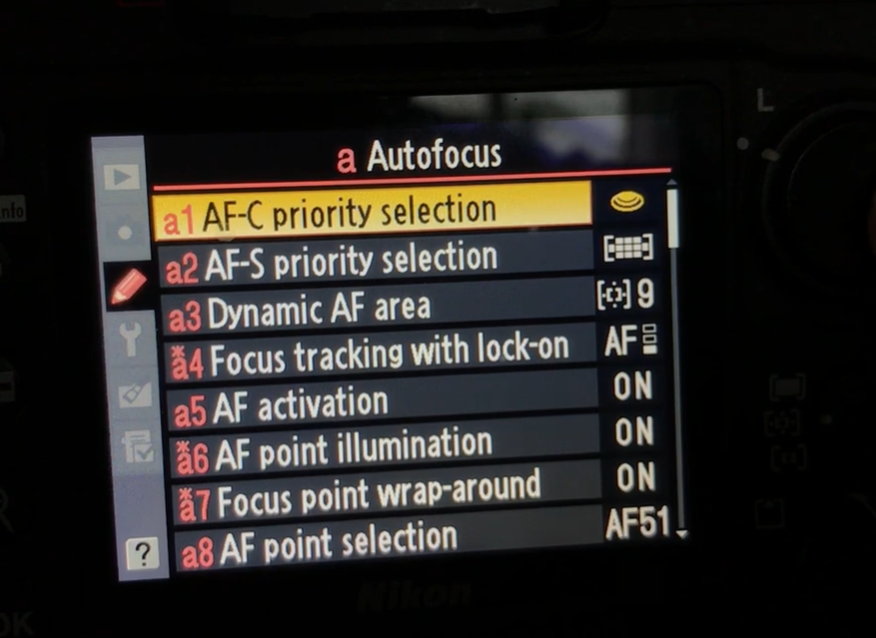
Set to Release mode as this maximizes shots per burst and keeps frame rate up. Also gives you volume with more blurry frames mixed in
VR (Vibration Reduction): Off
Shutter speed: Most sports are shot at fast shutter speeds (1/320 sec or faster, often 1/500–1/1200 sec), making image stabilization unnecessary.
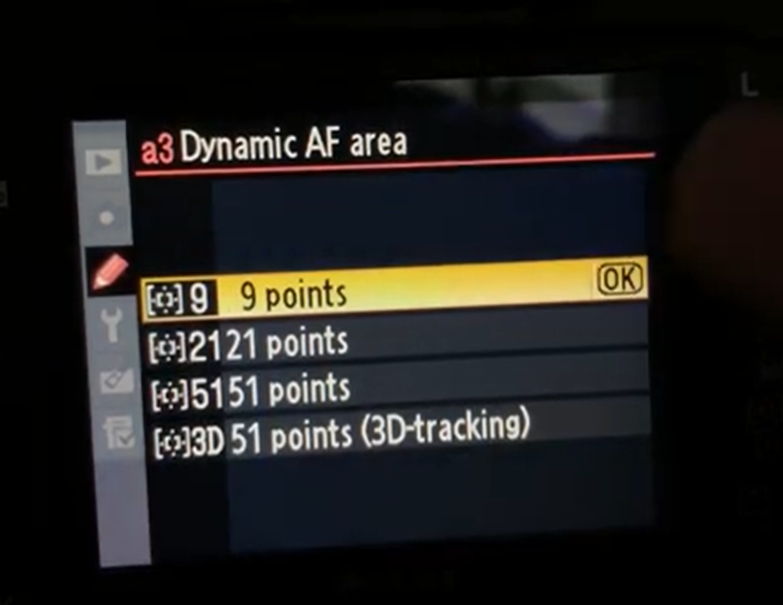
Dynamic AF area size:
- 9 points: when you can shoot tight and close to the subject
- 21 points: when the subject is farther away, moving faster, or you’re using too short a lens for the distance
Don’t go beyond 21 for sports, as 51 is reserved for point selection range, not dynamic tracking
Focus tracking with lock-on: Short, refocuses quickly if something briefly crosses in front of the subject, instead of staying locked onto the obstruction
AF point illumination: On; makes the active autofocus point easier to see while tracking action.
AF point wraparound: On; allows focus points to cycle from one side of the frame to the other, making focus point selection much faster.
AF point selection: 51 points as your selection range, and skip the crosshatch-pattern sub-options.
Great action shot ruined by stray objects, blocked backgrounds, or awkward framing?
Our Image Manipulation Services refine the scene while keeping the action believable.
Camera Settings for Sports Photography On Sony, Fujifilm & Other Brands
The fundamental settings for sports photography are identical regardless of brand: fast shutter, wide aperture, continuous AF, burst mode. What changes is the terminology and menu location. Here’s how to dial in the right settings on Sony, Fujifilm, and other systems.
Sony A6000 / A5100 Running Photography Settings
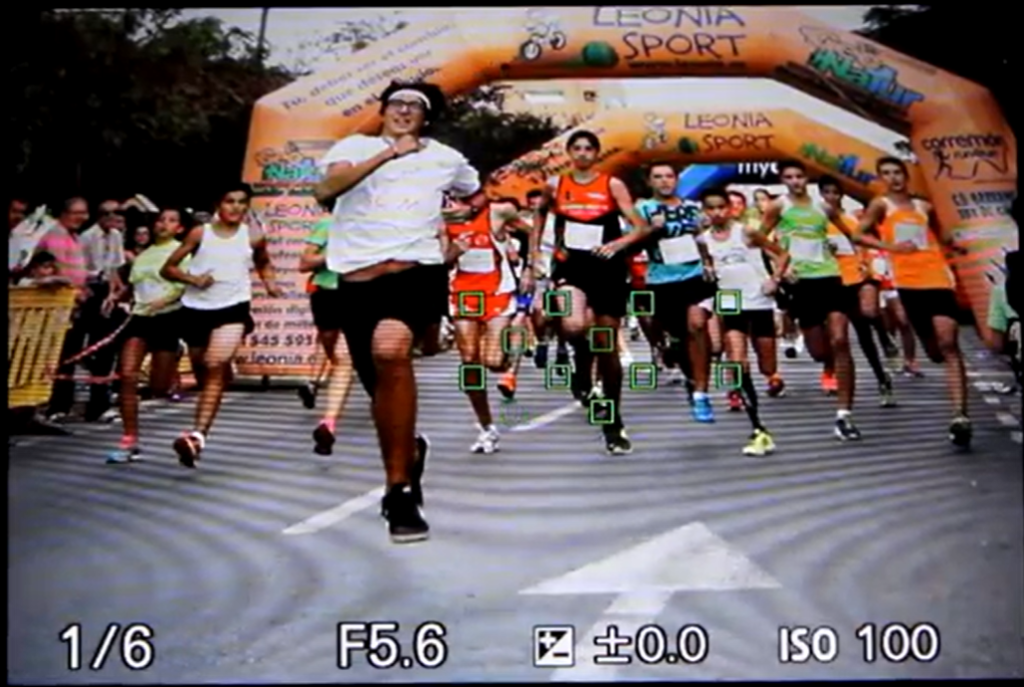
- Camera/lens used: Sony A6000 with a 20mm pancake lens
- Shooting mode: Aperture Priority
- Aperture: f/5.6
- Shutter speed: ISO adjusted until shutter reaches 1/800s or faster
- ISO: 100 or 200, to keep noise low
- Drive mode: Continuous Shooting; set to High shoot
Focus area: Flexible Spot; set to Large flexible shot
Focus mode: Automatic AF, as it detects whether the subject is moving or stationary. When detecting the subject is moving; use continuous auto focus mode and continue to focus , till you press the shutter button. And when the subject is not moving, use single shot AF and lock focus and press the shutter button.
On the Wide or Zone focus tracking:
- Achieved by setting Focus Mode to “Continuous AF” and Focus Area need to be set “Wide”
Resolution: Choose 24 megapixels; high enough to crop images aggressively and get a print-quality result
Fujifilm: Sports Camera Settings (X-T Series, X-H2S, X100 Series)
Fujifilm’s naming closely mirrors Sony’s for autofocus, but its color science adds an extra layer worth using deliberately for sports. Film simulations aren’t just a stylistic choice here; the wrong one can flatten the contrast and color punch that action photography benefits from.
- Set AF-C: Menu → AF/MF Setting → AF Mode → AF-C.
- Use Zone AF for controlled tracking or Wide/Tracking for unpredictable movement on compatible bodies.
- Enable Subject Detection AF on models such as the X-H2S and X-T5 to recognise people, animals, or vehicles.
- Select S mode for Shutter Priority and start at 1/1000s.
- Set the drive mode to CH. The X-H2S reaches up to 40 fps electronically or 15 fps mechanically. The X-T5 reaches up to 20 fps electronically with a crop or 15 fps mechanically.
- On the X-H2S, enable Pre-Shot ES to capture frames from before the shutter is fully pressed.
- For JPEGs, use Provia/Standard for balanced colour or Velvia for stronger saturation. Avoid Eterna when you need punchy contrast for sports action.
Panasonic Lumix, OM System (Olympus), and Other Brands
Smaller-sensor systems have closed the gap on sports performance significantly in recent generations, largely through faster processors and pre-buffering features that used to be exclusive to flagship full-frame bodies. Panasonic and OM System each have their own standout feature worth knowing before you shoot.
Panasonic Lumix (GH6, G9 II, S5 II):
- Set continuous autofocus to AFC.
- On newer bodies such as the S5 II and G9 II, use Phase Hybrid AF for improved subject tracking.
- Pair AFC with the 225-zone AF area for moving subjects.
- Select SH1 or SH2 for the fastest burst rate.
- The G9 II can reach up to 60 fps in SH2 electronic shutter mode.
OM System / Olympus Sports Settings
- Set continuous autofocus to C-AF.
- Enable AI Subject Detection for motorsports, birds, and animals.
- Use Pro Capture to pre-buffer frames while the shutter is half-pressed.
- Fully press the shutter at the decisive moment to save the buffered sequence.
- Compatible OM-1 modes can reach up to 120 fps with the electronic shutter.
How to Set Your Camera for Outdoor Sports Photography
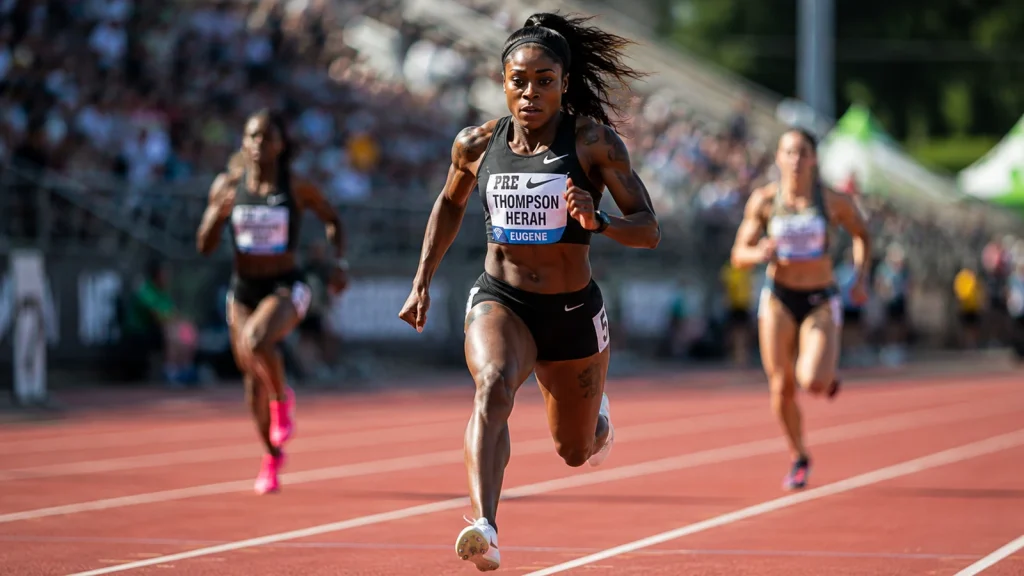
Use Manual mode with Auto ISO to keep motion and depth of field consistent while the camera adjusts to changing daylight.
1. Manual Mode + Auto ISO
Select Manual mode → set shutter speed and aperture → enable Auto ISO
| Outdoor condition | Shutter speed | Aperture | Typical ISO |
|---|---|---|---|
| Bright sunlight | 1/2000s | f/4 to f/5.6 | 100–400 |
| Partly cloudy | 1/1250s | f/2.8 to f/4 | 400–800 |
| Overcast | 1/1000s | f/2.8 to f/4 | 800–1600 |
| Golden hour | 1/800s | f/2.8 | 800–3200 |
Keep shutter speed at 1/1000s or faster for most field sports. Increase to 1/1600s–1/2000s for sprinting, ball contact, motorsports, and fast lateral movement across the frame.
2. Exposure Compensation for Backlit Athletes
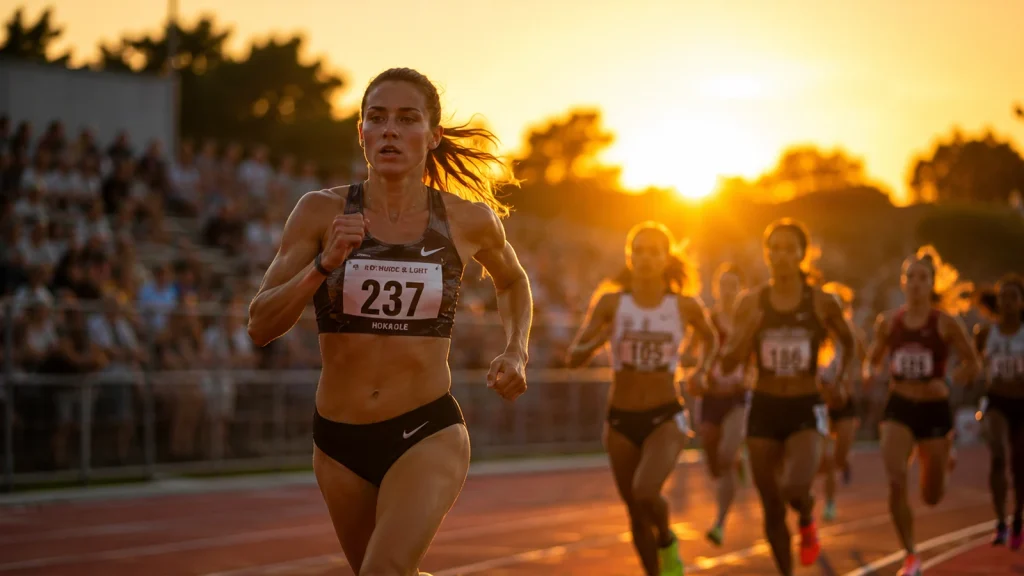
Take test shots during warm-up. Check the athlete’s face, bright uniform areas, and the histogram.
Start at +0.3 to +0.7 EV when:
- Sun is behind the athlete
- Faces appear dark against a bright sky
- Players move into deep shade
Increase further only if the athlete stays underexposed. Reduce exposure if white jerseys, helmets, or reflective gear lose highlight detail.
Note: In Manual mode with Auto ISO, exposure compensation typically adjusts the ISO the camera selects (model-dependent).
3. White Balance
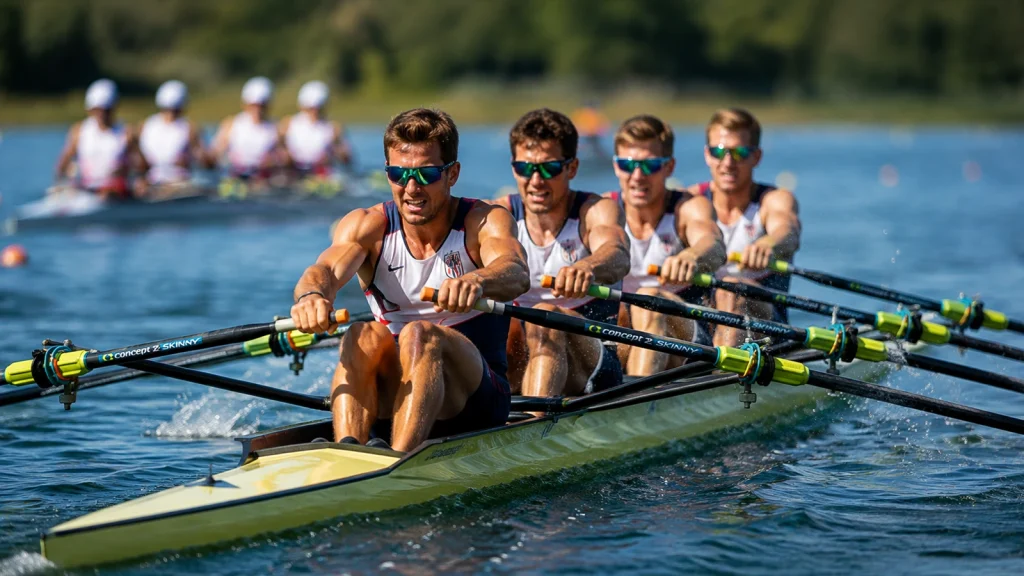
- Direct sunlight: 5200K–6000K
- Overcast: Cloudy WB or 6000K–7000K
- Shooting RAW: Auto WB
- Consistent JPEG batches: Fixed Kelvin setting
Avoid changing white balance mid-event unless lighting shifts significantly, thus a fixed setting prevents color shifts between bursts.
4. Lens Selection by Position
| Shooting position | Practical focal length |
|---|---|
| Close sideline | 70–200mm |
| Medium-sized field | 100–400mm |
| Far side of a large field | 200–500mm |
| Distant track events | 300–500mm |
These are approximate full-frame equivalents; as APS-C cameras produce a narrower field of view at the same focal length.
Keep the active AF area on the athlete’s face or upper body. Leave space in the direction of movement so the subject doesn’t run out of frame.
Image stabilization steadies the viewfinder for long-lens tracking, but shutter speed is what actually freezes the action.
5. Metering by Lighting Direction
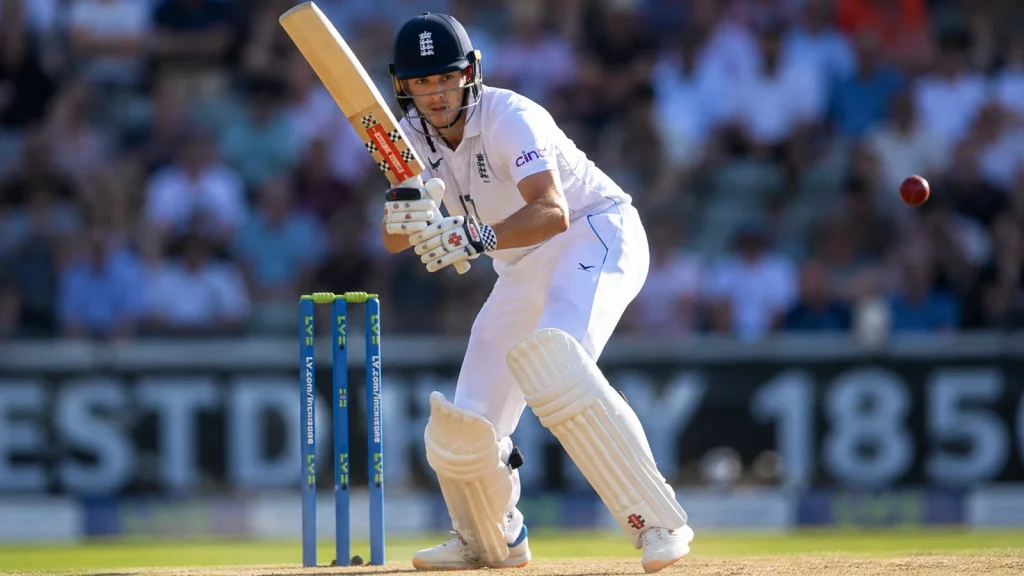
- Balanced daylight: Evaluative or Matrix Metering
- Bright sky or dark background influencing the reading (subject near center): Center-Weighted Metering
- Spot Metering: only when you can hold the metering point on a consistent part of the athlete; if it shifts between dark jersey, bright face, and background, exposure will swing sharply between frames
Check the histogram and highlight warnings after the first burst. Protect detail in white shirts, helmets, and reflective numbers rather than judging exposure from the rear screen alone.
6. Pre-Position for Peak Action
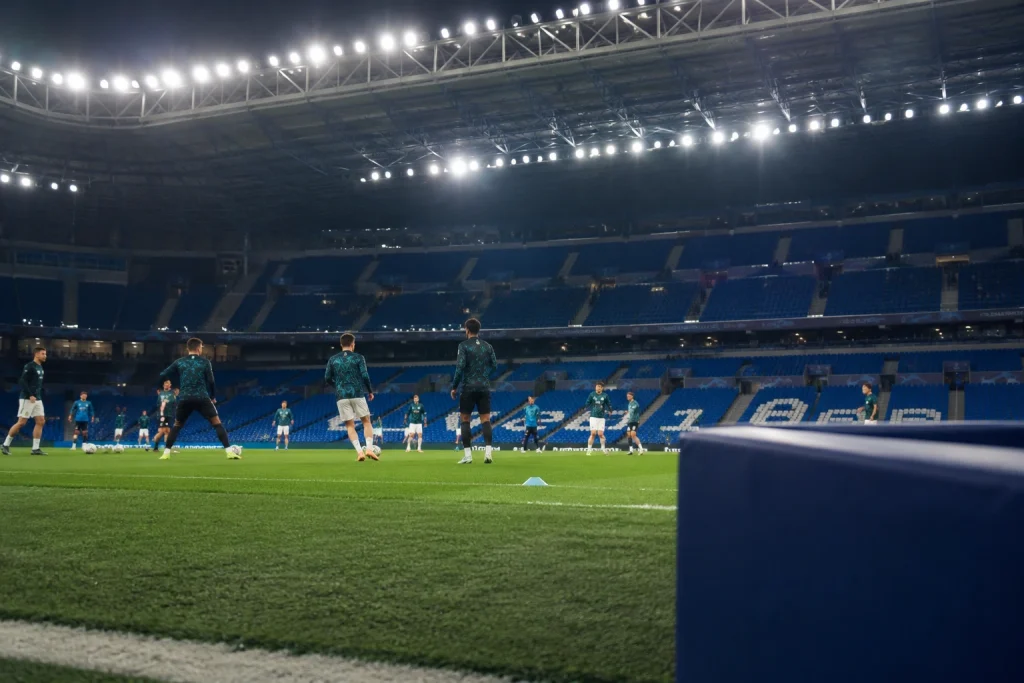
Before the play begins:
- Identify where the tackle, shot, catch, turn, or finish will likely happen
- Position the active AF area over that zone
- Start tracking before the athlete reaches it
- Fire a short burst just before the expected peak
- Release the shutter once the moment passes
Stand with the sun behind or slightly beside you when possible; this puts cleaner light on the athlete’s face and reduces harsh contrast with the background.
Stay outside the active play area, with enough clearance for athletes, balls, and equipment entering the sideline.
How to Set Your Camera for Indoor Sports Photography
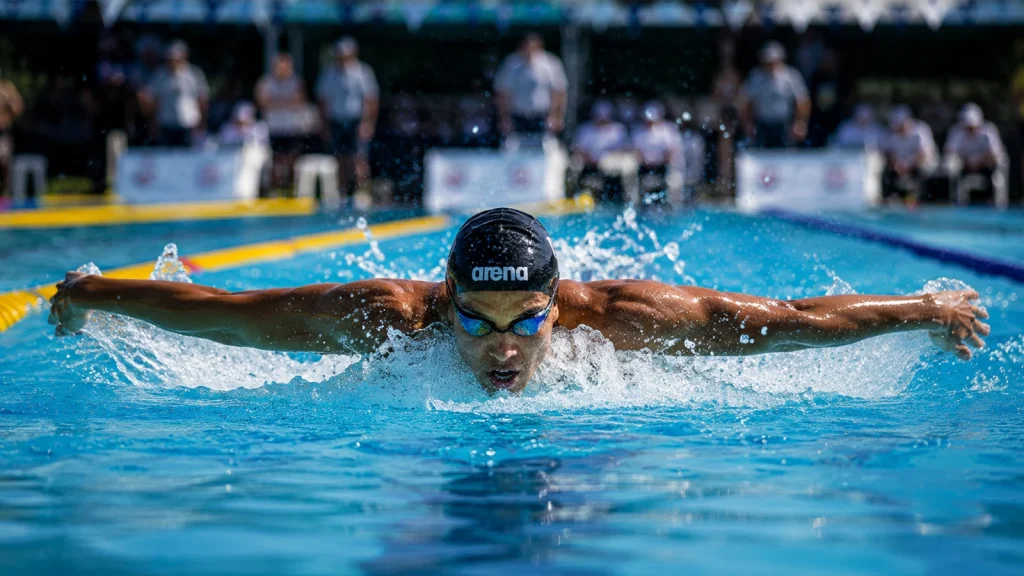
Set shutter speed first, open the aperture, and raise ISO until fast indoor action is correctly exposed.
1. Manual Mode + Auto ISO
Manual mode with Auto ISO keeps shutter speed and aperture fixed while ISO compensates for uneven gym lighting.
| Indoor sport | Shutter speed | Aperture | Typical ISO |
|---|---|---|---|
| Basketball | 1/800s–1/1000s | f/2 to f/2.8 | 3200–6400 |
| Volleyball | 1/800s | f/2.8 | 1600–6400 |
| Gymnastics | 1/500s–1/800s | f/2 to f/2.8 | 3200–6400 |
| Swimming | 1/500s–1/1000s | f/2.8 | 1600–6400 |
| Wrestling | 1/500s–1/800s | f/2.8 | 3200–6400 |
Use 1/800s–1/1000s for fast court action. Drop to 1/500s only for slower movement or when the venue can’t support a faster exposure.
2. Open the Aperture Before Lowering the Shutter
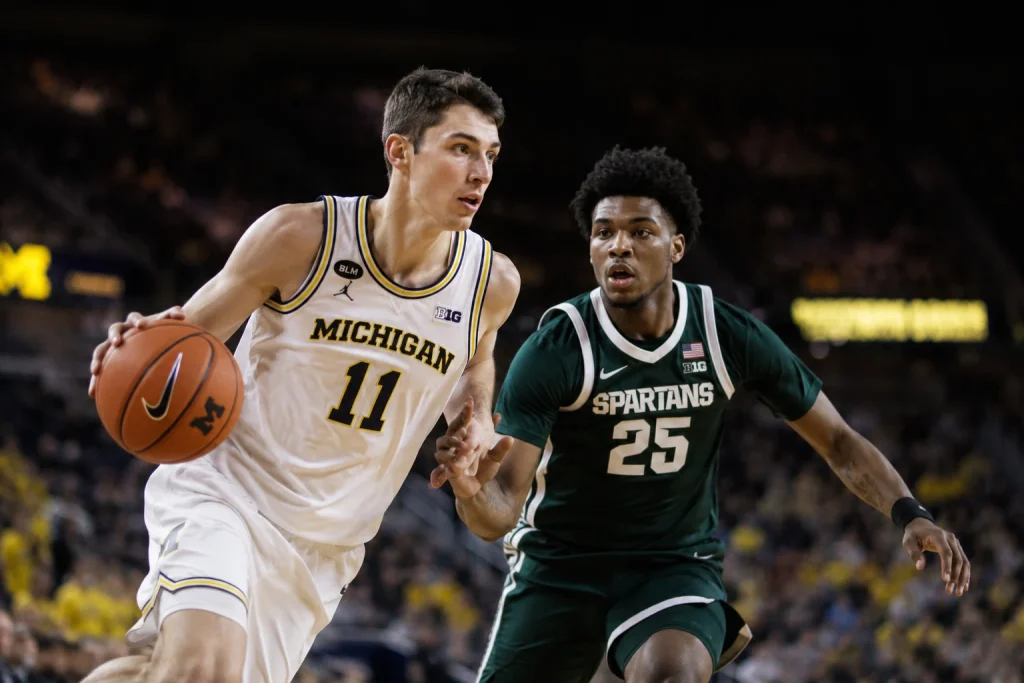
Use an f/2.8 zoom for flexible coverage. In smaller gyms, a 35mm, 50mm, or 85mm prime at f/1.4–f/2 provides one or two additional stops of light.
At f/1.4, depth of field becomes extremely shallow. Move to f/2 or f/2.8 when the athlete’s face, hands, equipment, and ball fall on different focus planes.
3. Raise ISO to Protect Motion Sharpness
Use roughly ISO 3200–6400 in an average school gym. Push to ISO 12800 when needed rather than dropping shutter speed below what the sport requires to freeze motion.
Review faces and uniform detail at 100% during warm-up. A correctly exposed ISO 12800 shot often produces a cleaner final file than an underexposed ISO 6400 image brightened heavily in post.
Shoot RAW or RAW+JPEG when lighting changes across the court. RAW retains more control over white balance, shadows, highlights, and high-ISO noise.
For inconsistent color across large sports batches, professional photo color correction services can standardize skin tones, team colors, and venue lighting.
4. Test for Flicker and Banding
Artificial lights can cycle in brightness and color, producing alternating dark, bright, green, or yellow frames.
During warm-up:
- Capture a burst at your intended shutter speed
- Compare consecutive frames for brightness or color shifts
- Enable Anti-Flicker or Flicker Reduction
- Retest burst rate and shutter timing
- Switch from electronic to mechanical or electronic first-curtain shutter if horizontal banding remains
Anti-flicker shooting may slightly delay shutter release, reduce max frame rate, or shift timing between frames and test it before the main action starts.
5. Set White Balance for the Actual Venue Light
Choose a white balance that matches the venue lighting.
| Lighting | Recommended White Balance |
|---|---|
| Mixed indoor lighting | 3200K–5600K |
| Tungsten lighting | Tungsten Preset |
| Fluorescent lighting | Fluorescent Preset |
| Consistent lighting | Custom White Balance |
| RAW shooting | Auto White Balance |
Tip: Test different areas of the court since LED, fluorescent, and daylight sources may create different colour casts within the same venue.
6. Control the Autofocus Area
Use continuous autofocus:
- Canon: AI Servo or Servo AF
- Nikon, Sony, Fujifilm: AF-C
- Panasonic: AFC
- OM System: C-AF
Choose a controlled Zone or Dynamic Area instead of full Auto-Area AF. Wide automatic coverage may lock onto spectators, signs, nets, barriers, or a closer player instead of your subject.
Use a smaller AF area when shooting through:
- Volleyball nets
- Hockey glass
- Swimming splashes
- Court-side barriers
Set a short or medium tracking lock-on delay when players frequently cross in front of your subject. This prevents autofocus from jumping to a temporary obstruction.
7. Work From the Most Evenly Lit Action Zone
During warm-up, identify the area with the most consistent light rather than simply the brightest spot in the venue.
Set exposure for that zone and position yourself so peak action develops within it. Fire short bursts around:
- The top of a jump
- Ball release
- A serve
- A tackle
- Contact between players
Short, timed bursts protect the buffer and produce more consistent exposure than tracking athletes through every unevenly lit corner of the venue.
How to Set Your Camera for Sports Photography at Night
Night sports need the same motion-control settings as indoor sports, but floodlight strength and color can vary across the field. Set exposure using the darkest action area you still need to photograph.
1. Lock the Shutter Speed and Aperture
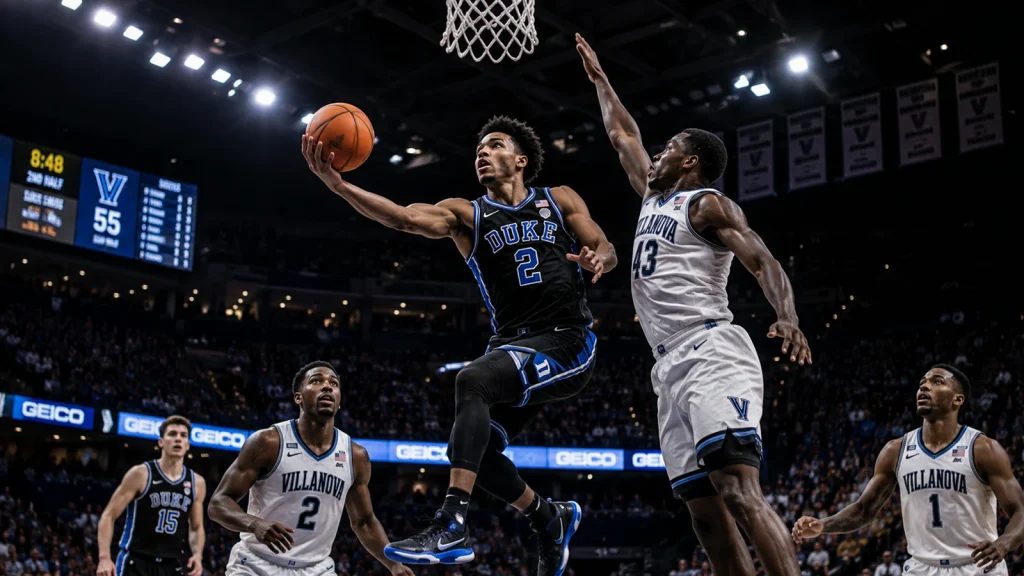
Start with Manual mode and Auto ISO.
| Venue | Shutter speed | Aperture | Typical ISO |
|---|---|---|---|
| Professional stadium | 1/1000s | f/2.8 | 1600–3200 |
| Bright college venue | 1/800s | f/2.8 | 3200–6400 |
| High school field | 1/640s–1/800s | f/2.8 | 6400–12800 |
| Dark community field | 1/500s | f/2.8 | 12800+ |
Keep 1/800s–1/1000s for fast action. Drop toward 1/500s only when the venue can’t support a faster setting and movement is less explosive.
2. Use an f/2.8 or Faster Lens
An f/2.8 lens collects four times as much light as an f/5.6 lens at the same shutter speed and ISO; this can bring ISO 12800 down to roughly ISO 3200.
Use:
- 70–200mm f/2.8 for near sidelines
- 300mm f/2.8 for distant field action
- f/1.8 primes where positioning allows
Very wide apertures reduce depth of field, so keep the active AF area on the face or upper torso.
3. Let ISO Rise
Keep ISO on Auto.
Typical ISO ranges:
| Venue | Typical ISO |
|---|---|
| Professional stadium | 1600–3200 |
| Bright college venue | 3200–6400 |
| High school field | 6400–12800 |
| Dark community field | 12800+ |
High ISO
Set the Auto ISO limit based on your camera’s acceptable noise performance.
Tip: It’s better to capture a correctly exposed image at ISO 12800 than an underexposed ISO 6400 image that requires heavy brightening later.
4. Meter for the Athlete, Not the Dark Stands
Dark backgrounds can cause Evaluative or Matrix Metering to overexpose the athlete.
Use:
- Center-Weighted Metering when the player stays near frame center
- Spot Metering for controlled backlit situations
- Highlight-Weighted Metering when white uniforms and reflective numbers clip easily
Check the histogram and highlight warnings after the first burst. Reduce exposure if white kits lose texture, even if the dark background stays nearly black.
5. Set White Balance for the Floodlights
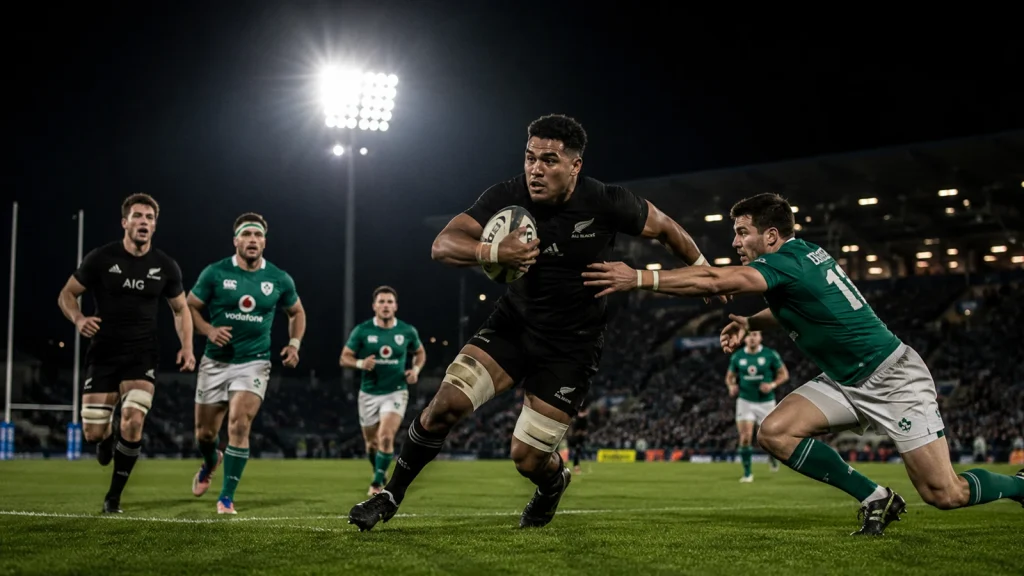
Use these only as starting points:
- Tungsten or sodium-vapor lighting: 2800K–3200K
- Neutral LED floodlights: 4000K–5500K
- Mixed floodlights: Shoot RAW and correct color by field zone
Avoid relying on one white-balance value when different parts of the field use different lamp types. Create separate correction groups in post-processing when needed.
A structured photography post-processing workflow helps manage noise, color variation, cropping, and sharpening across night sports files.
6. Test for Flicker and Banding
Take a fast burst during warm-up and compare consecutive frames.
If brightness or color shifts between frames:
- Enable Anti-Flicker or Flicker Reduction
- Switch from electronic to mechanical shutter
- Test a slightly different shutter speed
- Check whether burst rate changes
- Keep the setup that gives the most consistent exposure
Electronic shutters can produce horizontal banding under some LED floodlights, even when individual frames look correctly exposed.
7. Use a Controlled AF Area
Low contrast makes autofocus less reliable at night. Use continuous AF with a center cluster, Zone AF, or Dynamic Area placed over the upper body.
Avoid an unnecessarily wide tracking area when:
- Several players overlap
- The background contains bright signs
- Reflective equipment enters the frame
- The athlete occupies a small part of the image
Start tracking before the player enters the peak action zone — this gives autofocus time to establish subject distance before the burst starts.
8. Check Exposure Across the Field
Floodlights rarely illuminate every area equally. During warm-up:
- Photograph the center, near sideline, far sideline, and goal areas
- Note how much Auto ISO changes
- Identify zones where the camera reaches its maximum ISO
- Decide whether to lower shutter speed slightly or avoid those zones
- Save separate exposure settings when your camera supports custom modes
For high-volume night events, professional photo editing services can help standardize color and exposure across files captured under uneven floodlights.
IPhone Camera Settings for Indoor Sports Photography
You can capture usable indoor sports photos with an iPhone, but timing, distance, and lighting matter more than advanced menu settings. Use Burst mode for unpredictable movement, choose a practical resolution, and control exposure before the athlete reaches the action zone.
Enable Burst Mode
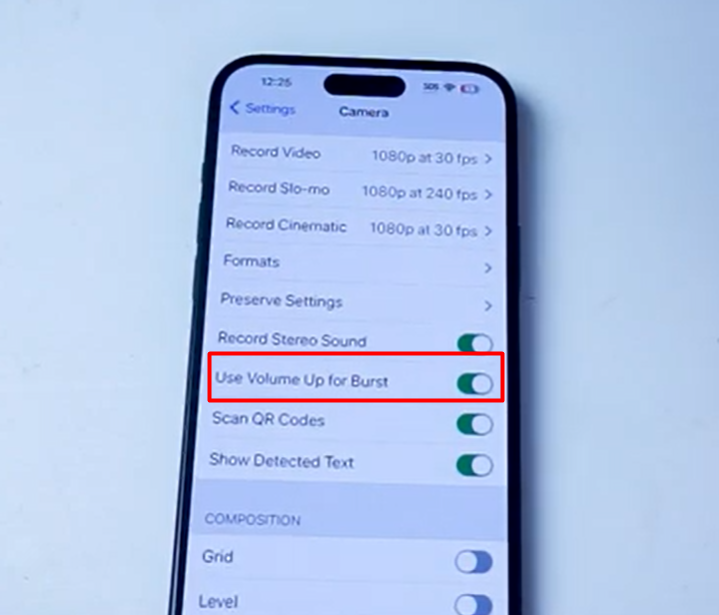
Setup: Settings → Camera → toggle “Use Volume Up for Burst” on
Once enabled:
- Press the volume-up button, your camera will start capturing a rapid sequence of images with a single press, rather than one photo per press.
- Each burst captures multiple frames within a fraction of a second
- Best suited for subjects with unpredictable, fast movement, for instance athletes, wildlife in motion
After shooting: Review the burst sequence afterward in your photo gallery and select the sharpest individual frame from the sequence
Resolution
Setup: Settings → Camera → Formats
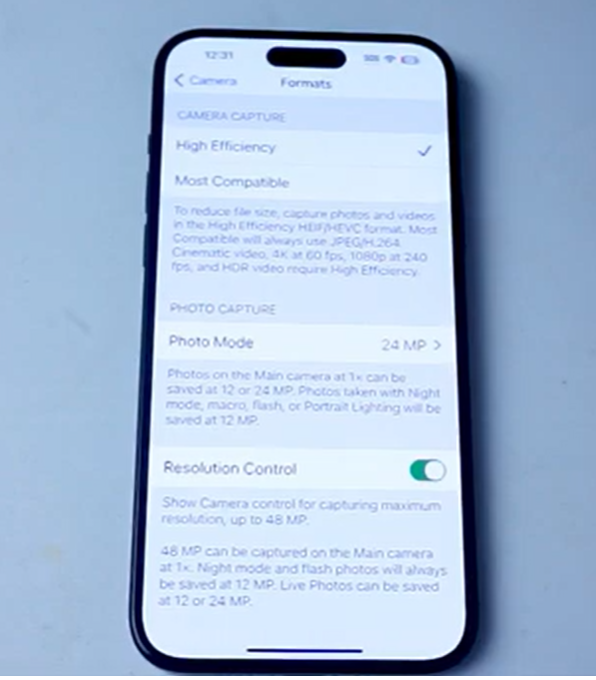
Set Photo Mode:
- Adjustable between 12MP and 24MP
- Enable resolution control for capturing up to 48MP
Why higher resolution matters for action shots:
- Captures finer detail on fast-moving subjects, or dynamic scene, as it capture the action shot with more precision
- Greater crop flexibility: since you won’t always get the perfect frame composed in-camera during fast action, higher resolution lets you crop more aggressively in post without losing sharpness or detail
- Better print quality: high resolution is essential if you plan to print the shots, for crisp detail and vibrant color
- Improves digital zoom results: when you can’t physically get closer, for example wildlife shots, higher resolution reduces noise and detail loss from digital zoom. Optical zoom is still preferred for quality, but digital zoom becomes far more usable with higher resolution to draw from
Exposure Compensation
Setup: Open Camera app → tap the subject/area of the shot on screen → a sun icon appears next to the tapped point → slide your finger up or down to brighten or darken the exposure
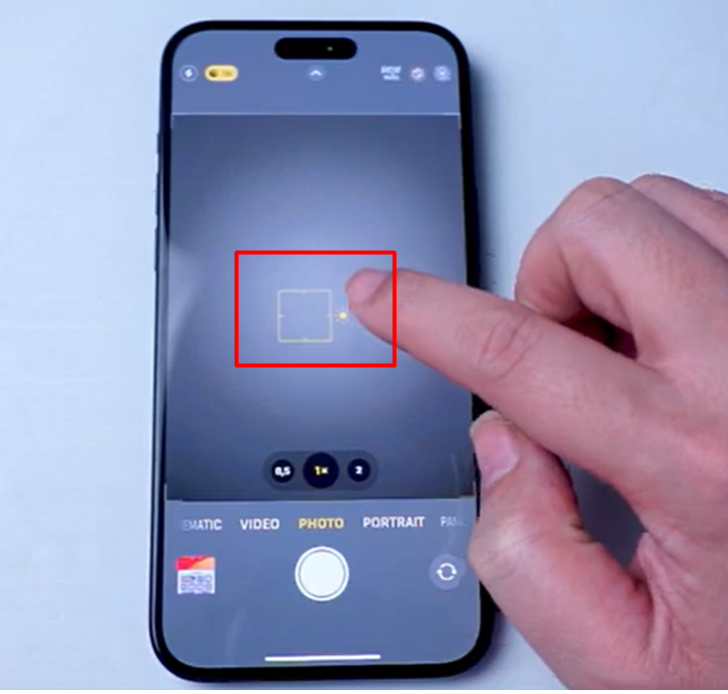
Why it matters for action shots specifically:
- Action photography often happens in unpredictable or rapidly changing lighting, for instance stadiums, wildlife habitats. Very useful where it’s hard to get an exposure.
- Fast-moving subjects can pass through light and shadow quickly, causing exposure inconsistency between frames
- Adjusting exposure compensation prevents overexposure (blown-out highlights, lost detail) and underexposure (shadows too dark, lost detail)
- Keeps a balanced exposure that preserves detail in both highlights and shadows across a changing scene
Common Mistakes in Sports Photography Settings (And How to Fix Them)
These are the errors that show up most often in a memory card full of missed sports shots. Most trace back to one of two habits: letting the camera decide too much, or shooting on reflex instead of a plan. Each one has a quick, specific fix.
- Using Auto Mode: The camera often defaults to something like 1/250s, and everything blurs.
- Using One-Shot AF (AF-S): Focus locks too early, before the subject moves.
- Not enabling burst mode: You lose the peak action one frame at a time.
- Lowering shutter speed to fix a dark exposure: Clean-looking, but blurry.
- Shooting JPEG only for indoor or night sports: Limits how much you can recover in post.
- Holding burst mode down for an entire game: Leaves you with 10,000+ photos to sort, most unusable.
- Not knowing the sport you’re shooting: You react instead of anticipating, and miss the peak.
Sport-by-Sport Settings Quick Reference
| Sport | Shutter | Aperture | ISO (Outdoor) | Notes |
|---|---|---|---|---|
| Football / Soccer | 1/1000s+ | f/2.8–f/4 | 200–800 | 70-200mm lens, anticipate plays |
| Basketball (Indoor) | 1/800s+ | f/2.8 | 3200–6400 | Zone AF, short bursts |
| Baseball | 1/2000s+ | f/2.8–f/5.6 | 100–400 | Predict pitch and swing timing |
| Swimming | 1/500s | f/2.8 | 800–3200 | Splash moments are peak action |
| Track & Field | 1/2000s+ | f/2.8–f/4 | 100–400 | 300–500mm for far events |
| Gymnastics | 1/500s–1/800s | f/2.8 | 3200 | Wide aperture, quiet venues |
| Motorsports | 1/2000s (freeze) or 1/60s (pan) | f/4–f/8 | 100–400 | Panning is a creative choice |
| Hockey | 1/1000s+ | f/2.8 | 1600–6400 | Shoot through glass or open gaps |
| Chess / Snooker / Archery | 1/250s–1/500s | f/2.8–f/4 | 100–800 | Slower action, no need for 1/1000s+ |
| Bull Riding / Rodeo | 1/1200s–1/2000s | f/2.8 | 400–1600 | Explosive, unpredictable motion |
Final Thoughts on Camera Settings for Sports Photography
The core principle behind everything in this guide is simple: shutter speed is king, and you raise ISO rather than lower shutter speed to fix a dark exposure.
Wider apertures, higher ISO, and a shutter speed that never drops below what the sport demands carry through night and indoor scenarios too.
On iPhone, burst mode, AE/AF lock, and the main rear camera get you most of the way there. Practice with your gear before game day, and once the game is shot, photo retouching can turn a good sports photo into one worth printing or selling.
FAQ Section
What is the best shutter speed for sports photography?
Start at 1/1000s for most sports. Increase to 1/1600s, 1/2000s, or faster for close action, motorsports, and fast ball movement.
Should I use Manual or Shutter Priority mode for sports photography?
Use Shutter Priority, marked Tv or S, if you are learning. Manual mode with Auto ISO gives experienced photographers greater control in changing light.
What Canon autofocus setting is best for sports?
Use Servo AF or AI Servo AF. Pair it with AF Point Expansion, Zone AF, or subject tracking based on subject size and background.
What Nikon autofocus setting is best for sports?
Use AF-C. Dynamic-Area AF suits Nikon DSLRs, while Wide-Area or 3D Tracking with people detection works well on newer Z-series bodies.
How do I take sports photos at night?
Start around 1/800s, use f/2.8 or faster, raise ISO as needed, shoot RAW, and meter carefully when floodlights create uneven exposure.
Can I use an iPhone for indoor sports photography?
Yes. Use the main 1x rear camera, enable Burst with Volume Up, avoid digital zoom, disable Night mode, and move closer to the action.
What autofocus setting should I use for sports on Sony?
Select AF-C with Zone, Wide, or Real-time Tracking. Enable Human Subject Recognition or Eye AF, then use Hi or Hi+ continuous drive.
Do I need to know the sport to become a good sports photographer?
Yes. Knowing the sport helps you predict movement, choose better positions, prepare focus, and begin bursts before the decisive moment enters the frame.