Model photography is more than just a model and a photographer. It involves meticulous planning and multiple phases, particularly for professionals working with clients and a brief. Typically, it’s a team effort, requiring not only the photographer but also assistants, a creative director, hair and makeup artists, a stylist, retoucher, and sometimes even more crew members, depending on the shoot’s scale and complexity. And let’s not forget the essentials: catering, coffee, accommodations, transportation, and insurance.
Even if you’re planning an informal model shoot on a tight budget or none at all, many of the previously mentioned items can still be relevant, even if it’s just the photographer and model working together in a Trade for Print (TFP) agreement. Thankfully, Adobe Photoshop can now assist with many aspects of model photography. Adobe Firefly, a generative AI functionality included in the latest Photoshop subscription, is a game-changer.
What you’ll learn in this article
Why Use AI in Your Model Photography
There are several compelling reasons to incorporate AI into your photo editing workflow for model photography. While planning remains an essential part of your shoot, Photoshop’s AI capabilities can significantly enhance productivity, creativity, and impact. The best part is that you’ll have access to most of the photography services needed for a professional model shoot. The only thing you’ll need to worry about is keeping your coffee cup full.
Save Money with AI
I know a successful portrait photographer who’s been in the business for several years. She shared how she has spent a lot of money over time purchasing hand-painted backgrounds for her subjects to provide creative choices for her clients, which helps her stay competitive. On top of that, there’s lighting equipment, wardrobe, and a host of other potentially expensive items we’ve already mentioned. The good news is, with AI, we can create all of this from scratch. Photographers working in model photography can potentially save thousands of dollars simply by incorporating Photoshop into their workflows now.
Maximize Efficiency and Save Time
I can’t stress enough how indispensable planning is in model photography. Effective planning not only streamlines the process but also saves valuable time. Think of all the hours saved that would otherwise be spent gathering clothing and accessories for the shoot. Or the back-and-forth between the model and photographer (in a small-scale shoot) about what to bring and what to wear. These details can be addressed in the initial planning stages with the understanding that artificial intelligence will be used to create the necessary effects for the shoot.
Flexibility in Shooting Locations (Backgrounds)
I’ve saved one of the most important details for last: shooting locations. This is always a crucial aspect of model photography because it directly affects the kind of photographic equipment, especially lighting, that will be needed. It can also quickly inflate the shoot’s budget if a studio needs to be rented because the photographer or model doesn’t have immediate access to a suitable location. But AI solves this problem in most cases. All you need is the right lighting, and you can easily change the backgrounds in post-production to include a variety of interior or exterior locations of your choice. The team need only settle on a space necessary for the actual photography.
A Photoshop AI Workflow for Your Model Photography
So, we’ve covered the three main ways AI can enhance your model photography: saving you time, cutting costs, and offering flexible location options. Now, let’s dive into a workflow that encompasses the entire photo editing process from start to finish.
We’ll tackle these sections in a logical order, beginning with skin retouching. Next, we’ll cover wardrobe changes and adding accessories. Then, we’ll explore changing out backgrounds. Finally, we’ll discuss expanding the frame using Photoshop’s Generative Expand feature to resize and change the image ratio, providing more creative options.
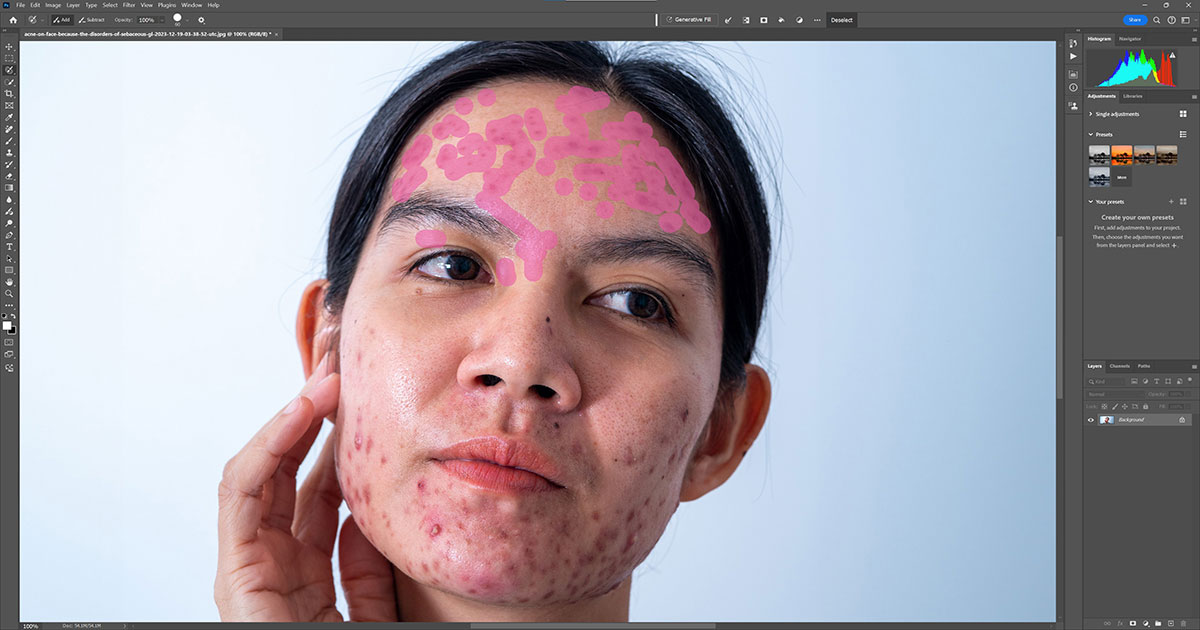
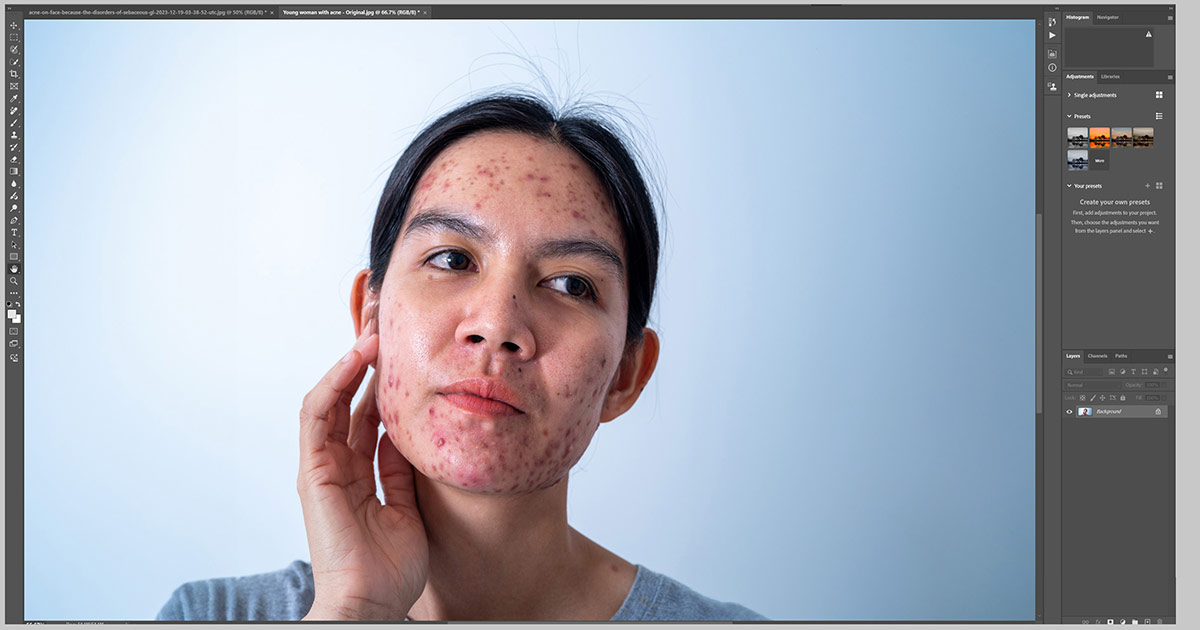
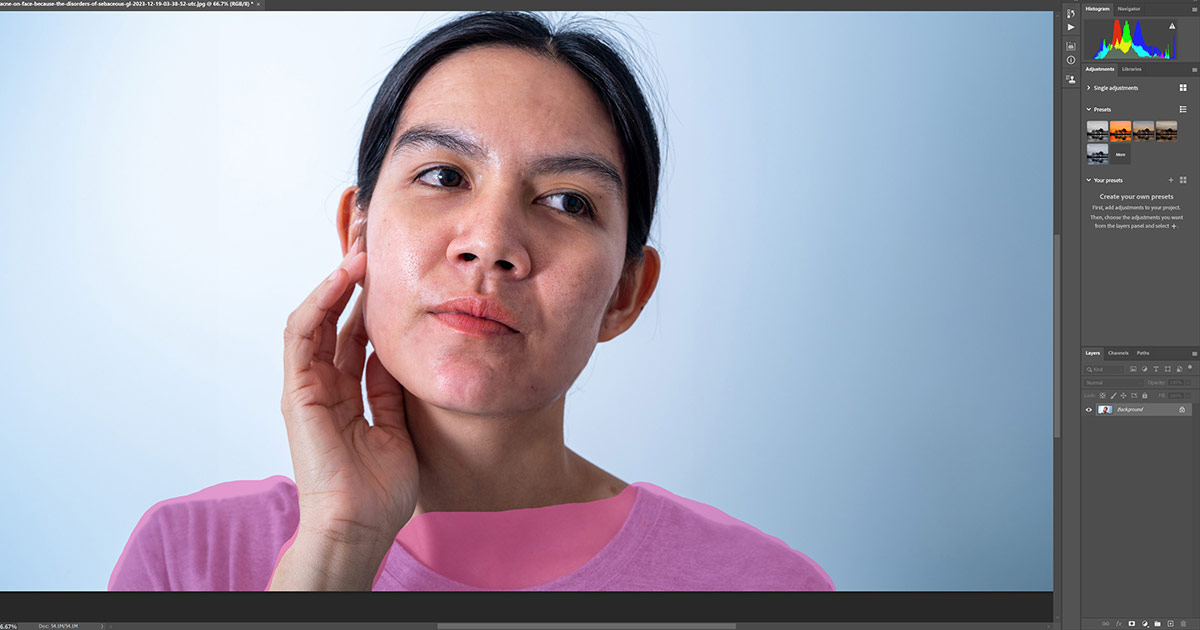
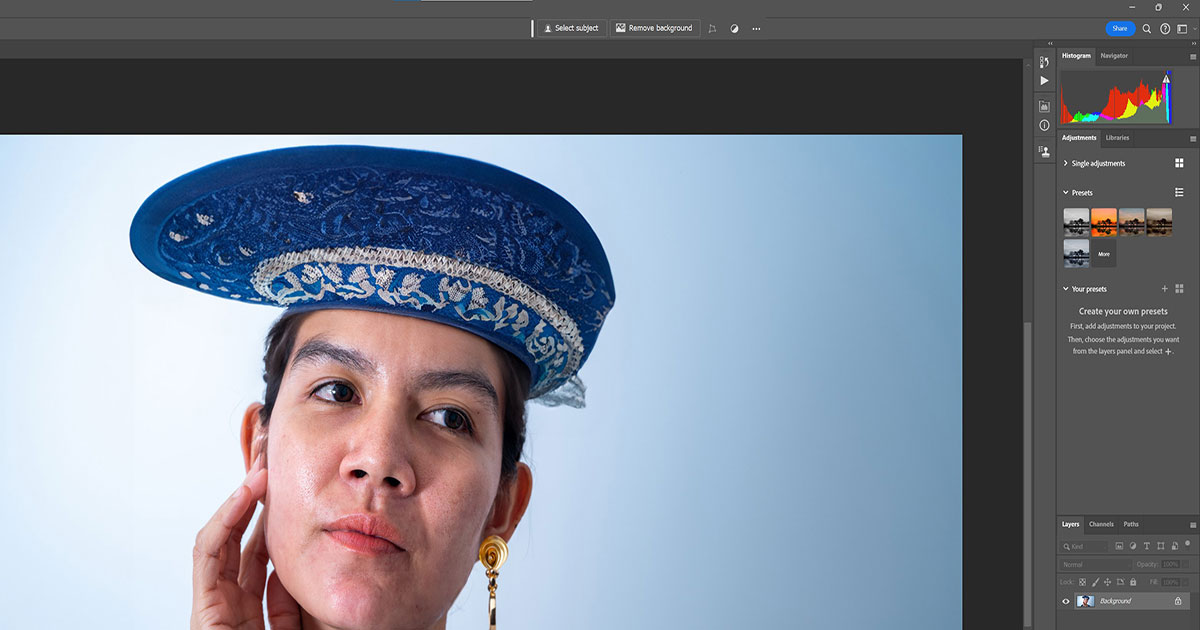
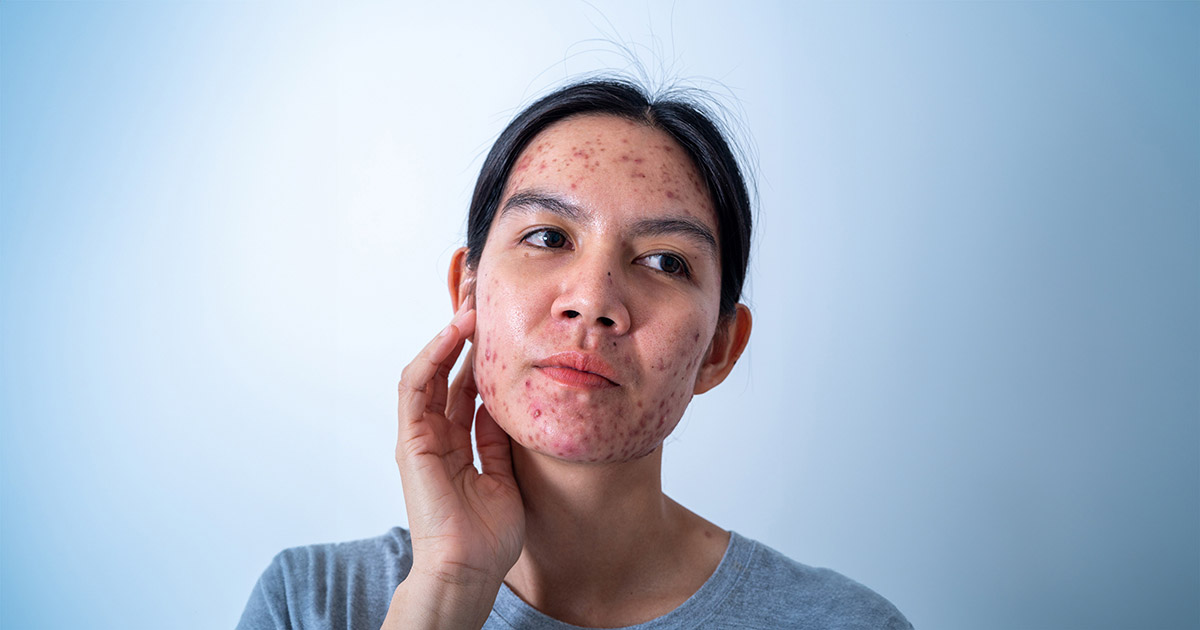
Workflow Part 1. Skin Retouching: Using AI for Removing Blemishes and for Makeup

We’ll be using the above image for all our AI workflow tutorials. I chose an image that might be more challenging and time-consuming for skin retouching. If you’ve done skin retouching before, you know it often requires multiple Photoshop tools and methods to achieve the desired results, including selection tools, healing brushes, the clone stamp and patch tool, frequency separation, and more.
Additionally, I want to note that as of this writing, results can be mixed when applying new makeup to a model’s face and skin. However, rest assured that applying makeup and other effects will only become easier and offer more creative flexibility in future Photoshop updates.
Let’s get started!
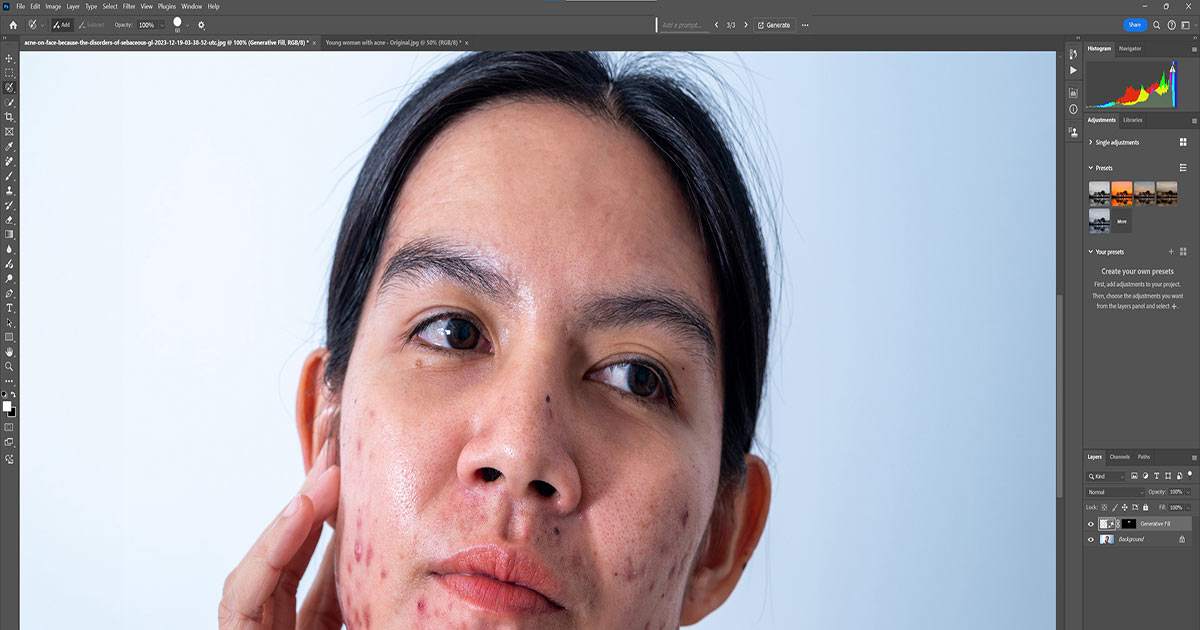
Removing Blemishes
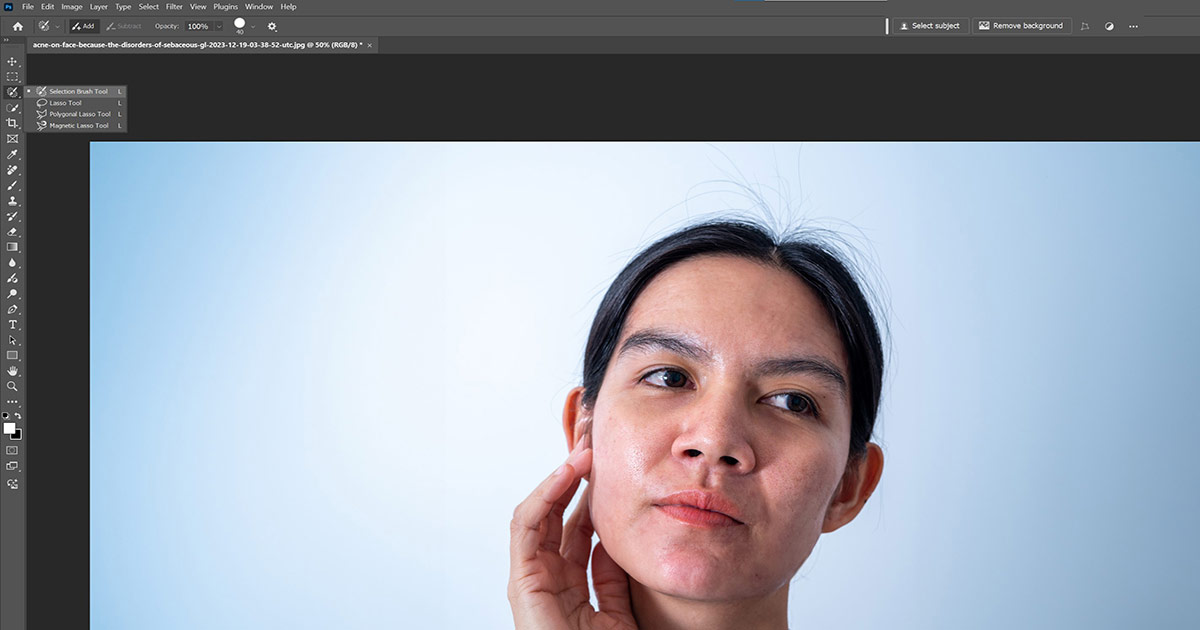
Step 1: Choose the Selection Brush Tool (keyboard shortcut L).
Step 2: Use the bracket keys [ ] to adjust the brush size as needed.
Step 3: Brush over all the blemishes. It may be more efficient to go section by section, starting with the forehead, to decrease processing time.
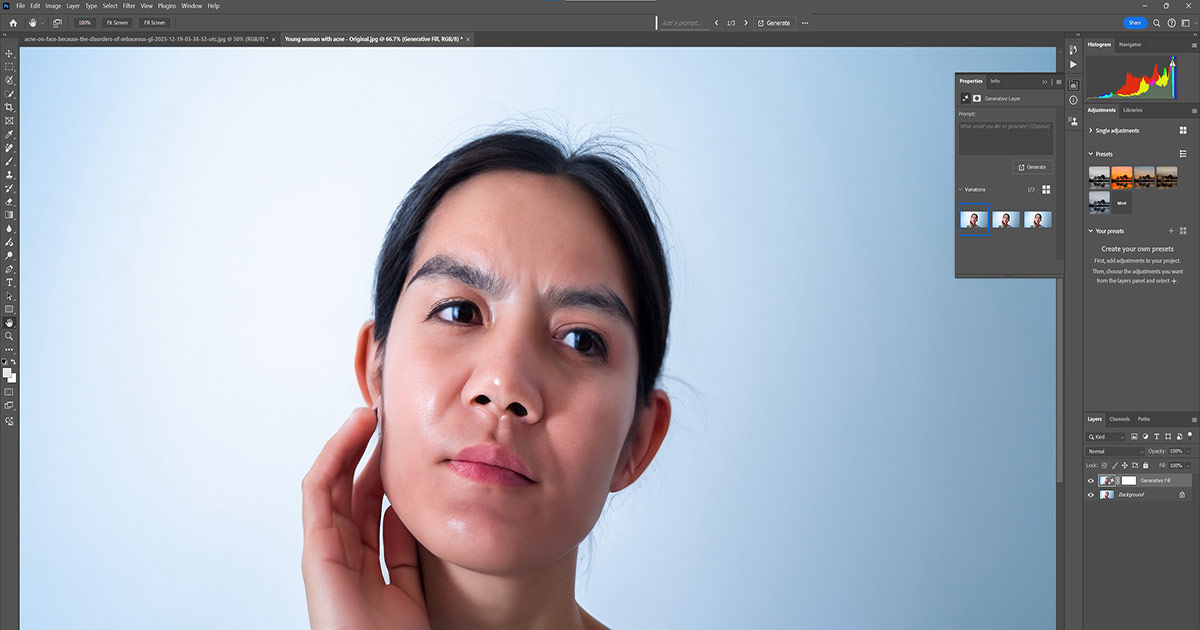
Step 4: Click on Generative Fill. Leave the text box empty. Then click Generate.
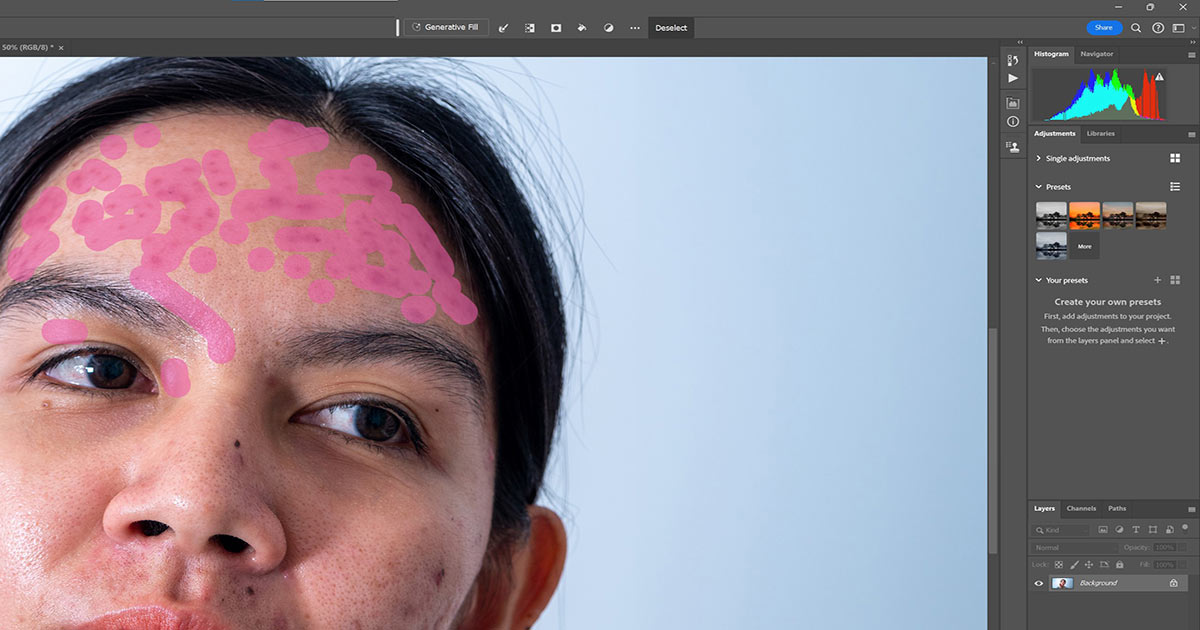
Step 5: Examine the results. You may have to go over some of the areas again if one of the three options isn’t acceptable. Notice that Photoshop has also created a new Generative Fill layer with the edits. If you make a mistake, you can drag and drop these layers into the trash and start over. After removing blemishes, these layers can be grouped together or flattened.
Step 6: Repeat these steps for the entire face. I recommend doing each cheek separately along with the chin. Feel free to use other Photoshop tools to fine tune but you’ll unlikely need them. But you will find the Remove Tool, another new AI feature, useful around the edges of the face if the Selection Brush Tool isn’t effective.
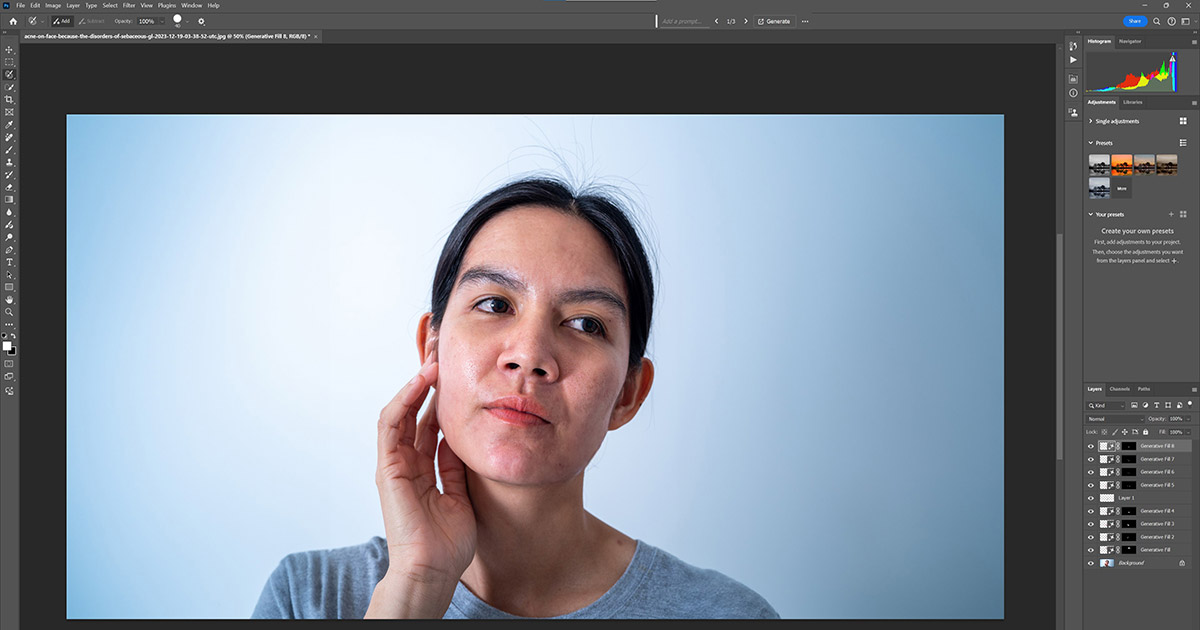
The entire process only took a few minutes. If you look in the middle of the layer stack, you’ll see a blank layer. I created this in order to use the Remove Tool along the edges of the woman’s right cheek.
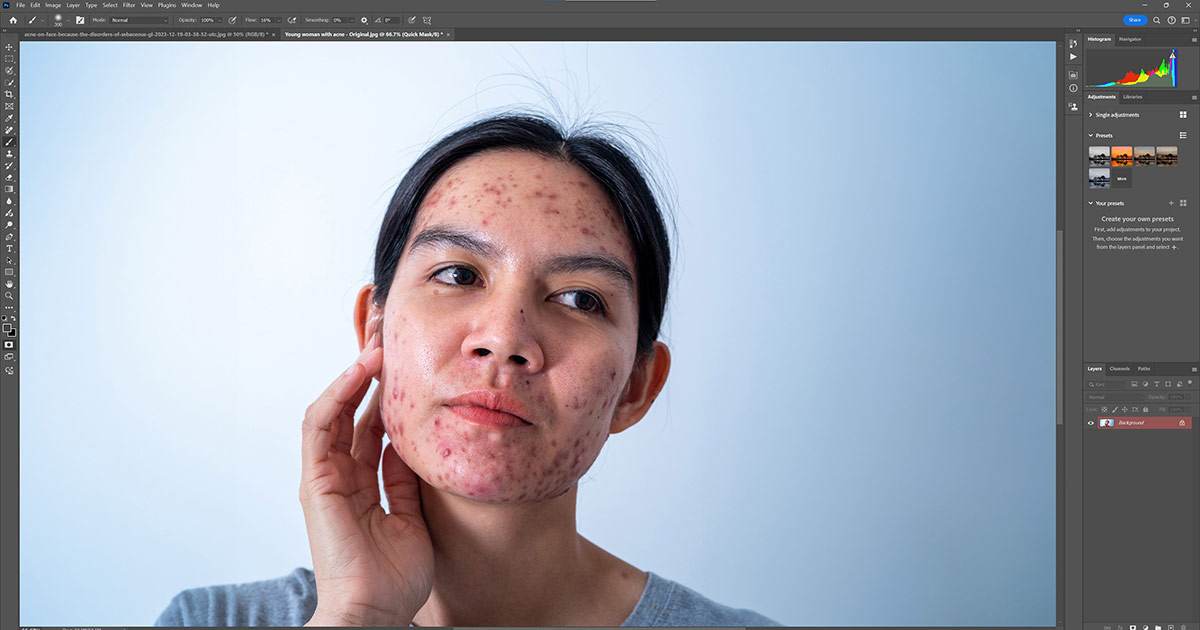
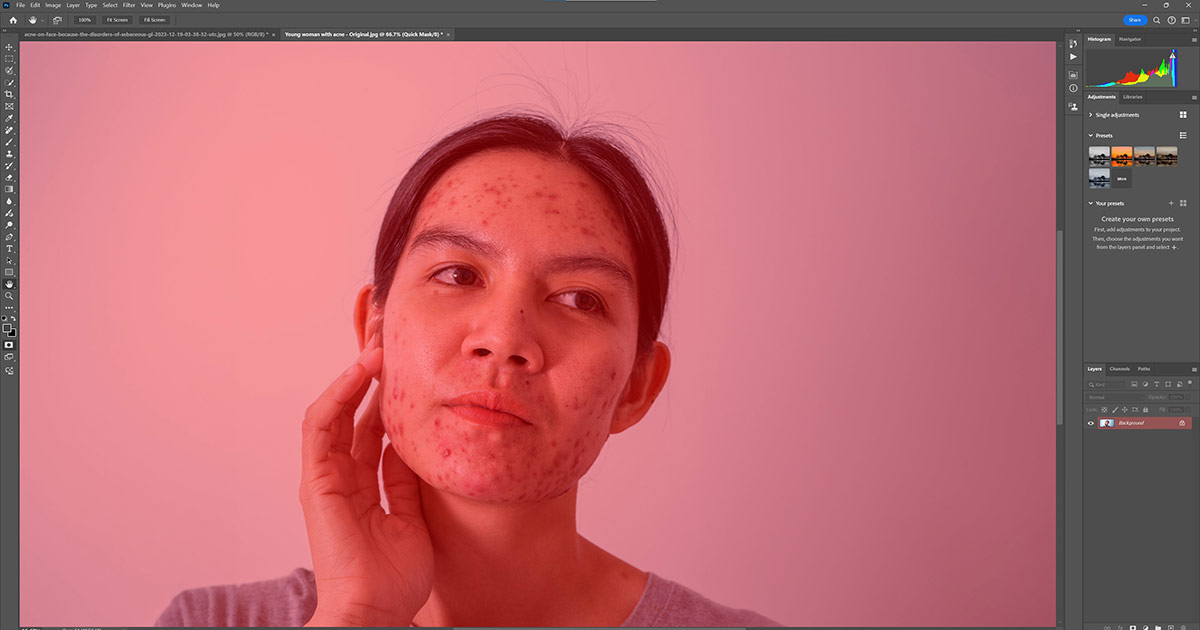
Using Quick Mask to Retouch Skin
An alternative to using the Selections Brush Tool and the Remove Tool is Quick Mask Mode to perform retouching. In future Photoshop releases, this method or a more streamlined one will likely be the quickest and most effective way of retouching skin and adding makeup. We will omit showing how additional makeup can be added until this feature is improved, but you can definitely use it now to retouch skin.
Essentially, we’ll be replacing all the pixels of our model’s face using AI in Quick Mask Mode. Then we’ll simply invert the layer mask and paint in the effects. You can use this method in addition to the first way for a more refined look. But if you’re just looking to remove the blemishes quickly and prefer a more automated approach, this approach could work for you too.
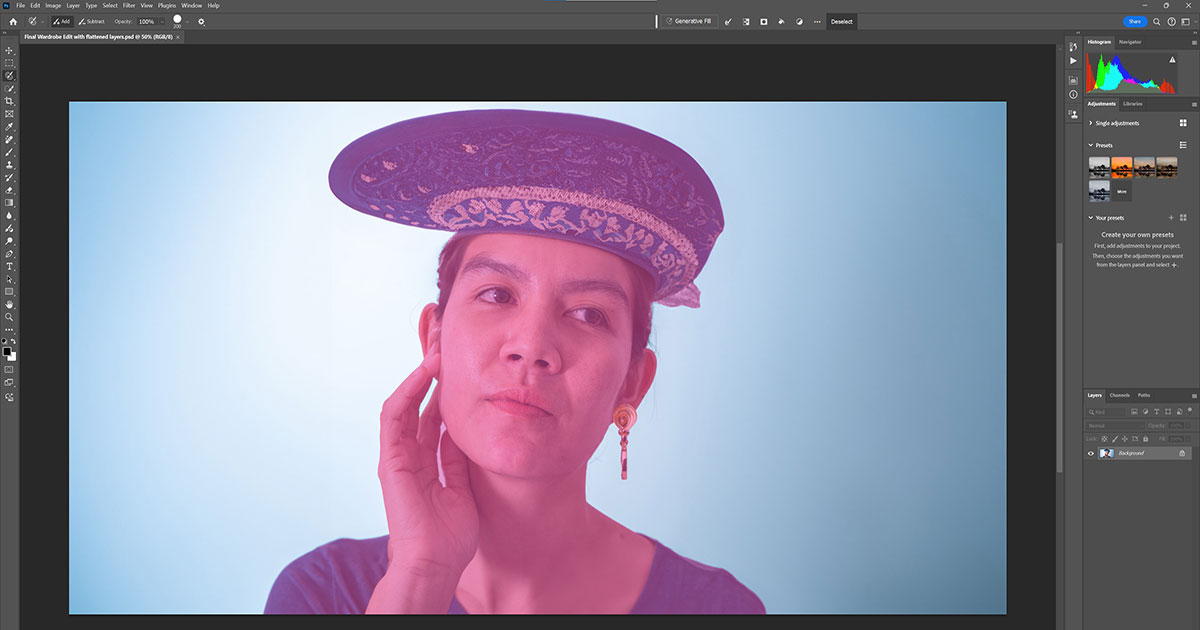
Step 1: Press Q for Quick Mask. The Background layer will become highlighted.
Step 2: Click on Set Foreground Color and change the Brightness (B) level to a value from 10 to 20. This will vary by image. For this example, we chose 20. Then click OK.
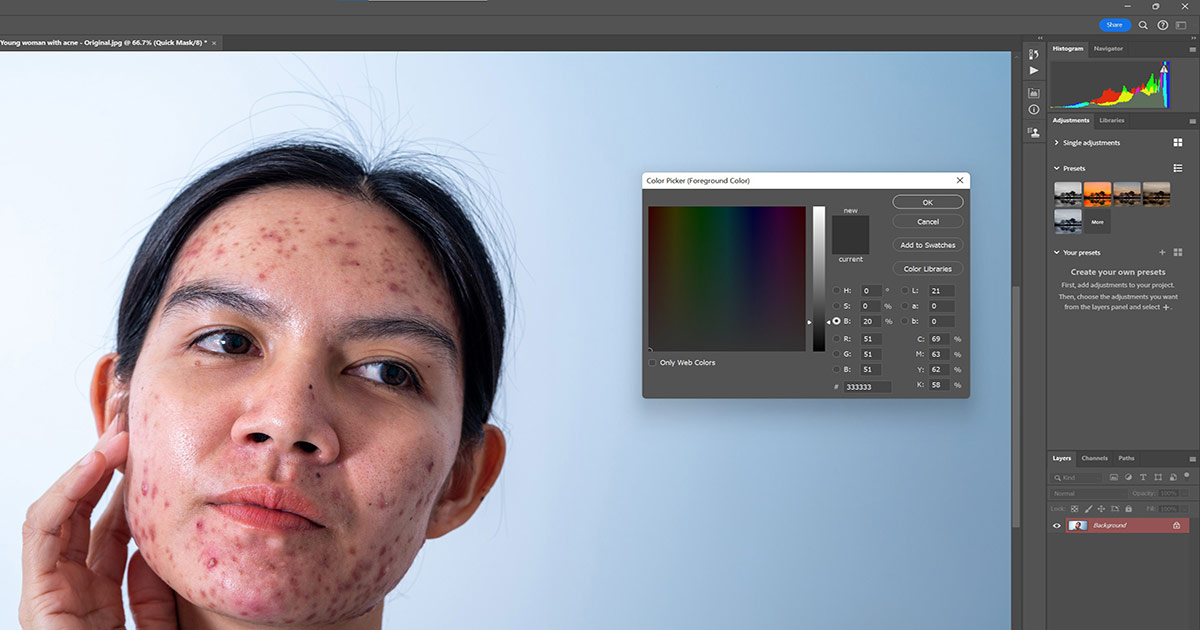
Step 3: For Windows machines, press ALT + Backspace. The Whole screen should change colors.
Step 4: Press Q once more for Quick Mask. The screen color should return to normal.
Step 5: If done correctly, the Generative Fill box should be active at the top of the page. Click on Generative Fill.
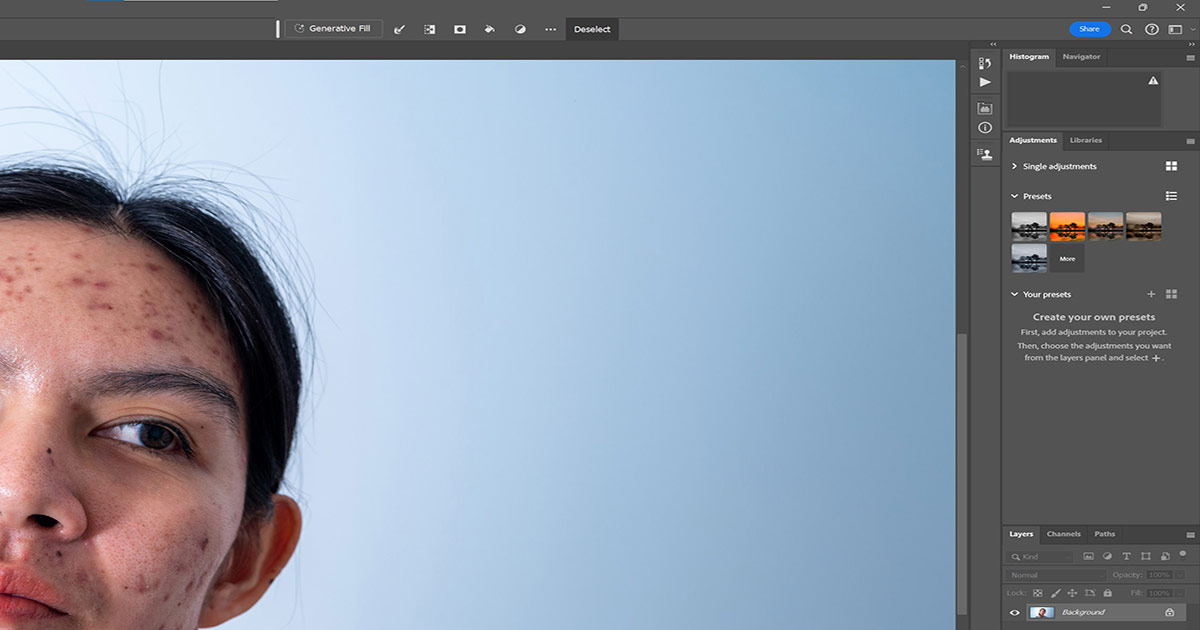
Step 6: Now, we enter in text to tell Photoshop’s Generative AI what to create. What we want perform is a retouch. So we’ll enter “Perform a professional skin retouch. Remove acne and blend skins tones for smooth transitions.” What you enter is up to you and what you want to achieve. And you may have to experiment.

Step 7: Click Generate. As before, you’ll have three options to choose from. You may have to generate several versions until you find one that has the correct skin tones. Remember, we’ll be painting in the effect so ignore how the rest of the face is being transformed. We’re only concerned with the skin.
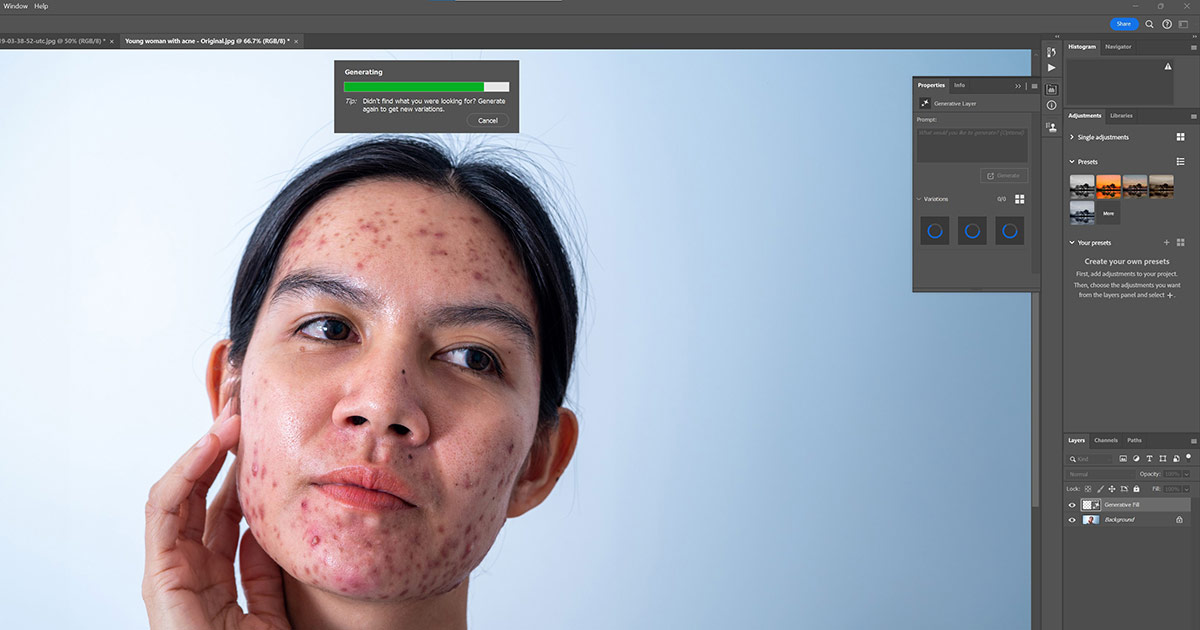
Step 8: Choose the best version. By luck, we’ll go with the first version generated. It’s way overdone as a retouching effect, but since we’ll be painting in the effect, we can control how much of the effect is applied and where.
Step 9: Click on the white mask on the Generative Fill layer. Press Ctrl + I to invert the mask. The mask should now be black and the original image should be showing once more.
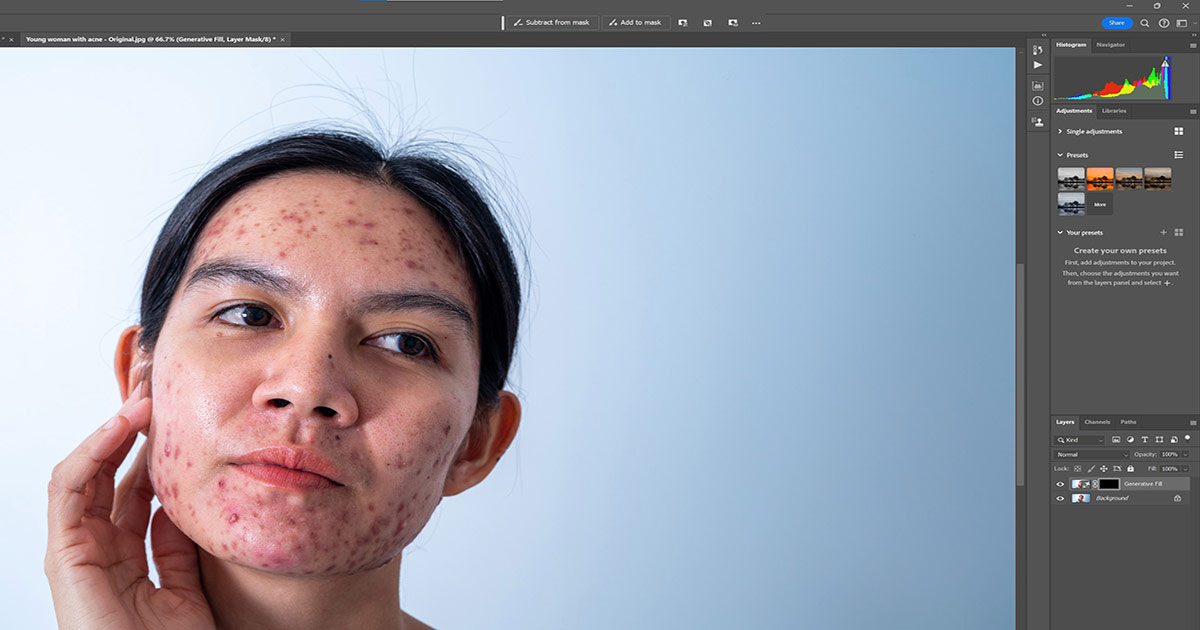
Step 10: Press B for the Brush tool. And with a Soft Round brush set to a Flow of around 2 percent, gradually paint over the face to cover the blemishes. Toggle between white and black as the foreground colors to apply or erase the effect as you go.
Note: make sure you’re only painting on the black mask at all times.
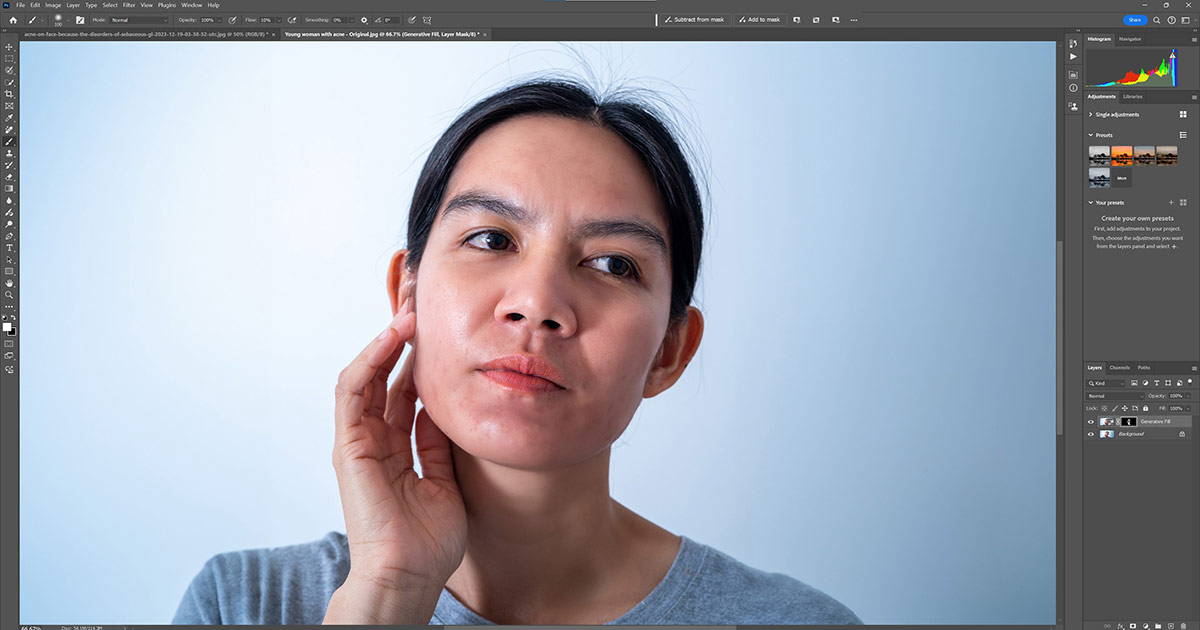
Most professionals would probably consider this method to be a little heavy-handed since we’re losing a lot of the skin’s original texture. But if the look is okay with your model, it’s by far the quickest way to edit multiple images if there’s a lot of intense skin retouching to do.
Workflow Part 2. Wardrobe Changes and Accessories
This is where things start to get fun! The sky’s the limit when it comes to what Photoshop can create for wardrobe changes and adding accessories in your model photography. There are multiple tools available for these steps. In the past, I’ve mainly used the Lasso tool to make selections for Generative AI, but for this tutorial, we’ll focus on using Photoshop’s new Selection Brush Tool to show how easy it is to use.
We’ll start with the edited image from the first example, as it represents natural-looking skin. We’ll make three simple changes to transform this image: first, we’ll create a blue dress, then we’ll add earrings, and finally, a hat—all using Photoshop’s Generative AI.
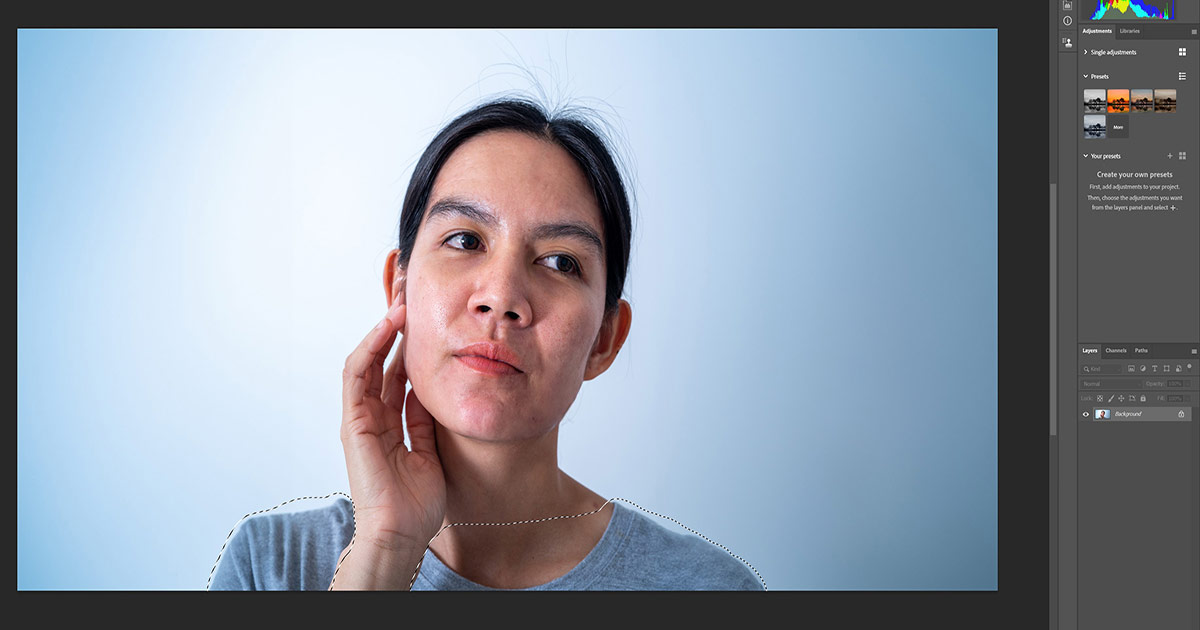
Step 1: Press L and select the Selection Brush Tool.
Step 2: Brush over all the pixels where we want the new dress to appear. Use the bracket keys to increase and decrease the brush size as needed.
Step 3: Now, choose any of the selection tools, such as the Lasso Tool. This will create the typical selection we’re accustomed to. While it might seem like an unnecessary step (why not just start with the Lasso Tool or any other selection tool?), the Selection Brush Tool offers additional features we won’t get to cover here. Since it’s a new Photoshop feature, I want to demonstrate its ease of use.
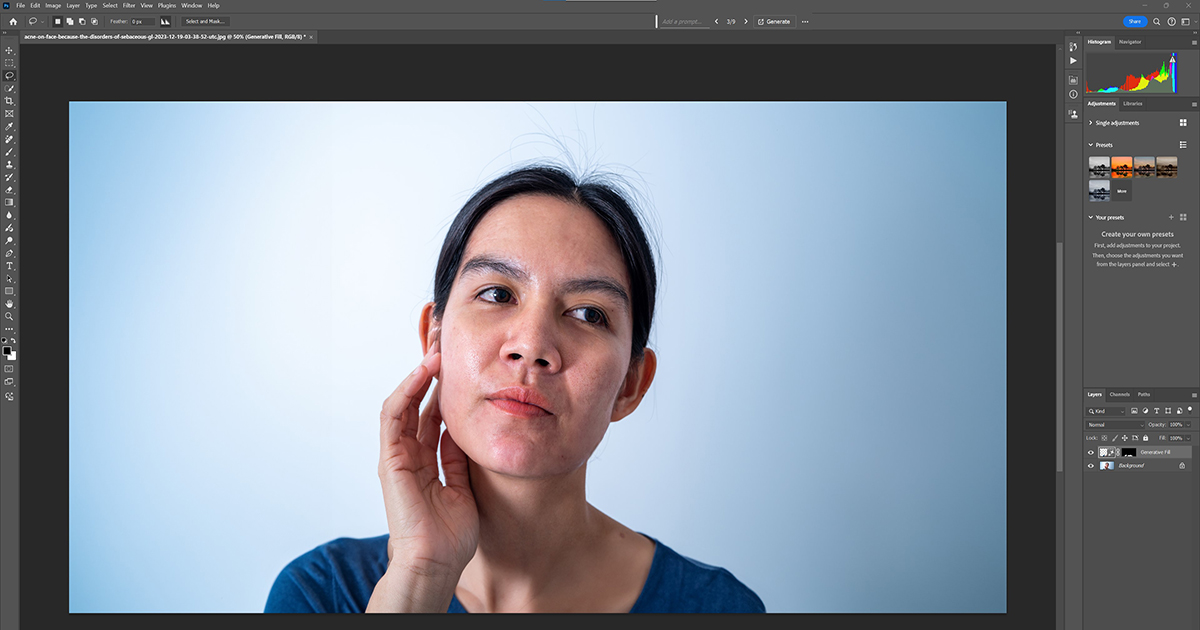
Step 4: Click on Generative Fill once more and enter a description for the kind of blue dress we prefer. We’ll enter “Create a fashionable blue dress made of silk.” We’ll then click Generate.
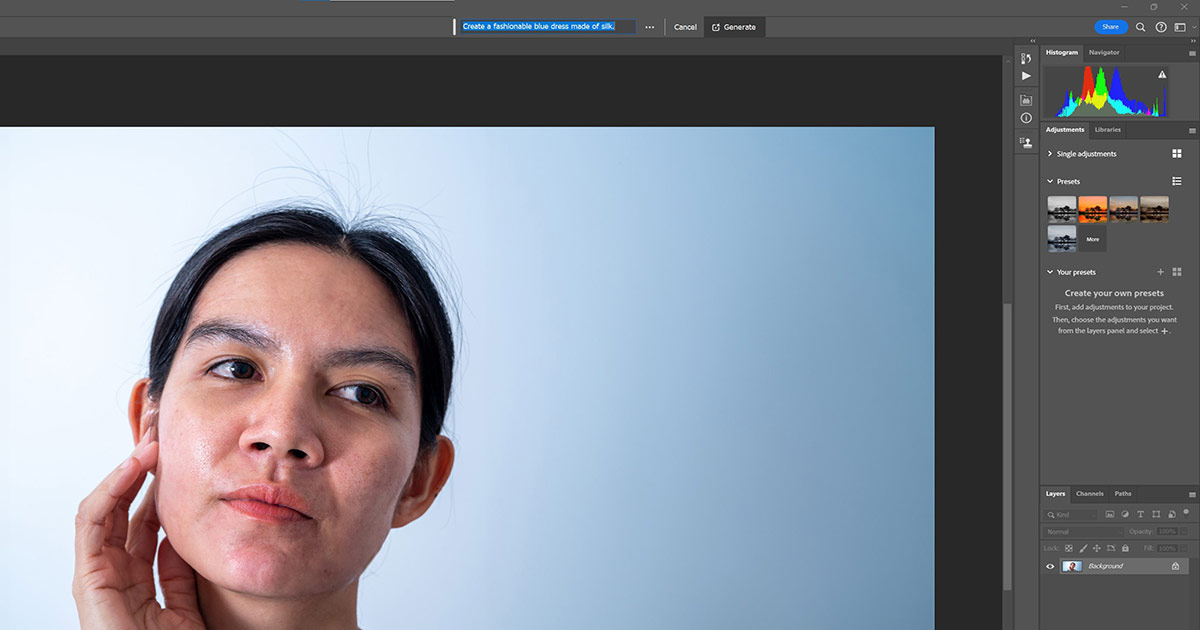
Step 5: Choose the best option. You may have to click Generate a few times to get the best results.
Step 6: Let’s use the Selections Tool Brush once more and create earrings on the model’s right ear. The steps are the same. Make the selection, choose another selection tool, and enter text to tell Photoshop what to create by clicking on Generate.
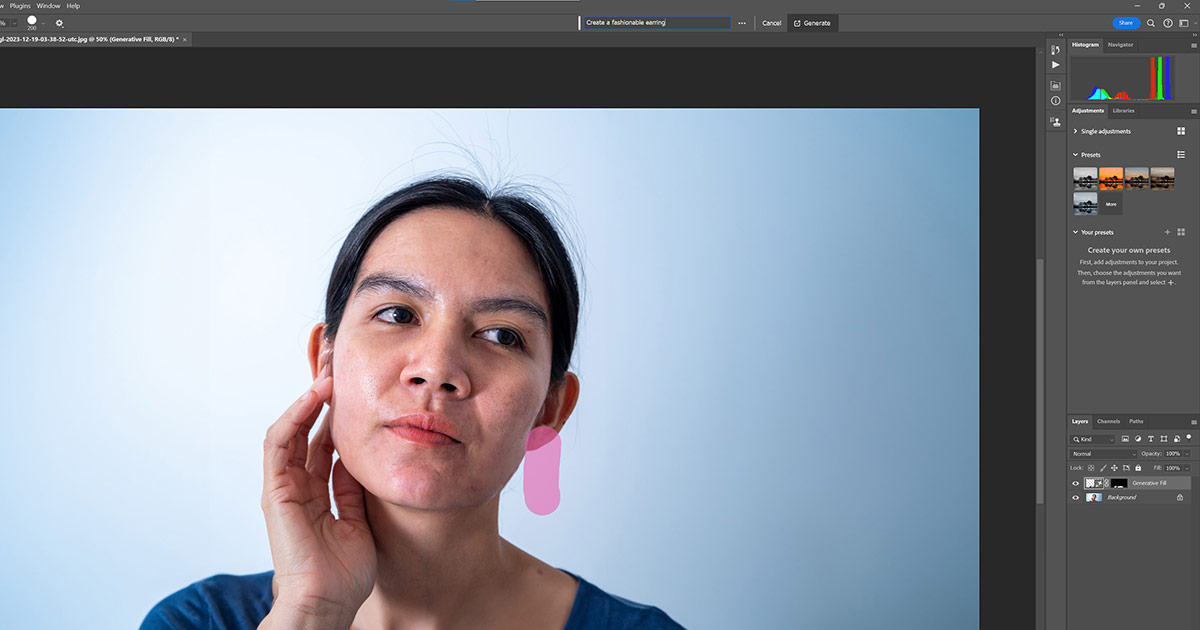
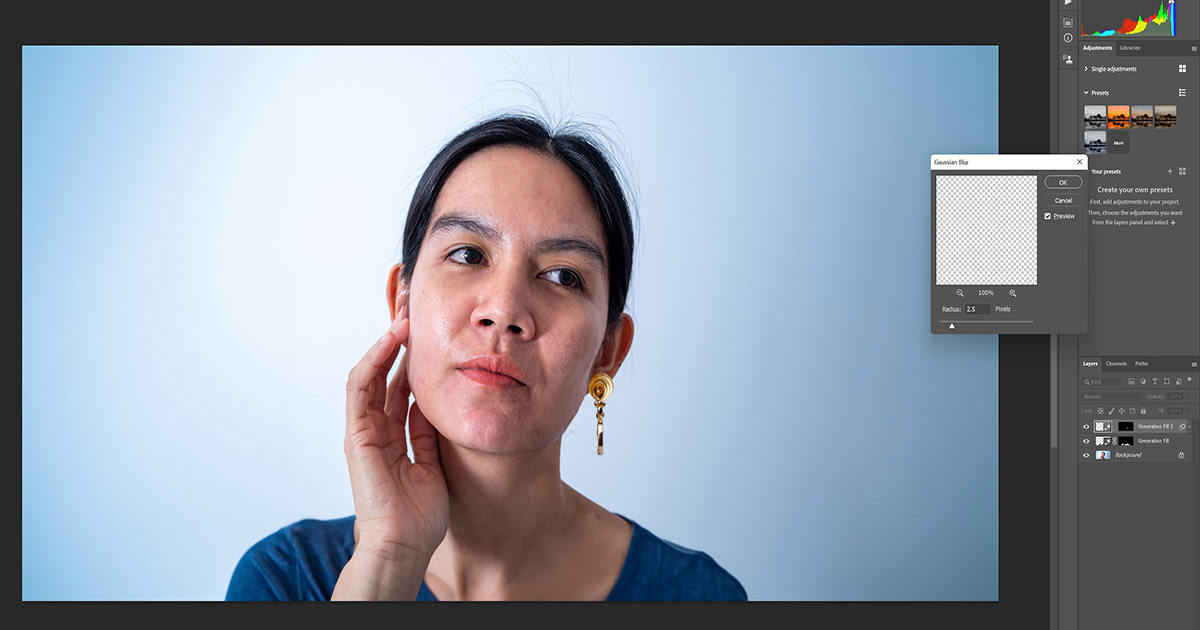
Step 7: (Optional). All my options displayed the earring as being in focus, but the model’s ears are slightly out of focus due to the depth of field fall-off. To blend the earring in seamlessly, I applied a Gaussian Blur to the earring layer. You may find that you’ll have to apply other effects too to make your new creations blend in. But this can be done using all the usual Photoshop tools.
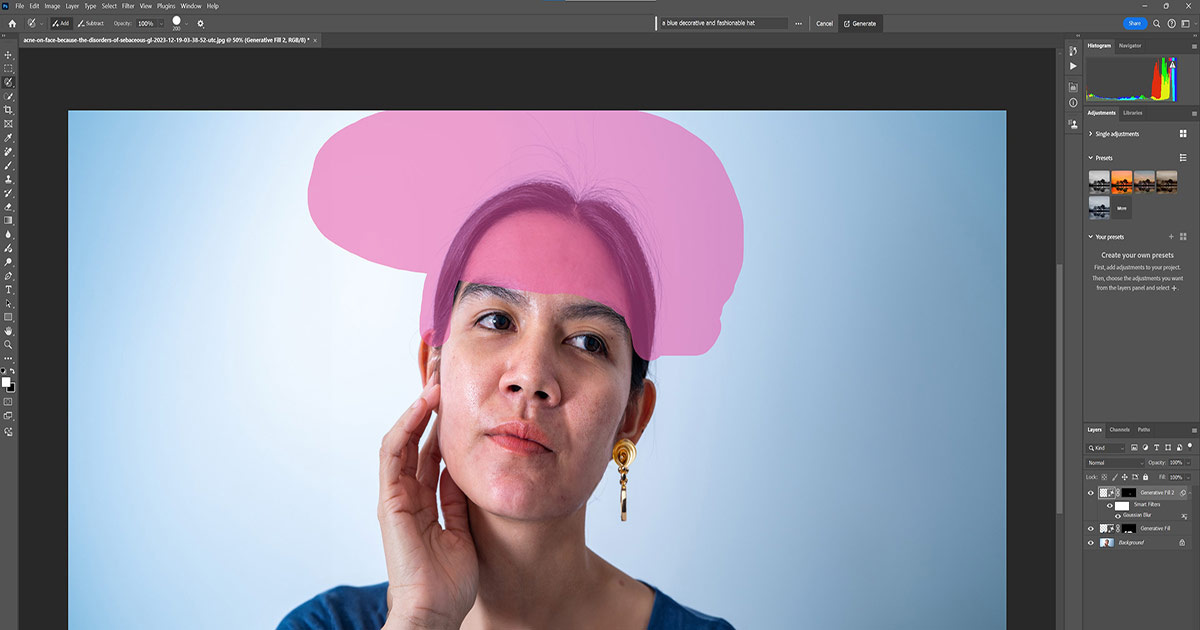
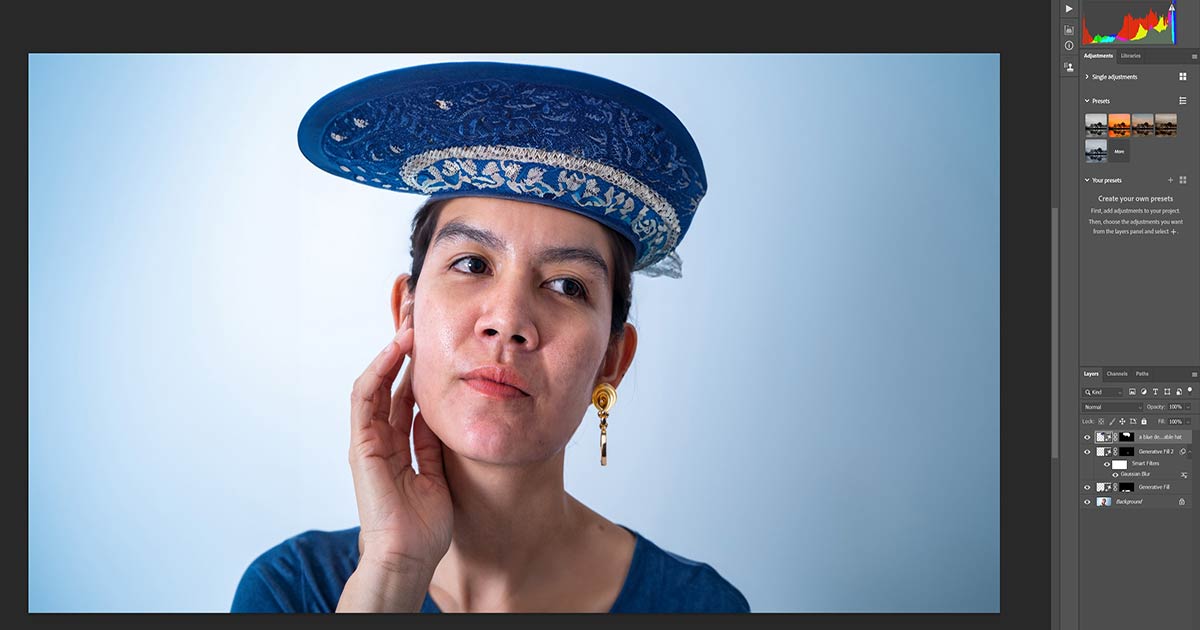
Step 8: Let’s add a hat. Using the same steps as before, starting with the Selections Brush Tool, paint over the pixels and create the perfect hat.
Worrying about expensive wardrobe and accessories is a thing of the past! With Photoshop’s Generative AI, you can create all of this from scratch and transform your model photography in extraordinary ways.
If you save your files as PSD files, you’ll always be able to go back and re-edit your images, basically having the ability to change wardrobe and accessories again according to your model photography needs.
Workflow Part 3: Changing Backgrounds
The ability to easily change backgrounds in your model photography is a game-changer, to say the least. No more expensive backgrounds or rented studios. As long as you have the necessary lighting for the photography itself, it doesn’t matter where you’re shooting your model. You can change the background in post-production to fit the needs of the brief or mood board.
There are usually three basic steps to changing backgrounds. First, select the model using any of the selection tools. Second, invert the selection to select the background. Third, use Generative AI to create the desired background. We’ll walk you through these steps again, using the same tools and techniques we’ve already employed for retouching and changing the wardrobe.
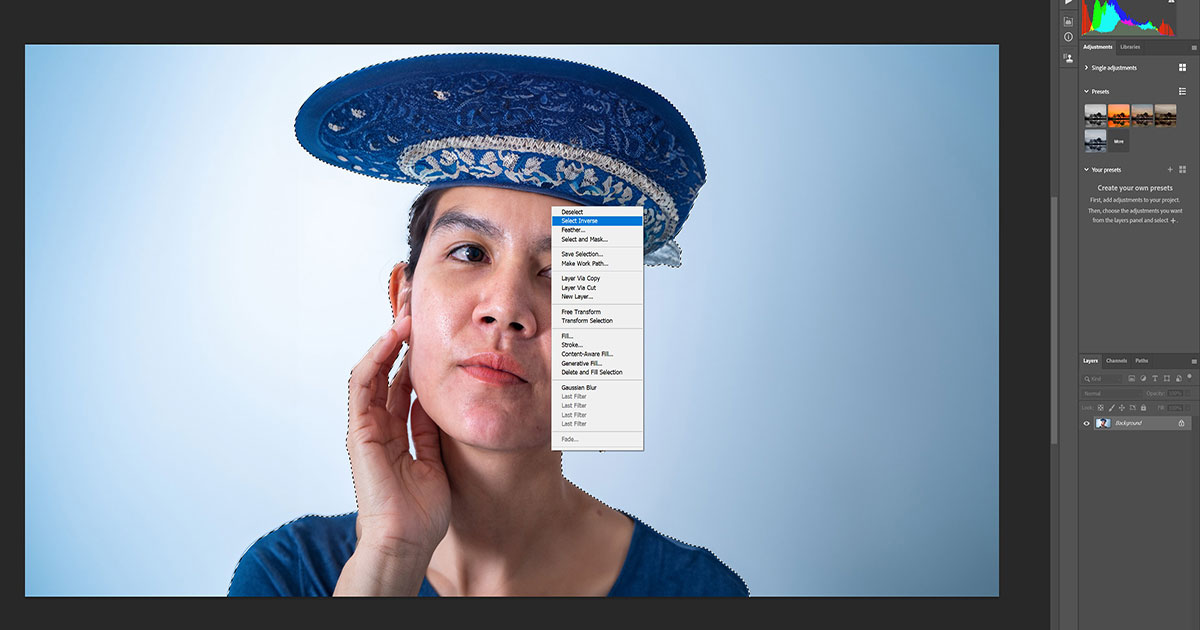
Step 1: Select the model. We’ll simply use the Select Subject feature at the top by clicking on it. The model will be selected as indicated by the marching ants.
Step 2: The subject will be selected as indicated by the color overlay. Now, choose the Lasso Tool to access the masking options.
Step 3: Right-click inside the selection and choose Select Inverse.
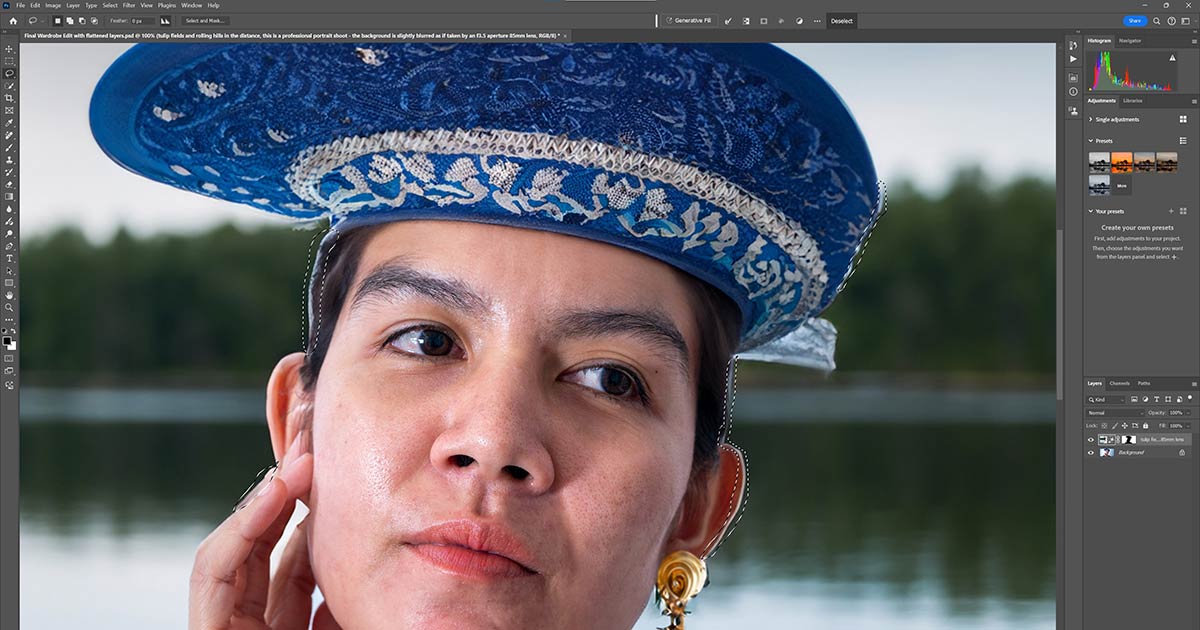
Step 4: Click on Generative Fill once again and enter the text that you want to create a new background. Then click Generate. Here’s what we entered for the description: “Peaceful lake background slightly burred as if taken by a high-quality portrait lens.”
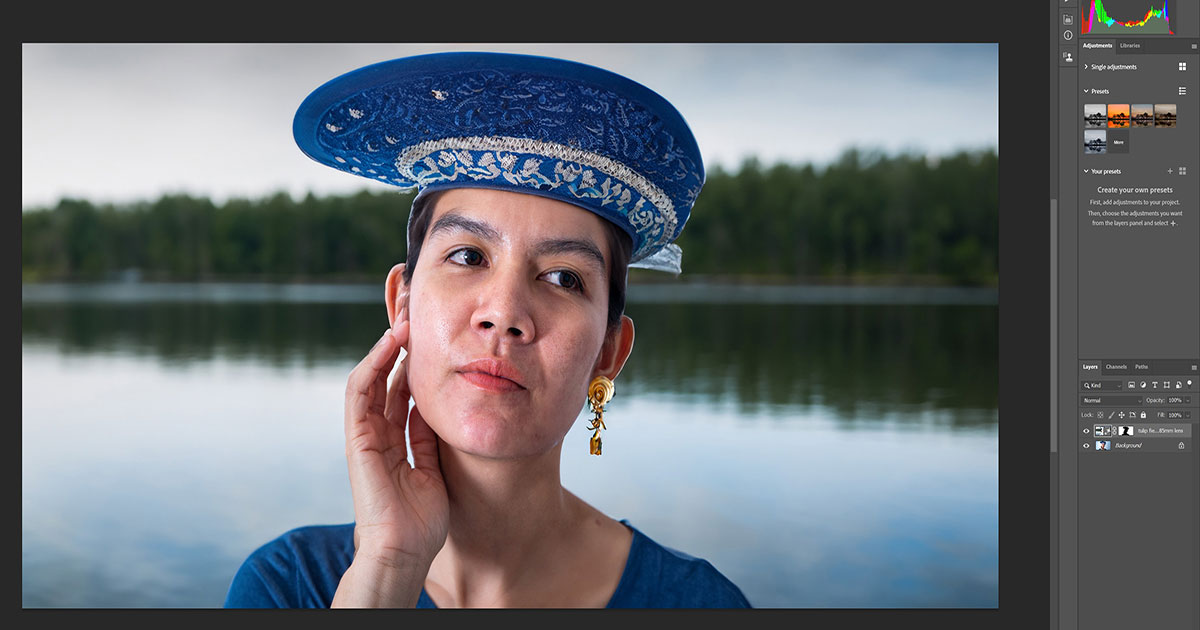
Step 5: As of this writing, it’s common to see a halo effect when Photoshop inserts backgrounds. It’s best to zoom in on your images to check for these. If you spot them, like we have around the edges of the model’s head in this example, you can easily fix them using Generative Fill. Create generous selections around the trouble spots using the Lasso Tool, click Generative Fill again, and leave the text field blank.
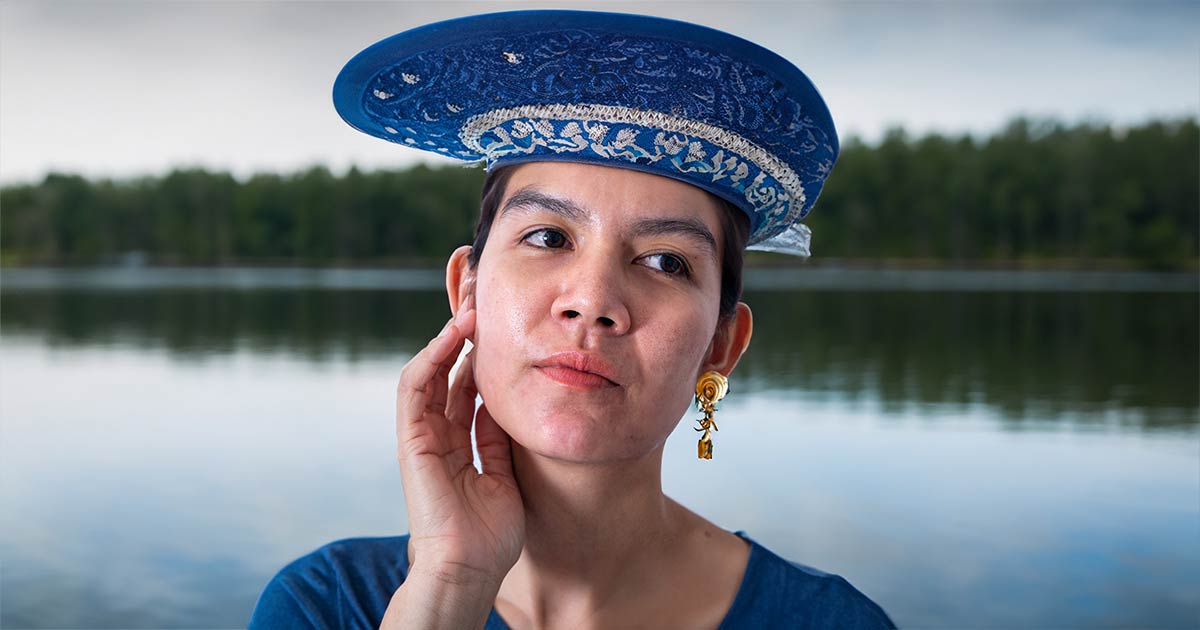
Now with a new and cleaned up background, you’re free to create even more backgrounds as options or move on to the other images in the set.
Final edit:
Helpful Tip:
Currently, there are resolution limits to generated images in Photoshop. If you’re working on a high-resolution image, a helpful tip is to slightly blur the background so that essential details don’t become distractions. You can also choose to enhance the resolution, an option available in each of the three generated options. Other workarounds include making multiple smaller selections around the subject and generating the background bit by bit, but this can be time-consuming and might not produce the desired results.
The best advice is to get everything right in-camera, with the idea that you’ll use AI to change wardrobe and backgrounds during post-processing. Planning is always key, even if you’re using technology to make significant changes later.
Workflow Part 4: Extending the Canvas Using Generative Expand
You may find yourself needing to expand your canvas for various reasons. Perhaps you had limited space for photographing your model and want to create a more open image. Maybe, due to poor planning or unforeseen circumstances, you couldn’t get the right shots and now need to expand the image to include more negative space or even more of the model. We can easily accomplish these adjustments using Photoshop in your model photography projects. With Photoshop’s Generative Expand feature, you can compensate for some of the shortcomings in your model photography by using AI.
For this example, let’s take the wardrobe change image and expand the canvas downward to a 4×5 ratio. This will allow us to make additional wardrobe changes and make the image more suitable for display on social media platforms like Instagram. Then we’ll make any adjustments necessary to the wardrobe by using prior methods.
Step 1: Click on the Crop tool.
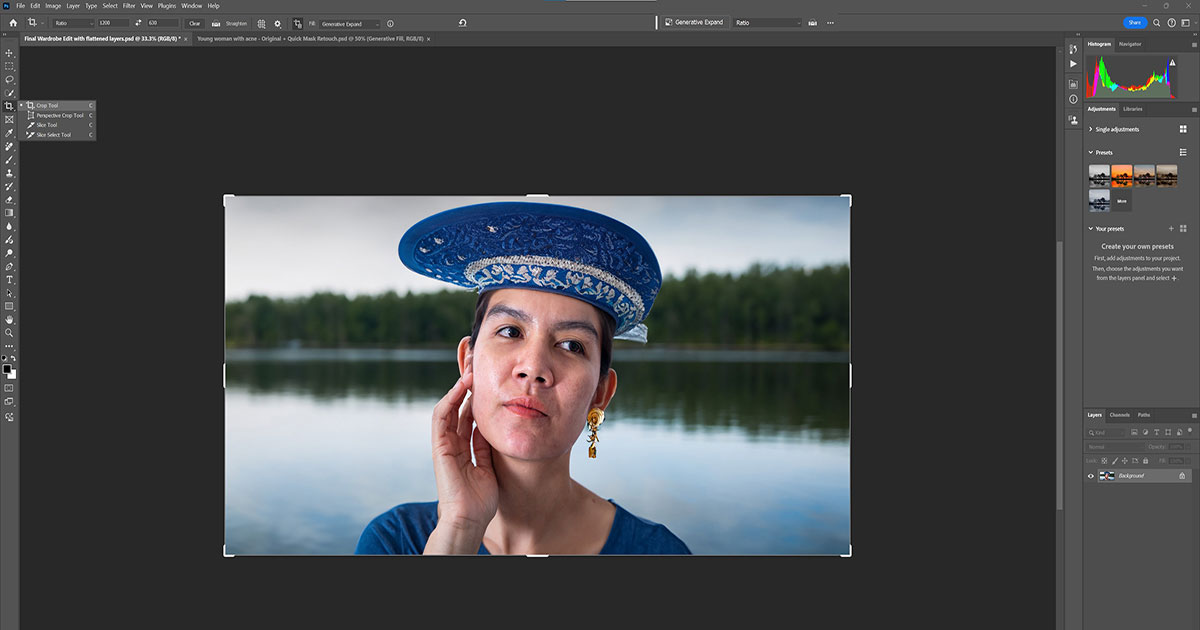
Step 2: Change the Ratio to 4×5.
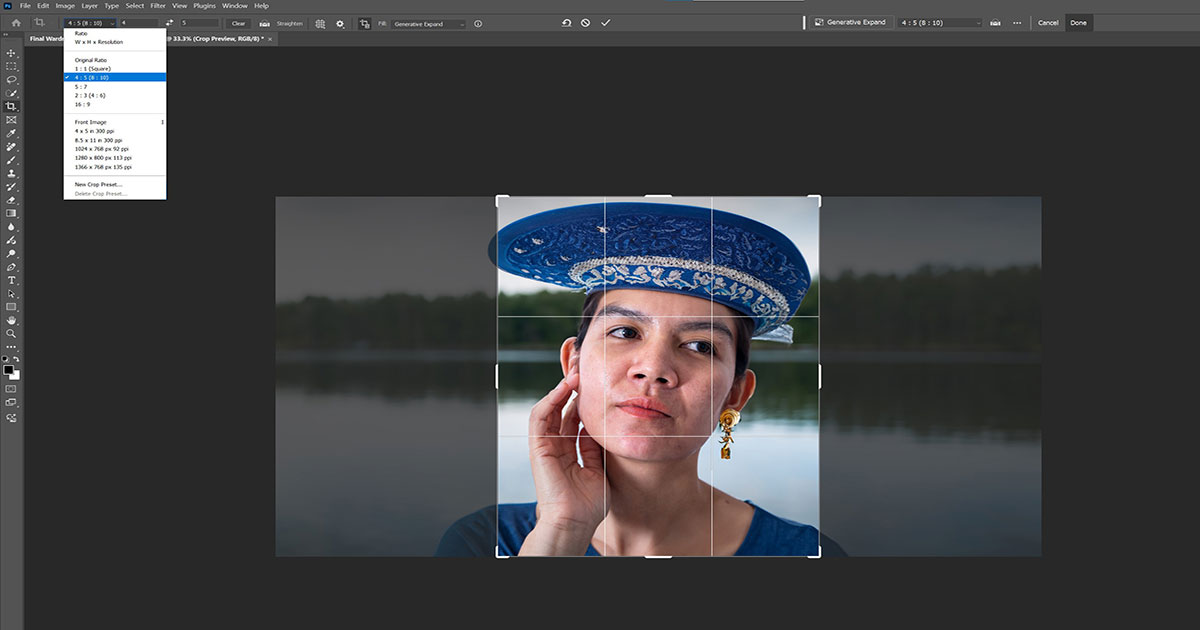
Step 3: Choose Generative Expand from the drop-down menu.
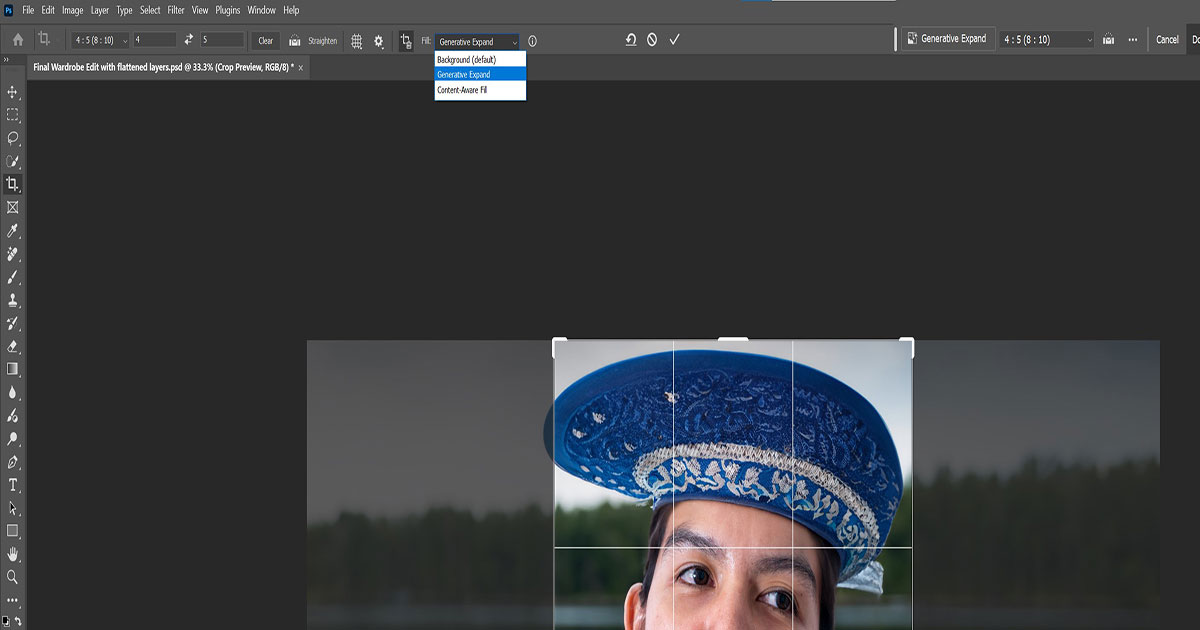
Step 4: Click and drag the bottom handle and expand the canvas to the desired size.
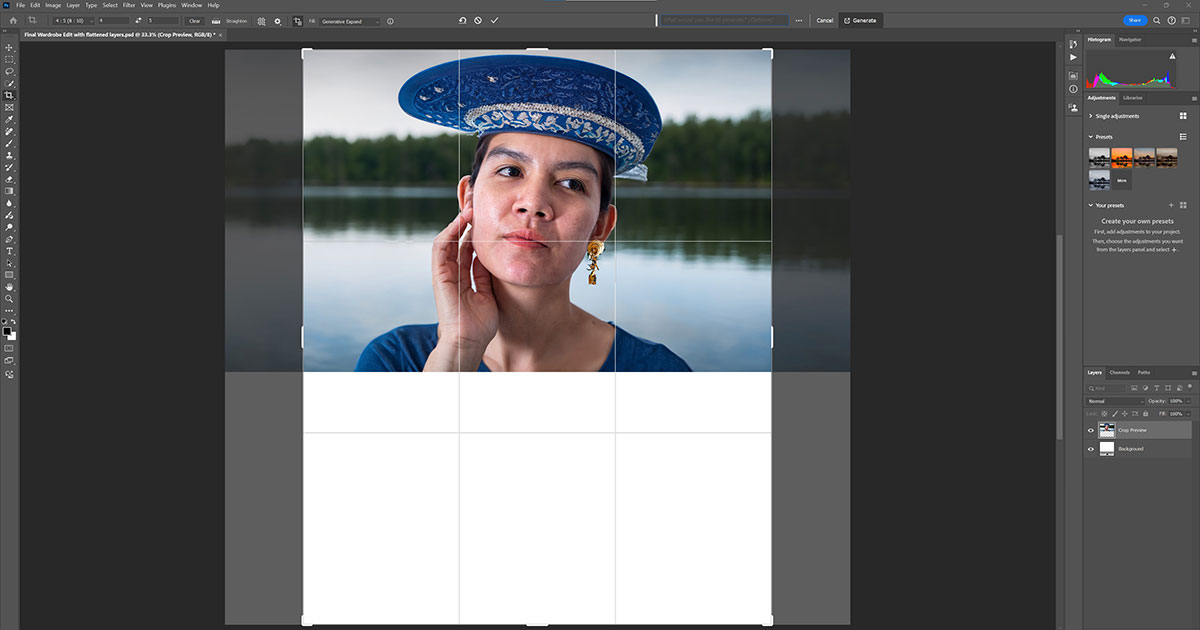
Step 5: Click on Generative Fill. Leave the text box empty to start if you like the background you’re working with. Click Generate. Choose from one of the three options. Keep clicking Generate to get more options.
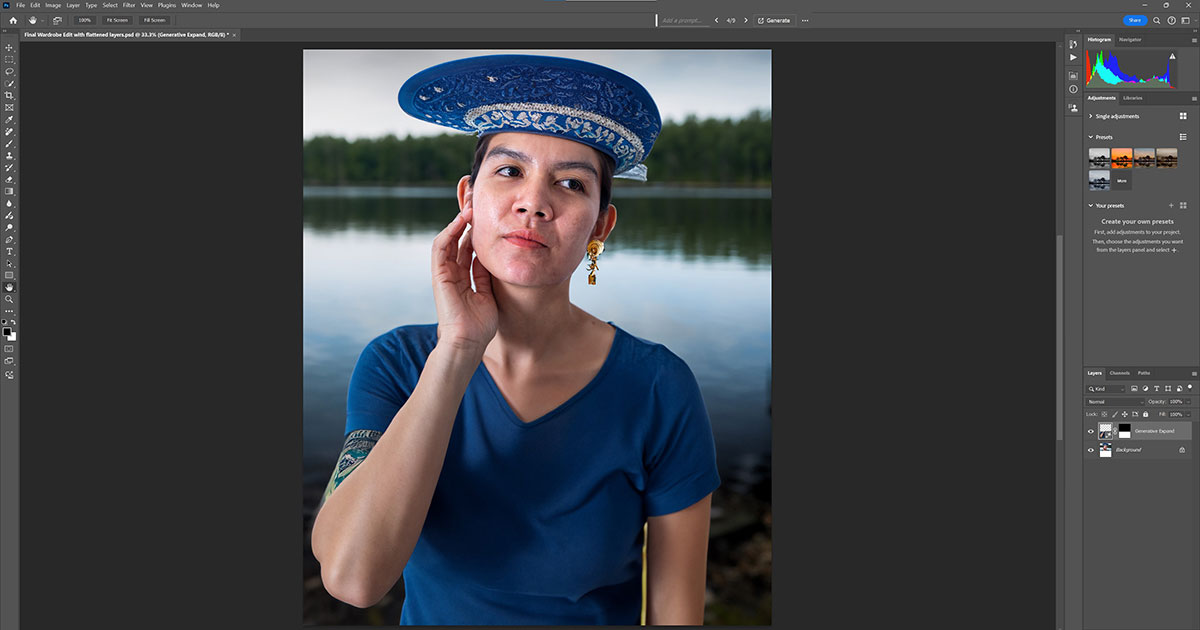
With a newly sized image ratio, you can now change the wardrobe and the background to create completely different looks for your model photography set.
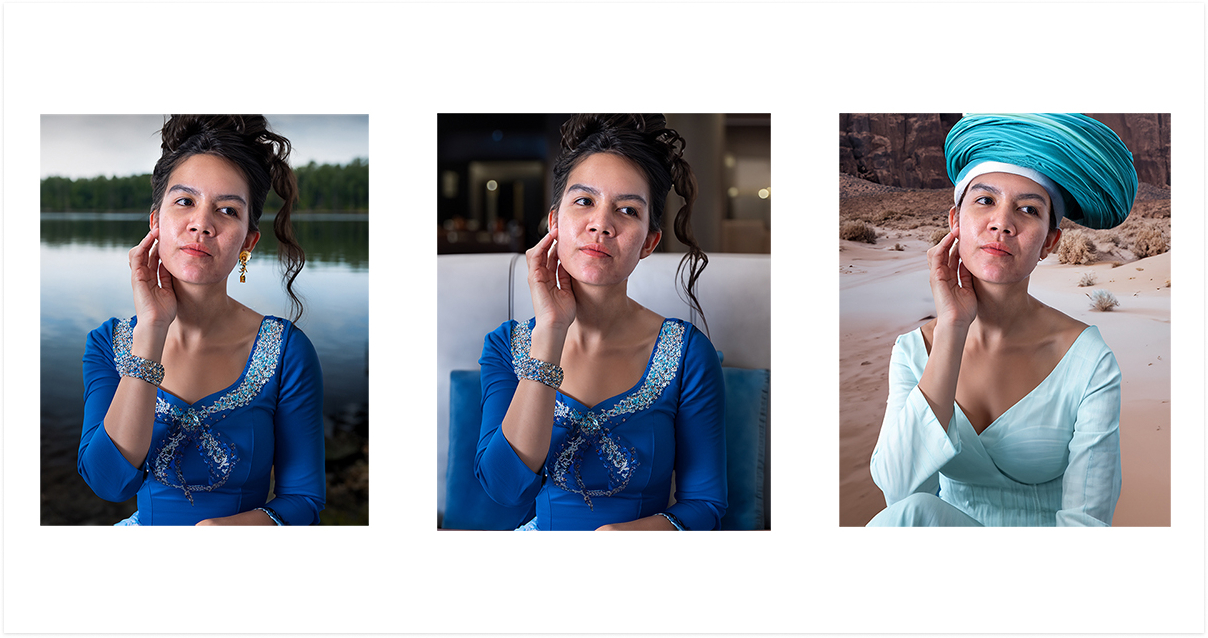
For comparison, here’s our starting image once again.
Before:
And here are a few of the countless possibilities.
After:
Transform Your Model Photography with Adobe Photoshop’s AI Tools
Model photography is more than just snapping a picture; it’s a complex dance involving meticulous planning and execution. Whether you’re rolling with a full crew or flying solo with a Trade for Print agreement, Adobe Photoshop’s AI capabilities, particularly Adobe Firefly, can elevate your game. These tools cut through the limitations, saving you time and money while offering flexibility that was once a dream.
By leveraging AI, you can seamlessly switch up backgrounds, tweak wardrobe and accessories, and expand your canvas to create dynamic, eye-catching images. This tech lets you focus on creativity and client satisfaction, rather than logistical headaches. AI isn’t just a game-changer; it’s your ticket to staying ahead in the competitive world of model photography. So, embrace the power of AI and take your shoots to the next level.