Clipping path and image masking are two essential image editing processes used for background-removal and subject-isolation techniques. Based on object complexity, image requirement, and edge detail, the processes vary. Clipping path is a vector-based editing technique, created with the Photoshop Pen tool. Masking is a pixel-based method used for selective editing to preserve soft-edge transparency in images.
Clipping path is important for creating precise vectors, clean paths, and allowing detailed editing and masking, which is important for non-destructive editing, detecting edges, and allowing layer-based isolation. The Photoshop pen tool, paths panel, and zoom tool are used for creating a clipping path in Photoshop. Layer Mask, Select and Mask, and Refine Edge Brush are used for creating a mask in Photoshop. Professional image clipping path service cost starts at $0.29 per image, and photo masking price starts at $0.60 per image in basic.
What you’ll learn in this article
- 1 Clipping Path vs Image Masking: Overview
- 2 Clipping Path vs Image Masking: Types
- 3 Clipping Path vs Image Masking: Importance
- 4 Clipping Path vs Image Masking: When to Use
- 5 Clipping Path vs Image Masking: Used Tools
- 6 Clipping Path vs Image Masking: Techniques
- 7 Clipping Path vs Image Masking: Cost
- 8 Clipping Path vs Image Masking: Which is More Precise?
- 9 How Do Photographers Choose Between Clipping Path and Image Masking?
- 10 FAQ’s
Clipping Path vs Image Masking: Overview
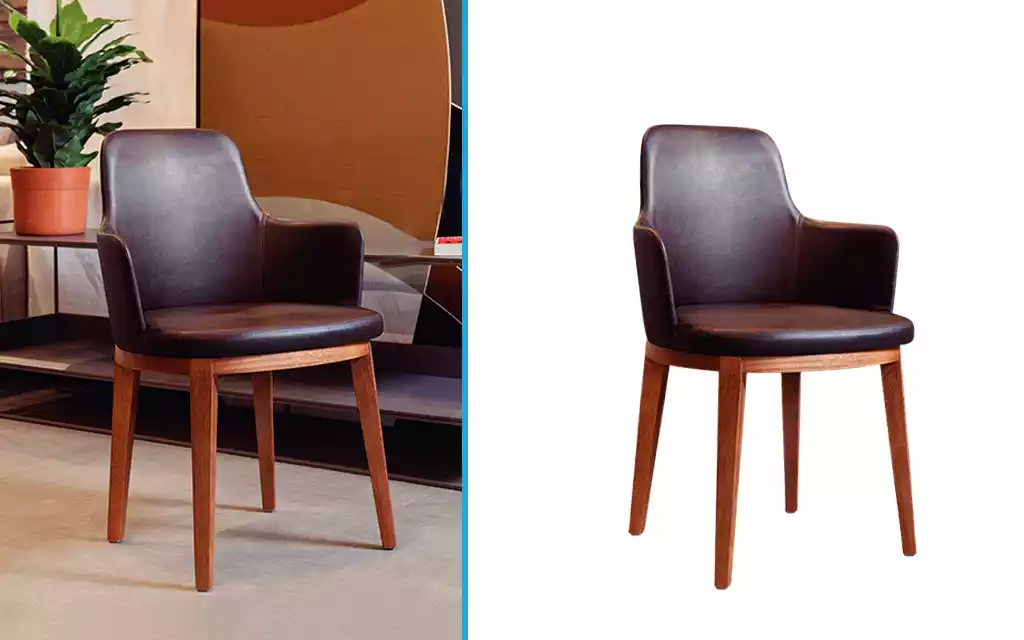
Clipping path is known as deep etch; it is the process of creating anchor points with the Photoshop pen tool around an object to clip it. It is used for creating precise vectors, clean paths, and allowing detailed editing. Photo masking allows selective editing without harming the whole image. It is used for non-destructive editing, detecting edges, and allowing layer-based isolation.
What is a Clipping Path?
A clipping path is a closed vector path drawn around an object with the Photoshop Pen tool to remove the background or isolate the object from the surrounding area for intentional use. Understanding clipping paths takes time; a simple clipping takes 2 to 5 minutes, and cutting complex shapes can take over 30 minutes. Clipping is mostly used by print and advertising agencies, digital media, e-commerce sellers, and online shop owners.
How Does Clipping Path Work in Photoshop?
Clipping path work in Photoshop involves creating precise vectors, accurate object selection, and clean background removal. The results of the clipping path is extraction of the object, ready to use on e-commerce catalog and ad campaigns.
Here are 4 ways on how clipping paths in Photoshop works.
1. Creates Precise Vector: Photoshop’s Pen Tool creates precise vector paths, producing sharp edges that pixel-based selection tools cannot match.
2. Creates Clean Paths: Editors trace the subject edge with anchor points. This process ensures accurate object extraction.
3. Removes the Background: Following the path creates a clean-edge selection, producing a perfect cut-out without rough edges.
4. Allows Detail Editing: Editors can apply any editing to the cutout, meeting commercial requirements, or store it for later reuse.
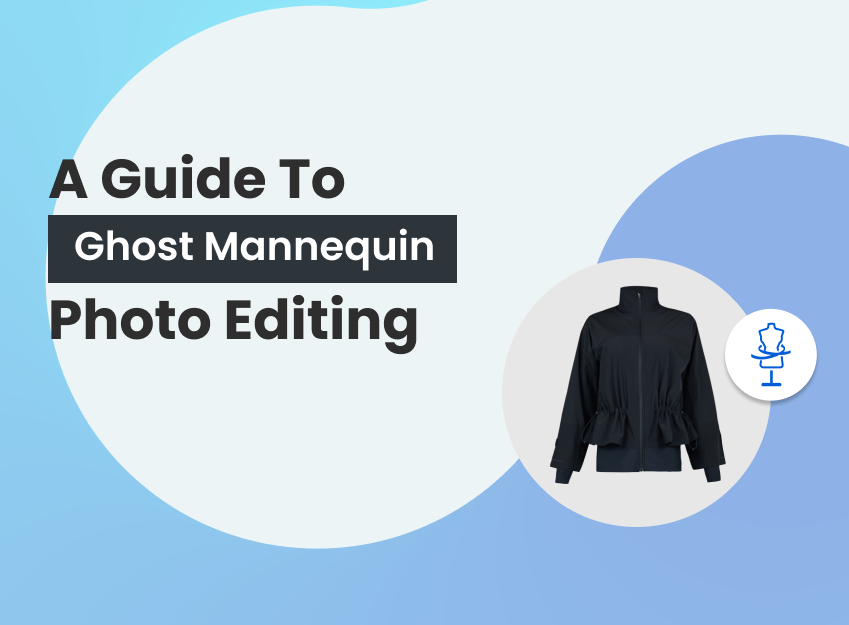
What is Image Masking?
Image masking is a non-destructive photo editing process to selectively reveal or conceal any part of images. The process is used when images contain complex or soft edges, such as hair, fur, smoke, or transparent fabrics. Depending on intricacy, the editing process takes 1 to 3 or more business days and is often sought after by e-commerce product photography, advertising and marketing industry, graphic design agencies, print and publishing media, etc.
How Does Image Masking Work in Photoshop?
Image masking works in the following 4 ways in Photoshop.
1. Ensures Non-Destructive Editing: The mask can be refined or adjusted anytime without permanently deleting pixels.
2. Preserves Details: Masking stores the fine edges like hair strands, fur, and semi-transparent objects without losing any data.
3. Detects Edges: The process includes Select and Mask tools that analyze contrast and texture for accurate isolation of the subject from the background.
4. Allows Layer-Based Isolation: A layer mask allows partial editing, hides unwanted areas while keeping the subject visible, maintaining editing flexibility.
Clipping Path vs Image Masking: Types
The types of clipping path include simple clipping path, complex clipping path, compound clipping path, medium clipping path, super complex clipping path, and multiple clipping paths. The types of masking include layer masking, clipping masking, collage masking, vector masking, and alpha channel masking, among others.
What Are the Different Types of Clipping Path?
The different types of clipping path used in the post-production industry are simple clipping path, complex clipping path, compound clipping path, medium clipping path, super complex clipping path, and multiple clipping path as follows.
1. Simple/Basic Clipping Path
A simple or basic clipping path is used for objects with clean edges and minimal curves, such as boxes, t-shirts, shoes, chairs, or cameras. It produces clean background removal with smooth edges, ready for e-commerce product listings.
2. Complex Clipping Path
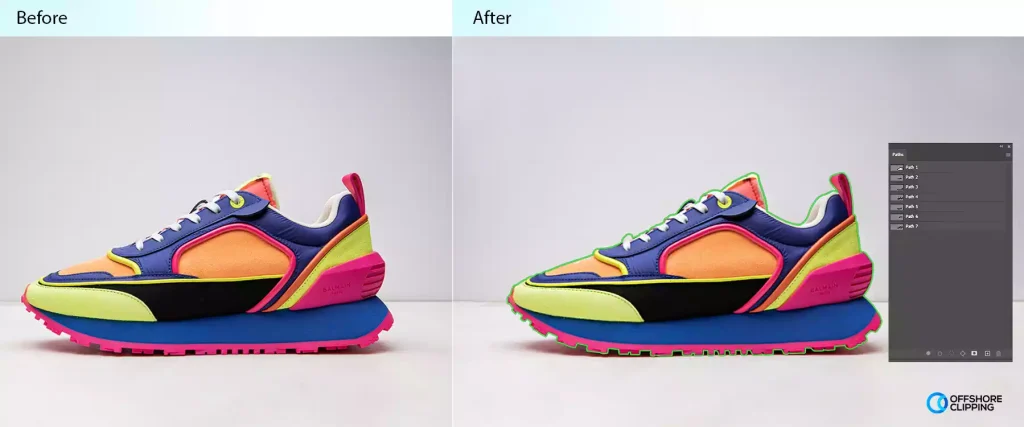
A complex clipping path is used for objects having different shapes, or images of multiple objects, and complex details such as tech products. It is an advanced-level clipping path and needs more anchor points.
3. Compound Clipping Path
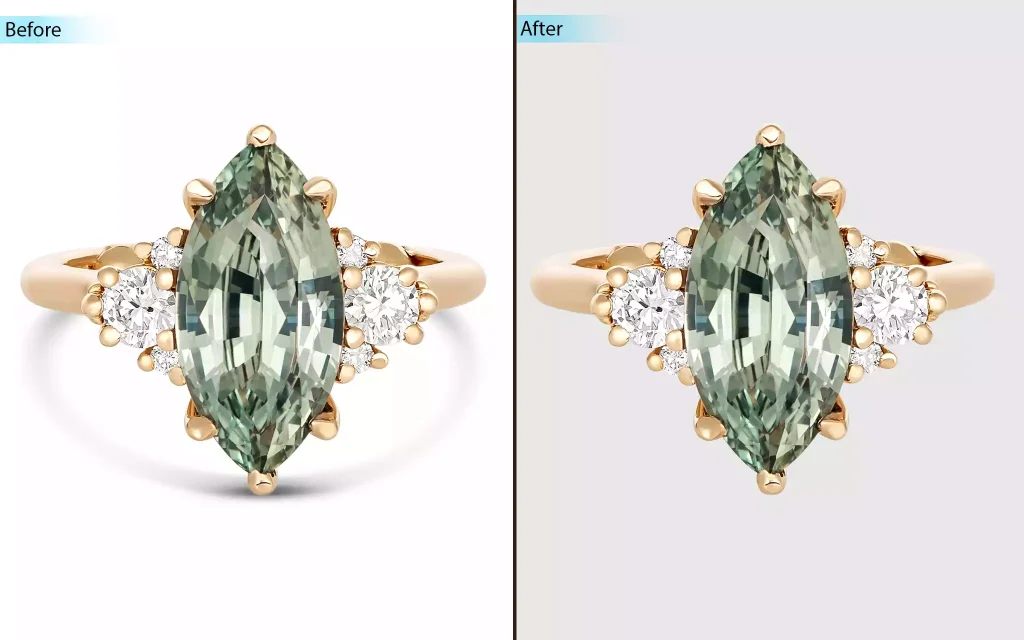
The compound clipping path process is a combination of various simple to advanced clipping techniques applied when multiple complicated shapes need to be isolated. It is applied to fashion images, jewelry images, etc.
4. Medium Clipping Path
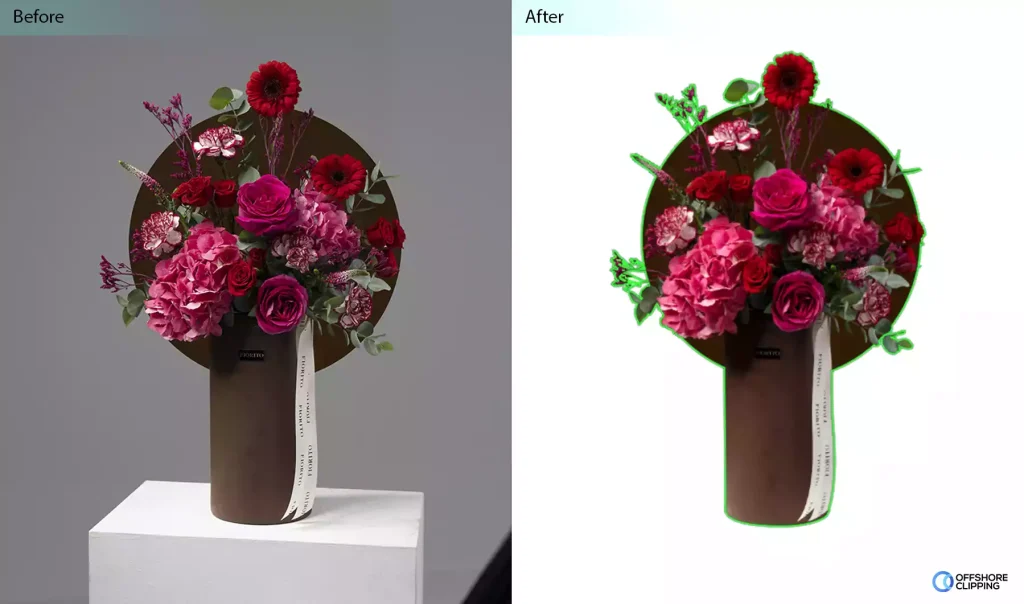
A medium clipping path has anchor points, and it is applied to photos where objects have several designs and holes, such as images of group shoes, group watches, bracelets, motor parts, etc.
5. Super Complex Clipping Path
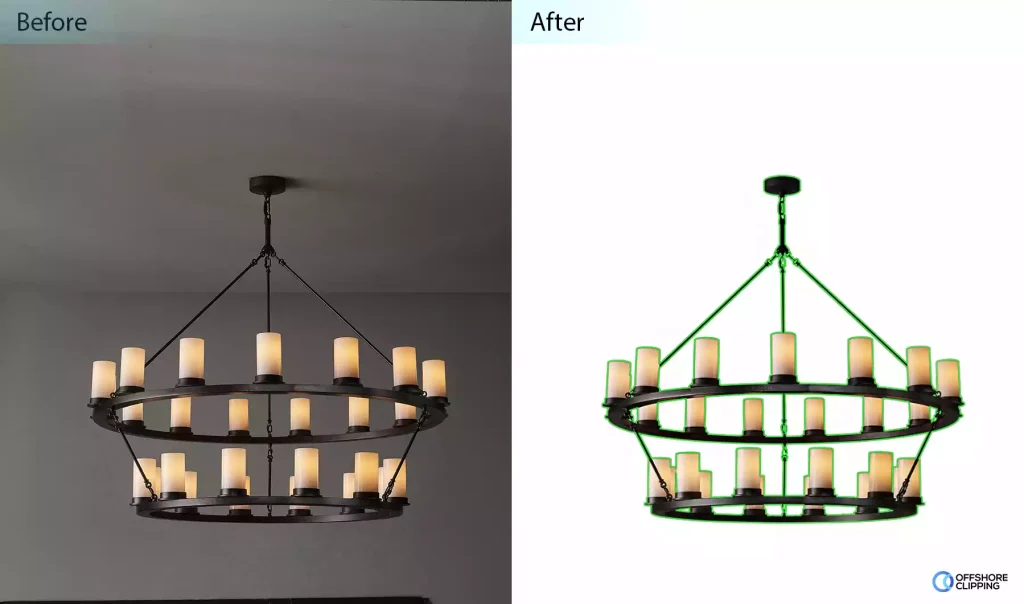
A super complex clipping path is an intricate clipping process and is applied where keeping the original shape of the object is difficult due to many paths, holes, and curves, such as chandeliers, watches, gadgets, etc.
6. Multiple Clipping Path
Multiple clipping paths are applied to images with multiple fillings, color levels, transform size, opacity, rotation, etc. It includes different effects and filters. GIF composite animation is an example of a multiple-clipping path application.
What Are the Different Types of Image Masking?
The different types of image masking include layer masking, clipping masking, collage masking, vector masking, alpha channel masking, etc., depending on how selections, transparency, and image data are controlled.
The 10 most popular types of image masking are listed as follows.
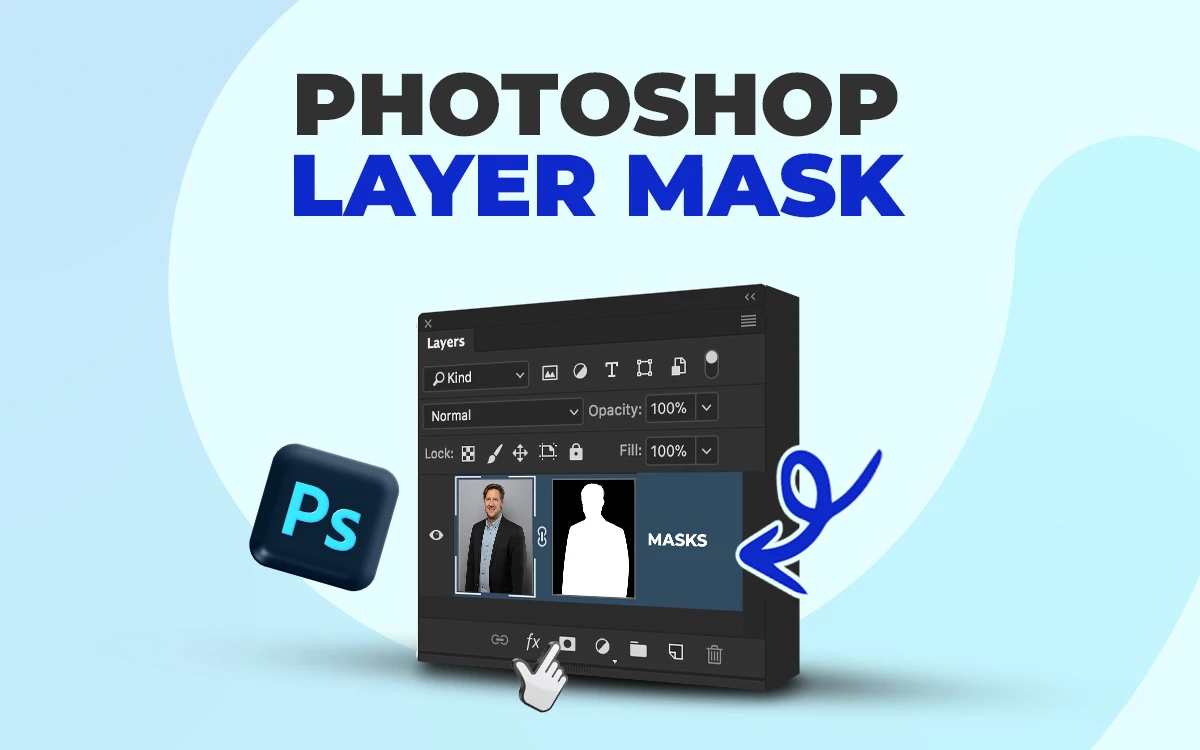
1. Layer Masking
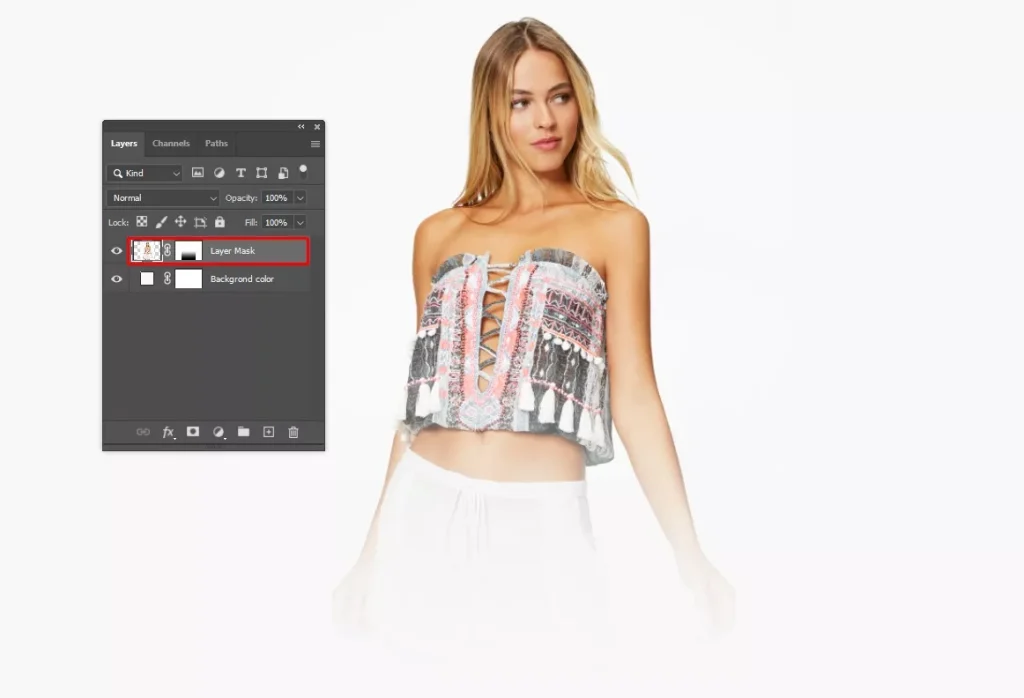
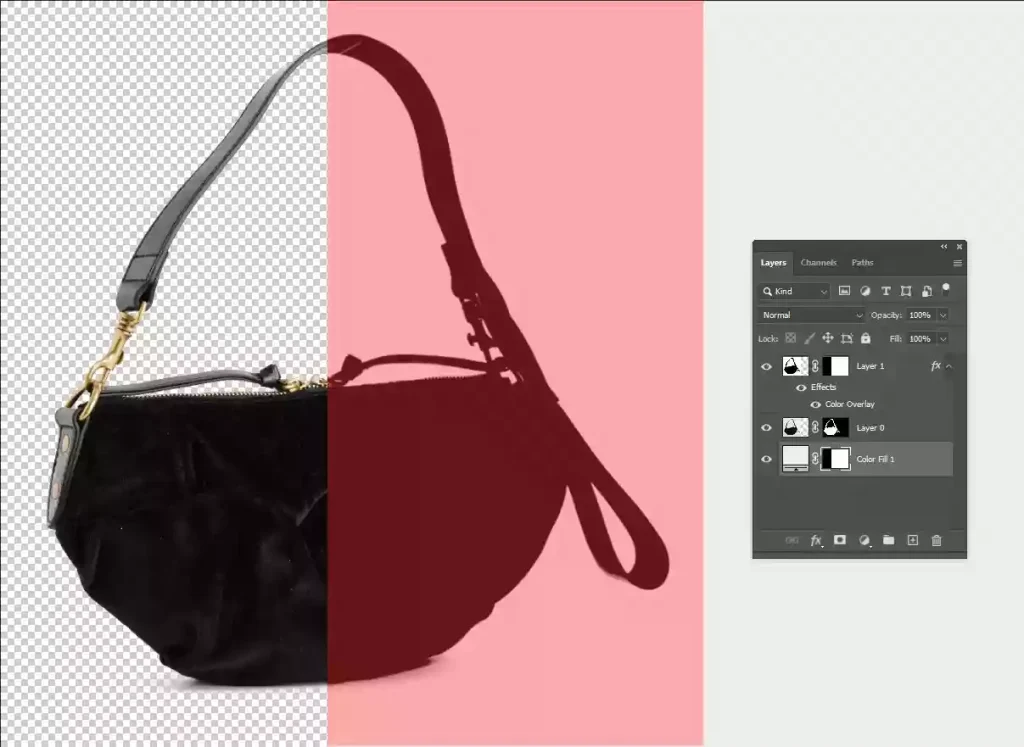
Photoshop layer masking controls the visibility of a layer using black, white, and gray values. Professional image editors perform non-destructive editing to hide or reveal areas while retouching, editing the background, or making color adjustments. It is created with the Layer Mask option and refined using the Brush Tool or Gradient Tool.
2. Clipping Masking
Clipping masking joins two or more layers, where the top layer only appears within the visible area of the base layer. Editors use it for text effects, image fills, and controlled compositions. It is created by using Create Clipping Mask, often used with the Type Tool, Shape Tool, and adjustment layers.
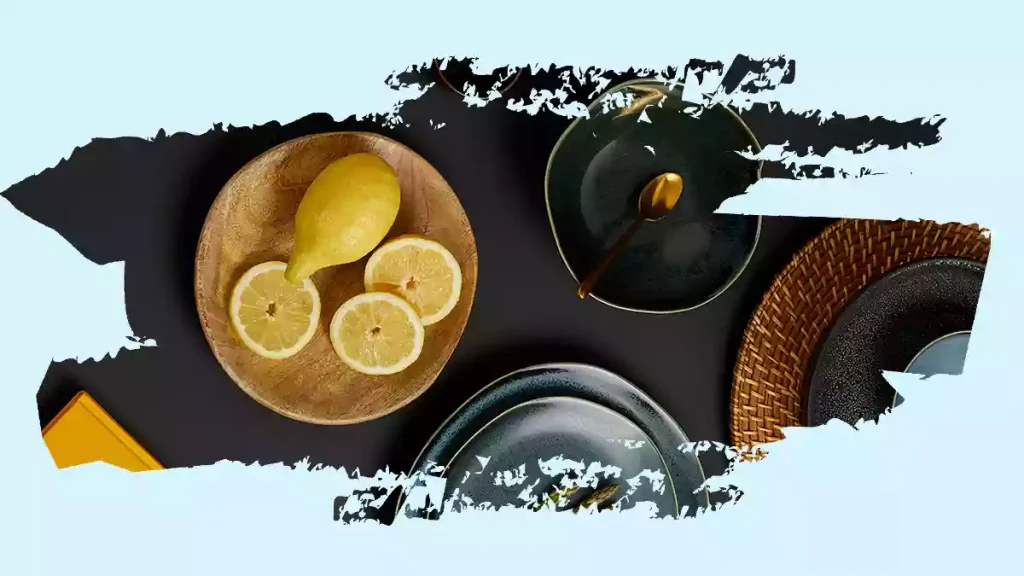
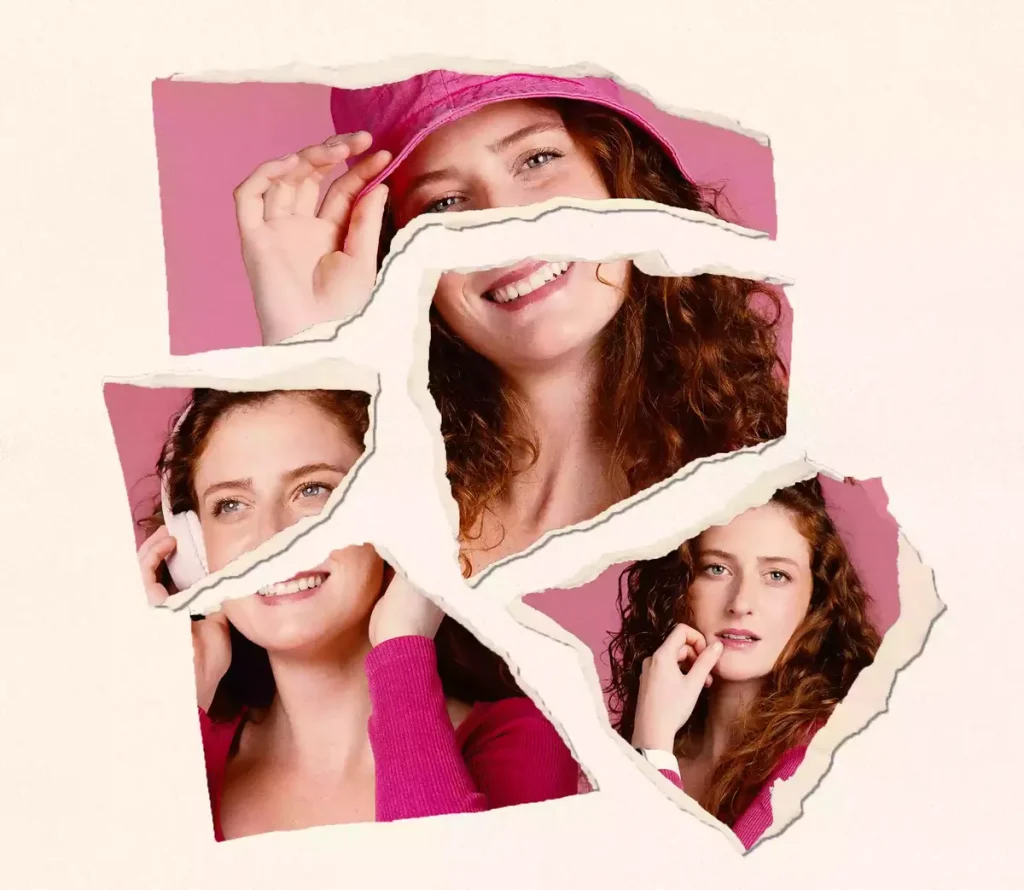
3. Collage Masking
Collage masking combines multiple extracted subjects into one composition. Editors isolate objects from different images and blend them on a new background, keeping the natural shadows and edges. Layer Masks, Move Tool, and Brush Tool are used for creating collage masking.
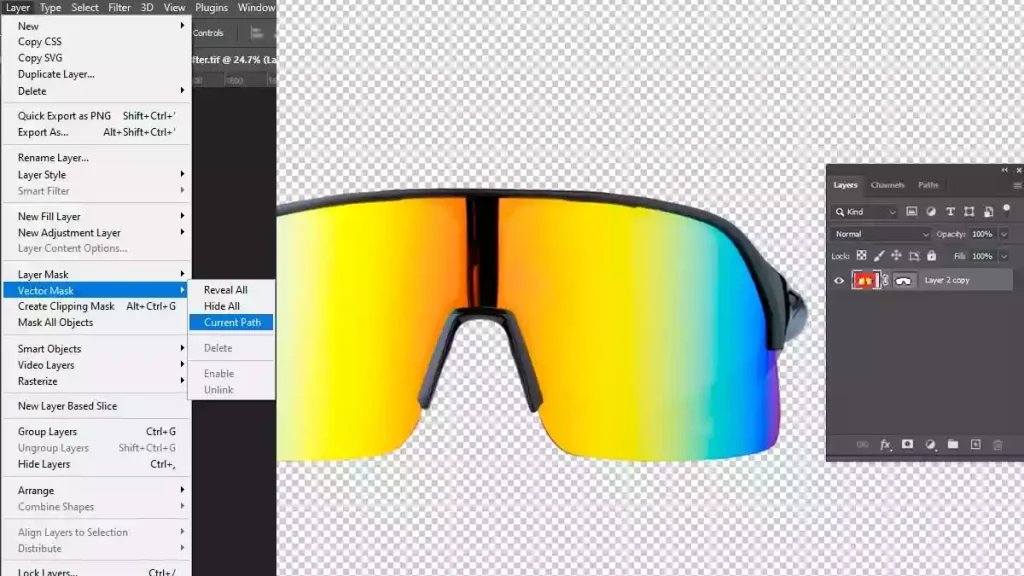
4. Vector Masking
Vector masking is a resolution-independent and non-destructive process that uses a Pen Tool or Shape Tool. It works best for hard-edged objects like products, packaging, or vehicles, and remains sharp even when images are resized.
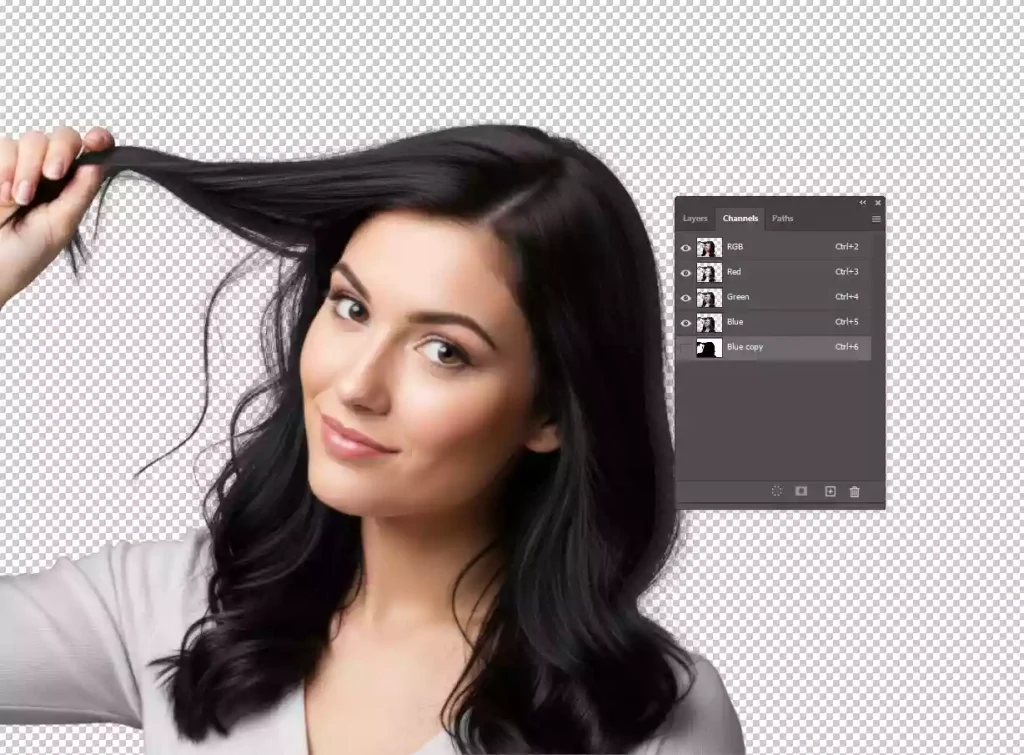
5. Alpha Channel Masking
Alpha channel masking, also called raster masking, uses an alpha channel to create a mask and stores selections in separate channels to isolate complex edges like hair or fur. It helps editors refine difficult cutouts and keep detailed transparency during advanced retouching. Tools that create alpha channel masking are Channels Panel, Select and Mask, and refined with Dodge, Burn, or Brush tools.
6. Translucent & Transparency Masking
Translucent masking is the method of creating a semi-visible effect on the subject, creating a blurry view similar to glass, water, etc. Transparent masking is the process of completely displaying the background with no visual barrier. This effect is required to remove backgrounds or create cutouts. Editors create it using Layer Masks, the Brush Tool, Opacity control, and sometimes the Select and Mask refinement tools.

7. Quick Masking
Quick masking is the process of speedy creation and editing of selection work in Photoshop. Quick masking is created by using the Magnetic Lasso Tool or Quick Selection Tool. Selecting an area with quick masking will appear as a semi-opaque red color to differentiate the selected and non-selected areas.
8. Channel Masking
Channel masking is the process of isolating and manipulating the color channels applied to complex images. It creates a transparency mask and allows adjusting color grade, hue, brightness, saturation, and different types of effects. Editors use the Channels Panel, Levels, and Brush Tool to refine selections before converting them into masks.
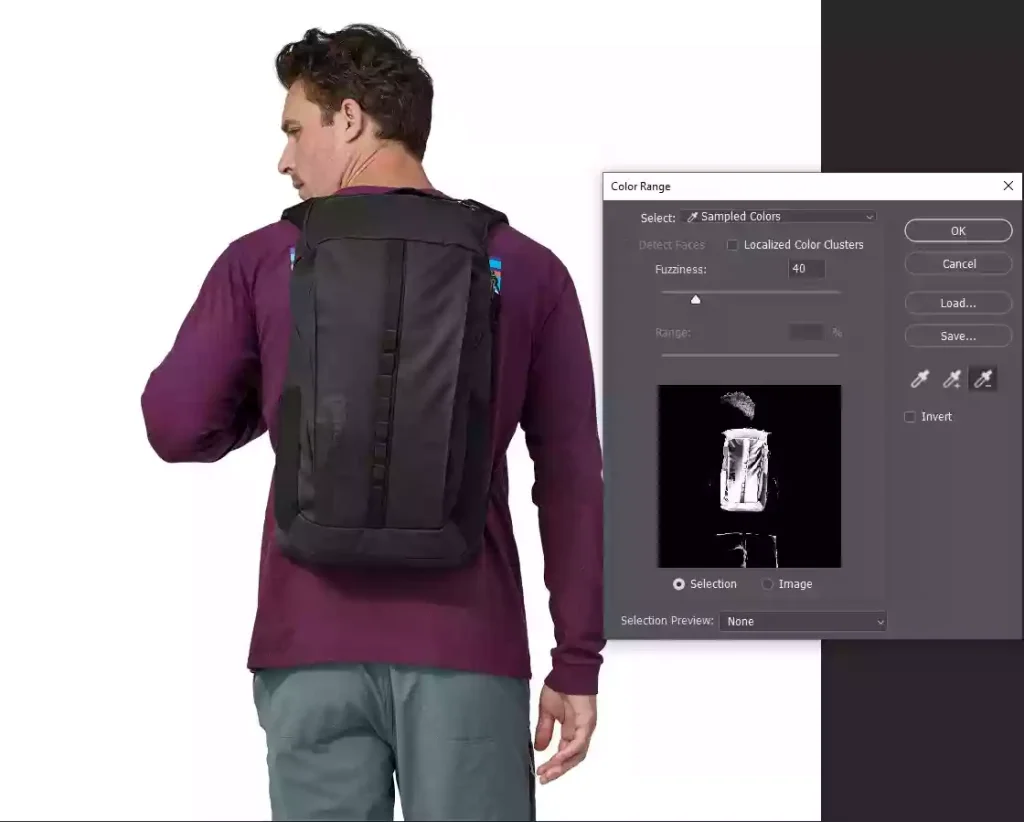
9. Color Range Masking
Color range masking selects pixels based on similar color values. This method helps isolate backgrounds, skies, or specific objects quickly before turning the selection into a usable layer mask. It is created using the Color Range tool, then converted into a layer mask for isolating backgrounds.
10. Luminosity Masking
Luminosity masking creates selections based on brightness levels in an image. It is widely used in professional editing to control highlights, shadows, and midtones without affecting the entire photo. Editors create it using channels, selections, and adjustment layers to control highlights, shadows, and midtones without affecting the entire image.
Clipping Path vs Image Masking: Importance
Both clipping path and image mask are non-destructive editing processes. Clipping path is essential for offering high-quality images with flexibility in the process. Also, you can apply other edits even after subject isolation in clipping. Photo masking allows selective editing and complete control in editing both hidden and visible parts. You can apply advanced retouching for natural-looking images.
Clipping Path vs Image Masking: Why is Clipping Path Used in Photo Editing?
Clipping Path is used in photo editing for fulfilling the following purposes of print and advertising agencies, digital media, e-commerce sellers, and online shop owners.
- Non-destructive workflow
- High-quality, precise, and professional images
- Flexible process and no loss of image quality
- Best for editing large volumes of similar products
- Consistency in the cutout creation for product photos
- Allows additional edits like color correction and shadow creation after subject isolation
- Scalable and versatile outputs for both online and offline applications
Clipping Path vs Image Masking: Why is Image Masking Used in Photo Editing?
Image masking is used in photo editing to meet the following purposes of the advertising and marketing industry, graphic design agencies, print and publishing media, and the fashion industry.
- Non-destructive editing process
- Offers control over both the visible and hidden parts
- Preserves fine details like hair, fur, smoke, and soft fabrics
- Allows advanced retouching and produces more natural results
- Allows application of selective visibility
- Ensures flexibility and reversibility in the process
Clipping Path vs Image Masking: When to Use
When to use a clipping path or an image mask is determined by the photo types and requirements, such as use of a clipping path during e-commerce image editing, bulk editing, adjusting images with hard edges, etc. When your images have soft, pointy edges, glass-made, transparent corners, use masking.
When Should You Use a Clipping Path?
Use the clipping path when your images fall under e-commerce images, have hard edges, need bulk editing or background removal, or need color or shadow adjustment without affecting the image.
When you should use a clipping path is listed as follows.
- When you have e-commerce product photos, a clipping path creates clean, sharp cutouts that meet marketplace white-background requirements.
- When images are hard-edged, such as electronics, furniture, packaging, or shoes, they need precise vector edges for a professional presentation.
- During bulk image editing, maintain uniform cutouts across hundreds of product SKUs across listings for visual consistency.
- When images need background removal or replacement for a promotional or branded look, without edge distortion.
- When images need color or shadow adjustment, a clipping path enables selective editing after isolation without affecting the entire image.
When Should You Use Image Masking?
Use image masking when your images involve hair, fur, transparent or glassy objects, have complex backgrounds, etc.
When you should use image masking is listed as follows.
- During editing images with hair or fur, masking preserves fine strands and soft edges.
- If the images are transparent or glass-made objects, masking maintains realistic transparency and reflection.
- When editing fashion and apparel images, keep fabric textures, soft folds, designs, and lace intact.
- When complex background separation, masking helps isolate subjects when edges blend into the background.
- When editing high-end advertising images for natural blending and realistic composition.
Clipping Path vs Image Masking: Used Tools
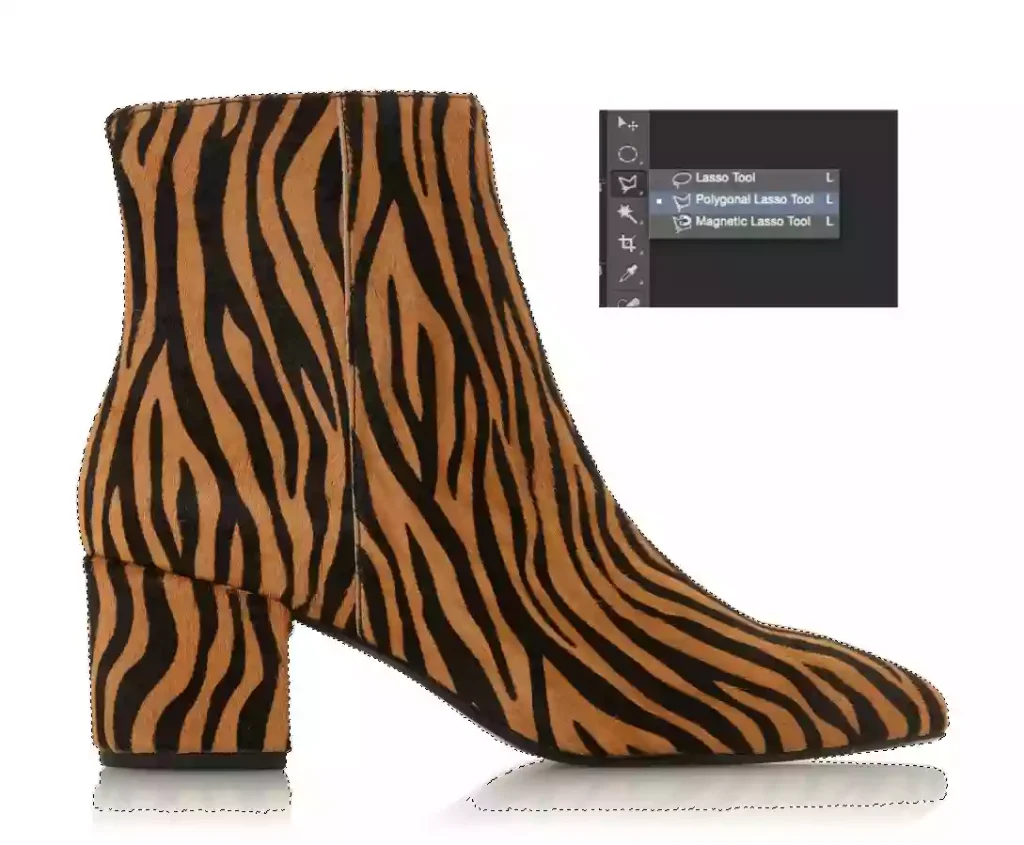
Clipping path creation is done by the Pen tool the most; other than that, you can use the Direct Selection Tool, the Paths Panel, Zoom Tool, among others. To create photo masking, you can use tools like Layer Mask, Select and Mask, Refine Edge Brush, etc.
What Tools Are Used for Clipping Paths?
The Pen Tool of Adobe Photoshop is used for creating a clipping path. Other supporting tools, such as the Direct Selection Tool, Paths Panel, Zoom Tool, and Hand Tool, are also used for creating precise anchor point adjustments.
Here is a list of the tools used for clipping paths.
- Photoshop Pen Tool for drawing precise vector paths around the subject.
- The Direct Selection Tool to adjust anchor points and path curves allows editors to refine edges and improve path accuracy.
- The Paths Panel for creating, managing, and saving clipping paths for future editing or layout design.
- Zoom Tool to zoom into image details by placing anchor points more accurately along object edges.
- Hand Tool to move around the canvas while working on detailed clipping paths without changing the zoom level.
What Tools Are Used for Image Masking?
Tools that are used for image masking include Layer Mask, Select and Mask, Refine Edge Brush, Quick Selection Tool, Channels Panel, and Brush Tool for creating complex selections and editing soft edges.
Here is a list of the tools used for image masking.
- Layer Mask to hide or reveal parts of a layer without deleting pixels.
- Select and Mask for detecting subjects and refining complex edges such as hair, fur, and soft details before creating a mask.
- Refine the Edge Brush Tool for improving edge detection around fine details.
- Quick Selection Tool, an AI-assisted selection tool used for faster selection based on color and texture differences.
- Channels Panel to create alpha channel masks.
- Brush Tool for manually refining masks by painting black, white, or gray to hide, reveal, or partially reveal image areas.
Clipping Path vs Image Masking: Techniques
There are plenty of techniques by which you can do clipping path and image masking, for example, manual pen path, vector mask, and compound path are used for creating a clipping path and layer mask, alpha channel, and transparency masking are used for masking in Photoshop.
How Do You Do a Clipping Path in Photoshop?
You can create clipping paths in Adobe Photoshop using the manual pen path technique, vector mask technique, compound path technique, multiple path technique, and path+layer mask combination.
- Manual Pen Path Technique: This technique is an expert photo editor’s hand-drawn approach. They draw vector paths around objects for clean and sharp cutouts.
- Vector Mask Technique: Editors use vector-based masking to hide backgrounds while keeping edges sharp and resolution-independent.
- Compound Path Technique: It is applied when objects contain internal holes or multiple separated areas that must be isolated within a single clipping path.
- Multiple Path Technique: This technique creates several paths within one image to allow separate editing of different parts.
- Path + Layer Mask Combination Technique: This combined approach is for solid edges with masking for difficult areas, ensuring both precision and natural detail retention.
How Do You Do an Image Mask in Photoshop?
You can create image masking in Photoshop by applying the layer masking technique, alpha channel masking technique, transparency masking technique, color range masking technique, luminosity masking technique, etc.
- Layer Masking Technique: This non-destructive method allows you to hide or reveal parts of an image while preserving pixels for flexible editing.
- Alpha Channel Masking Technique: This process uses contrast information from channels to isolate subjects with complex edges like hair or fur.
- Transparency Masking Technique: It is applied to semi-transparent objects such as glass, smoke, or fabric while removing backgrounds.
- Color Range Masking Technique: Editors use this method to select and mask areas based on similar color values.
- Luminosity Masking Technique: It creates masks based on brightness levels to control highlights, shadows, and tonal adjustments.
Clipping Path vs Image Masking: Cost
Clipping path service price starts at $0.29 per image, and image masking service costs $0.60 per image in the US. The pricing varies depending on image complexity, volume, project size, editing time, etc. Pricing of masking is higher than that of clipping because of the images’ intricacy and transparency.
What is the Clipping Path Service Cost in the USA?
Clipping path service cost in the USA starts at $0.29 per image in basic editing for simple product images. Pricing goes as high as $15 per image or more, depending on image complexity, volume, number of anchor points in images, turnaround time, etc.
What is the Image Masking Service Cost in the USA?
Image masking service cost in the USA usually starts at $0.60 per image in basic editing for simple images and goes higher than $10 or more per photo. Masking requires more manual work and precision, so the price is determined by the objects’ intricacy level in images, transparency, edge complexity, editing time, project volume, etc.
Clipping Path vs Image Masking: Which is More Precise?
Clipping path is precise for objects with dimension and masking is more precise and best for objects with undefined soft edges. Their differences involve several technical and practical areas, such as their compatibility with subjects, image requirements, workflow complexity, cost, time requirements, and pricing.
| Terms | Clipping Path | Clipping Mask |
|---|---|---|
| Data Type | The clipping path is vector-based. | A clipping mask is vector and raster-based. |
| Compatibility | Compatible with simple-shaped subjects. However, returning to a previous position isn’t allowed. | Easily works with difficult subjects, and the process allows freedom to go back to make any changes. |
| Edge Application | Applied to objects with hard or sharp edges. | Suitable for both hard and soft-edged objects. |
| Process Priority | Clipping path comes first for images needing both path and mask. | Masking is applied later when images need both processes. |
| Image Requirements | Performed on images with pointy or smooth edges, regardless of background. | Works well for images with chaotic, soft, and hairy subjects. |
| Practical Implication | Allows resizing images for various online or print uses without pixelation. | Handles complex textures and gradients to prepare for realistic effects. |
| Photo Presentation | Clipping path ensures the image looks better with crisp edges. | Masking ensures image smoothness. |
| Pricing | Image clipping path pricing starts at $0.29. | Photo masking price starts at $0.60. |
| Turnaround Time | The manual clipping process takes some time, less than masking, but it ensures precision and expertise. | Image masking takes quite a while, as the subject has so many delicate and tiny details. |
How Do Photographers Choose Between Clipping Path and Image Masking?
Photographers and photo editors choose between clipping path and image masking based on the subject, edges, complexity, transparency, etc., in the images. Generally, subjects having a defined and geometric shape require clipping, and objects with soft, hairy, and pointy edges require masking.
Photographers and photo editors use a clipping path on images if they find these 4 signs.
- Objects having clean and defined edges, such as shoes, boxes, furniture, cars, etc.
- Objects have medium complexity enough to place anchor points.
- Objects with a consistent and visible shape, uniform size, for commercial presentation.
- High-volume and repetitive work, such as background removal for the same type of objects.
Photographers and photo editors use image masking on images if they find these 4 signs.
- Subjects have soft, pointy, or complicated edges, difficult to discern.
- Subjects often appear transparent or semi-transparent.
- Subjects, patterns, textures, etc require precise isolation without damaging the other details or losing data.
- High-end editing is required for images of fashion, apparel, or marketing campaigns.
Which is the Best Method Between Image Clipping Path and Image Masking for Background Removal?
The best method between the image clipping path and the image masking for background removal is determined by the characteristics of the object in the photos. Clipping path is the best technique when the object is well-defined and sharp, and you want scalable and vector-based accuracy with precision for print and objects having geometric shapes. Image Masking is the best method when the object in photos has complex, soft, and transparent edges, as it offers flexibility and control over the editing process.
How to Use AI to Remove Background and Complete Clipping Path and Image Masking?
To use AI to remove background and complete clipping path and image masking, upload your photos to your preferred AI photo editing tool. Some tools require written prompts, and some tools offer dedicated tools. AI-edited images are good for personal use, but are yet to be updated to completely comply with industrial requirements.
Here is a step-by-step guide on how to remove the background with AI tools.
Step 1: Use an AI tool like Remove.bg or Photoshop to remove the background.
Step 2: Refine edges with a clipping path or masking for hair, fur, or transparent areas (optional).
Step 3: Clean, adjust colors, or add a new background (Optional).
Step 4: Export as PNG, PSD, or JPEG for e-commerce or marketing.
How Do You Find a Clipping Path and Image Masking Service Provider?
To find a clipping path and image masking service provider for professional-grade cutouts or to remove background, check 7 vital factors: experience, expertise in tools, portfolio, free trial, client testimonial, turnaround, and price. Depending on your requirements, you can check other factors such as service category, client communication, in-house team, etc.
FAQ’s
Are clipping path and image masking the same thing?
No, clipping path and image masking are not the same thing, though both are Photoshop techniques applied to remove background or isolate the subjects. A clipping path is the process to create a vector path with the Photoshop Pen tool to make the cutout. A masking uses layer masks and selection tools to selectively edit out the subject while preserving the soft and complex edges.
When should you use a clipping path instead of image masking?
You should use a clipping path when the object has clear, solid edges and defined shapes, as it is easy to place anchor points around the object and extract it. Soft-edged objects, such as hair, are difficult to edit like this, so use masking for soft-edged objects.
When is image masking better than a clipping path?
Image masking is better than a clipping path when the subject has complex, soft, or semi-transparent edges, and creating a vector path is difficult. Use masking when images have hair, fur, veils, smoke, glass objects, and fabric details. You can maintain natural transparency and fine textures.