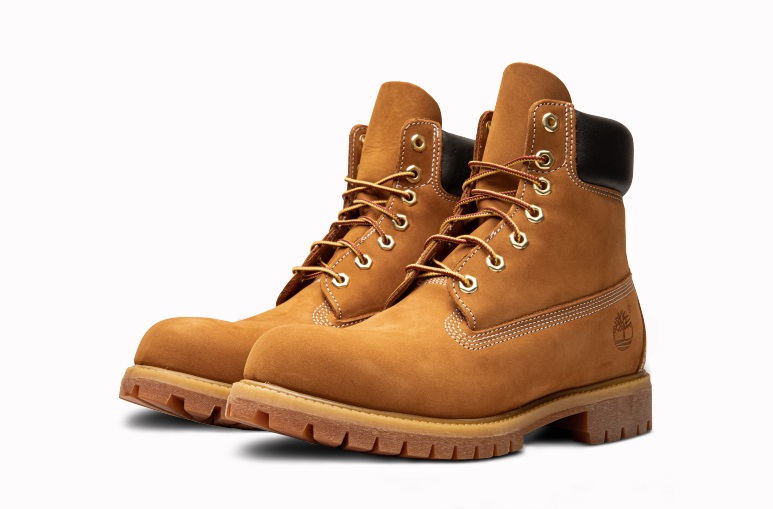
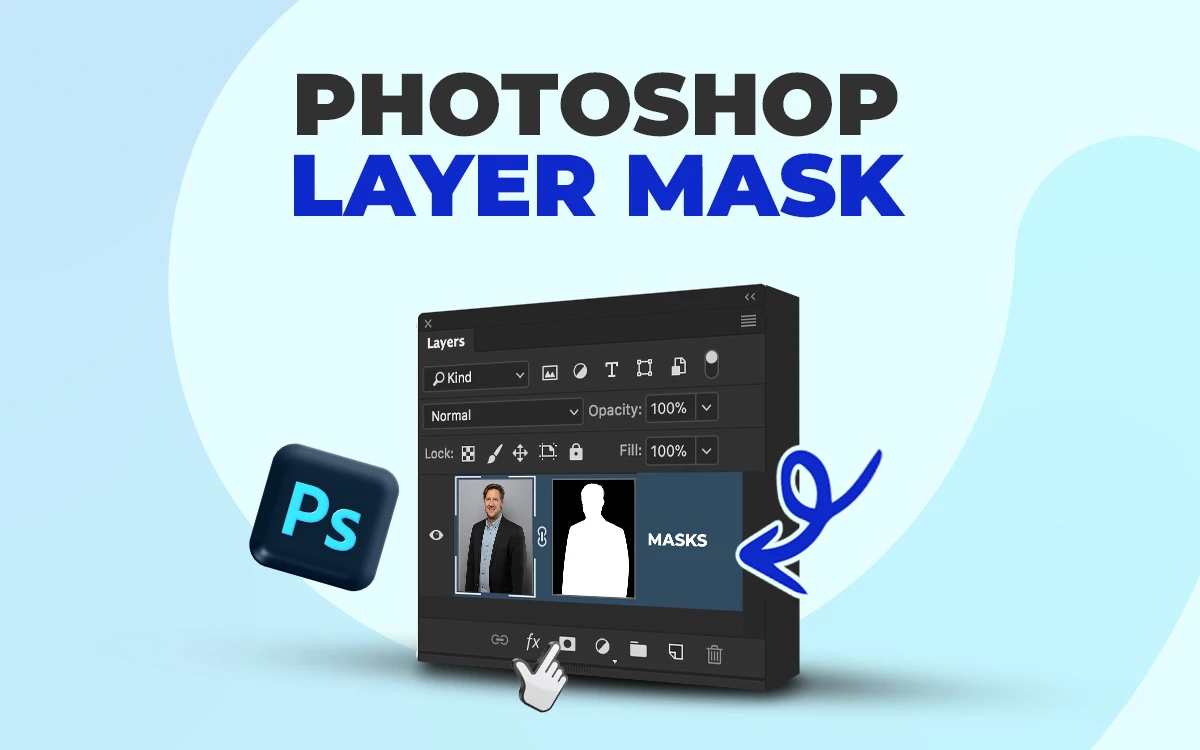
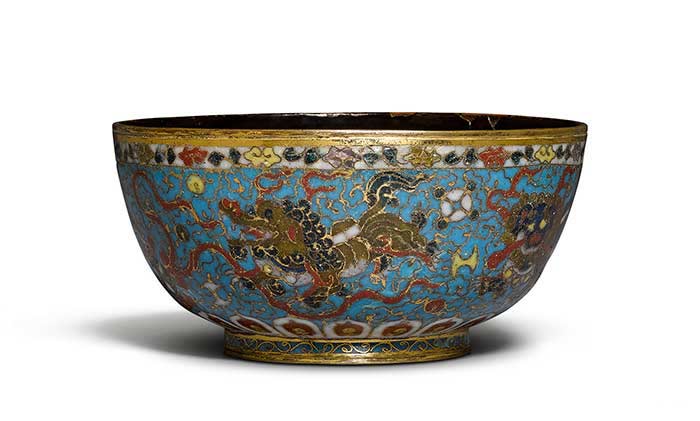
Drop shadows are an amazing design technique you can use to add a little extra something-something to an image. Perfectly sized and positioned drop shadows are a crucial element to implementing a great-looking image.
But what is a drop shadow anyways? And most importantly, how do I get them right?
If you’ve ever tried to create a realistic-looking drop shadow in Photoshop, you know how frustrating it can be. Instead of copying and pasting premade drop shadows or using gradient overlays, why not make your own with a few easy steps?
In this tutorial, you’ll learn how to add drop shadow in photoshop alongside understanding what it really is. We’ll go through the whole process from start to finish.
What you’ll learn in this article
- 1 What is a Drop Shadow?
- 2 Tutorial: How to Add a Realistic Drop Shadow in Photoshop
- 2.1 Step 1: Open image in Photoshop
- 2.2 Step 2: Create Clipping Path
- 2.3 Step 3: Remove the Background
- 2.4 Step 4: Create White Color Layer
- 2.5 Step 5: Duplicate Background Layer
- 2.6 Step 6: Set Foreground Color
- 2.7 Step 7: Turn Copy Layer to Black
- 2.8 Step 8: Place the Shadow
- 2.9 Step 9: Motion Blur
- 2.10 Step 10: Gaussian Blur
- 2.11 Step 11: Paint the Shadow
- 2.12 Step 12: Save the Photo
- 3 When to use a drop shadow in Product Images
- 4 Final Thought
What is a Drop Shadow?
Drop shadow is a visual effect that creates an artificial shadow effect on an image. This effect is mostly used in commercial photography. Drop shadow has the potential to make an image look professional.
There are two kinds of shadows – Form Shadow and Cast Shadow. The shadow that is created on the object itself is Form shadow and the shadow that is created on the surface is the cast shadow. Drop shadow is a cast shadow. It is created during post-processing.
Drop shadows are used for a variety of reasons, such as to create depth, visual interest and make an object appear to stand out from the background.
While their use may seem intuitive, the effect you get from the shadow on your image is very dependent on the color of both the shadow and the object you are creating it for. You’ll know whether it suits or not only after trying it out!
Tutorial: How to Add a Realistic Drop Shadow in Photoshop
Photoshop offers manual and automatic options to create a drop shadow effect. There are two ways to make a shadow in photoshop.
In the Layer menu, there is an option called Layer Style. If you click on that, it’ll give you several options including Drop Shadow. There, you can adjust the distance of the shadow, size, opacity, noise, and many more things.
But photoshop works best when you take full control over your image. Here, we’ll describe how to add drop shadow in photoshop with detailed steps. This method is called the duplication method too, where you’ll create the shadow manually.
So, let’s start with this creative process of drop shadow photoshop!
Step 1: Open image in Photoshop
Open the image in Photoshop by clicking > File from the menu bar. Then > Open.
Step 2: Create Clipping Path
At first, make a duplicate of the background layer. Right-click on Background Layer, click on Duplicate Layer, or just press Ctrl+J.
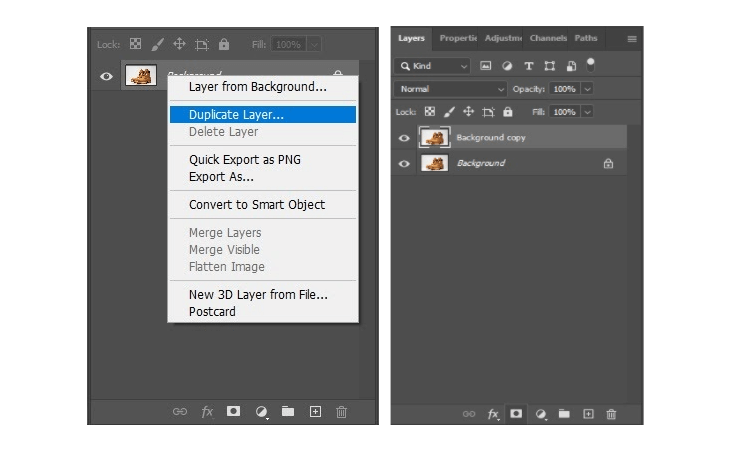
Before adding a drop shadow, first, we’ll have to separate the background from the subject. And to separate the background, we need to create a clipping path.
From the toolbar, pick the pen tool. It’s right above the Text tool.
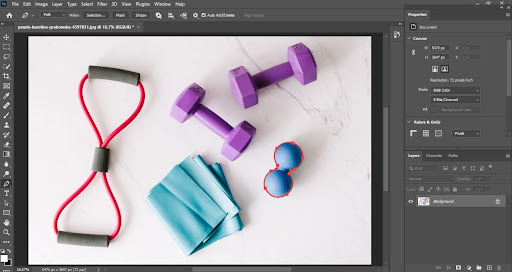
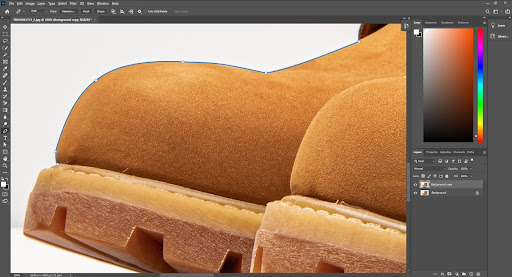
Now zoom in the image so that you can see the edges clearly and start creating a clipping path by drawing anchor points around your subject.
Step 3: Remove the Background
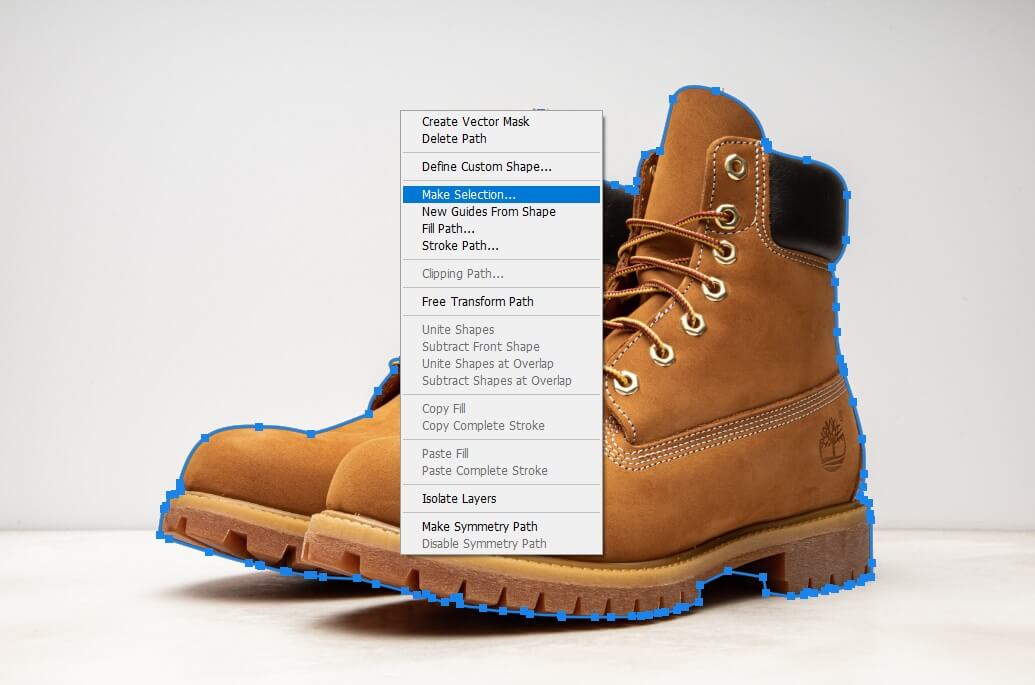
When you’re done with creating a clipping path, right-click on the image and click on Make Selection.
Now add a layer mask to remove the background. In the Layer Panel, you’ll find a square box with a circle inside, which looks like a flag. Click on that to add the mask. This will remove the background.
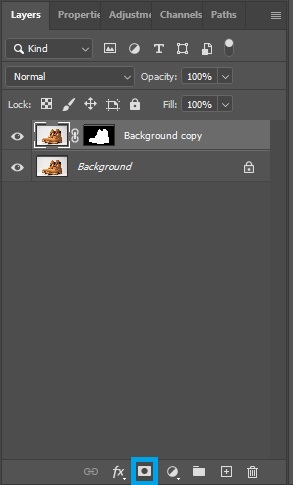
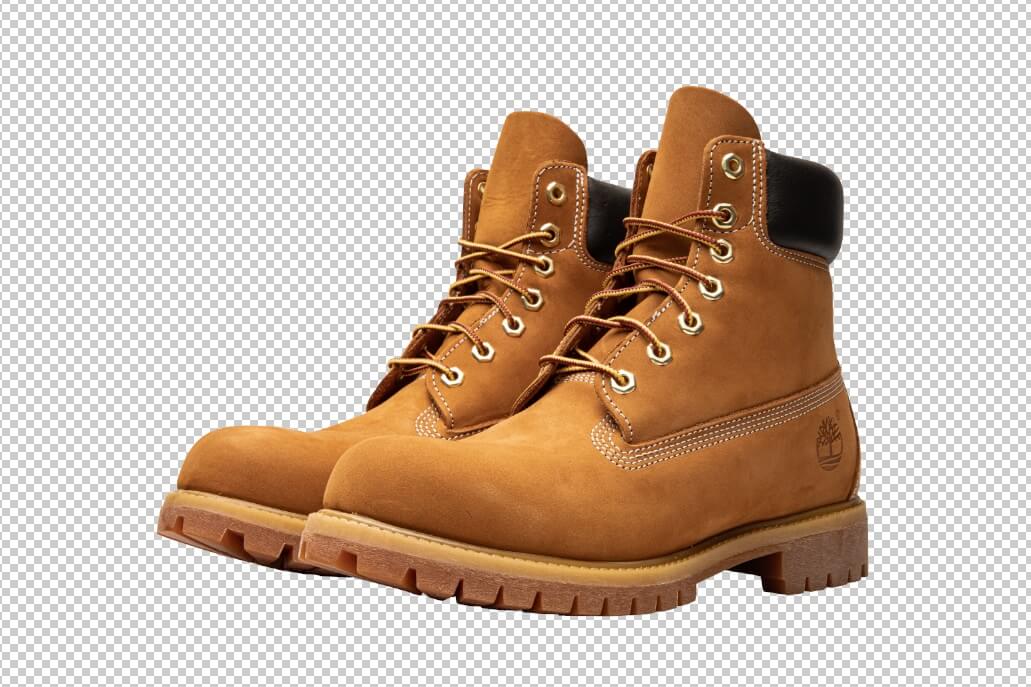
Now your image is ready to add drop shadow.
Step 4: Create White Color Layer
Next, add a white layer. From the Layer Panel, click on the fill or adjustment layer menu. This is right beside the mask option. From there, click on Solid Color to add a white color background.
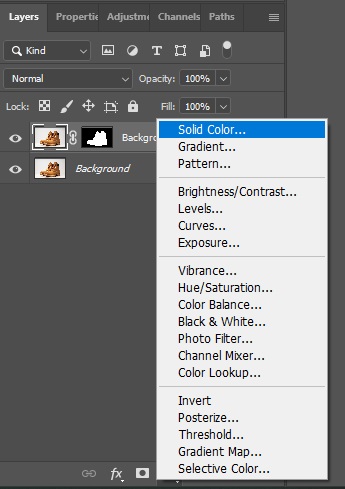
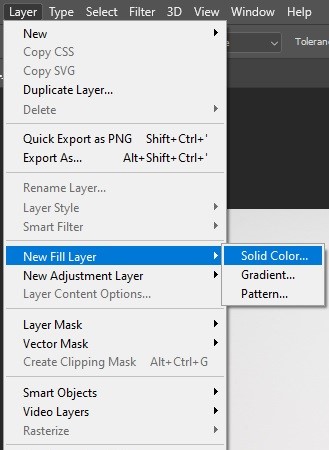
You can also add a solid color layer from the Layer Menu. Click on Layer, then click New Fill Layer and then select Solid Color.
Pick the white color when the color palette pops up.
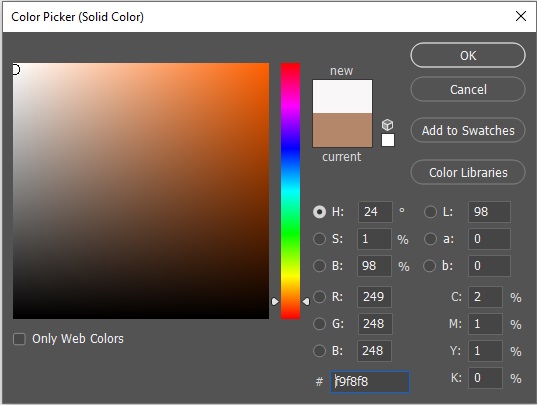
Don’t forget to place the Color Layer below Layer 0. Otherwise, your background will disappear. Click and drag down the layer.
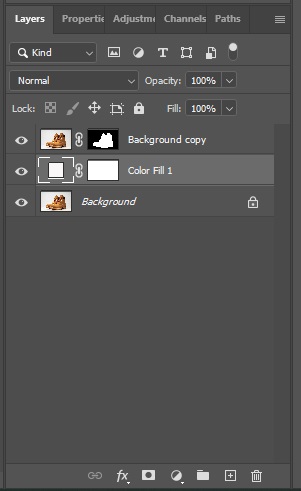
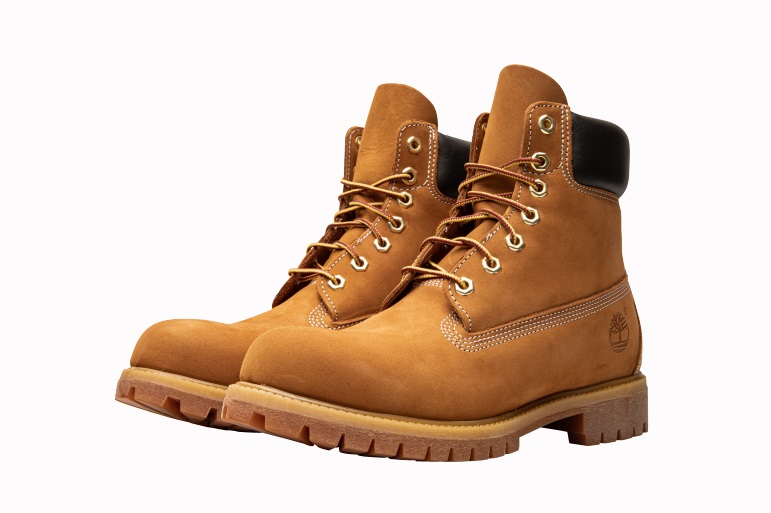
Step 5: Duplicate Background Layer
Name the ‘Background Copy’ layer as ‘Layer 0’ and make a copy of this. Right-click on the Layer and select Duplicate Layer. Or you can press Ctrl+J on the keyboard to make a copy of the layer.
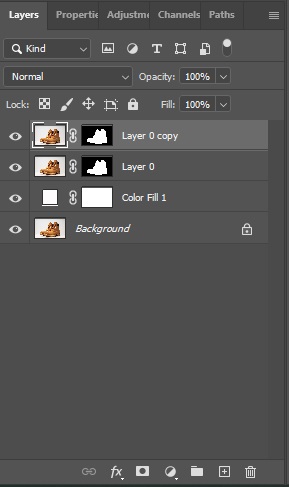
Step 6: Set Foreground Color
From the toolbar, set the foreground color to black. Or just press Shift+X on your keyboard.

Step 7: Turn Copy Layer to Black
Select the ‘Layer 0 Copy’. Now press ‘Shift+Alt+Delete’. You’ll see your layer has become black and this layer will work as a shadow.
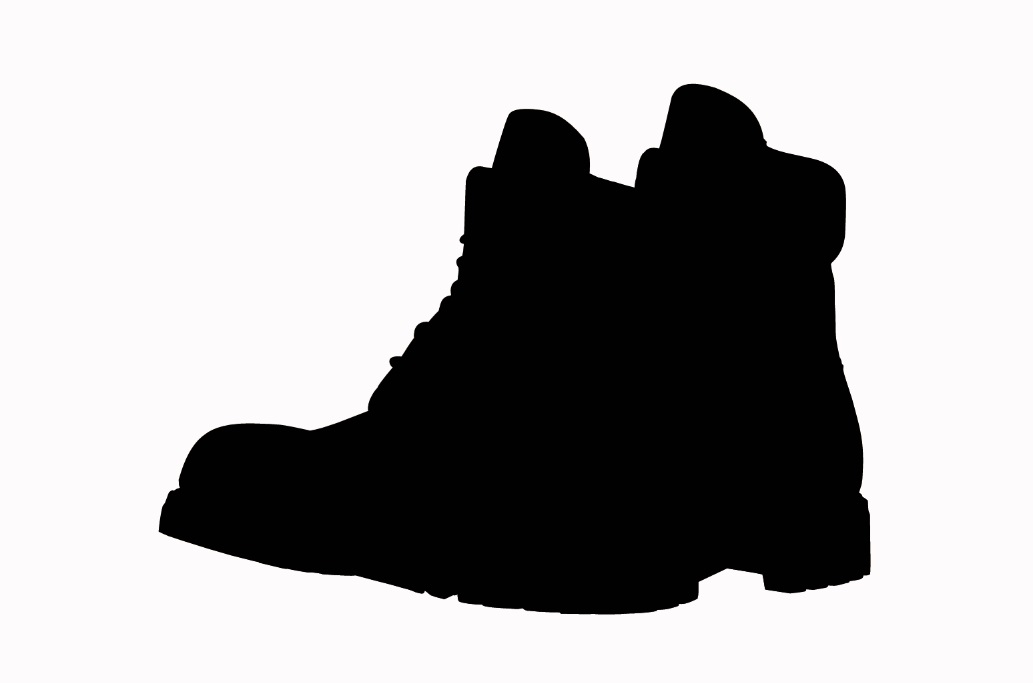
Step 8: Place the Shadow
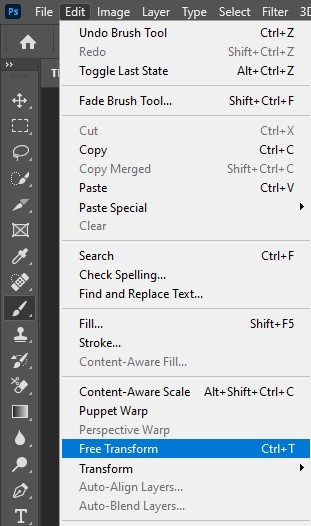
Go to Edit and select Free Transform from there. Or press Ctrl+T on your keyboard.
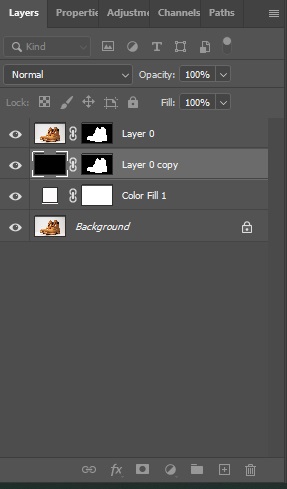
Place the ‘Layer 0 Copy’ below the ‘Layer 0’.
Click on the square and drag the black image down to cast a shadow. Press Enter when you’re done.
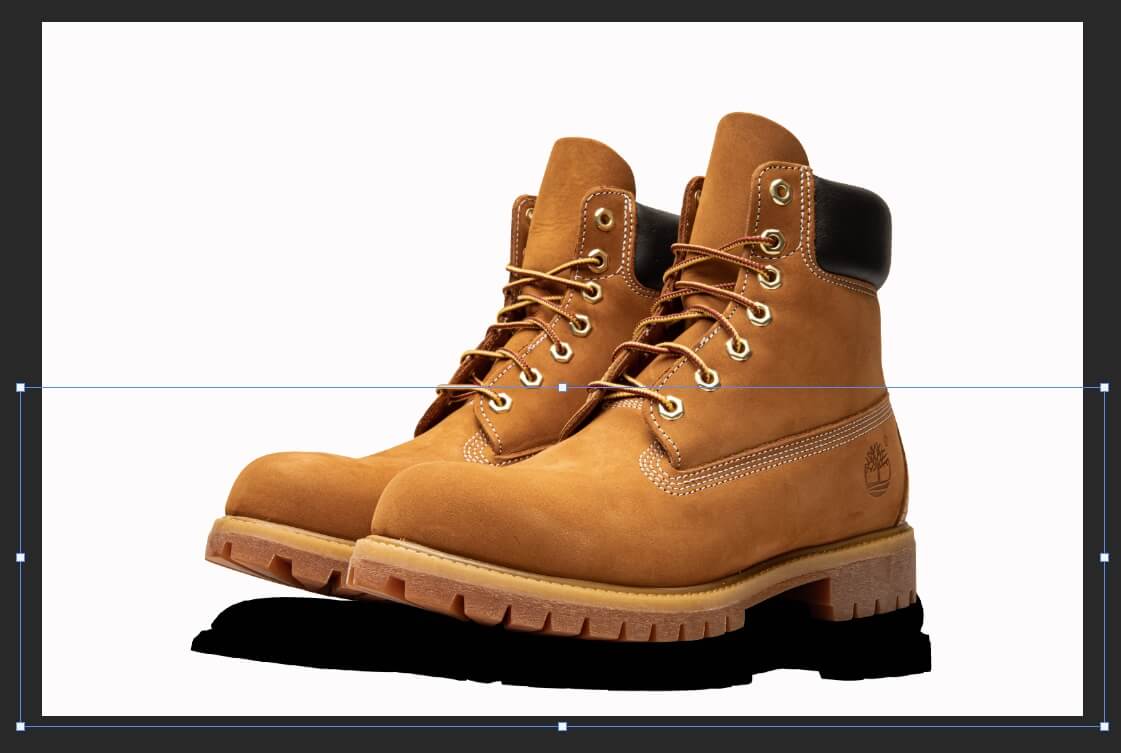
Also, while determining the placement of the shadow, define the light direction first and then place it in the right position based on that.
Step 9: Motion Blur
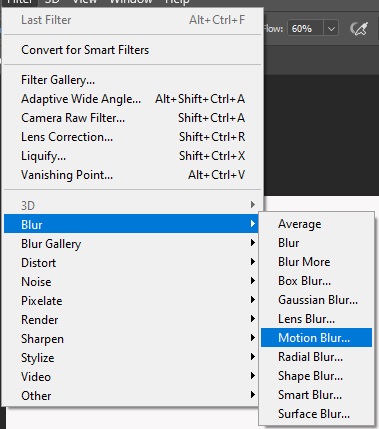
Go to Filter. Click on Blur and then select Motion Blur. Set the angle to 0. Adjust the distance to smooth out around the shadow. Click on Okay when it’s done.
Step 10: Gaussian Blur
Again, go to the Filter menu. Go to Blur and select Gaussian Blur. Set the radius around 3 pix.
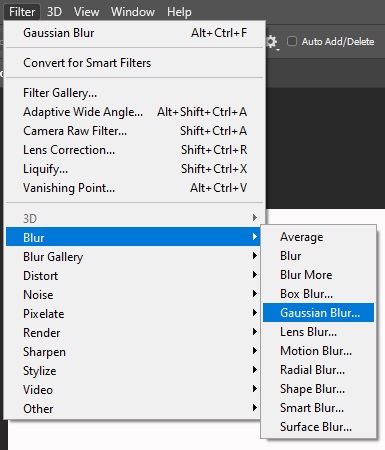
Step 11: Paint the Shadow
This is the final step to draw the shadow. Take the Brush Tool from the toolbar menu.
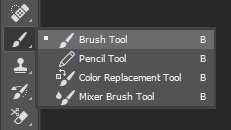
Now, set the foreground color to white

Next, you’ll have to swipe the brush to give the shadow a realistic look. This step might seem difficult but it’s not that tough if you can have a clear idea of how you want your shadow to look.
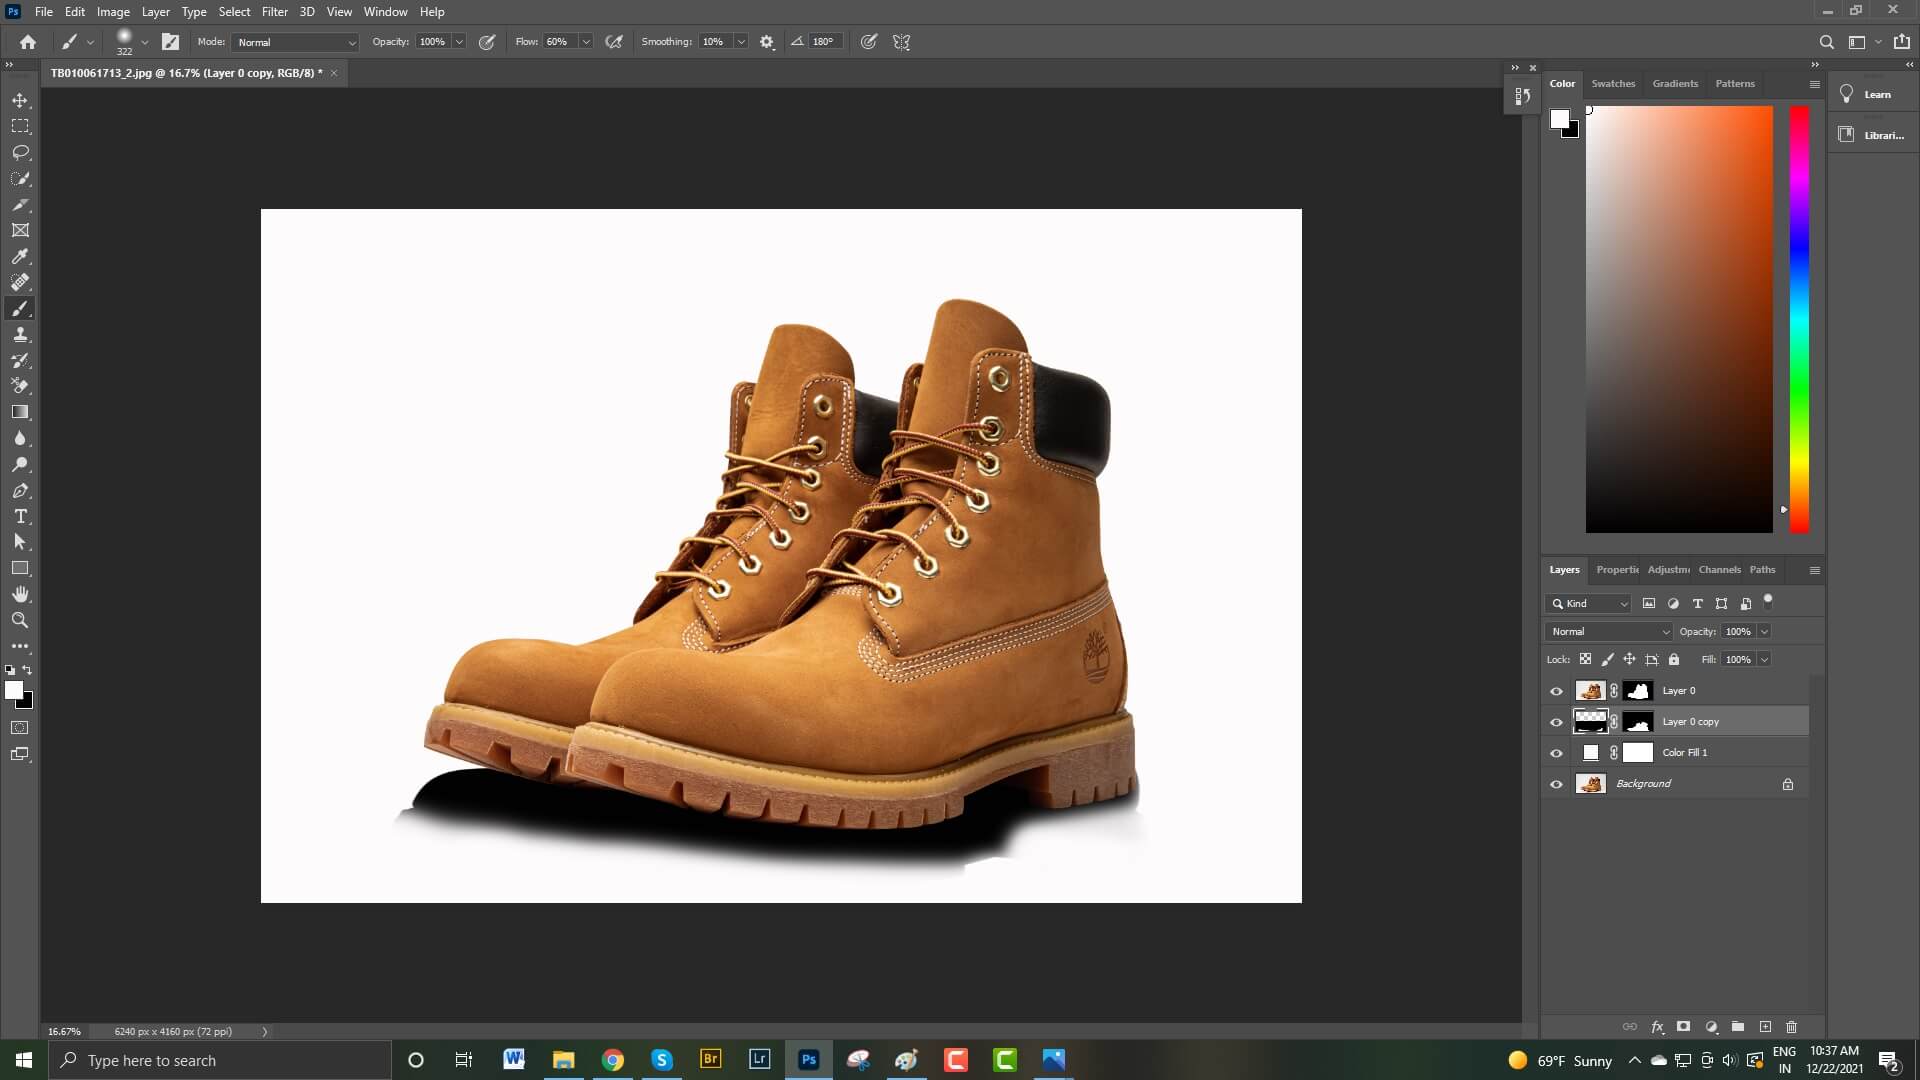
You need to practice this step several times to find your own techniques. Still, there are some tricks that will be helpful. For example, keep the brush size bigger, brush from a distance, make the shadow darker as it goes closer to the subject.

Step 12: Save the Photo
Save the image when you’re done. Go to File and click on Save As. It’s wiser to keep both JPEG and PSD files. Because with a PSD file, you can edit the image anytime you want.
When to use a drop shadow in Product Images
Drop Shadow is quite a common effect that is widely used for product photography. This can add an extra dimension to your image, but don’t use it unnecessarily either. Let’s see when you should add a drop shadow to your image –
- If you want to create drama and contrast, you should definitely go for adding a drop shadow. Shadows work best to create drama.
- Drop shadow can be used to create form too.
- If your image is plain and simple, adding drop shadow can help to grab the attention of the viewers.
- Drop shadow is also used to give information like the surface on which the product is placed, or the size, shape of the product.
- Drop shadow gives a 3D effect to an image. Without shadow, the product won’t even be visible enough.
Final Thought
If you’re a designer or just learning some of the basics of Photoshop, it’s important to know how to add a realistic drop shadow to your images. But you’ll be not able to bring the best output of photoshop drop shadow effect you can communicate with professionals. For that, the best solution is Offshore Clipping.
By adding a drop shadow, you’ll be able to give the illusion that the image is raised above the background or below where it would usually be placed.
We hope this article has helped you learn how to add drop shadow in photoshop!
