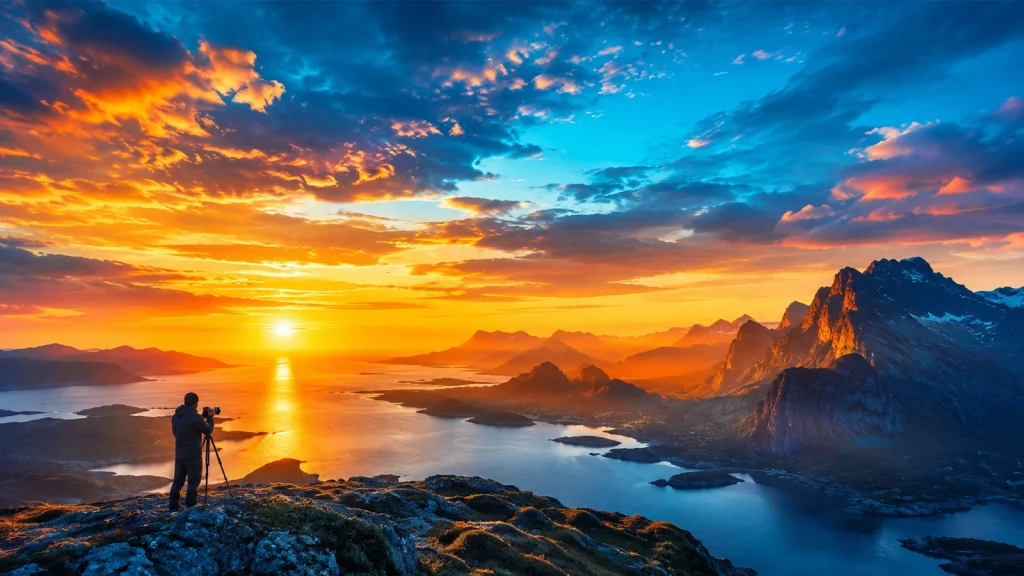
Have you ever seen a photo and felt something deep inside your chest? That warmth comes from golden hour light—the brief window when the sun sits low, shadows stretch long, and the whole world seems to glow from within. It is the single most powerful tool in photography, and it costs nothing.
In this golden hour photography guide, I am sharing the pro tips and camera settings that transform ordinary shots into scroll-stopping images. I have shot in studios, on rooftops, in deserts, and in rainforests. Not a single piece of expensive gear has ever given me what mastering this light gives me for free.
Whether you shoot portraits, landscapes, street scenes, or smartphone snaps, the right golden hour approach works for every camera and every skill level. Below, you will find everything from optimal shooting times to exposure settings, composition tricks, and genre-specific advice.
Let us step into the magic.
What you’ll learn in this article
- 1 What Is the Golden Hour in Photography?
- 2 How to Find and Calculate the Golden Hour
- 3 Sunrise vs. Sunset Golden Hour: Which One Creates Better Photos?
- 4 Best Camera Gear and Settings for Golden Hour Photography
- 5 Golden Hour vs. Blue Hour: What’s the Difference?
- 6 Pro Tips for Capturing Stunning Golden Hour Photos
- 7 6 Common Golden Hour Photography Mistakes
- 8 Some Shoots of Our Golden Hour Photography
- 9 5 Famouse Golden Hour Photographers Should Follow for Inspiration
- 10 Some FAQ’s on Golden Hour Photography
- 11 Ready to Transform Your Golden Hour Shots into Masterpieces?
What Is the Golden Hour in Photography?

Golden hour photography is all about capturing the moment between the first hour after sunrise and the last hour before sunset. Golden hour happens when the sun sits low on the horizon, between roughly 6 and 10 degrees above the skyline.This is the perfect moment when the sun sits low in the sky.
Golden hour is the perfect time and angle for photography. It creates soft, warm light that reduces harsh shadows, evens skin tones, and adds a natural glow to photos.
The light during golden hour spreads more evenly across a scene, which helps capture richer colors, gentle contrast, and longer shadows. This makes it ideal for portraits, landscapes, and street shots that feel calm, cinematic, and visually balanced without heavy editing.
Understanding Golden Hour Light in Photography
The Golden Hour is not just a “pretty time of day.” It is a short window when the sun sits low in the sky and the air bends its light into warm, soft rays. This section helps you to decide how this light works, how to find it, and how to shoot it.
Solar Elevation vs. Light Properties
| Elevation (°) | Period | Color Temp (K) | Dominant λ (nm) | Atm. Path Length (×) | Illuminance (lux) | Quality |
| 90° | Solar noon | 5,500 – 6,500 K | 450 – 495 (blue) | 1× | ~100,000 | Harsh |
| 30° | Mid-morning / afternoon | 4,500 – 5,000 K | 490 – 560 (yellow-green) | 2× | ~50,000 | Neutral |
| 10° | Pre-golden hour | 3,500 – 4,200 K | 570 – 620 (orange) | 5.6× | ~10,000 | Warm |
| 6° | Golden hour begins | 3,000 – 3,500 K | 590 – 650 (orange-red) | 9.4× | ~3,000 | Golden |
| 4° | Deep golden hour | 2,500 – 3,000 K | 610 – 680 (deep orange-red) | 14× | ~1,000 | Peak golden |
| 2° | Final golden minutes | 2,000 – 2,500 K | 640 – 700 (red) | 26× | ~300 | Ultra warm |
| 0° | Horizon / sunset-sunrise | 1,800 – 2,200 K | 650 – 700+ (deep red) | 38× | ~50 | Transitional |
| –4° | Blue hour | 6,500 – 12,000 K | 420 – 480 (blue-violet) | — | ~5 – 50 | Blue hour |
| –18° | Astronomical twilight | >15,000 K | <420 (violet) | — | <1 | Night |
Golden Hour Duration by Latitude — Approximate Minutes
| Latitude Band | Example Location | Summer (Jun solstice) | Equinox (Mar/Sep) | Winter (Dec solstice) | Pattern |
| 0° – 10° | Singapore, Nairobi | 20 – 25 min | 20 – 25 min | 20 – 25 min | Shortest, stable |
| 20° – 30° | Mumbai, Cairo, Miami | 25 – 35 min | 25 – 30 min | 25 – 30 min | Slight seasonal change |
| 35° – 45° | Tokyo, Rome, New York | 40 – 55 min | 30 – 40 min | 28 – 35 min | Moderate variation |
| 50° – 55° | London, Warsaw, Calgary | 60 – 90 min | 35 – 45 min | 30 – 38 min | Strong seasonal swing |
| 60° – 65° | Helsinki, Anchorage | 90 – 180 min | 40 – 55 min | 30 – 40 min | Extended summer hours |
| 66.5°+ (Arctic) | Tromsø, Barrow | All-day golden (sun stays near horizon) | 45 – 60 min | Very short polar day | Perpetual golden in summer |
Sun’s crossing rate through the 0–6° elevation band is slower at higher latitudes because the sun’s path is more oblique to the horizon. Duration scales roughly with 1/cos(latitude) for equinox conditions.
Color Temperature Reference — Light Sources Compared
| Light Source | Color Temp (K) | Visual Tone | CRI | Photography Relevance |
| Candle flame | 1,800 – 1,900 K | Deep amber-orange | ~100 | Matches horizon sun at 0° |
| Golden hour (peak) | 2,000 – 3,500 K | Warm gold-orange | ~100 | Optimal for portraits, landscapes |
| Tungsten / incandescent | 2,700 – 3,200 K | Warm yellow | ~100 | Similar to deep golden hour |
| Early golden hour | 3,500 – 4,500 K | Soft gold | ~100 | Flattering for all subjects |
| Sunrise / sunset sky (diffuse) | 4,500 – 6,000 K | Neutral warm | ~100 | Fill light from golden sky |
| Noon daylight (direct) | 5,500 – 6,500 K | White-neutral | ~100 | Harsh overhead light |
| Overcast sky | 6,500 – 7,500 K | Cool blue-white | ~100 | Soft but flat and cool |
| Blue hour sky | 7,500 – 12,000 K | Deep blue-violet | ~100 | Cityscapes, long exposure |
| Clear blue sky (shade) | 10,000 – 15,000 K | Very cool blue | ~100 | Avoid as primary source |
Dynamic Range Demands — Golden Hour Scene Types
| Scene Type | Highlight Zone | Shadow Zone | Typical DR Spread | Camera Sensor DR | Gap / Strategy |
| Landscape (sky + ground) | Bright sky: EV 12 – 14 | Foreground shadow: EV 5 – 8 | 6 – 9 stops | 12 – 15 stops (modern RAW) | Manageable in RAW |
| Backlit portrait | Rim light / sky: EV 13 | Subject face (shadow side): EV 7 | 5 – 7 stops | 12 – 15 stops | Use fill / reflector |
| Silhouette | Sky: EV 12 – 14 | Subject: EV 2 – 5 (intentional black) | 8 – 12 stops | 12 – 15 stops | Meter for sky only |
| Sun in frame (landscape) | Solar disk: EV 15 – 17 | Foreground: EV 5 – 7 | 10 – 12 stops | 12 – 15 stops | Bracket or GND filter |
| Blue hour cityscape | Street lights / windows: EV 8 – 10 | Sky: EV 0 – 3 | 5 – 8 stops | 12 – 15 stops | Ideal balance moment |
| Front-lit portrait (open shade) | Lit face: EV 9 – 11 | Shadow: EV 7 – 9 | 1 – 3 stops | 12 – 15 stops | Easily captured |
DR spread = difference in EV between brightest and darkest desired zones. Modern full-frame mirrorless sensors (Sony A7 IV, Canon R5, Nikon Z8) achieve ~14–15 stops of DR in RAW at base ISO. APS-C sensors typically offer 12–13 stops.
How to Find and Calculate the Golden Hour
A photographer looks at where the sun sits near the ground. The golden hour starts right after the sun comes up. It also starts about one hour before the sun goes down. You can find the golden hour if you know when the sun rises and sets where you live. Many apps and weather tools tell you the right time. This helps you plan when to take photos outside.
Here is how to find the golden hour:
- Learn the basic idea: The golden hour happens when the sun sits low in the sky. This is right after sunrise and right before sunset. The light moves through more air. This makes the light soft, warm, and gentle.
- Use sunrise and sunset times: Look up when the sun rises and sets where you live. This helps you guess when the golden hour starts. It starts at sunrise. It ends about one hour before sunset.
- Know it changes: The golden hour is not 60 minutes every day. It changes with the season. It changes with where you live. It changes with the weather.
- Use simple tools: You can find the time with apps or a quick search. Weather apps and tools like PhotoPills tell you the exact time.
- Quick tip: The morning golden hour starts at sunrise and lasts about one hour. The evening golden hour starts about one hour before sunset.
- The best way to get it right: Get there early. The light changes fast. The best light shows up in the last 10 to 20 minutes.
6 Tools to Determine the Perfect Golden Hour in Your Location
These tools help you catch the best light. Also suggest the perfect time when the sun looks golden and pretty. No guessing needed!
- Golden Hour One: This app shows you when the sun comes up and goes down. It uses big, clean pictures. You can see the best light times fast.
- PhotoPills: This tool is for people who love taking photos. It shows where the sun will be. It also shows where shadows will fall.
- Sun Seeker: This app shows the sun’s path in real time. You can point your phone at the sky and see where the sun will move. It helps you see where light will hit before you take the shot.
- Sun Surveyor: This tool shows the sun and moon paths on maps. Pick your spot and date. It tells you when the light will look best.
- The Photographer’s Ephemeris: This tool uses maps to show how light hits hills and trees. It helps you plan outdoor photo trips.
- Magic Hour App: This app is easy to use. It shows only golden hour and blue hour times. Great if you want quick, simple answers.
5 Ways to Position Your Subject During Golden Hour
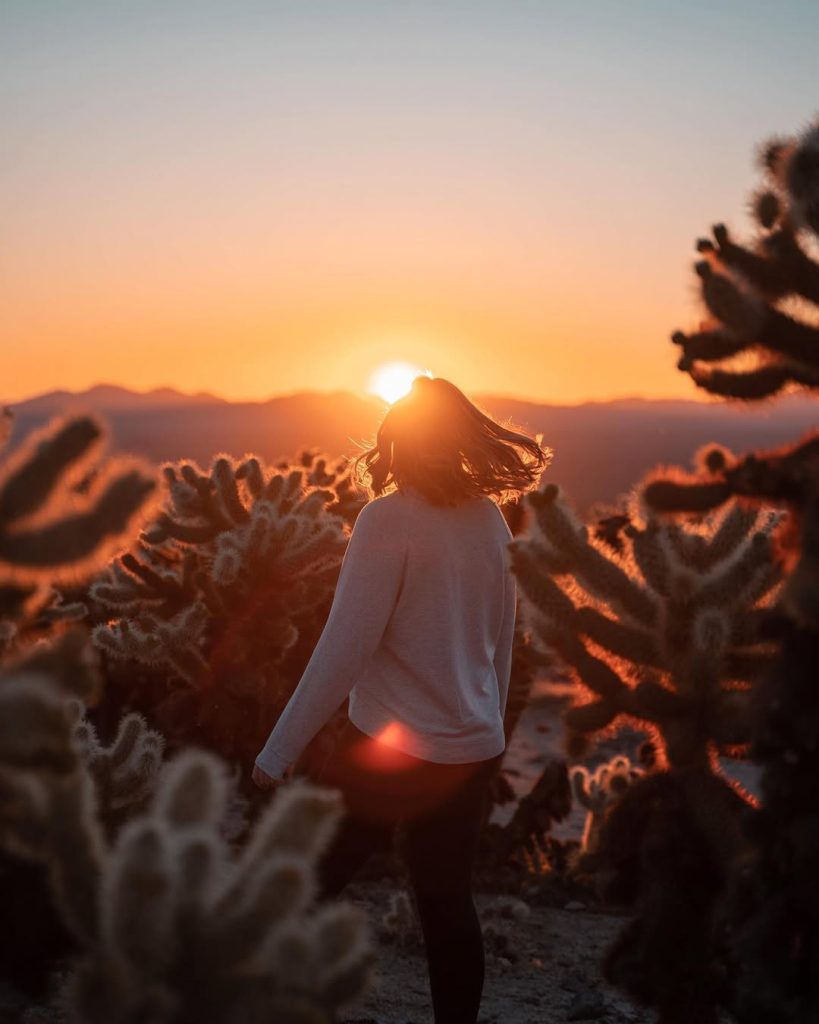
The best way to place your subject during golden hour is to keep the sun behind them. The light glows around the edges and helps the subject stand out from the background. This makes photos feel warm, soft, and full of emotion. Use soft light and simple angles to add depth and avoid dark shadows.
Here are the best ways to place your subject during golden hour:
- Backlight Position: Place the sun behind your subject. The light glows around the hair and shoulders. This gives the photo a soft and cinematic vibes. Raise the exposure a little so the subject does not look too dark.
- Side Light Position: Let the sun hit one side of the face or body. This adds shape and depth with soft shadows. It works great for portraits because it shows facial details in a natural way.
- Front Soft Light Position: Keep the sun in front of the subject when the light looks soft from clouds, haze, or angle. This lights the face evenly and removes hard shadows. Skin looks smooth and natural.
- Silhouette Position: Place the subject between the camera and the sun. Set the exposure for the bright sky. The subject turns into a dark shape. This works best with strong poses and clean backgrounds.
- Framed Light Position: Place the subject near trees, doors, or arches. Let sunlight pass through small gaps. This adds layers and draws the eye to the subject while keeping the light soft.
Sunrise vs. Sunset Golden Hour: Which One Creates Better Photos?
Sunrise and sunset are both great times for photos. Both give soft light, warm colors, and long shadows. This light adds depth and helps the subject stand out. Choose sunrise or sunset based on the mood, light, and place you want in your photo.
| Feature | Sunrise | Sunset |
| Light Quality | Clean, crisp, and softer atmosphere | Warmer, richer, and more intense glow |
| Color Tone | Cooler mix of warm and soft blue tones | Deep orange, red, and golden tones |
| Shadows | Long but gentle and less harsh | Deeper and more dramatic shadows |
| Atmosphere | Calm, quiet, less crowded scenes | Emotional, cinematic, often busier |
| Shooting Control | Easier exposure and clearer visibility | Slightly harder exposure but more dramatic results |
Why Sunrise Golden Hour Is Perfect for Soft, Peaceful Shots
Sunrise golden hour is perfect for soft, peaceful shots because the light is gentle, directional, and low in intensity. It’s an excellent time when the sun sits just above the horizon, and the light passes through a longer atmospheric path. This also reduces the overall irradiance of sunlight and scattering of shorter wavelengths.

This naturally lowers the contrast, softens the highlights, and produces smoother tonal transitions across the image. The morning weather is usually cooler and contains less dust, pollution, which increases clarity and micro-contrast in fine details.
Here are the following reasons why sunrise golden hour is perfect for a soft, peaceful shot
- Soft light: The sun is low on the horizon, so light travels through more atmosphere, scattering harsh rays and producing a diffused, even glow.
- Low-Angle Light: Light hits subjects from a shallow angle, creating gentle modeling, natural depth, and soft directional shadows.
- Reduced Contrast: The dynamic range is easier to manage, with smoother transitions between highlights and shadows, reducing clipping risk.
- Flattering Tones: Warm color temperature around 2000K–3500K enhances skin tones and natural textures without heavy post-processing.
- Lower Atmospheric Haze: Cooler early air often has less dust and pollution, improving clarity and micro-contrast in distant details.
- Soft Color Palette: Rayleigh scattering favors reds, oranges, and soft pinks, producing a controlled, cinematic color gradient across the sky and subject.
Why Sunset Golden Hour Produces Rich and Dramatic Colors
Sunset golden hour produces rich and dramatic colours because of Rayleigh scattering, as sunlight travels through a much longer atmospheric path at low solar angles.
During this path length increase, shorter wavelengths like blue and violet are scattered out by air molecules, leaving longer wavelengths such as red, orange, and yellow to dominate.
This reduces overall light intensity, softens harsh highlights, increases color saturation, and enhances local contrast, making skies, clouds, and landscapes appear vivid, layered, and cinematic in photographs.
Here are the following reasons why sunset golden hour produces rich and dramatic colors:
- Low sun angle: The sun’s light travels a longer path through the atmosphere (higher optical air mass), which reduces intensity and enhances warm wavelengths like red and orange.
- Rayleigh scattering: Short wavelengths (blue and violet) scatter more strongly (∝ 1/λ⁴), leaving longer wavelengths dominant, which shifts the color balance toward warm tones.
- Soft light quality: Sunlight becomes more diffused due to atmospheric scattering, reducing direct intensity and lowering highlight clipping, which improves tonal smoothness.
- Long shadows: A low solar elevation angle increases shadow length, improving scene depth and increasing local contrast between lit and shaded areas.
- Atmospheric particles: Aerosols like dust, moisture, and haze increase Mie scattering, which enhances saturation and creates a glowing diffusion around light sources.
- Refraction: Light bends slightly when passing through air layers with different temperature and density gradients (atmospheric refraction), subtly shifting and blending color transitions near the horizon.
Best Camera Gear and Settings for Golden Hour Photography
The best camera gear and settings for golden hour photography depend on managing low sun angle, high dynamic range scenes, and rapid light change. During this time, exposure shifts quickly, so precise control over highlights and shadows is important to avoid clipping and retain detail in both sky and foreground.
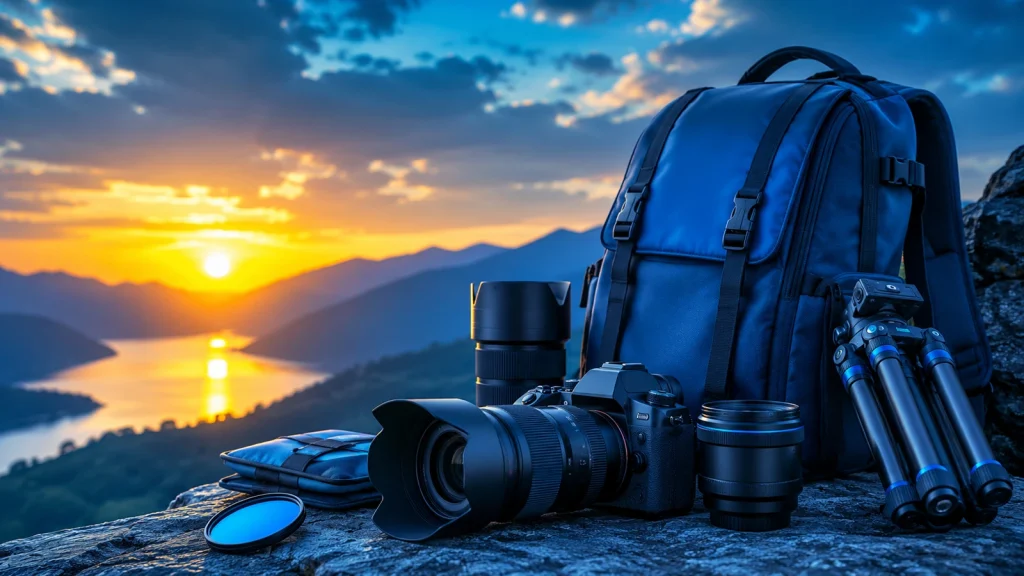
Here are the key essentials for capturing high-quality golden hour images:
- Camera body (DSLR/Mirrorless): A sensor with 12–15+ stops of dynamic range helps preserve highlight roll-off in bright skies while keeping shadow detail usable in post-processing.
- Lens choice: Wide-angle (16–35mm) for deep depth scenes and foreground inclusion, or 50mm–85mm prime lenses for compression, sharpness, and subject isolation with smoother bokeh.
- Aperture (f/1.8–f/5.6): Wider apertures increase light intake and create shallow depth of field, while mid apertures (f/5.6–f/8) improve edge-to-edge sharpness for landscapes.
- Shutter speed: Adjust to exposure meter readings; slower speeds increase light capture but require tripod use to avoid motion blur, especially in low EV conditions near sunset.
- ISO (100–400): Keep as low as possible to minimize signal noise and preserve tonal gradation in gradients like sky transitions and skin tones.
- White balance (5000K–6500K): Warmer Kelvin values enhance amber and orange wavelengths, while auto WB helps balance mixed light for more neutral color rendering.
Recommended Camera Settings for Shooting During Golden Hour
The recommended camera settings for shooting during golden hour include using low ISO, a controlled aperture, and an adaptive shutter speed to handle changing light conditions. Since the light is soft but constantly shifting, exposure must be balanced carefully to protect highlights while keeping shadows detailed and natural-looking across the frame.
| Phase | Approx. EV | ISO (tripod) | ISO (handheld) | Aperture | Shutter (portrait) | Shutter (landscape) | White Balance |
| Early golden (6°) | EV 11 – 13 | 100 | 100 – 200 | f/2 – f/8 | 1/250 – 1/500s | 1/125 – 1/500s | 4,000 – 4,500 K |
| Peak golden (4°) | EV 8 – 11 | 100 – 200 | 200 – 400 | f/1.8 – f/5.6 | 1/250s | 1/30 – 1/125s | 3,500 – 4,000 K |
| Late golden (2°) | EV 5 – 8 | 100 – 400 | 400 – 800 | f/1.4 – f/4 | 1/125 – 1/250s | 1/8 – 1/30s | 3,000 – 3,500 K |
| Horizon (0°) | EV 2 – 5 | 200 – 800 | 800 – 1,600 | f/1.4 – f/2.8 | 1/60 – 1/125s | 1/4 – 2s | 2,500 – 3,000 K |
| Blue hour (–2° to –6°) | EV –1 – 2 | 400 – 1,600 | 1,600 – 6,400 | f/1.4 – f/2 | 1/30s (min) | 5 – 30s | 6,500 – 9,000 K |
EV = Exposure Value at ISO 100. Each 1 EV stop = halving of light. Peak golden hour (EV 8–11) is approximately 8–32× dimmer than solar noon (EV 15). Prioritize ETTR (Expose To The Right) in RAW for maximum shadow recovery latitude.
Golden Hour vs. Blue Hour: What’s the Difference?
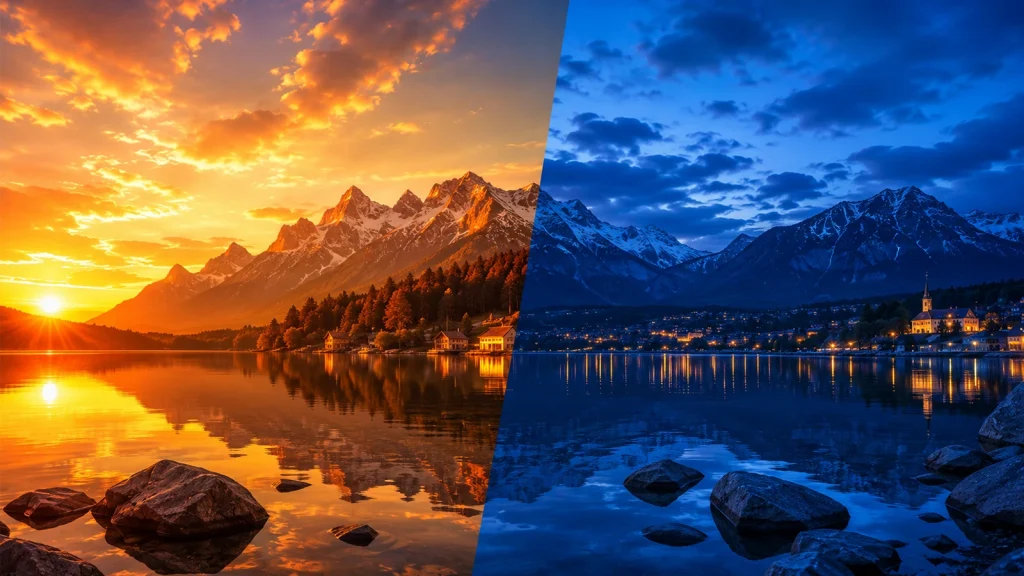
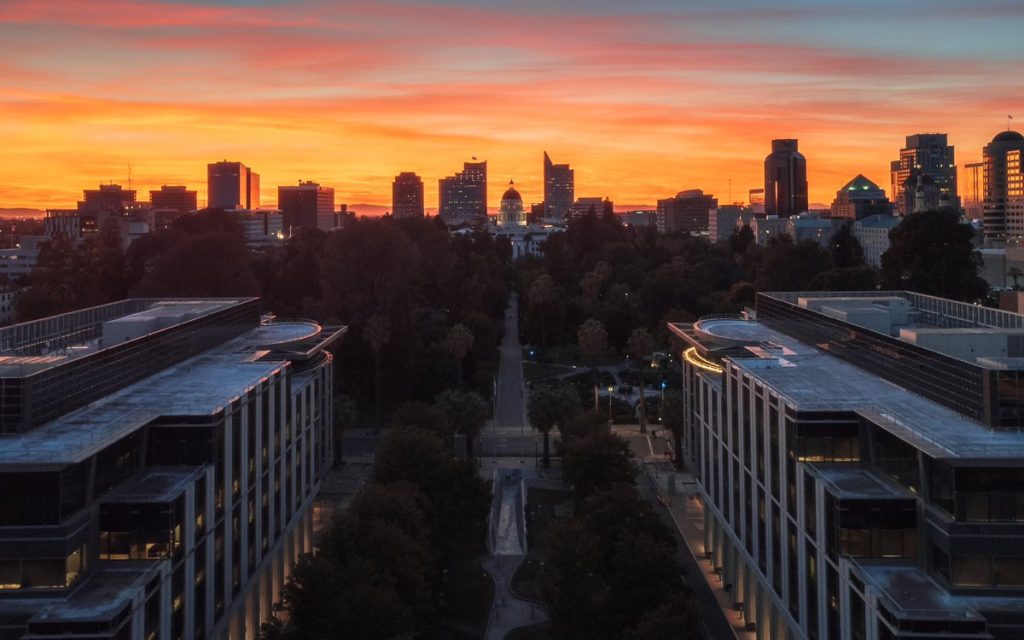
The difference between Golden hour and blue hour is the quality and color of light. Golden hour has warm, soft sunlight with golden tones and long shadows, ideal for vibrant, glowing images. Blue hour happens before sunrise or after sunset, offering cool, blue tones and even lighting, perfect for calm, moody scenes and city photography.
Here is a table to highlight the difference between golden hour and blue hour:
| Feature | Golden Hour | Blue Hour |
| Timing | After sunrise, before sunset | Before sunrise, after sunset |
| Light Color | Warm, golden | Cool, blue |
| Shadows | Long and soft | Minimal and soft |
| Mood | Warm, vibrant | Calm, moody |
| Best For | Portraits, landscapes | Cityscapes, night shots |
Comparing Golden Hour Light and Blue Hour Light
The difference between Golden hour light and blue hour light is how they shape the look and feel of a photo. Golden hour light brings warm, soft light with rich colors and long shadows that add depth and life. Blue hour light, on the other hand, gives cool, dim light with smooth tones and a quiet, moody feel that works well for calm, dramatic scenes.
Here is a table to highlight the difference between golden hour light and blue hour light:
| Feature | Golden Hour Light | Blue Hour Light |
| Timing | After sunrise, before sunset | Before sunrise, after sunset |
| Color Tone | Warm, golden, orange | Cool, blue, deep tones |
| Mood | Bright, soft, romantic | Calm, moody, cinematic |
| Shadows | Long and soft | Minimal and diffused |
| Best For | Portraits, landscapes, nature | Cityscapes, night shots, long exposure |
| Light Intensity | Soft but brighter | Dim and low light |
Pro Tips for Capturing Stunning Golden Hour Photos

The pro tips for capturing stunning golden hour photos include understanding light direction, exposure control, and camera settings. Use low ISO (100-400) for clean images, adjust white balance for warmth, and shoot in RAW for better dynamic range. Position subjects against the sun for rim light, and meter for highlights to avoid clipping while keeping shadows detailed and balanced.
Here is a list of pro tips for capturing a stunning golden hour photo:
- Shoot during peak low-angle light: Capture images when the sun is near the horizon to get soft directional light, longer shadows, and enhanced texture definition.
- Use exposure compensation: Slightly underexpose to preserve highlight detail and prevent blown skies while keeping color saturation rich and controlled.
- Set manual white balance: Fine-tune Kelvin settings around 5000K–6500K to enhance warm tones without oversaturation or color shift.
- Shoot in RAW format: Retain full dynamic range for better recovery of highlights, shadows, and color grading flexibility in post-processing.
- Use backlighting creatively: Place the sun behind your subject to produce rim light, glow effects, and natural subject separation from the background.
Use wide apertures: Shoot at f/1.8 to f/4 to allow more light intake and create a shallow depth of field. This helps isolate subjects and enhances background separation with smooth bokeh under soft golden illumination. - Leverage open shade: Place subjects near shaded areas like buildings or trees to reduce direct sunlight contrast. This creates even exposure on faces while still maintaining warm ambient light from the sky.
- Use reflectors or flash: Bounce natural light back onto the subject using a reflector or add subtle fill flash. This controls harsh shadows, balances exposure, and preserves detail in both highlights and darker areas.
Essential Techniques to Make the Most of Golden Hour Light
The essential techniques to make the most of golden hour light focus on controlling exposure, direction, and composition to capture its soft, warm qualities effectively. This light is low, directional, and constantly changing, so quick adjustments and awareness are key for balanced, cinematic results.
Here are the following techniques to use golden hour light effectively:
- Shoot with backlighting: Place the sun behind your subject to create glowing edges, reduce harsh shadows, and enhance subject separation from the background.
- Use spot metering: Meter for highlights or midtones to avoid overexposure, since golden hour light has strong dynamic range shifts.
- Adjust white balance manually: Set Kelvin between 5000K and 6500K to preserve warm tones instead of relying on auto white balance.
- Control exposure compensation: Slight underexposure (-0.3 to -1 EV) helps retain highlight detail and adds richer color depth.
- Use reflectors or natural bounce: Redirect soft light to fill shadows and maintain balanced illumination on the subject.
- Shoot silhouettes: Expose the bright sky and let your subject fall into darkness, creating strong shapes and dramatic contrast against the glowing background.
- Embrace lens flare: Position the sun partially in or near the frame to create natural flare patterns that add warmth, depth, and a cinematic feel.
- Create sunstars and bokeh: Use a small aperture (like f/11–f/16) for sharp light rays from the sun, or a wide aperture for smooth, creamy background bokeh.
- Shoot through foreground elements: Frame your subject using leaves, glass, or objects in the foreground to add depth, layering, and a more immersive composition.
6 Common Golden Hour Photography Mistakes

The common golden hour photography mistakes and how to avoid them often come from poor exposure control, arriving late, over-editing, incorrect metering, and not adapting to rapidly changing light.
As solar elevation drops, luminance and color temperature shift quickly, so technical precision is key to maintaining detail, dynamic range, and accurate color rendering.
Here is a table that highlights the common golden hour photography mistakes and ways to avoid them:
| Mistake | Description | How to Avoid |
| Overexposing highlights | High luminance near the sun can exceed sensor dynamic range, causing highlight clipping. | Use spot or highlight-weighted metering, monitor histogram, and expose to protect highlights (ETTR carefully without clipping). |
| Wrong white balance | Auto WB neutralizes warm tones, reducing color fidelity. | Set Kelvin manually (around 4500–6500K) or use a daylight preset to preserve natural warm color temperature. |
| Ignoring dynamic range | Strong contrast between sky and foreground leads to lost shadow or highlight detail. | Use exposure bracketing, HDR merging, or graduated ND filters to compress dynamic range. |
| Poor subject positioning | An incorrect angle reduces light directionality and depth cues. | Align the subject with a light angle for rim lighting, backlighting, or side lighting to enhance texture and separation. |
| Incorrect exposure settings | Fixed settings fail as light intensity drops rapidly. | Continuously adjust aperture, shutter speed, and ISO to maintain proper exposure as EV decreases. |
| Late shooting timing | Missing optimal solar angle reduces color intensity and shadow quality. | Track solar elevation and plan shooting window using sun position tools for precise timing. |
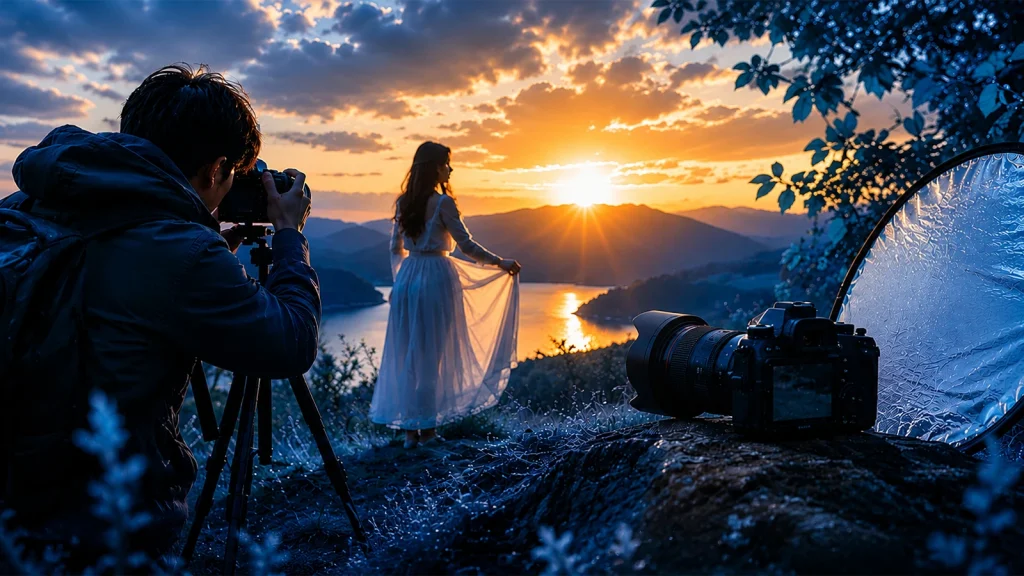
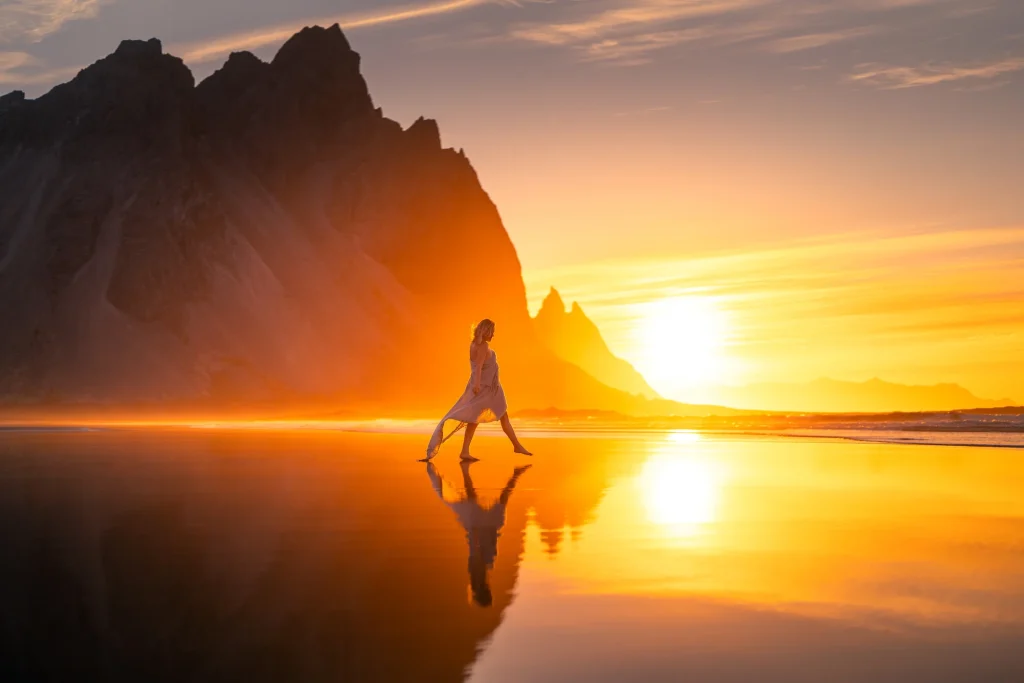
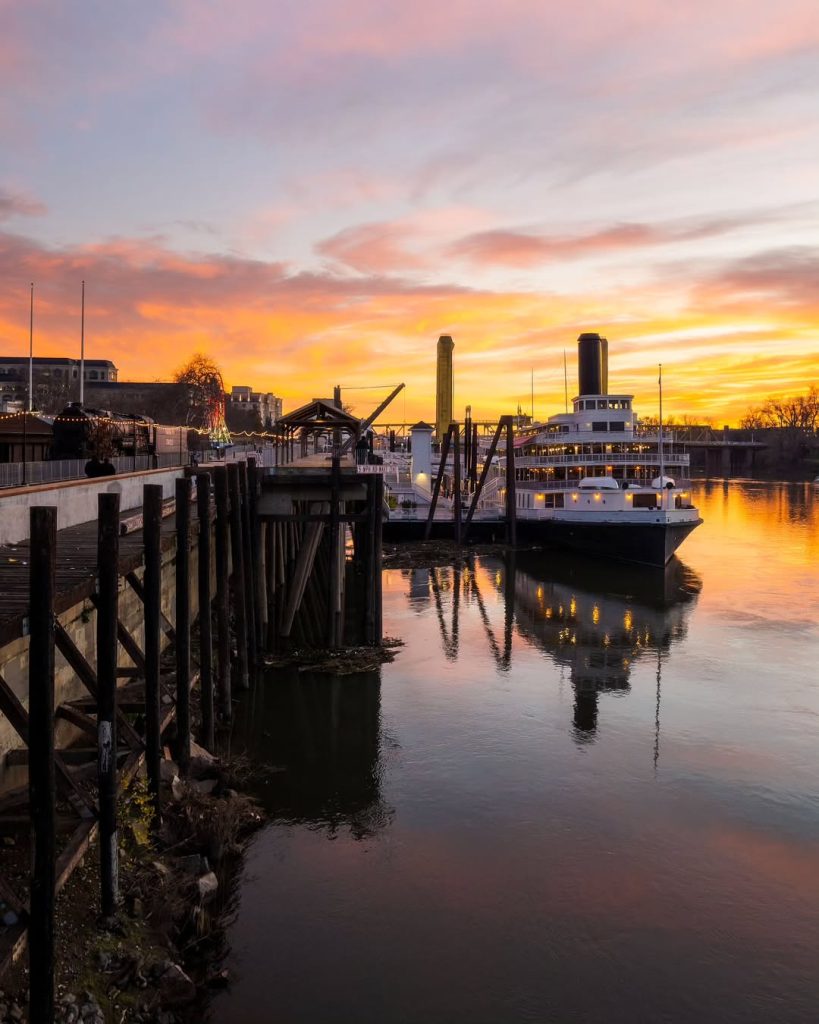
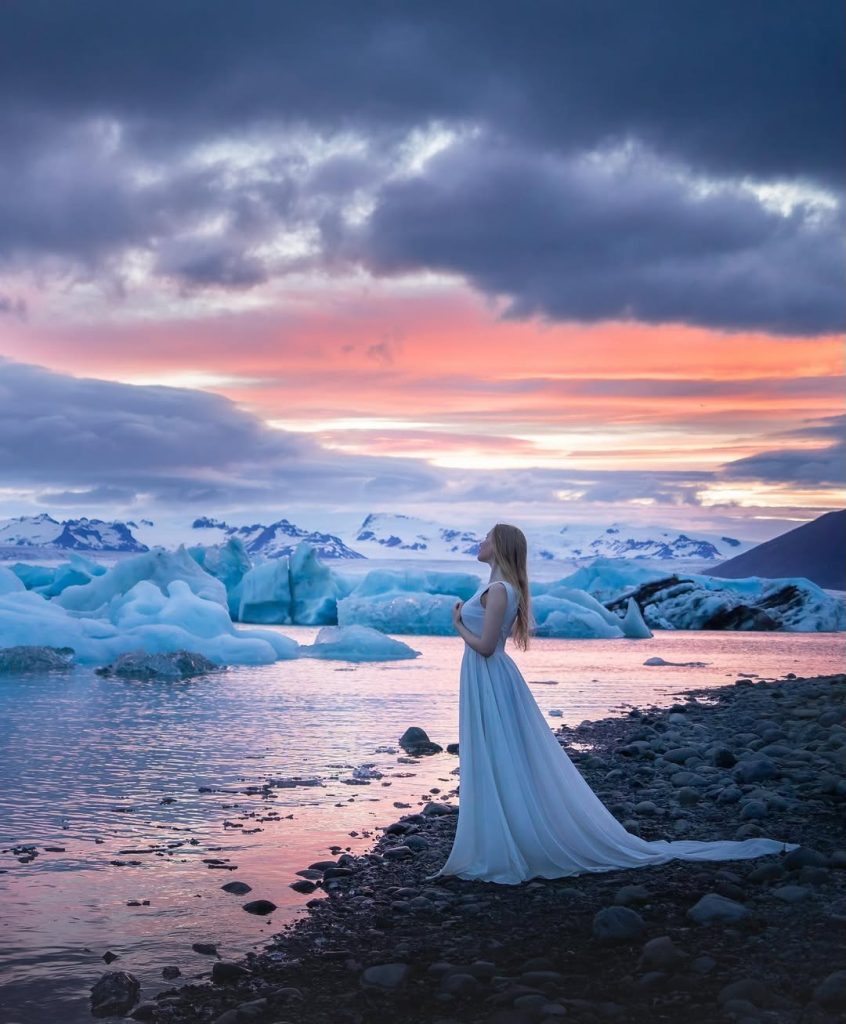
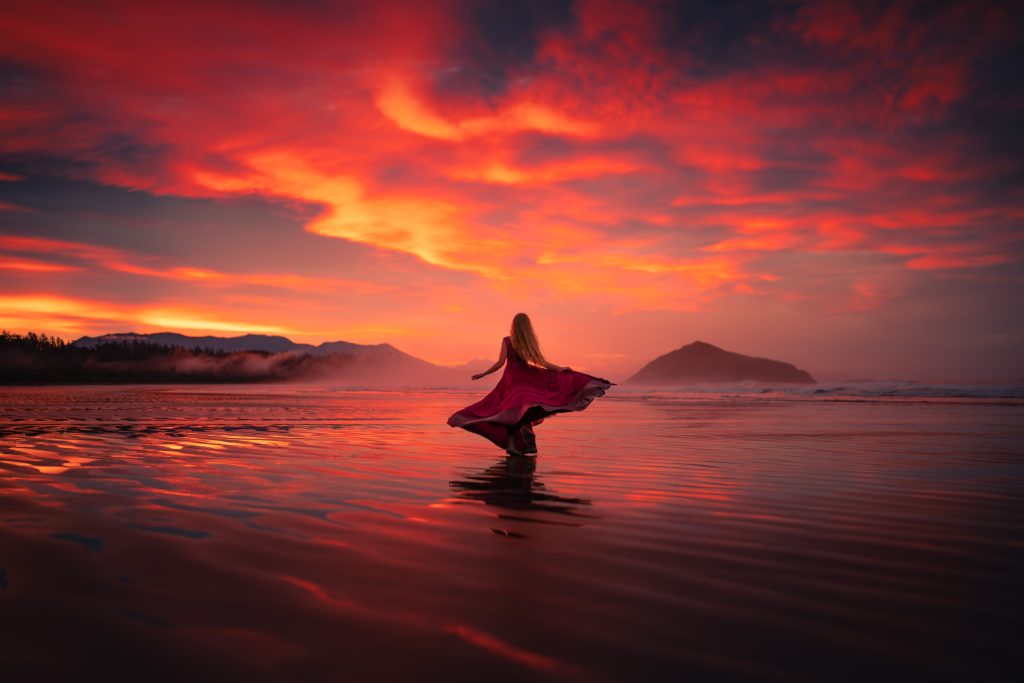
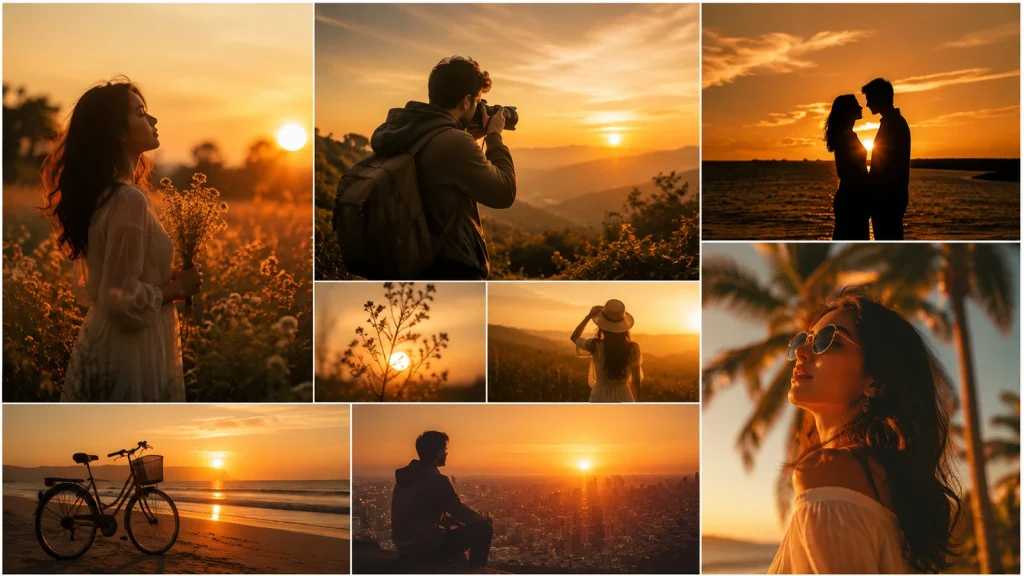
Some Shoots of Our Golden Hour Photography
5 Famouse Golden Hour Photographers Should Follow for Inspiration
1. Lizzy Gadd — @elizabethgadd
Genre: Self-portrait / Nature
Why follow: A Sony Alpha Ambassador, Gadd creates ethereal self-portraits set against dramatic natural backdrops, often shot during sunrise golden hour in remote locations like Iceland. She emphasizes feeling the moment over just capturing it—her work at spots like Vestrahorn at 2 AM demonstrates how she uses golden hour light to create introspective, atmospheric images that blend human scale with vast landscapes.
2. Sara France — @sarafrance
Genre: Luxury Wedding & Engagement
Why follow: A Sony Artisan based in Southern California, France has built a reputation for seamlessly incorporating the warm California sun into couples’ photography. Her sunset engagement sessions showcase how golden hour light can be used to create romantic, flattering illumination on subjects while maintaining rich environmental context.
3. Allison Anderson — @photoallison
Genre: Travel & Landscape
Why follow: Another Sony Alpha Ambassador, Anderson is known for her practical approach to fleeting golden hour moments. She often shoots with dual camera bodies to capture both wide and tele perspectives of the same sunrise/sunset without missing the light window. Her waterfront sunrise shots from Bay Harbor, Maine demonstrate strong composition combined with efficient workflow during time-sensitive lighting conditions.
4. Andrew Eggers — @andreweggers
Genre: Landscape, Cityscape & Timelapse
Why follow: Eggers is a Sony Alpha Ambassador who produces striking golden hour timelapses showing the burn of golden glow as it transitions across urban and natural scenes. His work bridges still photography and motion, making his feed valuable if you’re interested in how golden hour light changes dynamically over time rather than just single-frame captures.
5. Anna Isabella — @annaisabellach
Genre: Self-portrait / Nature
Why follow: Isabella specializes in self-portraits in natural settings and offers practical technical insight—such as using a timelapse intervalometer with manual focus and a telephoto lens to position yourself precisely within golden hour frames. Her work demonstrates how to solve common challenges (like self-timing with long lenses) when shooting solo during narrow golden hour windows.
Some FAQ’s on Golden Hour Photography
When to Take Golden and Blue Hour Images?
The best time to take golden hour images is the first hour after sunrise and the last hour before sunset. This is when natural light becomes softer, warmer, and more dramatic, adding depth and gentle shadows to your photos.
The best time to take blue hour images is just before sunrise and right after sunset, when the sky turns cool and calm, giving a peaceful, cinematic feel. These moments don’t last long, but they can completely change how a photo feels.
How to get soft light during golden hour?
The golden hour naturally provides soft, diffused light because the sun is low on the horizon, forcing its light to travel through more of Earth’s atmosphere. To maximize this softness:
1. Shoot during the first/last hour after sunrise or before sunset when the sun is lowest
2. Use a diffuser if the light is still too harsh on your subject’s face
3. Position subjects with the sun behind them (backlighting) for a soft, glowing rim light
4. Seek open shade if the direct sun is still too contrasty—near buildings, trees, or hills
5. Use a reflector to gently bounce the warm light back onto shadow areas rather than using harsh fill flash
What is the best ISO for golden hour?
There is no single “best” ISO—start with the lowest native ISO your camera offers (typically ISO 100 or 200) and raise it only as needed:
ISO 100-200: Ideal when you have a tripod or enough light to maintain your desired shutter speed and aperture
ISO 400-800: Useful for handheld shots or when capturing movement as light fades
ISO 1600+: Necessary only in the very last minutes of sunset or for artistic low-light effects
Keep ISO as low as possible to preserve dynamic range and minimize noise, especially since golden hour scenes often have subtle tonal gradients in the sky.
What colors should I wear for golden hour photoshoot?
Golden hour casts a warm, yellow-orange hue (approximately 3200K color temperature), so wardrobe choices matter:
Colors that work beautifully:
Warm earth tones: Rust, burnt orange, mustard yellow, camel, terracotta—these harmonize with the ambient light
Deep jewel tones: Emerald green, sapphire blue, burgundy—create rich contrast against warm backgrounds
Creams and ivories: Reflect the golden light beautifully without washing out
Soft pastels: Blush pink, sage green, dusty blue—work for a gentle, romantic mood
Colors to avoid:
Neon/bright colors: Can reflect oddly on skin and clash with the warm palette
Pure white: Risks overexposure and loss of detail in highlights
Black: Can lose all detail and appear as flat silhouettes unless that’s the intent
Ready to Transform Your Golden Hour Shots into Masterpieces?
You’ve captured the light—now let us perfect the details. While golden hour provides the most beautiful natural glow, managing high dynamic range, lens flares, and deep shadows can be tricky in post-processing.
At Offshore Clipping, we specialize in professional photo retouching and color correction that brings out the true warmth and vibrance of your images. Whether it’s a romantic portrait or a cinematic landscape, our expert editors ensure your shots are polished, professional, and ready to wow your audience.