Have you ever wondered while seeing the astonishing product photographs on Instagram, “Wow! How were these photographs taken?”.
Probably yes… Many of us do the same.
Products are photographed keeping in mind that the photographs should be intriguing enough to drive the customers to go crazy over the product and buy them the moment they have viewed it.
For that, you don’t have to own a studio, have a high budget, or be a professional photographer. Proper guidance, including some Instagram product photography ideas, will help to get you started with making your products Instagram ready.
Let’s dive in to get into the details.
What you’ll learn in this article
- 1 What is Instagram product photography?
- 2 Why Instagram Marketing is important for your Brand?
- 3 Why are high-quality product photos important for Instagram business
- 4 How do you shoot Instagram product photos?
- 5 Instagram product photography ideas: Top 10 product photos to follow for your next shoot
- 5.1 1. Group product photography
- 5.2 2. Individual shots: Individual shot contains only one object
- 5.3 3. Close-up shots: Type of shot that tightly frames a person or object.
- 5.4 4. Lifestyle shots: Mainly aims to goal is to tell stories about people’s lives
- 5.5 5. Detailed shots: The primary goal is to show a viewer things in a different way
- 5.6 6. Packshot photography: Captures the product image along with the packaging
- 5.7 7. Flat lay shots: A flat lay is simply an image shot directly from above
- 5.8 8. Mannequin shots: These types combine the photos to remove the mannequin
- 5.9 9. Hanging shots: Give your objects a more realistic
- 5.10 10. Scale shots: Product shows how big or small
- 6 Tips to Improve Your Instagram Product Photos
- 6.1 Tips 1. Mini studio: Try a mini studio or a lightbox
- 6.2 Tips 2. Clean backgrounds: Keep your background in focus
- 6.3 Tips 3. Realistic view: Experiment with 360-degree angles
- 6.4 Tips 4. Group photos: Show all varieties of copies available
- 6.5 Tips 5. Image resolution: Use high-quality and large-resolution images
- 6.6 Tips 6. Photo dimensions: Use the right dimensions
- 6.7 Tips 7. Photo manipulation: Try isolated images in high-resolution
- 6.8 Tips 8. Photo retouch: Improve consistency and output quality
- 7 Important FAQ’s of product photography
- 8 Bottom Line
What is Instagram product photography?
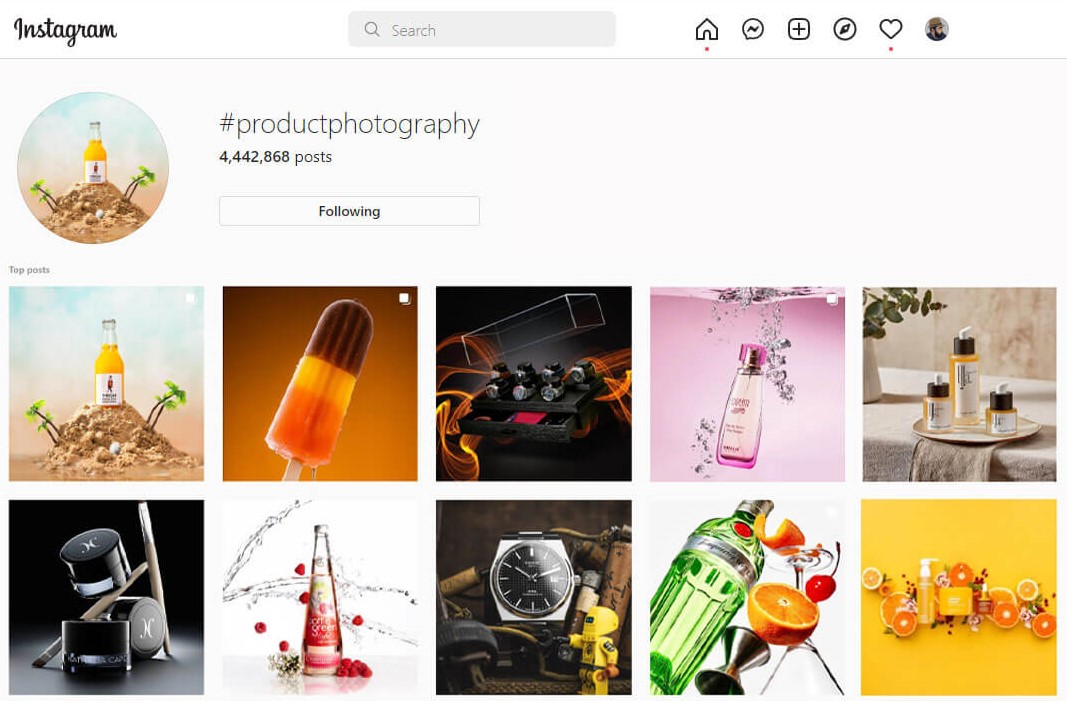
Instagram product photography refers to the type of commercial photography which uses different photography techniques to capture appealing photographs of products with the purpose of advertising on Instagram.
Different types of photography styles to make the products look more attractive and acceptable to the customers include motion photographs, flat-lay shots, lifestyle photos, group photos, macro shots, a white background, colorful background, and so on.
Instagram photography is not just about capturing photographs of the products, rather is about making the product stand out so that it can persuade customers to buy the products online and boost sales for the business.
Why Instagram Marketing is important for your Brand?
Instagram is considered one of the most influential social media platforms for brand promotion. Among all the other social media sites, Instagram has a comparatively higher engagement rate which allows the brand to reach a larger audience naturally.
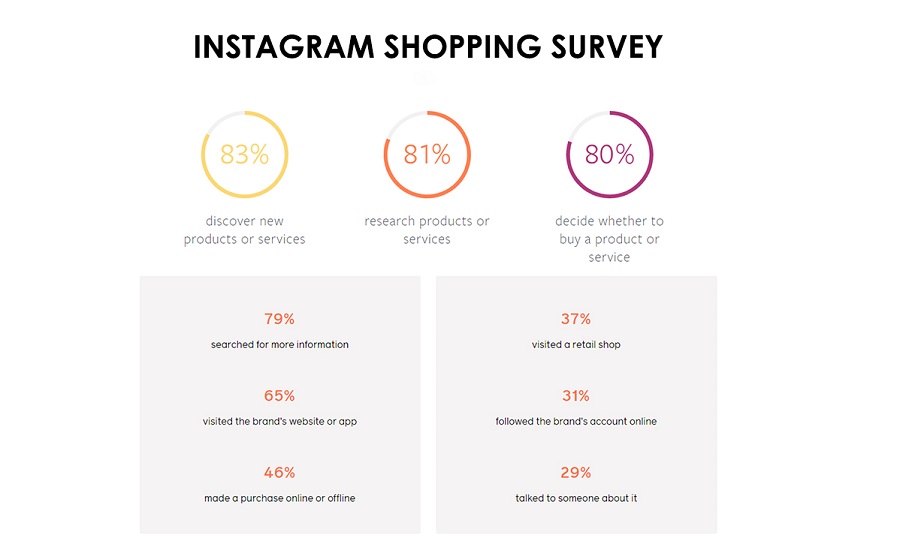
Moreover, in a survey, it is seen that around 80% of customers decide whether they will purchase a product or not only by seeing product photographs on Instagram. Can you imagine how impactful Instagram is for branding!
Furthermore, Instagram has driven 65% of customers to the brand’s website as well as made them use their app.
The following survey will provide you with better visualization of the significance of relying on Instagram for growing your brand.
Why are high-quality product photos important for Instagram business
You may think that to buy a product; all a customer needs is to see the product photos. So why should the photographs be of high quality where any kind of photo should work?
Well, here go some genuine reasons-
To represent your brand: People usually scroll through their news feed when they use social media. While scrolling, it is the first impression of your product that will convince customers to pause and invest their time in seeing your product.
As product photographs are the only source through which you can establish your brand’s image, high-quality photographs have a massive impact on representing your business.
To make your brand stand out: Among all the available brands, why would a customer choose your product? To stand out from the competition, your product must be appealing enough to attract customers’ attention.
Generally, customers don’t read the product details; rather, they prefer to purchase by noticing the product details from the photographs. Therefore, the prominent features of the products in high-quality photographs make the product visually appealing and stand out among others.
Build credibility: Customers always prefer to purchase the best quality product. To ensure customers that the quality of your products is premium and your service is professional, your products must be displayed in high-quality.
Customers will judge your product only by seeing your product photographs. So, to gain their trust and build the credibility of your business, there are no alternatives to high-quality photographs.
Don’t forget to read: Top 15 Ecommerce product photo editing trends to follow
How do you shoot Instagram product photos?
Seeing fancy high-quality product pictures on Instagram may make you feel that it’s not possible to take such photographs for someone who does not have a high-tech camera or a studio.
The following guidelines will help you out if you want to work with a smartphone or want to capture studio-quality photographs at home.
1) Shoot photographs with your smartphone
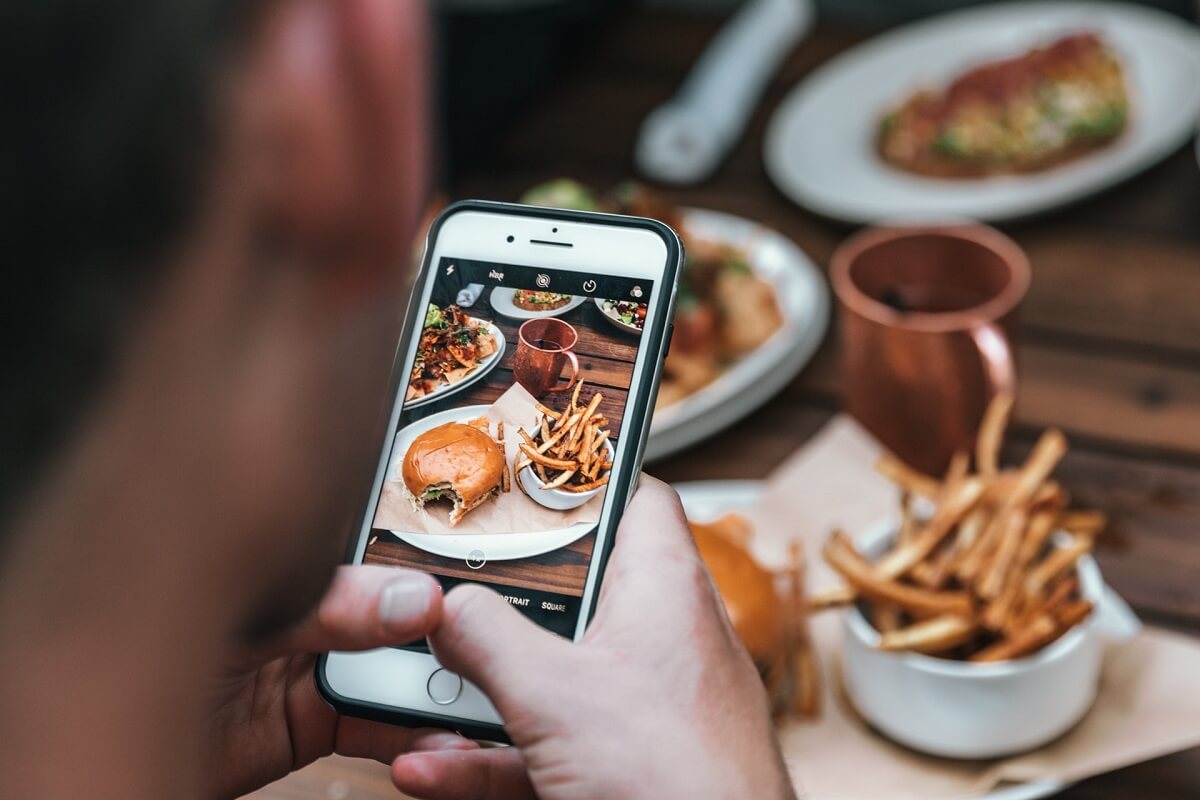
Whether you shoot with a smartphone or a camera, the first thing that you need is to select a theme for your product. As per the theme, you will have to decide how you are going to arrange the setup.
You can use a white paper or foam board if you prefer a white background. However, if you want to add some color, then you can use colored paper and some props like plants, natural or faux flowers, stones, mugs, or any other element that will add contrast to your product.
For shooting in natural light, make sure to place your set up near the window with sheer curtains to have a softened light effect. To maximize the light on your background and avoid shadows, use white paper as a reflector beside your product on the opposite side of the window.
Next, enable gridlines from your camera settings to use the rule of third. In the rule of thirds, you place your subject on the one-third side of your frame keeping the rest two-third side open. This rule is effective in bringing the customers’ attention directly to the product.
You should shoot the product from various angles to bring out the best of it. If necessary, zoom in or zoom out. As natural light may change anytime, make sure to lock in auto focus and exposure by tapping and holding on to the subject.
No raw photograph is perfect. So, post-production is important to adjust the brightness, contrast, saturation, highlights, shadow, and other features. Also, use the eraser tool to erase if there is any spot.
Note: Always use soft light and clean your subject and lens before the shoot.
2) DIY studio-like product photography at home
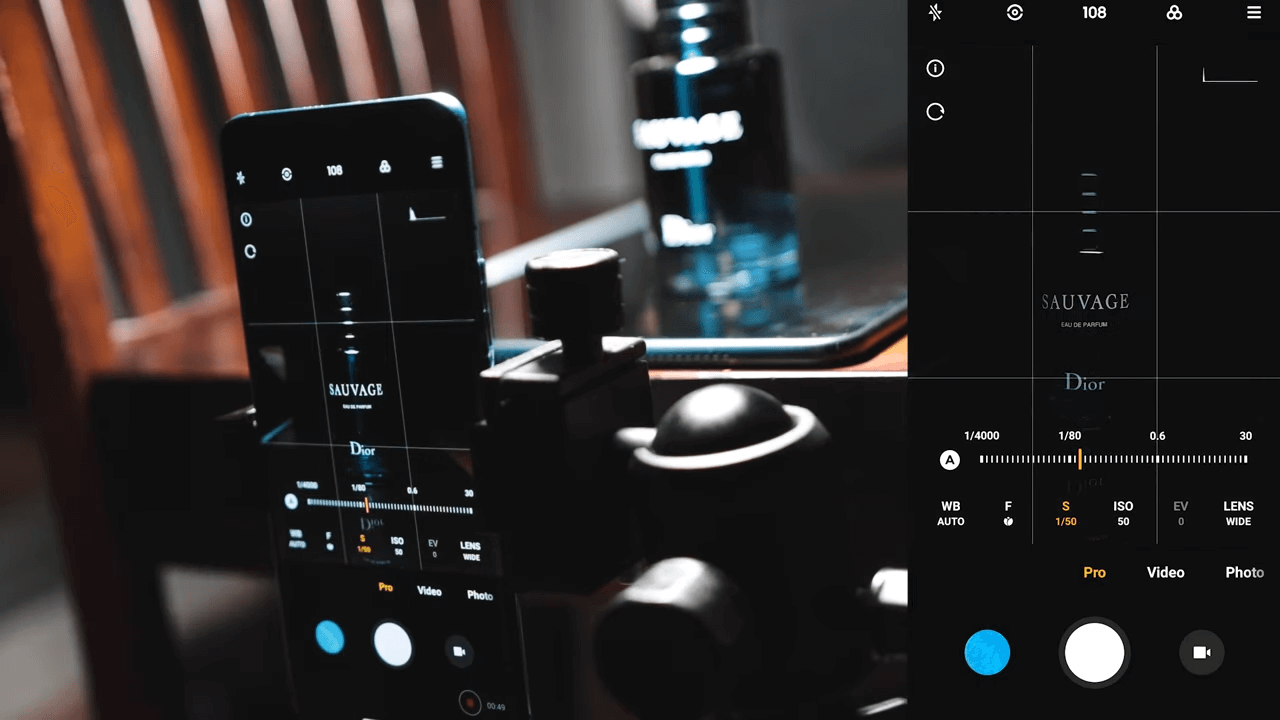
Professional photography is all about the proper use of lights. To achieve studio-quality photographs, all you need is a good camera, be it a DSLR or a smartphone. For equal distribution of light, you will need equipment like a diffuser and reflectors. And most importantly, a stable shooting platform.
Above I have discussed the use of natural light. But how are you going to work with artificial light? There are two types of artificial lights which are Flashlight, and Continuous light.
Here goes the use of artificial lights-
Flashlight:
Strobe lighting is a kind of flashlight used by professional photographers for its brighter and more powerful light. You can shoot studio-quality photographs at your home using a strobe.
However, DSLR or mirrorless cameras are preferable to be used with a strobe as they can’t be synced with every phone. So before relying on your phone, check if the strobe can be synced properly.
After placing your product on the surface and structuring the background with the required props, set the light with a modifier. Softening the light with a modifier is important as the light of the strobe is very powerful to overpower all other light sources.
White cardboard can be used as a reflector to bounce the light toward the darker area. Also, if you are only working with one product, then one light setup is enough.
The ideal camera settings for a mirrorless camera in this setting include: 105mm focal length, aperture f/18, ISO 100, and the shutter should have a fast speed of around 1/200. If your smartphone camera supports manual setting adjustment, then do it accordingly.
Note: You don’t need to worry about other light sources while using a strobe, as they won’t have any effect on your photograph in front of the overpowering strobe light.
Continuous light:
The artificial light that stays illuminated throughout the shoot is referred to as continuous light. Continuous lights are less powerful than strobe light. Also, strobes contain a modeling light that can be used as a continuous light.
For shooting with the modeling light of your strobe, the shutter is recommended to keep open for a longer period of time to capture more light. Hence, a shutter speed of 1/8 is good to go. Along with that, you should adjust your aperture to f/5.6, ISO 100, and focal length to 105mm.
However, if you are using a lamp and don’t have a modifier, then you can use thin paper or tissue paper to create one. If the intensity of the light can be controlled, then it is a plus point.
As the power of a lamp is a lot less than the modeling light, the shutter should be kept open even longer, with approximately a shutter speed of 1/4 and an aperture of f/4.5.
Note: Always use a modifier to soften the light. Also, any ambient light in the room should be switched off as it may affect your photograph.
Whether you shoot with a strobe or a continuous light, the photographs should be retouched to pop up the color of the subject and adjust the overall exposure as per individual preferences.
3) Hire professionals to shoot product photos
If you are not confined within a budget and have the mental and financial ability to spend on marketing your product, then you can hire a professional photographer. They have way more experience in the niche of product photography.
Product photography services are very easy to hire. The majority of the services take payment per photograph. And the price goes down for a large number of photographs.
There are numerous trusted product photography service providers like Squareshot, Pencil One, Results Imagery, Pow Product Photography, Product Photography, and many more. All you need is to visit their website and follow their guidelines.
Instagram product photography ideas: Top 10 product photos to follow for your next shoot
There are numerous photography techniques that are used to make the product pop out and draw customers’ attention. Here, we have accumulated the 10 most used Instagram product photography ideas that you can try out with your products.
1. Group product photography
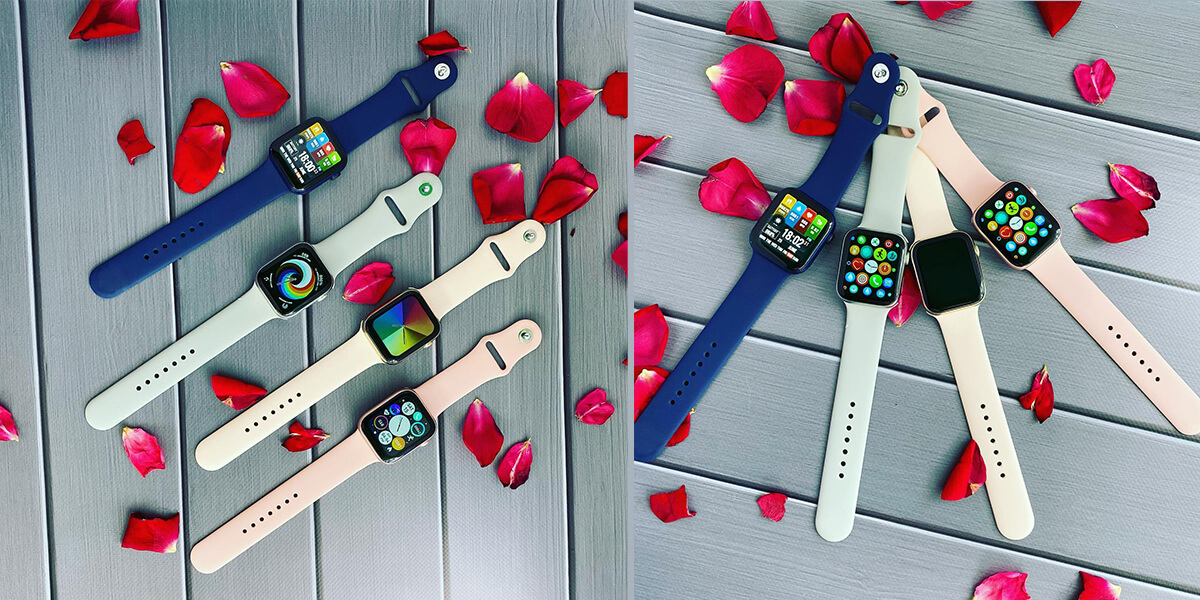
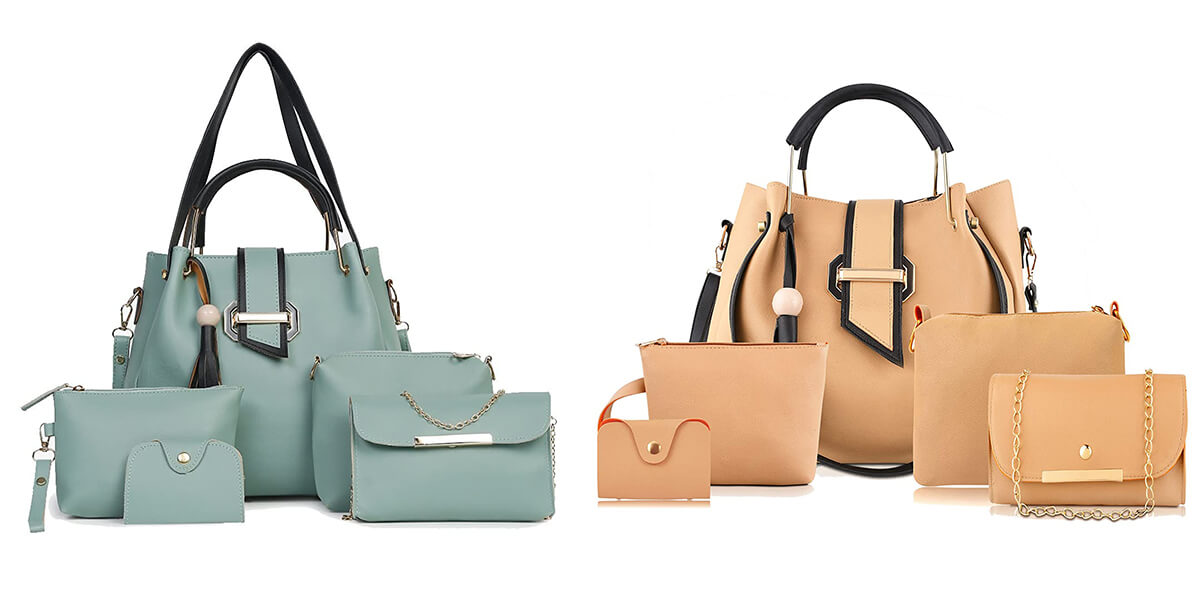
Group shots refer to showcasing multiple products within one frame. It can be categorized depending on color, size, design, or even a package. It is one of the most effective social media marketing strategies.
Through group photographs, you can provide an overall view of your brand’s offering to the customers. It also helps customers to compare the products and decide which one to choose from such a varied range of products.
For this type of shoot, you can arrange products with different color options or the same color in different designs, like organizing a group of watches having numerous color variants or white T-shirts in different designs. Also, as a beauty product package containing facewash, toner, serum, and moisturizer.
2. Individual shots: Individual shot contains only one object
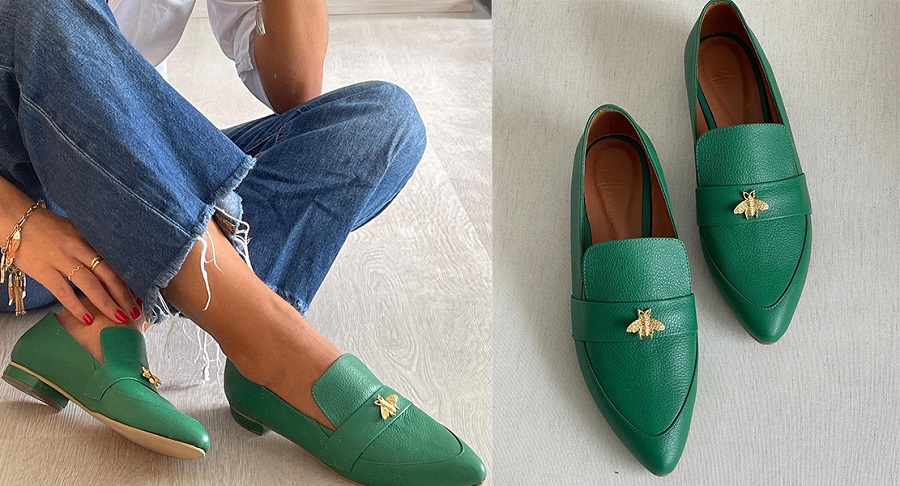
Individual shots mean to place only one product in the frame. It is the most used technique for marketing products on social media sites like Instagram.
One of the most effective ways of highlighting a product is to keep it solo in a simple setting to prevent visual clutter. It also helps to draw customers’ attention toward the product.
For this, first, you need to set up a simple background like a white background or any other monochromatic backdrop. Then, place your product at the center or at one-third of your frame to get the perfect shot.
3. Close-up shots: Type of shot that tightly frames a person or object.
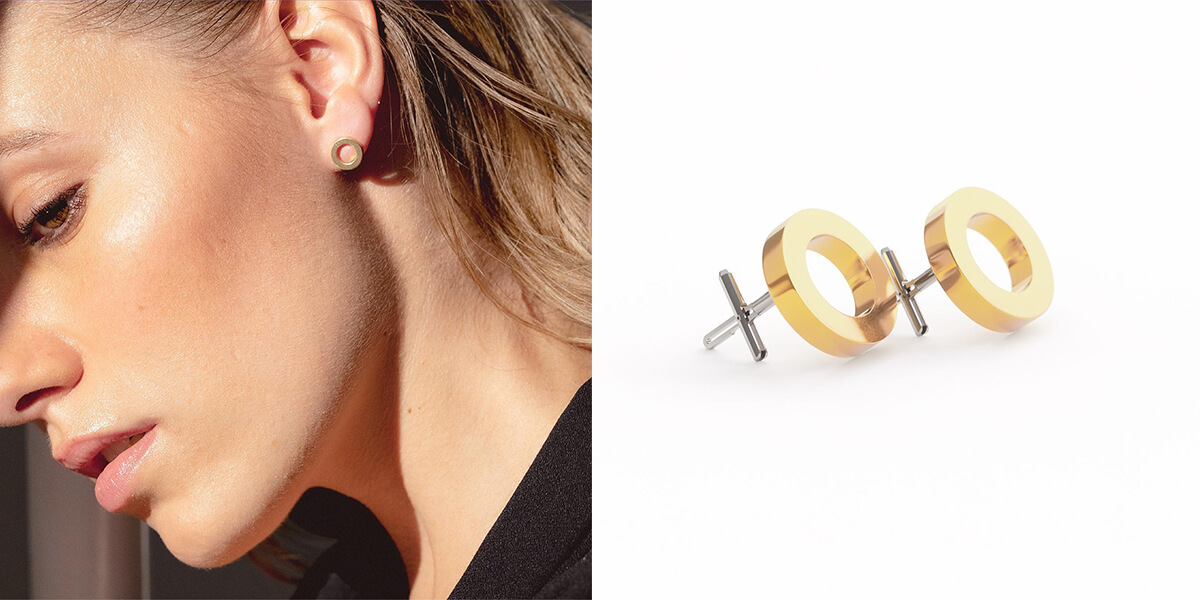
The style of product photography where shots are taken from a close distance to highlight their prominent details are the close-up shots. This style is most popular in case of jewelry photography. However, it’s also used for apparel, beauty products, shoes, and many other types of product photography.
Close-up shots work better to show the texture and fine details like stitching, patterns, buttons, zippers, etc. This also helps customers to visualize what the product will look like in person. It makes the product realistic and trustworthy to the customers.
First, you have to set up your lighting properly to evenly distribute light. Use reflectors to illuminate the background and the product from all sides. Then, focus on the details and take shots from a close distance using a tripod. Experiment with angles to get the perfect shot.
4. Lifestyle shots: Mainly aims to goal is to tell stories about people’s lives
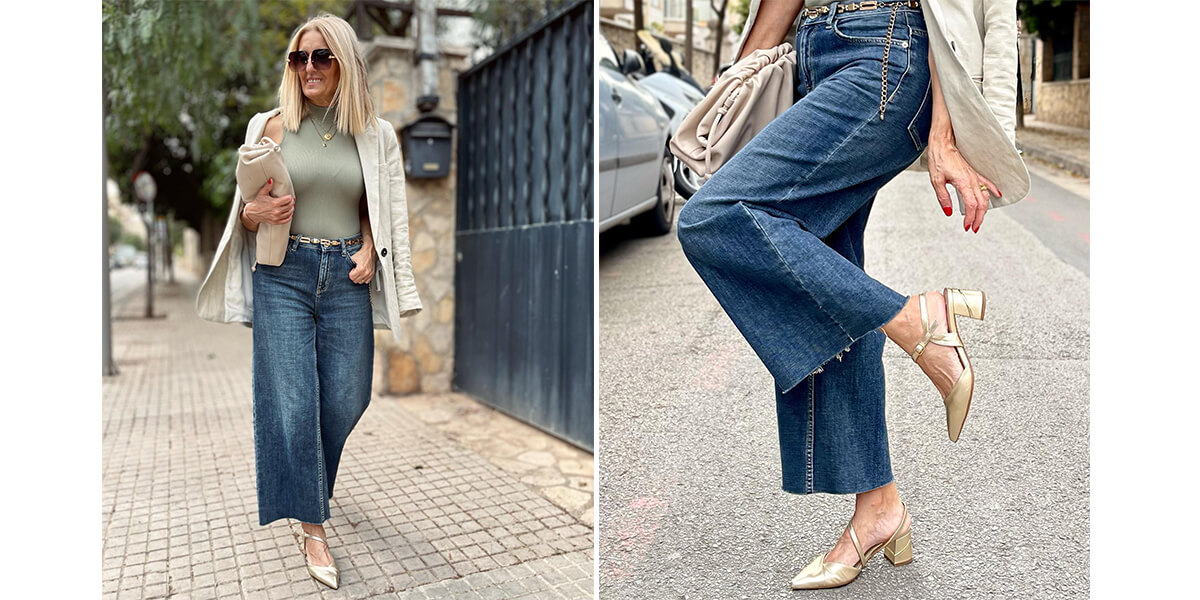
To bring life to the brand, people usually opt for lifestyle shots where the products are shown as a part of everyday life. This is mostly a shot showing the products in use, like someone wearing a shoe or a dress to give it a wearable look.
Through this type of shot, you can make your customer feel more connected to your brand. It also helps the customer visualize how the product would look or work if they possess one and gives a reference to its size as many customers might be unable to envision size only by reading the product description.
You can take lifestyle shots both with and without models. Your model can pose while using the product. However, if you are shooting without models, then place your product with other relevant items which will provide a context to it.
Read Also: Get Ideas For Hat Photography.
5. Detailed shots: The primary goal is to show a viewer things in a different way
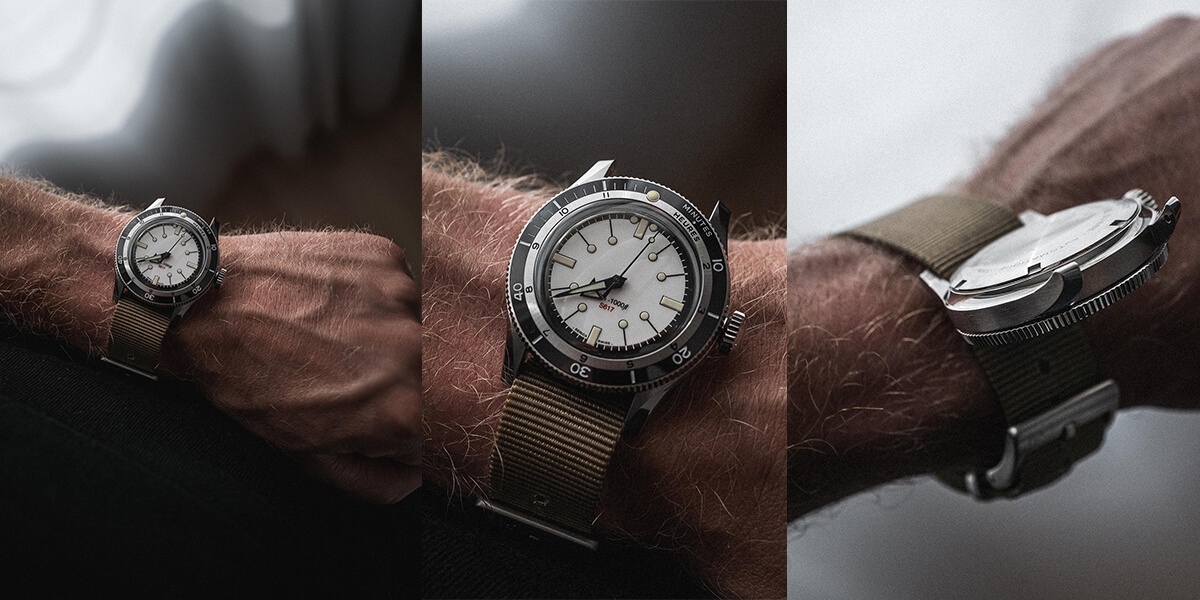
Detailed shots are kind of super close-up shots which are also known as macro shots. This type of vivid photography is mostly done with small products like jewelry or other accessories.
This shot is especially preferred for showing specific features of the products, which are not that possible in normal or traditional shots. It’s most effective to show the texture and highlight the original color of the product.
With a normal camera, it is difficult to take eye-catching macro shots as extreme zooming can affect the focus of the camera. Hence, a macro lens should be used in a well-lit setting.
6. Packshot photography: Captures the product image along with the packaging
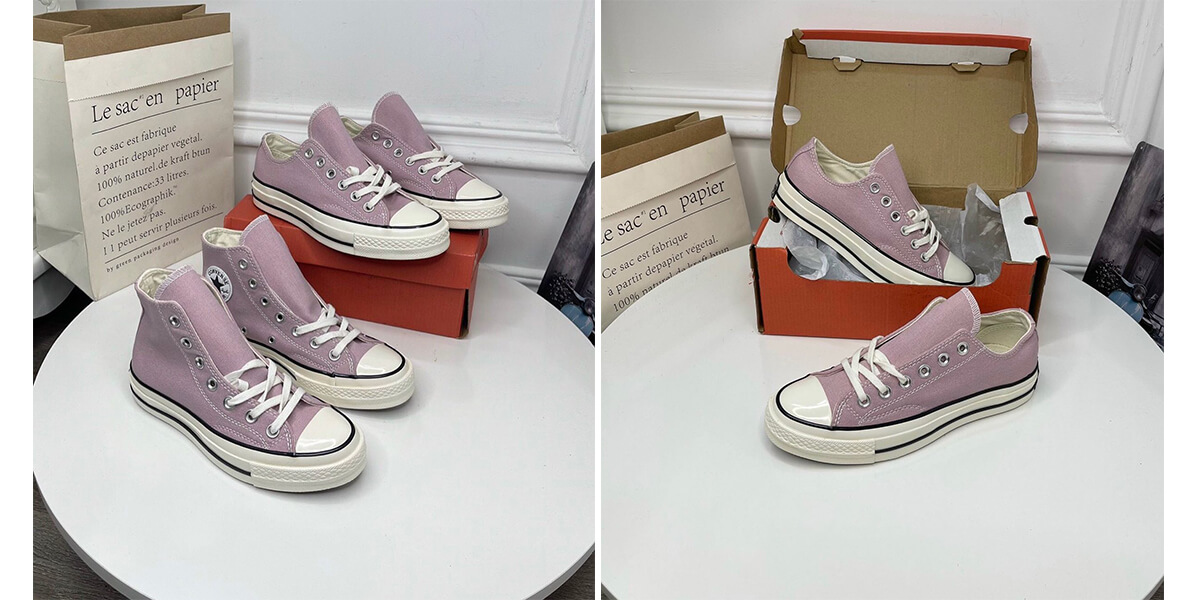
Packaging shots are also known as packshot photography, where products are shot along with their packaging. The product can be still or in motion showing the labels or the packet in which they will be delivered to make them look appealing to the customers.
Packaging shots help to build a distinctive image of the brand among the customers. Indeed, a product with attractive packaging and a professional look provides a message to the customer that the product is of good quality. As some customers’ buying choices solely depend on the packaging, having smart and cute packaging can help boost sales.
To make the packshots stand out, the background should be kept plain to avoid visual noise. Then shots should be taken from various angles to see which angle fits best for that certain packaging, considering the text and logo in its body.
7. Flat lay shots: A flat lay is simply an image shot directly from above
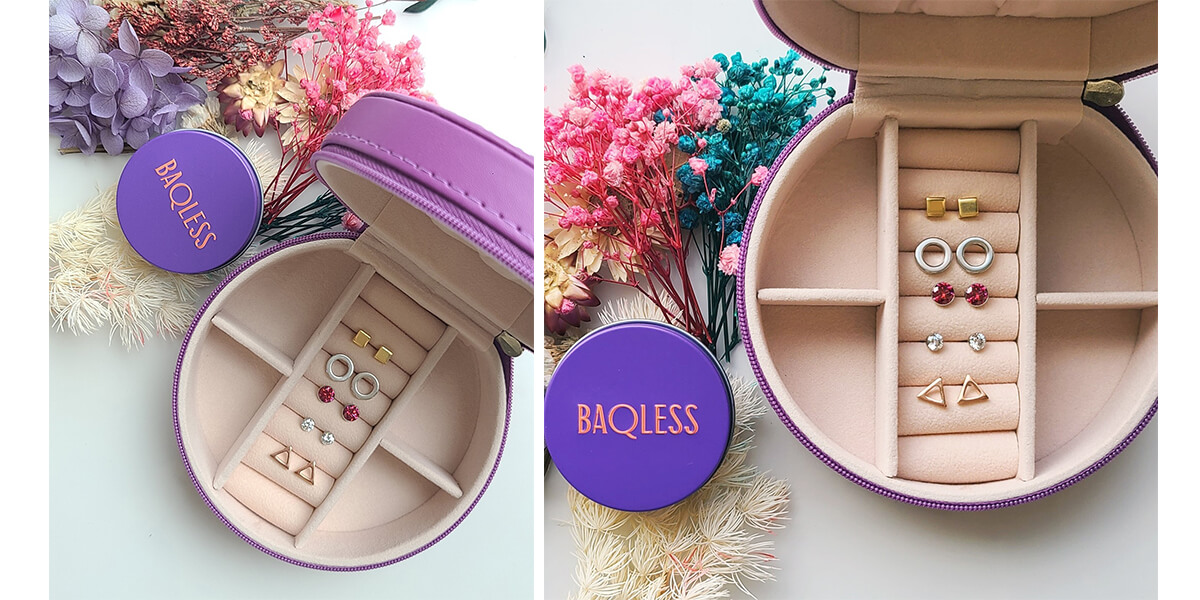
Flat-lay shots are most popular on social media platforms, especially in the case of the fashion industry. In this type of shot, the product is laid flat on a surface, and the camera is placed above, making it parallel to the product. The shot gives a bird’s eye view of the product.
Flat-lay shots provide ample opportunity to go creative and capture aesthetic, eye-catching social media-friendly photographs. It is easy to organize products in a way that all the features of the products are absolutely visible and draw the complete attention of the customer to the product.
Rather than a boring plain white background, Instagram users like flat lay products arranged along with props like complimentary accessories, which include sunglasses, bags, hats, shoes, jewelry, or natural elements like flowers, leaves, etc., which adds a pop of color and contrast to the product. Also, keep some negative space to give an organized and cozy look.
8. Mannequin shots: These types combine the photos to remove the mannequin
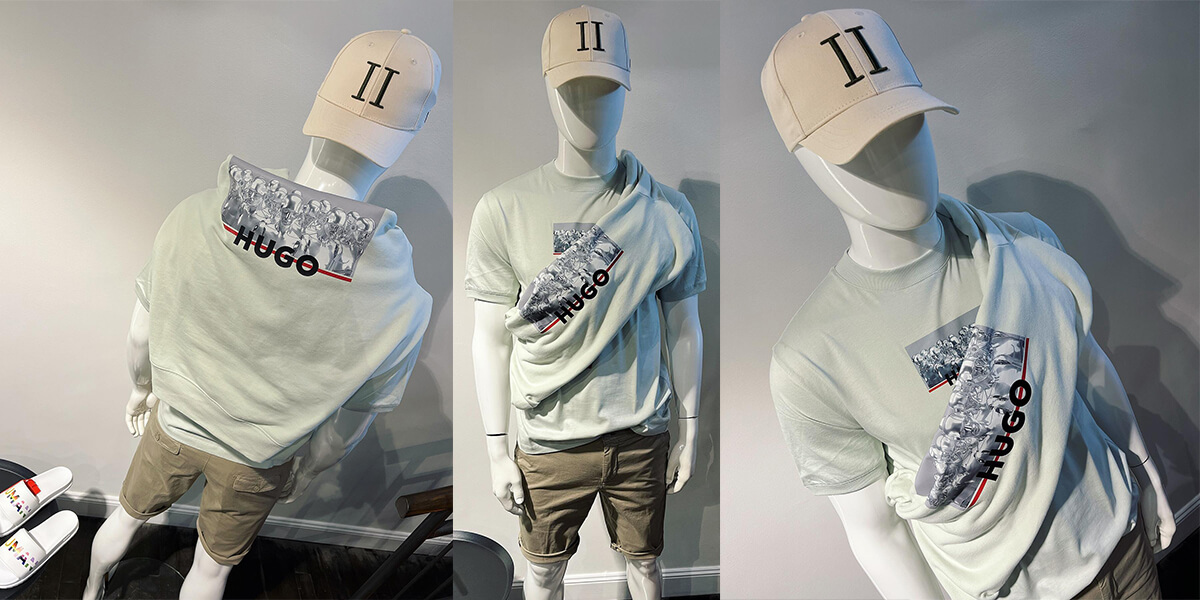
In this type of shot, a mannequin is used as a model to give the product a 3D effect. It’s mostly suitable for clothing photography. However, certain parts of a mannequin, like a wrist or a neck, are also used to shoot accessories.
Mannequin shots provide a realistic look at the clothes and accessories. It also helps customers visualize how the dress would fit on their bodies as it provides an idea about the actual size of the dress or even how a necklace, bracelet, watch, or ring would look upon wearing.
To shoot, you would need a proper and even lighting setup to highlight the details of the clothing on the mannequins. However, if you want to create a ghost mannequin effect, then you have to rely on photo editing software to remove the mannequin from the frame.
9. Hanging shots: Give your objects a more realistic
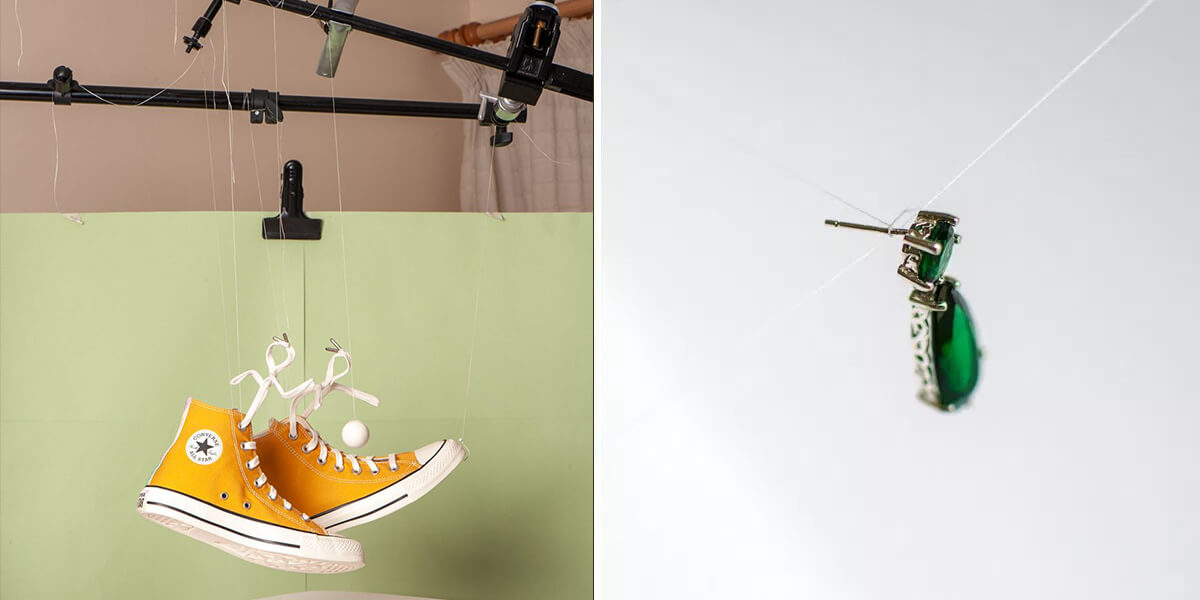
Shooting suspended products are the modern technique of giving your product photography a dramatic effect to create a lasting impression among the customers.
Hanging shots gives a three-dimensional look to the product. It also draws customers’ attention faster than most other techniques for being exceptional. Besides, the movement of the product adds life to the photograph.
For shooting, all you need is to hang your product using a fishing line and later remove the lines from the photograph with the use of photo editing software. You can also place your product at unusual angles and replace the background and adjust the size to give a floating look.
10. Scale shots: Product shows how big or small
The biggest drawback of online shopping is not being able to know the actual size of a product. Especially affected greatly in the case of buying bags like backpacks or handbags. To overcome this problem, other objects are used adjacent to the product to refer to the actual size of the product.
The only purpose of a scale shot is to provide the idea regarding the actual size of the products to the customers, as it’s difficult for the customers to visualize the size only by seeing the product description.
Using everyday objects like a smartphone, laptop, or other objects can be used for scale shots. You can also use models to hold the product to refer to what size the bag may look if a customer holds that with their hand.
Tips to Improve Your Instagram Product Photos
Below are some practical Instagram product photography tips that may come in handy for getting started with your product photography.
Tips 1. Mini studio: Try a mini studio or a lightbox
Whether you are using natural light or artificial light, the most important thing to consider is even light distribution and managing shadow to get professional quality product photographs.
Therefore, you can create a mini studio or a lightbox having enclosed sides with white paper as they will also act as a reflector. Also, modifiers like sheer fabric can be used to diffuse the light to have a softening effect. Remember, harsh light can create shadows.
Tips 2. Clean backgrounds: Keep your background in focus
Keeping the background simple is the key to drawing your customers’ attention to the product, as simple background provides a clean effect to the picture and a professional look to the photo.
Usually, a white background is preferred as it highlights the features of the product with minimal effort. It also helps to eliminate visual noise. However, you can also use other neutral colors like black, grey, or any muted shade if that goes well with the color of your product.
Tips 3. Realistic view: Experiment with 360-degree angles
360-degree views of your product will let the customer see the product from all different angles and give the feel of holding it like a physical shop. The detailed view from all sides establishes trust in the product as the customers get to know what they will be receiving in real life.
Particularly if you are working with shoes, then you should definitely create 360-degree photos. Sometimes clothing photography also requires such kind of shot to influence the customers to make the decision whether to buy or not.
Tips 4. Group photos: Show all varieties of copies available
Group photos give customers options to choose from a variety of collections. You may have a product in various colors or color with multiple items. Categorize them considering their color, design, materials, texture, or theme.
Sometimes customers buy products beyond their needs or plans. So, give your customers the feeling that you are offering everything that they may need by showing your wide range of products.
Tips 5. Image resolution: Use high-quality and large-resolution images
For marketing your products on social media sites like Instagram, make sure your photographs have a higher resolution. Because higher resolutions will create high-quality photographs by ensuring more pixel information.
We all know how much customers love to zoom in on the photographs to observe the details of the products. So, you wouldn’t want your photographs to appear blurred when zooming in due to lower resolution and losing your potential customer.
Tips 6. Photo dimensions: Use the right dimensions
The length and width of a photograph which is usually measured in pixels, are referred to as photo dimensions. It is important to use the correct dimensions on Instagram, as the wrong dimension may result in a blurry effect due to stretching, or even some parts may get cut off.
Usually, Instagram allows square and horizontal photographs. However, now vertical or portrait photographs are also allowed. To make your product photos clear and professional, maintain 1080×1080 pixels for square, 1080×608 pixels for horizontal (landscape), and 1080×1350 pixels for vertical (portrait) photographs.
Tips 7. Photo manipulation: Try isolated images in high-resolution
Photo manipulation can add thrill to your product photography. It makes the photographs more dramatic and intriguing to make the customers go wowed seeing your products.
However, to make stunning manipulated product photos, it is recommended to take help from a professional graphic designer as photo manipulation is not an easy task like swiping left or right to adjust colors in a photo editing app. Nevertheless, you can also learn this skill by watching tutorials.
Tips 8. Photo retouch: Improve consistency and output quality
Last but not least is photo retouching. Adjusting color, contrast, brightness, etc., makes a lot of difference in the photo quality, which you can realize after comparing it with the raw version of the photograph.
So, to make your photograph flawless and enhance its quality, you must have to go for post-production. For that, you can adjust the color of your product, keeping it the same as the original color. You can adjust the exposure in the background or even remove spots and creases.
Photo retouching service
Important FAQ’s of product photography
Q: What do I need for product photography?
Ans: For product photography, all you need is-
- A DSLR camera or a smartphone with a good resolution camera
- A tripod to keep the camera stable
- A white or any neutral color backdrop
- A tape for a paper backdrop
- White paper or foam board as a reflector
- A flat surface for the base
- Light sources like a window for natural light and a strobe or bulb for artificial light.
- Modifiers like curtains for windows, DIY softboxes using sheer fabric, or tissue paper for artificial light as a diffuser.
Q: Is a ring light good for product photography?
Ans: Yes, undoubtedly, a ring light is a good source of artificial light for product photography. Because it has the place to fix the camera at the center and soft lights coming from all directions due to its circular shape eliminates any possible shadow and distributes light evenly. Besides, its intensity can also be controlled as per the situation demand.
Q: What background to use for product photography?
Ans: A plain white background is considered the ideal background for product photography. But you can also use any muted color if that compliments the color of your product. However, make sure that your background doesn’t steal all the attention rather than your product. So, try to keep the background plain and simple.
Q: How much does product photography cost?
Ans: Well, the product photography cost differs depending on the service providers. However, paying options include- per photo, per hour, per day, and per product. You can expect to pay $10 to above $400 per photo, $25 to above $500 per hour, and $300 to $3000 per day. Remember, the price goes up for highly experienced photographers.
Q: Smartphone photography vs DSLR: Which would be best?
Ans: Apparently, a DSLR is better compared to a smartphone for photography because of its higher resolution capacity. Not all smartphones have high-resolution cameras. However, the highest resolution smartphone camera can be defeated by a normal DSLR camera. Besides, all phones do not support manual adjustment of camera settings like a DSLR.
Q: What is a good camera for product photography?
Ans: A mirrorless camera or DSLR is good for product photography. There are numerous brands available in the market like Sony, Nikon, Canon, Fujifilm, Olympus, and many more. Recently Sony A7R IV is popular for product photography.
However, you can also consider Sony A6100, Nikon D850, Canon 5D Mark IV, Sony a7R III, Nikon D3500, or Panasonic Lumix GX85.
Q: Which phone is better for product photography?
Ans: Usually, a smartphone is not recommended for capturing professional-quality product photos. However, if someone wants to use a phone, then iPhone 12 Pro Max, Google Pixel 5, OnePlus 8 Pro, and Samsung Galaxy s20 Ultra can be considered a good choice.
Bottom Line
Excelling in creating high-quality professional-level photographs overnight is not possible. However, we believe if you keep practicing the Instagram product photography ideas we have shared, then you will definitely be able to stand out gradually with time.
