Spot healing brush tool is a powerful clean-up tool used for removing imperfections such as spots, marks, creases, facial pimples, wrinkles, scratches, and blemishes. Spot healing tool is used on photos containing human and non-human objects. The application method differs depending on the type and the subject of the image.
To use the spot healing tool in Photoshop, look for the Adobe Photoshop Toolbar menu in between the eyedropper tool and the brush tool. Drag the brush and it’ll take you just a few minutes to correct the spots.
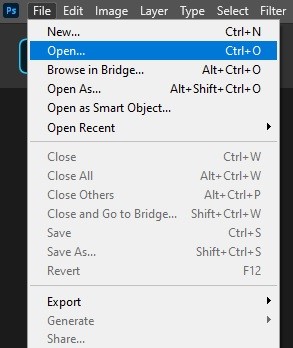
Step 1 : Open the File
Go to File and click on Open to open the file.
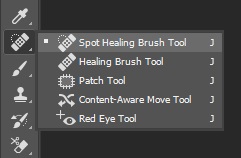
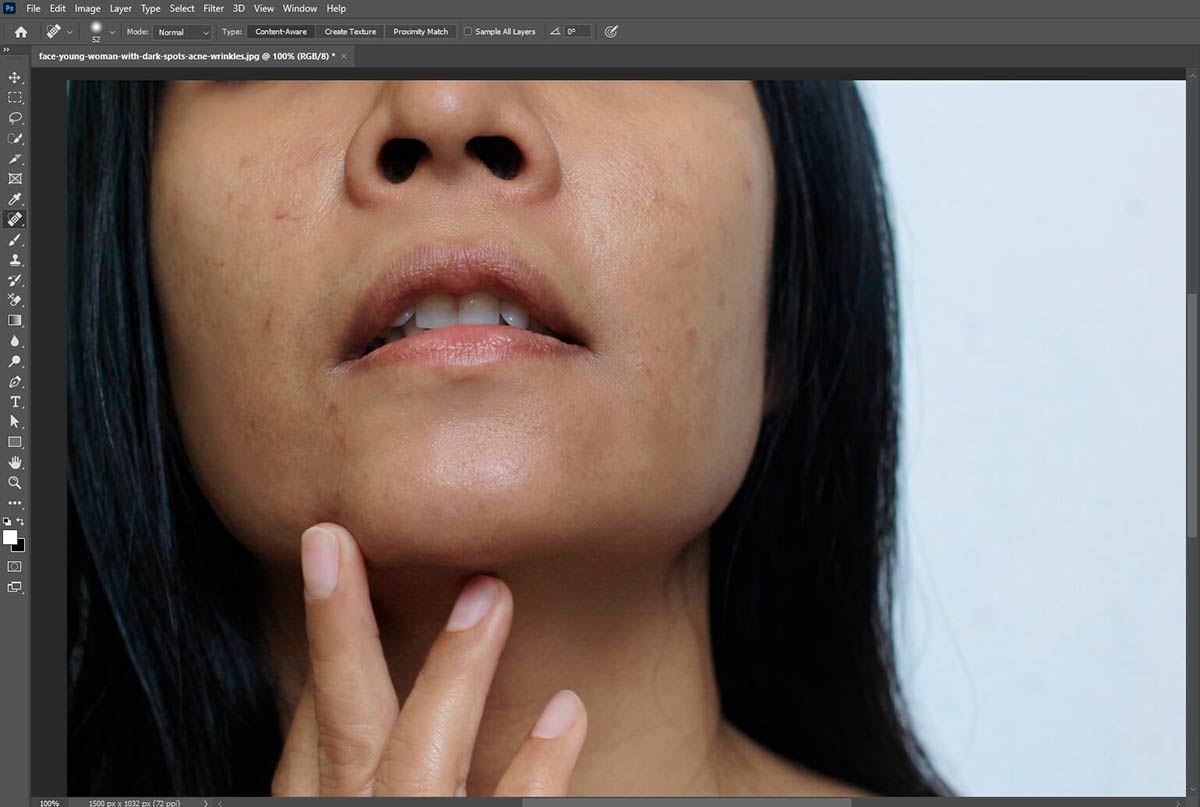
Step 2 : Take the Spot Healing Brush tool
Select the Spot Healing Brush Tool from the toolbar menu.
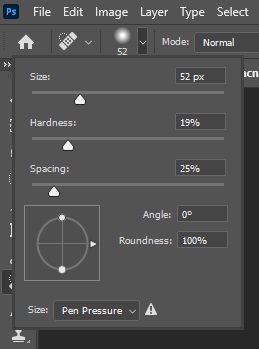
Step 3 : Adjust the Brush
After selecting the tool, on the top menu, brush adjustment options like size and intensity will show up.
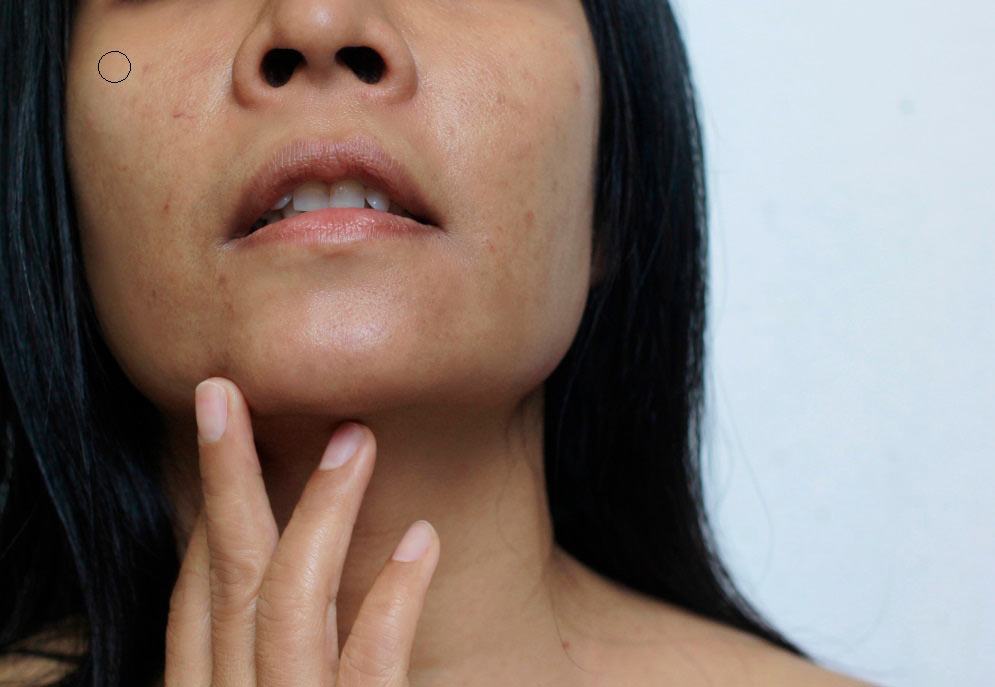
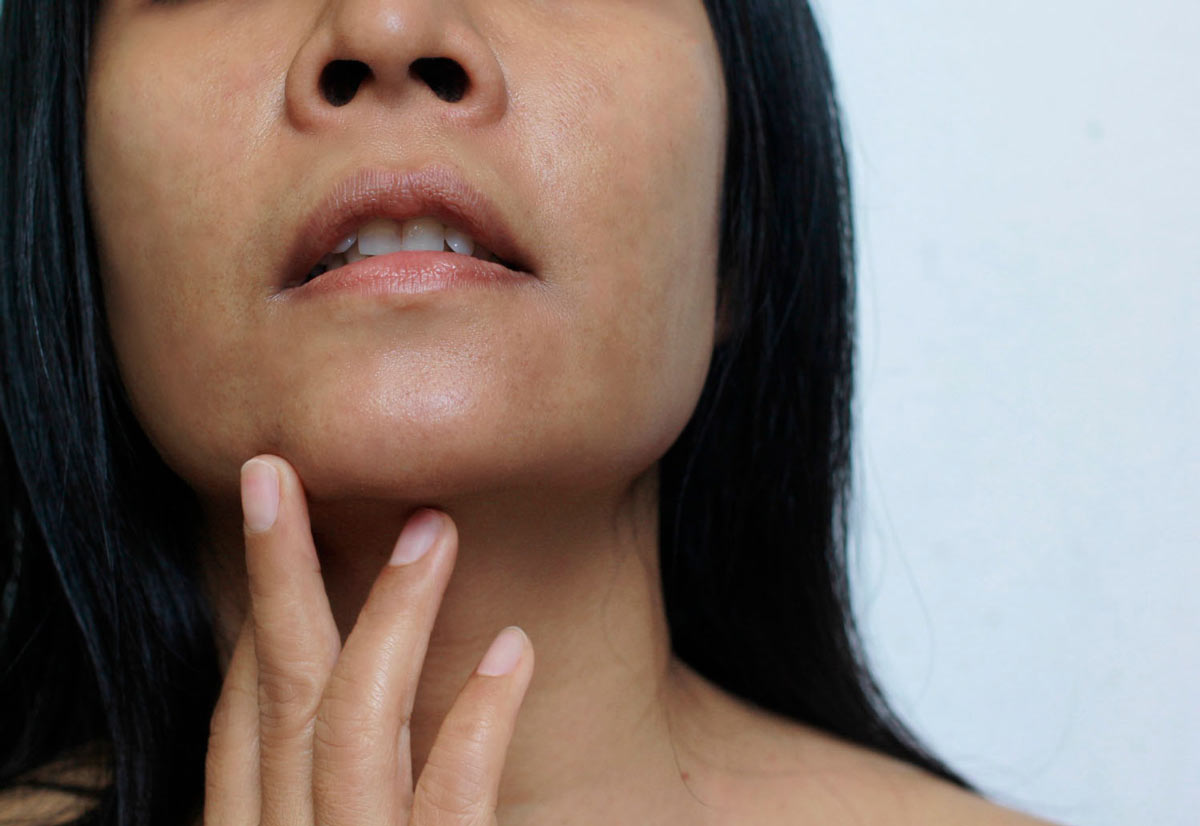
Now zoom in on your image so that you can see the details. Start brushing where correction is needed and you’ll notice the changes.
Change and adjust the brush size and intensity according to your needs.

Step 4 : Save the Image
After you’re done with the modification, save the file. Always keep the PSD file so that you can always work on this file later.
Note: Adobe Photoshop offers 2 other ways to remove spots from your images which are the healing brush tool and the patch tool.
What you’ll learn in this article
How to Use The Healing Brush Tool in Photoshop?
The Healing Brush tool works similarly to the Spot Healing Brush Tool, additionally based on reference. Take a reference from the image and then paste it on the area you want to apply changes. This changing process appears as replacing one area with another.
Step 1 : Open the File
Go to File from the top menu and click on Open to open the file you want to work with.
Step 2 : Pick the Healing Brush tool
Select the Healing Brush Tool from the toolbar. It is right below the Spot Healing Brush Tool.

Similar to the spot healing brush tool, you’ll get the same options for adjusting the brush size and hardness. Adjust these options before starting brushing.
Step 3: Take a Reference
Press the Alt button on the keyboard and click on a plain area to take reference. The reference should match the light and color of the area you want to rectify. The brush size will determine the amount of occupied space.
Step 4: Brush Over the Target Area
Click on the area that you want to replace. That area will change similarly to the reference.

You can change the reference anytime you need. Make sure that your reference matches the area you’re working on for an authentic appearance.
Step 5: Save the Image
From the File menu, choose Save As and save the file as JPEG and PSD.
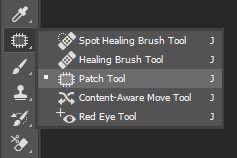
How to Use the Patch Tool in Photoshop
The patch tool works with a reference tool. You’ll have to mark and cut a certain area and then drag it to the area that needs to be corrected. This tool is useful while working with larger areas. The step-by-step guide on how to use the patch tool in Photoshop is as follows.
Step 1 : Open the File
Open the file by clicking on File from the top menu.
Step 2: Take the Tool
Select the Patch Tool from the toolbar You’ll find it right below the Healing Brush Tool.
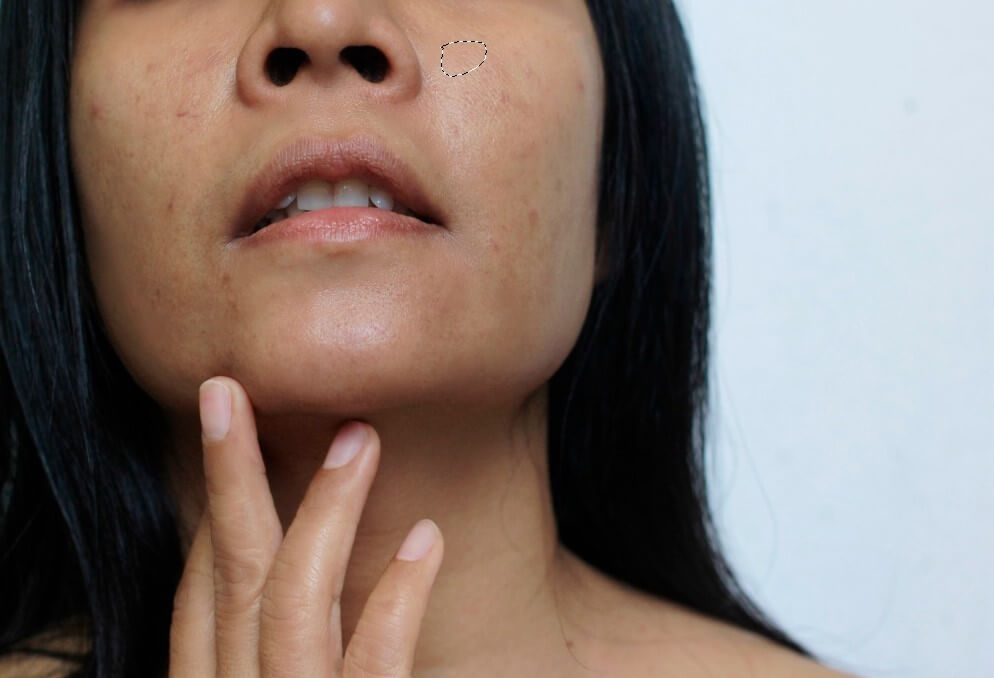
Step 3 : Mark an Area
Mark an area from the image that looks clear. It is better to choose a plain surface without any flaws and the area’s shape should match the shape of the area that you want to correct.
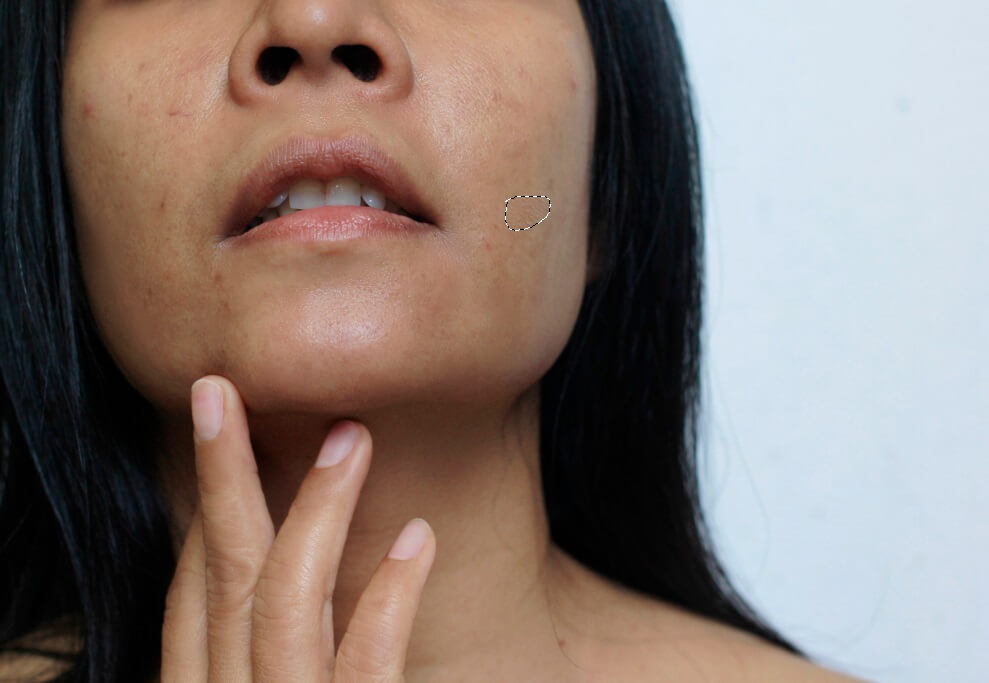
Step 4: Drag the Area
Now, click on your mouse and drag the area to the spot you want to replace. Make sure the new replacement goes with the surroundings of the replaced area.
Step 5: Save the Image
Your image is ready to save. Click on File > Save As and save your file.