It’s a common issue for photographers to keep track of their work. Not just photographers, businessmen, photo editors, whoever works with photos, have to deal with a huge quantity of photos. Many of them don’t know what Adobe Bridge is, how it works, or what are the facilities of using this software.
For those who deal with photos, Adobe Bridge is like a life savior. You don’t need any personal assistant or extra time to manage and organize your photos. This software will help you manage everything with just a few clicks.
It often happens that we don’t find the photo when we need it or in an emergency. Also, many of us lose important files, like raw copies of an image. Using adobe bridge alone can solve all the problems. This is one of the best software to deal with photo management.
What you’ll learn in this article
What is Adobe Bridge?
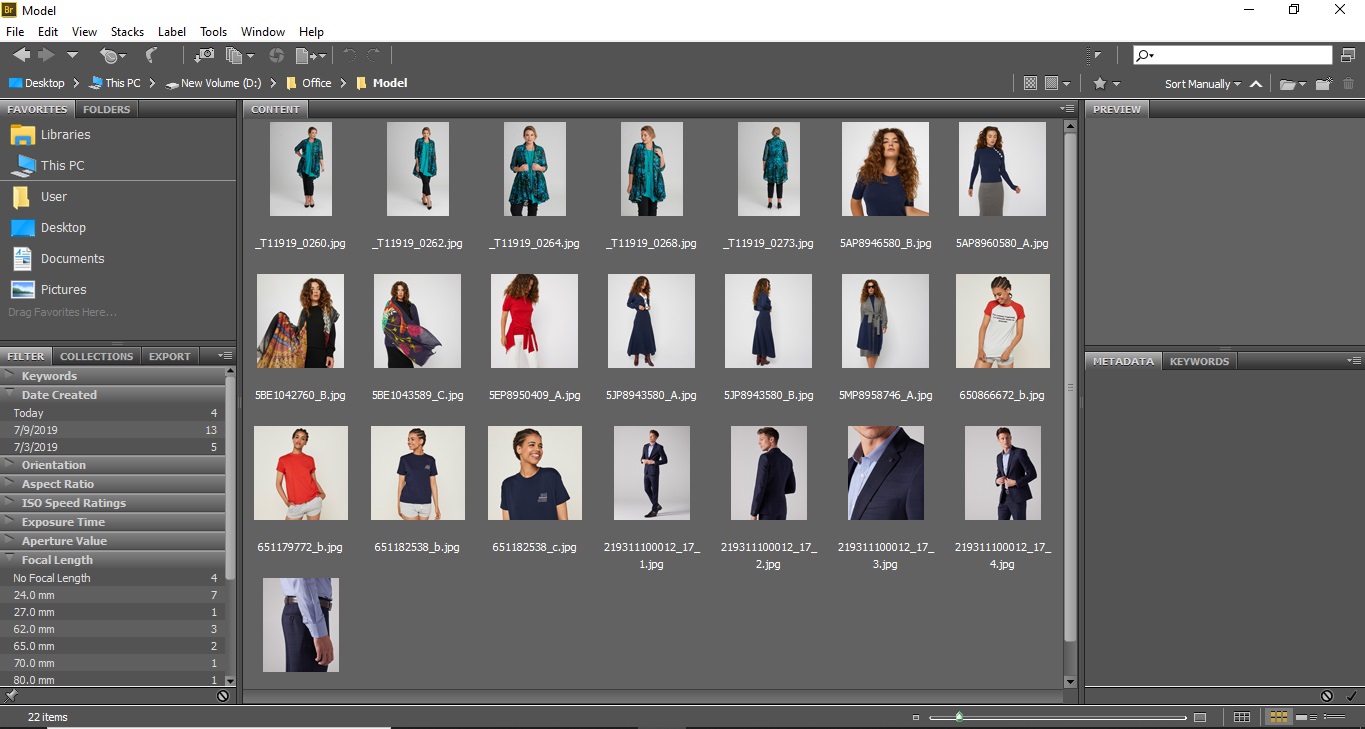
Many have this question in mind about what is adobe bridge. To simplify, Adobe Bridge is a digital asset management or media manager software that comes with Adobe Creative Cloud. This can be compared with a file manager, but it works much more than that. Bridge has options to copy or move photos from one place to another, mark photos as you wish, create categories using metadata.
The interface of this software is really simple and easy to use. There are options to check all the information of a photo. You can even categorize photos based on their aperture, shutter speed, or focal length. You also can separate raw and jpeg files in the bridge.
What’s the use of Adobe Bridge?
Now you know what Adobe Bridge cc is. So, what is Adobe Bridge used for? If you work with images, Adobe Bridge will work as your personal assistant. This software is super efficient in maintaining, managing, and organizing photos, as well as keeping track of all your work. Here are some of the basic benefits of adobe bridge –
Organize Photos
The most important use of adobe bridge is that this is so far the best software to organize your photos. This is not just a usual file manager type thing; rather, Bridge has so many features and options to organize your photos.
You can easily access folders and also copy, move, create folders directly from the bridge. You don’t need to open the photos separately.
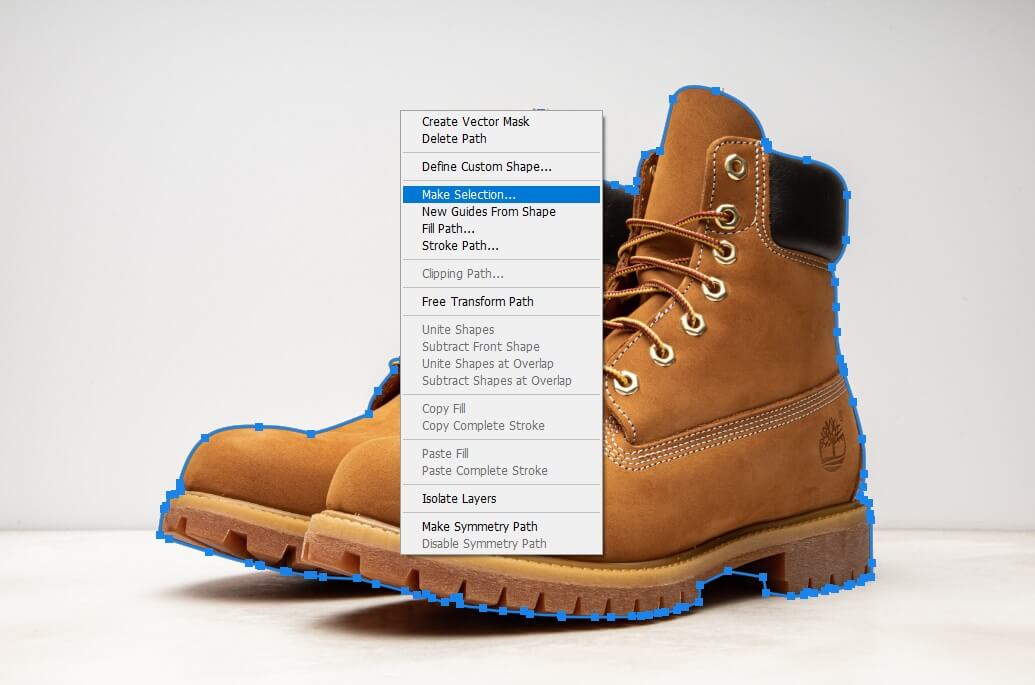
Make Selection
Creating selection is one of the coolest features of adobe bridge. Obviously, we don’t use all the photos we shoot. There are only a few photos that go to the final selection. So, before that, we need to make the first selection, second selection, third selection, and so on.
Adobe Bridge has options both for marking with color and star. You can mark your photos as red, yellow, blue, as well as one star to five stars. Later, you can just click on the marking, and Bridge will show you exactly the photos you marked.
Manage Photos
If you are a photographer, or businessman who works with photos or a freelance photo editor, or have an online studio that makes photos for others, working with photos means having a large collection of photos. If you don’t keep your photos in a particular order you will have to struggle with finding photos when in need.
Adobe Bridge helps to categorize the photos in different ways, so it’s easier to find any photo with the least amount of information you have in your head. Bridge is the perfect place to manage huge amounts of photos without any struggle.
Find all in one place
You can keep your photos in so many places on your pc or hard disk. When you’re taking lots of photos, it’s obvious to feel pressure to keep the photos in order. You can keep photos in different folders; that won’t be a problem if you keep the information properly in the bridge. This software will keep track of all your work. So, you won’t struggle with finding your photos.

Create Metadata
Creating metadata is another amazing feature of Adobe Bride. You can call metadata the identity of a photo. Metadata includes all the information about a photo. Metadata is important to find a photo.
One benefit of using metadata is that the more information you’ll include in metadata, the easier it will be to find your photo on the internet. This will increase the ranking of your image. You can include tags there too.
How to Download and Install Adobe Bridge
Check out the requirements to run adobe bridge on your pc and how to download and install it.
Computer requirements for adobe bridge
You need to have some specific requirements if you want to use adobe bridge on your pc. Here, we’re giving all the requirements of the adobe bridge October 2020 release, version 11. Keep in mind, this version is not supported on Windows 7, Windows 10 v1511, v1607, v1507, v1703, v1709, 1803, and 1809.
For Windows
Processor :
Minimum: Intel® 5thGen or newer CPU – or AMD equivalent
Recommended: Intel® 7thGen or newer CPU – or AMD equivalent
Operating system :
Microsoft Windows 10 (64-bit) version 1903 or later
RAM :
Minimum: 4 GB
Recommended: 16 GB of RAM for HD media
32 GB for 4K media or higher
GPU
Minimum: 2 GB of GPU VRAM
DirectX 9.0-capable system
Recommended: 4 GB of GPU VRAM
DirectX 9.0-capable system
Hard disk space
Minimum: 2 GB of available hard-disk space for 64-bit installation; plus additional free space required during installation (cannot install on removable flash storage devices)
Recommended: Fast internal SSD for app installation and cache
Monitor resolution
Minimum: 1280 x 800
Recommended: 1920 x 1080 or greater
Internet :
Internet connection and registration are necessary for required software activation, validation of subscriptions, and access to online services.
For macOS

Processor
Minimum: Intel® 5th Gen or newer CPU
Recommended: Intel® 6th Gen or newer CPU
Operating System
Minimum: macOS v10.14 or later
Recommended: macOS v10.15 or later
RAM
Minimum: 4 GB
Recommended: 16 GB of RAM for HD media
32 GB for 4K media or higher
GPU
Minimum: 2 GB of GPU VRAM
Metal 1.0-capable system
Recommended: 4 GB of GPU VRAM
Metal 1.0-capable system
Hard disk space
Minimum: 2 GB of available hard-disk space for 64-bit installation; plus additional free space required during installation (cannot install on removable flash storage devices)
Recommended: Fast internal SSD for app installation and cache
Monitor resolution
Minimum: 1280 x 800
Recommended: 1920 x 1080 or greater
Internet
Internet connection and registration are necessary for required software activation, validation of subscriptions, and access to online services.
Previous Versions :
You can also check the specifications required to run and use Bridge 10.x, 2020 releases here and specifications required to run and use Bridge 9.x, releases here.
Adobe bridge download Link
Here is how to download and install Adobe Bridge. You can download Adobe Bridge from Creative Cloud. It has all the software that you need. Follow these steps to download adobe bridge from Creative Cloud.
Step 1: Open the Creative Cloud app on your pc.
Step 2: Scroll down, and you’ll find Adobe bridge there.
Step 3: You’ll find an Install button there. Click “Install,” and the installation process will start immediately.
When it’s done, you can open Bridge any time by clicking the Open button.
If you don’t have creative cloud or you want to download adobe bridge separately, click on this Adobe Bridge download Link
How to Use Adobe Bridge to Manage and Organize Your Images
Adobe Bridge Predefined Workspaces
Adobe Bridge has predefined workspaces to work with. Each workspace has a specific setup. You can always make new workspaces according to your need and also delete the workspace. To find these workspaces, you’ll have to go to ‘Window’ from the top menu and then go to ‘Workspaces’.
You’ll find several different workspace options there. Here are some of the default workspaces that are preloaded in bridge –
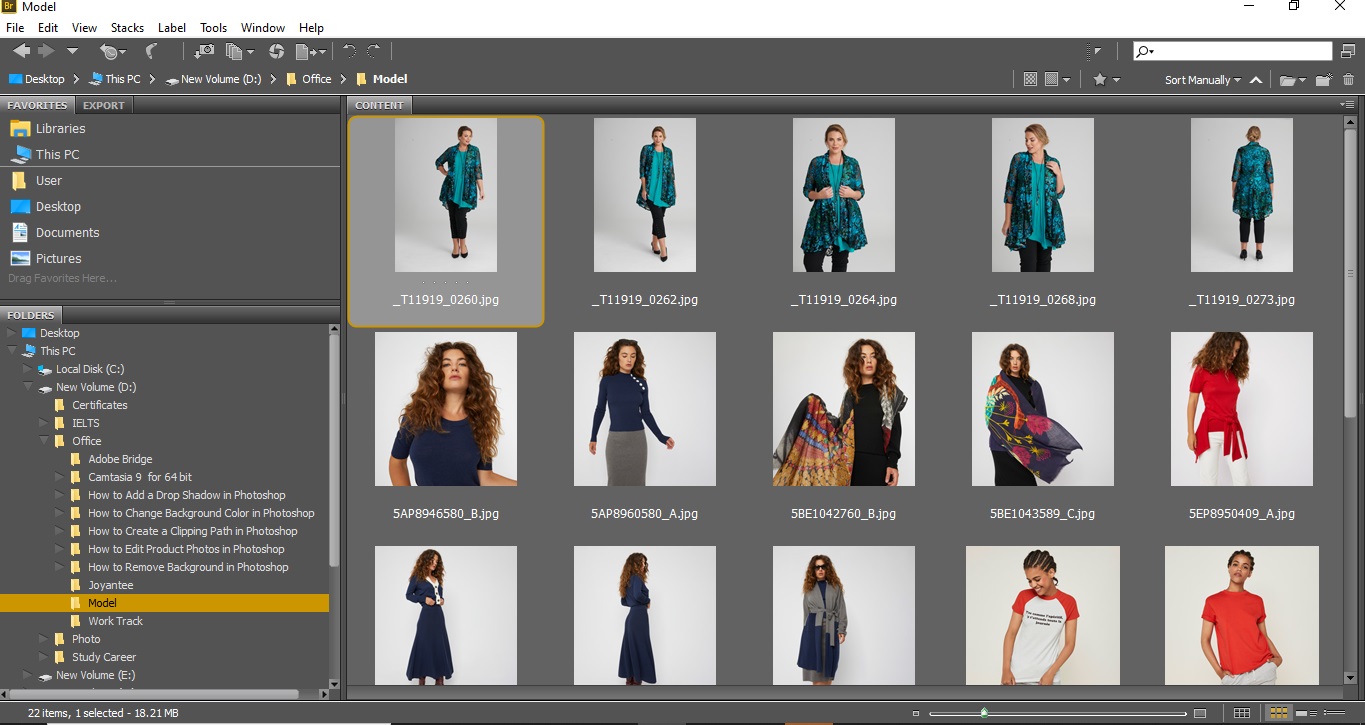
Essentials
Essentials is the default workspace of Bridge. It has adjustable thumbnails in the center column. On the right side, there is preview, metadata and keyword options. On the left, there are folder selections, filters, collections and more.
Filmstrip
If you need to preview images with a larger view than essentials, you can use filmstrip. It doesn’t have metadata and keywords panels. You can adjust the size of the thumbnails by moving the slider below the thumbnails.

Preview
This workspace is similar to the filmstrip. It has almost the same interface as the filmstrip. The only difference is that thumbnails are shown vertically here.
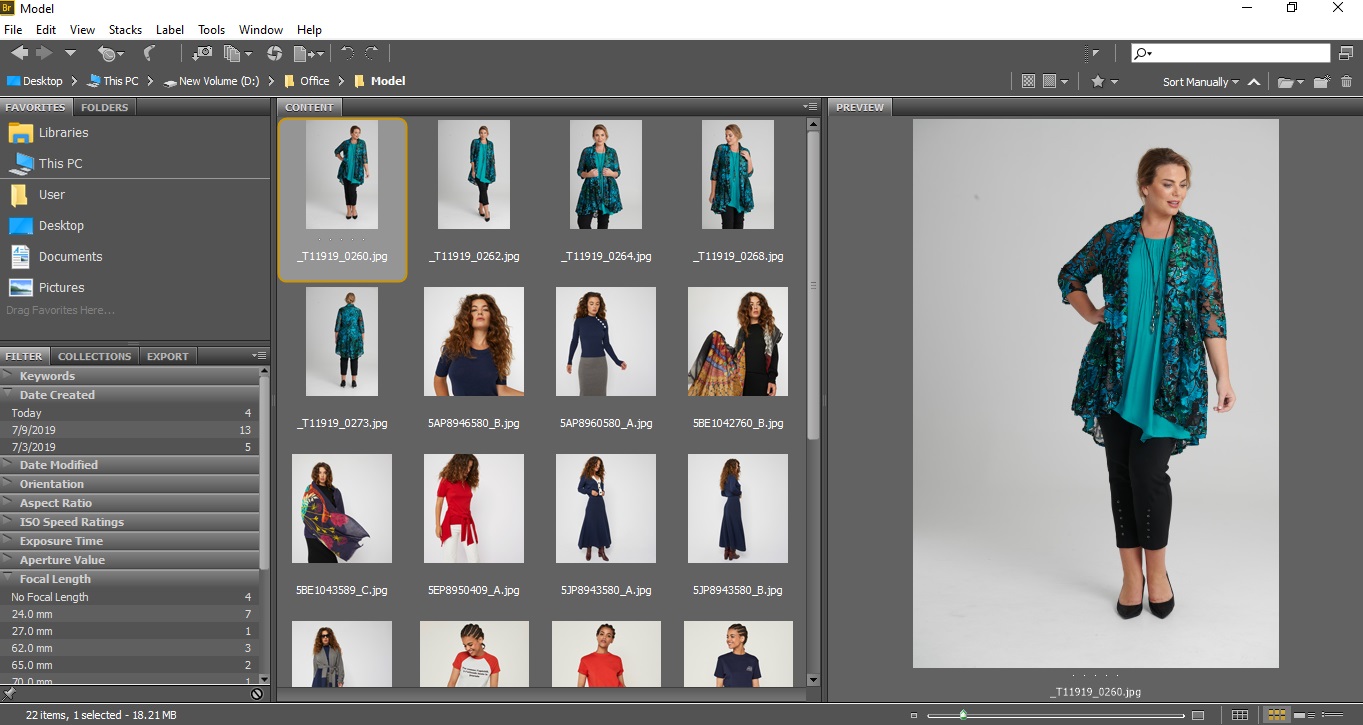
Light Table
This workspace will show your images by itself. It removes all the panels from the view and shows your photos only. There is a size adjustment slider to change the thumbnails.
Metadata & Keywords
You can get to see the metadata and keywords in other workspaces too. Still, there are two workspaces called ‘Metadata’ and ‘Keywords’. They show specific information about photos. You can use these to check all the specific information in one place.


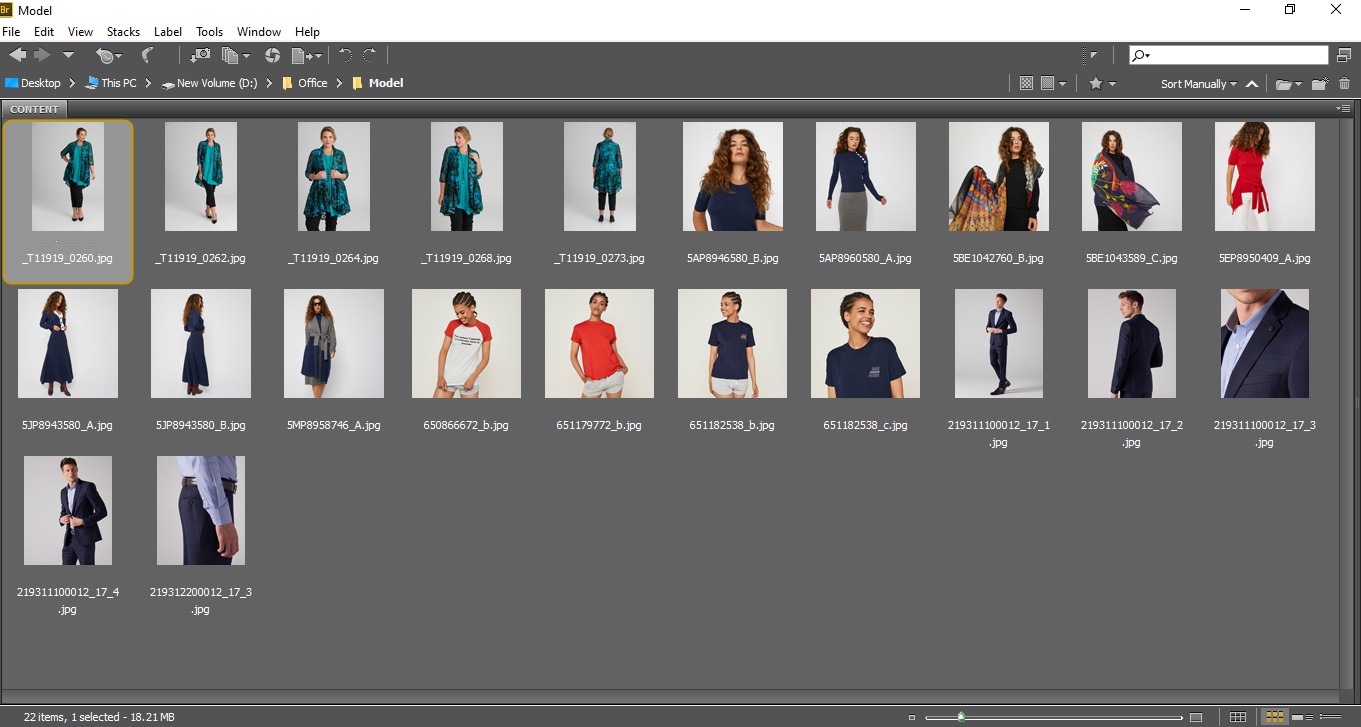
Folders
This workspace helps to find the folders and get quick access to the images. So, if you need to find images according to the folders you made, you can work here.
There is an option to reset the workspaces too. Go to Window > Workspaces, and you’ll find the reset workspace option on top.
How Adobe Bridge Creative Link Work with Other Adobe Software
Before, there wasn’t that connection among adobe software like photoshop, InDesign, illustrator that can give access to all from one place. Adobe bridge actually works as the bridge among all these essential adobe applications.
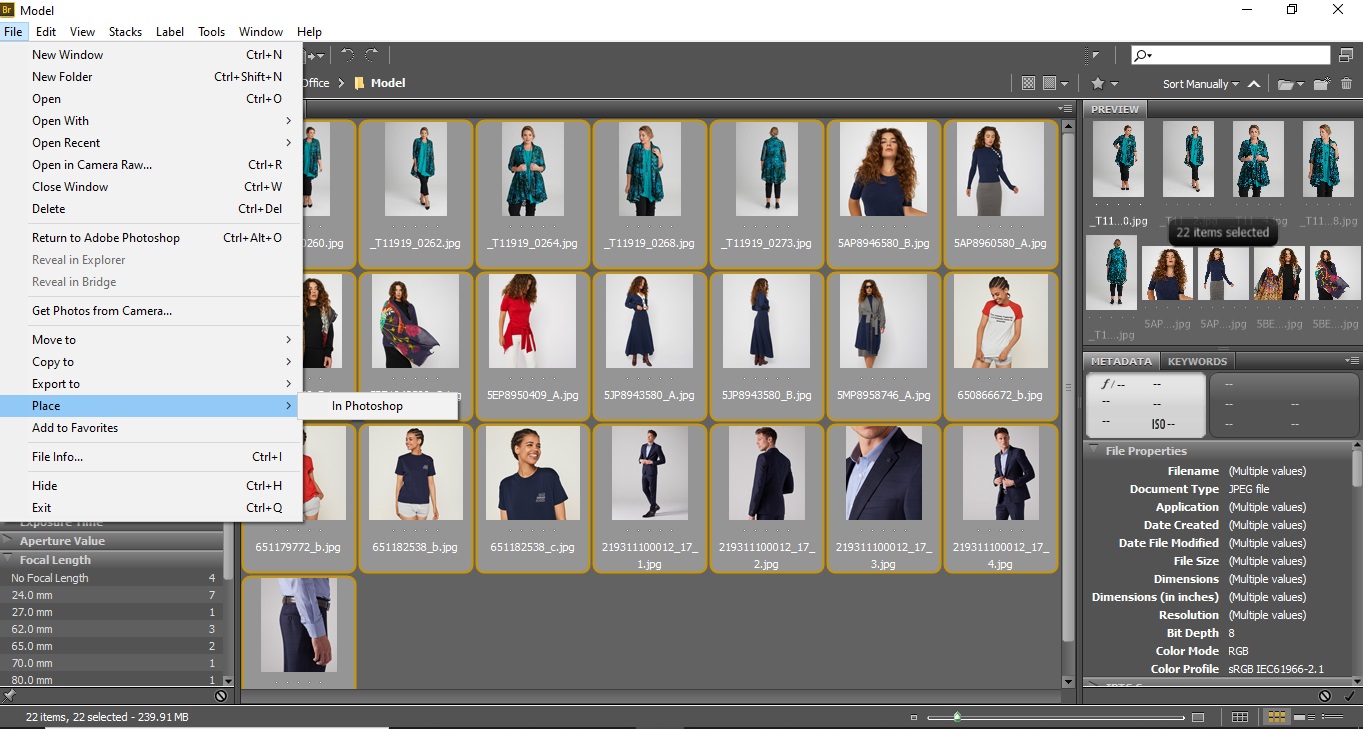
If you’re working on a project, you can get an optimized workflow from the bridge. Go to File, scroll down and click on Places. You’ll find the options to go to other applications. This way, you can keep track of your project.
This option works by keeping all your projects in one place and then keeping track of them based on your work in other applications.
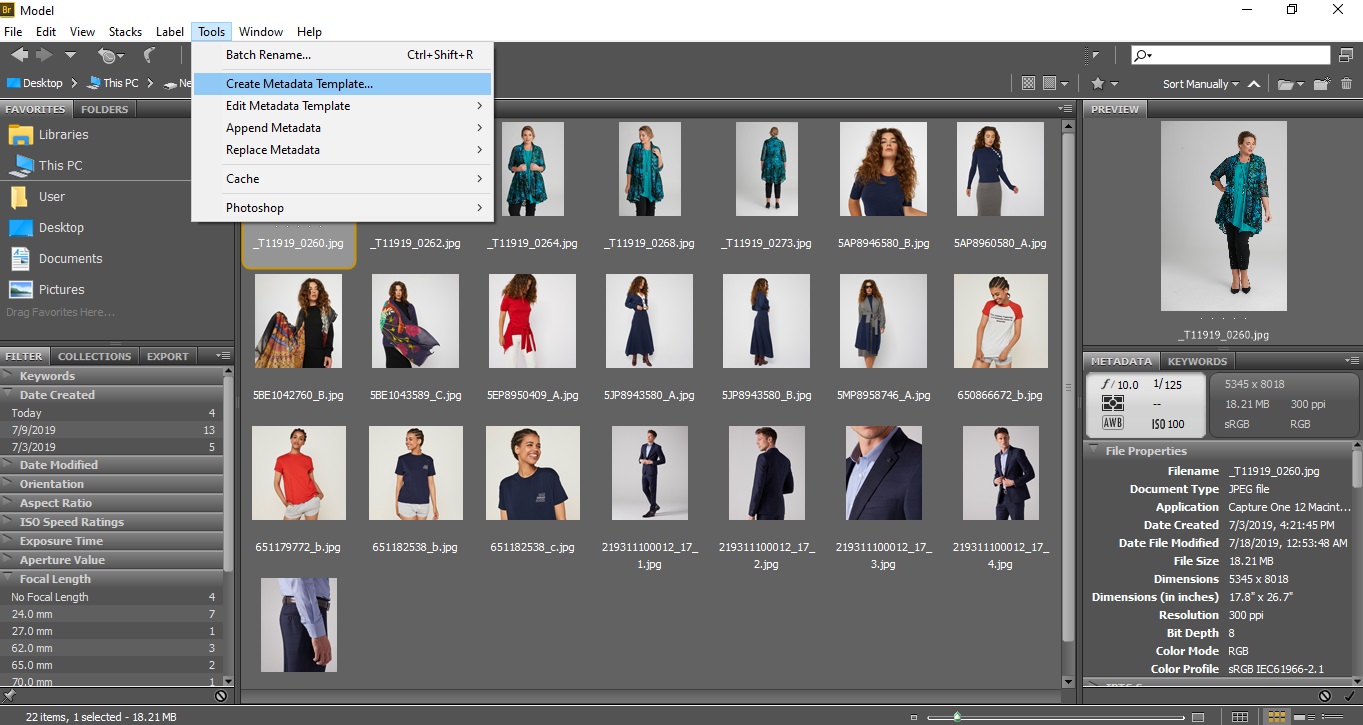
How to Manage Metadata Using Adobe Bridge
Adding metadata in Adobe Bridge is one of the most vital tasks you will do in this application. Metadata is the basic information of images. This actually gives all the history and specific details about photos. You can edit, create metadata in the bridge. Under the ‘Tools’ on the top menu, these options are available.
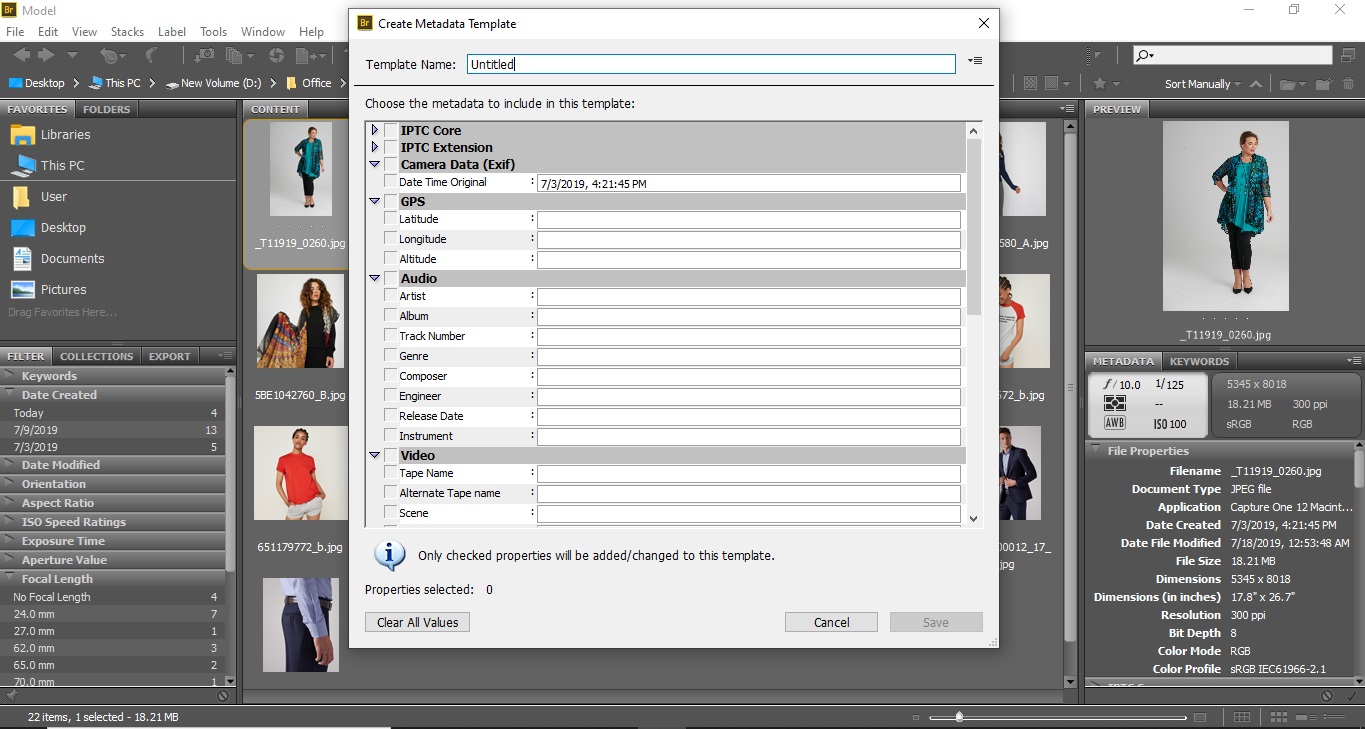
You can create specific metadata templates for your project. You can edit, remove metadata too. This includes all the information you want to include in your image. The more information you input, the more specific your image will be and the easier it will be to find a photo.
Frequently Asked Questions
Q: Can I install adobe bridge without a creative cloud?
A: Yes, you can. You can download adobe bridge even if you don’t have a creative cloud. Adobe Bridge is available here to download.
Q: How to open images into Photoshop from Bridge?
A: It’s so simple. Just open the folder in the bridge. Double click on any image that you want to open in photoshop. Photoshop will open immediately with the image.
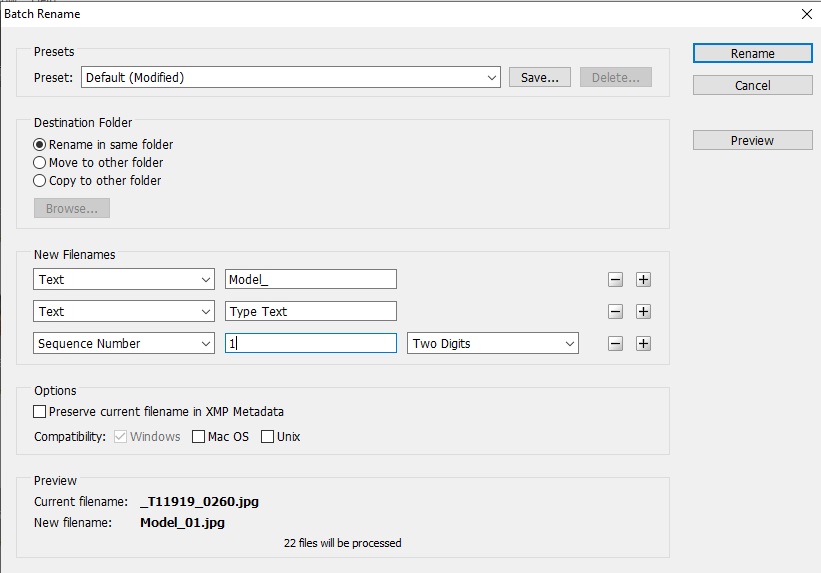
Q: How to batch rename in Adobe Bridge?
A: Open adobe bridge. Select all the photos you want to rename. Go to ‘Tools’ from the top menu. Now click on ‘Batch Rename’. A box will pop up with so many options like selecting the folder, filename, etc. You can add sequence numbers from here too.

Q: What’s the difference between Adobe Bridge and Adobe Lightroom
A: Adobe Lightroom is basically a photo editing software. On the other hand, adobe bridge is more like a file manager. You can search as well as edit photos in lightroom. In Bridge, you won’t get the editing option, but you’ll get to see the contents from a folder and the data of the image.
Conclusion
Adobe Bridge is really a very important software to maintain photos. Without this software, you won’t get access to your photos that easily with all that information. The way Bridge uses metadata of an image is really impressive.
It’s really easy to download and install bridge on your pc. Also, using this software is not a tough job either. Rather, you will get many more benefits from using it. It’ll decrease your workload to half.
Almost all serious photographers use adobe bridge to keep their works in order. This is convenient, easy to use, time-saving, and last but not the least, really helpful. If your pc is loaded with images, you should definitely try this adobe bridge.