Louis Vuitton, Gucci, Armani. Some of the trendsetter clothing brands of the world. Fashion, trends, style everything is clearly manifested by their clothes.
Take a look at the clothes of eCommerce sites. Don’t those look like they all are ready to wear on any occasion?
From clothing brands to eCommerce stores, all clothing businesses have their distinctive attributes. And they made these perceptible to clients with their photographs.
A major part to convince clients depends on clothing photography concerning many reasons, for example-
- People believe quality businesses have quality photos.
- Good quality photos enhance the business brand value.
- It increases trustworthiness among clients.
- It helps increase the conversion rate.
- You get CTA increased.
To make your brand name recognizable at e-commerce stores, make your apparel photography appealing.
Take photos the way it describes a story and appeal to your clients the way it is supposed to.
Clothing photos are like a journey. Let us walk you through.
What you’ll learn in this article
Clothing Photography Tips – The Ways to Clothing Photography
In the era of internet marketing, people are more digitized on whatever they do and it is now limited to nothing. If we talk about online shopping, it has made life easier by saving both time and labor. This is one side of the coin from the clients’ perspective.If this is the apparel industry, the competition is more vibrant.
Clothes photography has to be lively and animated. People are attracted to clothes that look attractive in a body that resembles their own. You have to have calculated thoughts on your buyer persona.
For example, a skirt looks good in a mannequin that has a relatively slim body. Chances are the customers with slender figures are going to get attracted and would possibly want to try that on.
Often clothing may be shown without a body, but the products are in vogue. That still counts.
How you display your product says a lot about what type of customers you are going to attract. Therefore photograph your clothing the way your customers will feel comfortable to wear considering fashion, trends, and so on.
Under these 3 ways, take photos of your product, and attire.
1. Using a Ghost Mannequin or Invisible Mannequin
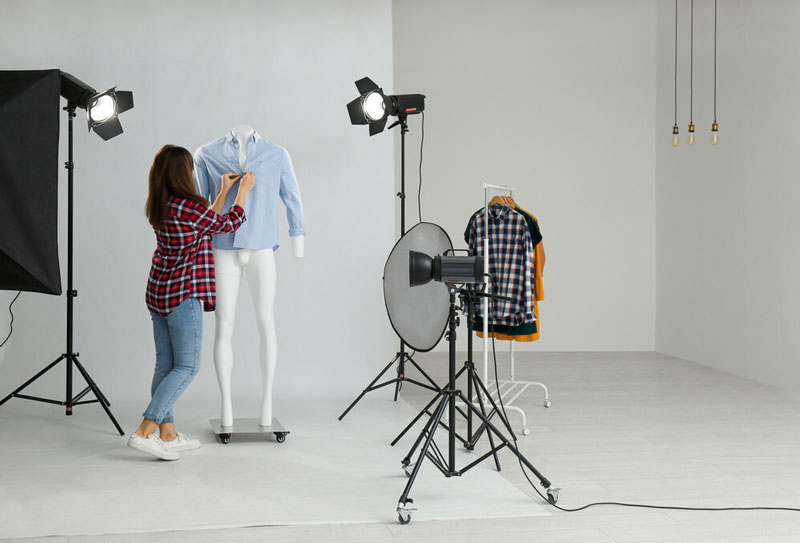
Ghost mannequin photography is also called invisible mannequin, 3d mannequin, or hollow man photography. It is a often used photography style for clothing photography.
Boutique shops are somewhat dependent on ghost mannequins. Using those mannequins are one of the good approaches for showcasing your product online. Unless it is a SaaS product, it is impossible for online shoppers to touch, check or verify the clothes that are being exhibited on any site.
That being said, the only method for them is to check your clothes images. With using a ghost mannequin you let them visualize how it will look when they wear it.
2. Hiring a Model
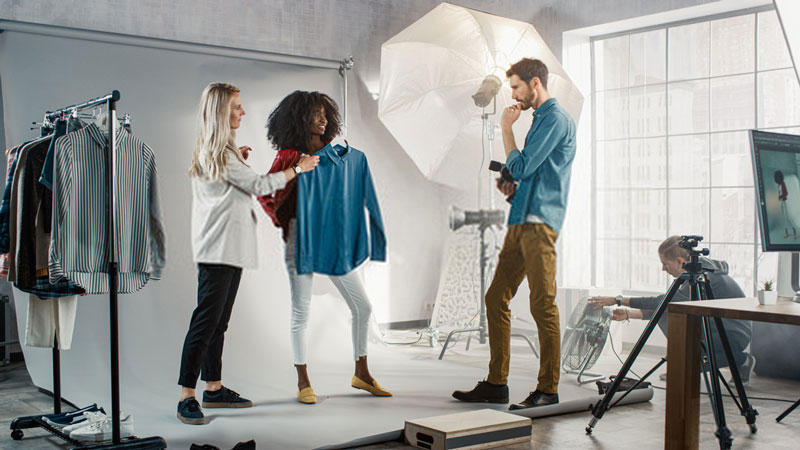
Hiring a model is a great way of apparel photography marketing. Though there is a concerned part named ‘budget’ considering their remuneration, you can always hire aspiring models to cut down costs.
By using a model, you characterize your product. It is like showing your targeted demographic that this particular outfit is designed only for them to look lucrative.
Another thing about models is their posture. For adding more charm to the dress/attire they are going to shoot, they can deliver the pose you want them to.
3. Flat lay Clothing Photography
Flat lay photography, also known as ‘Table-top photography’, is a cool style for clothing and a cost-saving way for apparel photography.
One of the convenient features of apparel photography in flat lay is minimalist staging. Neither do you have to acquire a big stage nor a lot of accessories.
Under this process, you lay clothes intended to display on the top of a table or any flat surface, create bit volumes and make a near resemblance to a human body, use props (if necessary) whatever you find relevant around you and that’s it. You are all set.
Get the guide: Top trendy product photo background ideas
How to Photograph Clothing Using Mannequin or Model – Step By Step
As you have known the ways for taking clothing photos, let us walk you through digging deeper.
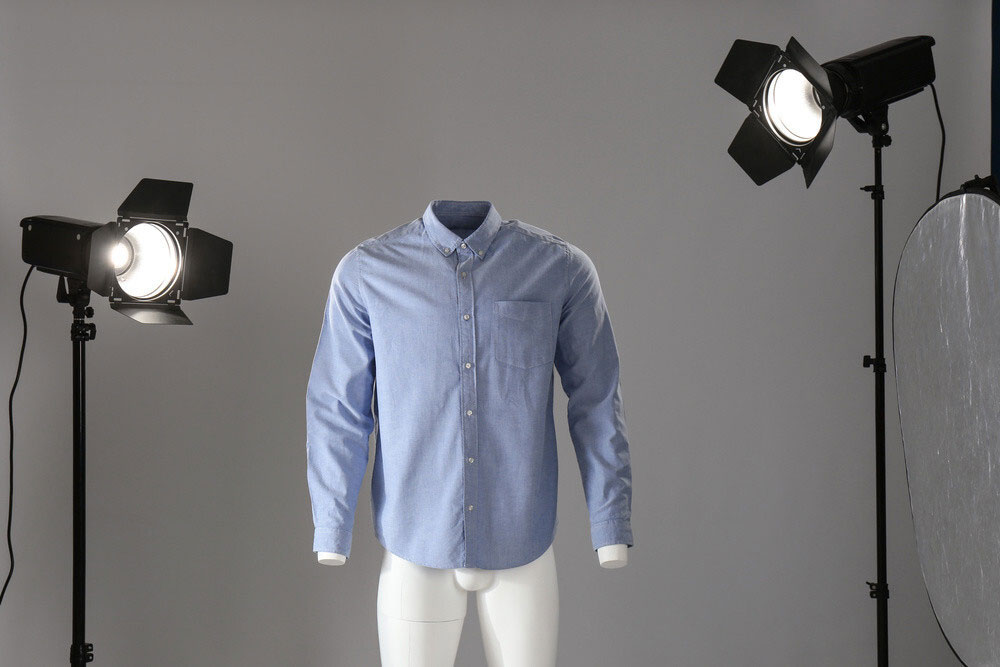
Step 1: Choose Location
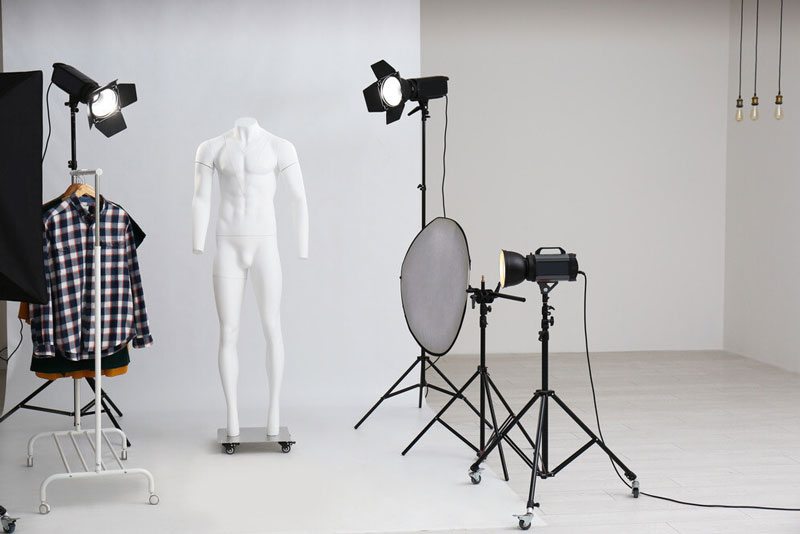
Location plays an important role. Pick a spot that has consistent lighting.
If you are going to shoot in natural light, choose a place that is moderately illuminated. Try avoiding spots too bright or have not ample light at all.
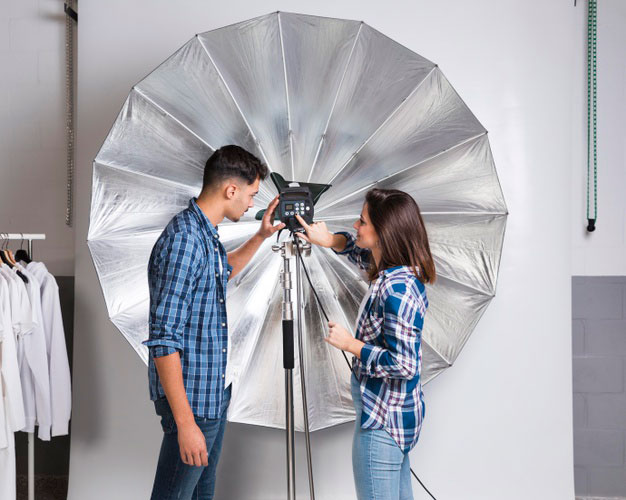
If you use artificial or external light, make sure it doesn’t reflect unnecessary rays. Use a diffuser to spread the reflection evenly and a bounce card to remove the shadow. Make sure your overall set-up brightens up the focal point where the mannequin or the model will stand for shooting.
Step 2: Select a Background
A background carries grave importance for online product listing when you are doing business on eCommerce sites. Most of the sites for online shopping have a preset (which changes at times) of product image requirements, not to mention background. They specifically mention colors to use for image background. For example-
- Amazon – white background
- eBay – between white to light grey
- Alibaba – mono-color background
- Walmart – seamless white
So, using a plain color background or backdrop is recommended while shooting. However, it is better to check the image requirement of the online site you will upload images beforehand.
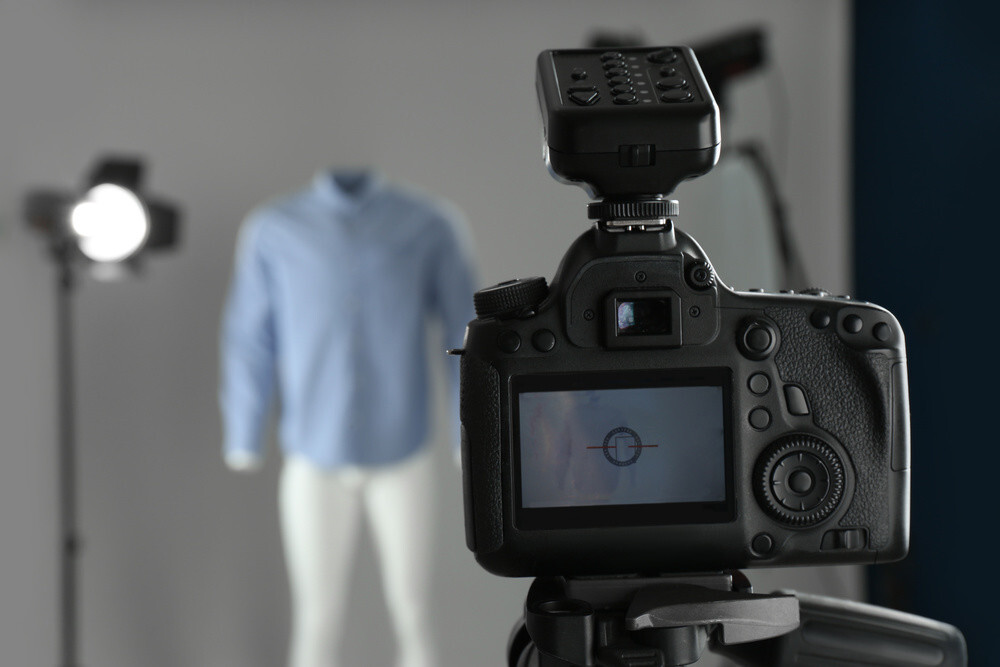
Step 3: Camera Setup
Clothing photograph depends largely on camera setup; if your camera settings or placing do not support you well, your effort won’t pay either. How should your camera be setup? Take a look at here-
Camera Settings:
What should be your camera settings for clothing photography with a mannequin or model? Check this out-
ISO – ISO is connected to lightning; a higher ISO will illuminate the product more brightly as well as increase noise. Depending on your light setup, you have to adjust it. However, better start shooting with a low ISO like 100 to 400 if you have abundant lighting. Increase your ISO sensitivity if you are shooting in low light.
Aperture – The larger the aperture is, the more apparent the product in focus would be. It is suggested to start shooting a photo with an f-stop around f/11. Adjust aperture depending on whether you want your backdrop to be included in the picture or not.
Shutter speed – When you are taking clothing photos on a mannequin, keep low shutter speed. Because, you are taking images of a still subject now. So there won’t be any movement.
If you are capturing dresses on models who have to move constantly to deliver different poses, make sure you get all those moves photographed. For having sharp clothing images without missing any details, set shutter speed in-between 1/200 to 1/500 and then adjust according to your needs.
Camera Placing:
Make sure the clothes you are going to shoot remains in front of the camera. Consider the height of the model or the mannequin while placing your camera. If it is too high or too low, you can’t expect a good outcome from there. So, consider a middle position, as the waist height of the model.
For an eCommerce photo shoot, a lot of images are required and all the deliveries have to be from the same point or keeping the same distance. To get a steady camera shot, use a tripod.
The model or the mannequin should stand at an exact point. Light and camera need to be placed keeping a moderate distance focusing the attire. The model may pose differently but his/her point of standing won’t be changing. Therefore, you get all the shots of different movements from the same distance and same place.
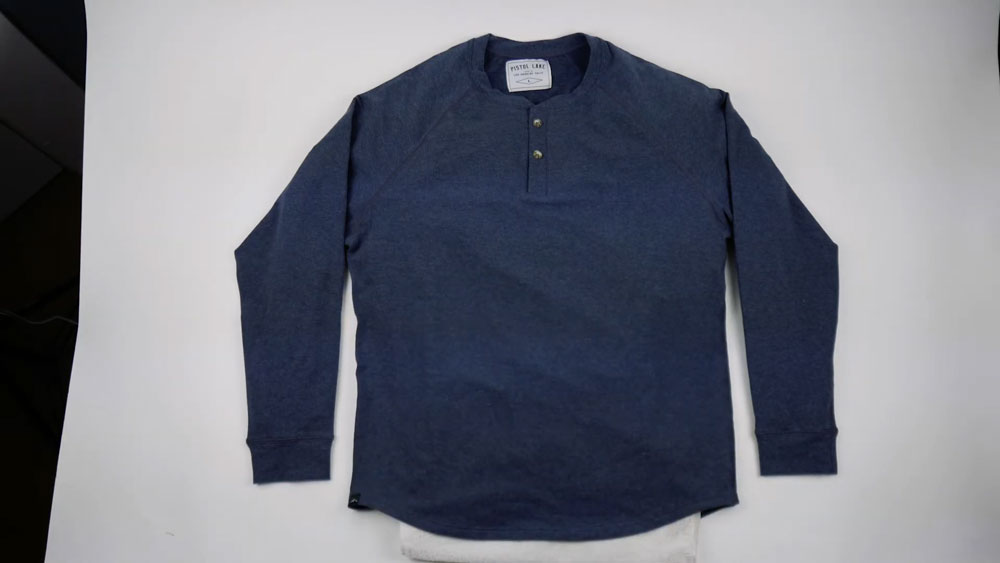
Step 4: Get Your Mannequin or Model Dressed.
Now the dressing part. Choose clean clothes. Remove any creases using an iron or a cloth steamer.
Get a model who you think the best fit for your clothing. Same goes for mannequins. For example, when you are shooting sleeveless clothing, you may use mannequins without hands. But that is definitely a freakish choice for full or half sleeve clothing.
If the dress seems loose-fitting for the model or the mannequin, use clamps, clips, pegs, or tape.
To be more precise-
- Model – When you are shooting from the front, to make the dress appear fitting, use pegs back of the dress. When you are shooting backside, use safety pins inside of the sewing part of the dress/ attire.
- Mannequin – If the mannequin does not properly fit the dress, stuff paper or tissue to create more like natural shape. Use clip tape to make it fitting around the torso.
Step 5: Start Shooting
So, the fun part begins. Clothes need to be shown hanging. Neither wrapped or packed nor kept in the closet shots. For clothing photos, a stand-up model is mostly preferable.
You have to remember, your clients are only believing images of the clothes you are selling. With your images, you have to show and assure that your products are of good quality. Make the clothes as visible as possible.
Take as many shots as required so that you do not miss anything about the clothes. Some of the online sites have their own photo dimension while some don’t. In those cases, you are permitted to take images of your own style keeping it professional.
When you are taking a full-length shot of your clothing, place your mannequin or model far from the background. Hide any tags or distracting parts that stick out of the dress.
For close shots, adjust your tripod and optical zoom option of your camera. Show details of the attire. You can take price tag photos in closer shots.
Remember these following facts,
- Capture an image considering your clothes’ height.
- Make sure your images are in HD quality and it won’t distort while zooming. A report shows that zoom enabled images have influenced people to purchase products.
Step 6: Post-production in photography
Now you have finished taking your photos; it’s time for processing. Editing commercial images are important to make those look better, realistic, and eye-catchy.
Post-production is a series of works. You may hardly manage time for DIY. Therefore, teaming up with a clipping path services provider is the best solution for you.
You will get polished clothing images with the removal of creases and distractions. Also, professional-level editing, retouching, color correction, invisible mannequin effect, etc., can make a huge difference to your images.
How to Take Picture of Clothes Without Mannequin – Step by Step
Under certain circumstances like considering expenditure, you may have to take pictures of clothes without a mannequin or model. Then what?
There are some other options left for such situations. Such as-
a. Use a Hanger
Using a hanger for clothes to photograph. It is one of the easiest ways to shoot garments. You just use a hanger, hang the cloth and set it the way you want it to look.
Use the same light and camera option as told earlier. However, make sure the clothing is kept even on the hanger.
Another thing you can do is to if you can lean your backdrop a little, or if it is possible for you to make the product lean a bit, do it. That way you will get to shape your clothes more nicely.
b. Flat Lay Photography
Flat lay or table-top clothing photography allows you to take clothing photos without any hassle. Follow the step by step process to create an animated vibe in the clothes you want to shoot under the flat lay process.
Step 1: Select Your Surface
Select your background for the eCommerce business. It is recommended to follow the instructions of eCommerce sites that have specifications. For those who don’t have, in those cases, you can use your own background.
As for the background, you can use paper, poster board, fabric anything as a backdrop you find that goes along with the dress you will shoot. However, it doesn’t matter which background you choose, you can always change the background by taking post-production services.
Pick a flat and even surface that is big enough for your cloth to fit in, it can be a table as well. By no means the garment should cross the surface; it should be inside the frame. Even though the clothes will cover the maximum portion of the images, the rest will be surrounded by the background.
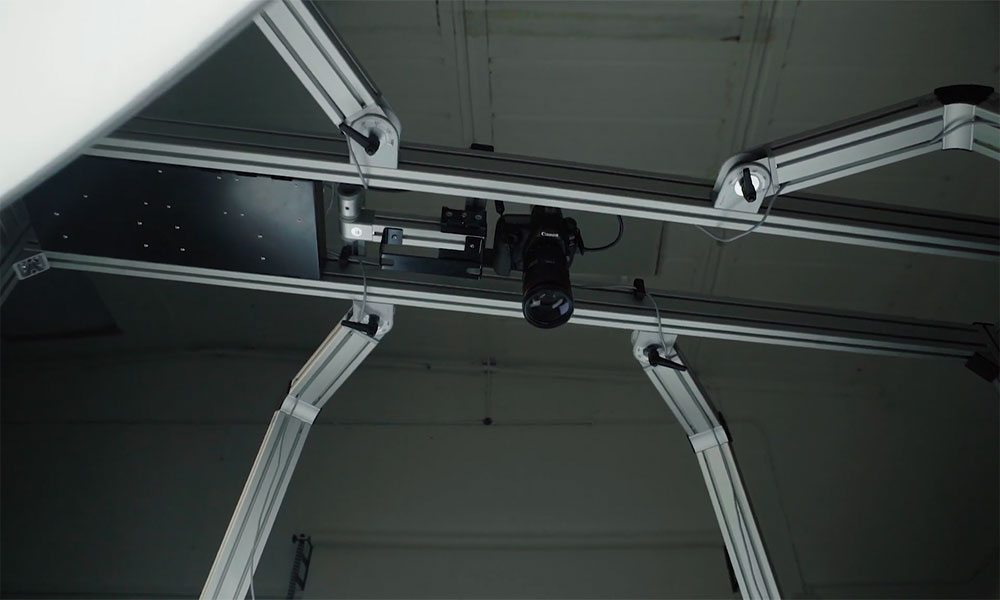
Step 2: Light and Camera Setup
For camera settings, follow ‘Step 3’ of How to Photograph Clothing Using Mannequin or Model – Step By Step.
Mount your camera direct overhead of the surface concentrating on a certain point where your clothing will be placed. Keep your camera in a steady position by using a tripod or a c-stand.
Along with the camera, you can set your light overhead as well. If you are using 1 light, by using a diffuser in front of the light you can disseminate the rays around. If you are using 2 lights, place them on either side of the surface. If using more than 2, place them the way those won’t create any shadow or overlight the area.
To enhance illumination or to even out the lights, you better use board reflectors or bounce cards.
Step 3: Clothing Placement
Place your clothing on the top of the surface and table and make the shape obvious by using a hand. Spread it evenly. If there is any side or features you want to show, make it visible by using tape, stick, or clasps.
Use paper, tissue, and stuff these materials inside of clothes you will shoot. These will work as stuffing material and create a body-like effect on the attire and add volume to lift the product up instead of making it look flat.
If the clothes are for the upper body, fill those stuffing materials inside the hands and arms, around the chest, and the bally part. If the clothing is for the lower body, stuff those materials around the waist and the legs.
The sides or parts you don’t want to show in the photo, tuck those insides. This process will make the shape of the dress clearly visible.
You can use props if necessary. However, keep the props relevant to the clothing product. For example, a flower goes well with a frock instead of male jeans.
Step 4: Start Shooting.
Follow ‘Step 5‘ of How to Photograph Clothing Using Mannequin or Model – Step By Step.
Step 5: Clothing Photography Post-production
The editing process is a part of being creative. Get your photos edited the way those will be more stunning and beautiful to the viewers’ eye.
Clothing Photography Tips
- Use a tripod or C-stand. It will help you get a steady viewpoint from the same direction keeping an equal distance. Moreover, there is no chance of getting shaky effects on your images.
- If you use natural light to shoot, place the product near the window to get uniform light.
- Provide multiple images of different angles including front, back, close shots. Help your prospective clients notice subtle features and measure the overall of your garment.
- Take closer shots of buttons, hem tags, instructions, designs, fabric, etc. Make sure closer shots leave no room for doubt or raise a question.
- Test a 360-degree spin feature for the dress. Such an image will allow users to understand everything about the garment. However, check first if the eCommerce site you have chosen allows it or not.
- Pay attention to the details like buttons, collar, designs, etc. Ensure those are properly shown. Also, check if any creases are blocking the perfect view.
- Do not forget the power of visual description. So, get your photos edited.
Why Do You Need post-production after Clothing Photography?
Ecommerce businesses mostly rely on post-production services. The most reasonable explanation for that is edited photos bring results up to scratch. It is a great idea of playing safe and getting expectations fulfilled.
Clothing photography is no less important than other product photography. However, it is not so complicated as some other products in the market. Yet you have to make sure that your efforts to showcase your product are prioritized properly. So you need to edit your clothing images.

Appropriately edited photos play a vital role when it comes to bringing out exquisite features of any product. With your captured images, you have already featured the additional attributes of your clothes as well. When you get those edited, those will be more discernible. The clearer, the better- and it will be easy for your customers to spot what you are bringing to their table.
High quality edited images make important contributions for promoting corporate identity in search engines. Online shoppers prioritize visual content rather than contextual one.
Let’s talk about the ghost mannequin effect as an example. At present, among the B2B and B2C clothing businesses, this service has become relatively popular. This is a unique style of presenting a cloth as simulating as a human body. It seems like an invisible figure is wearing those clothes.
All features become clearly visible under this effect without any confusion. This effect is only possible to make through editing. If you want to compete with those clothing businesses in the eCommerce sites, you have to ensure your images never fall behind.
Your potential buyers are looking for your products because of having their own set of specific demands. And your clothing is going to fulfill that.
When you are displaying the best products through images, make sure that images are properly processed. Edited images shine on their own and your potential online buyers will easily understand what they are going to get in return for their payment. It will help you get more responses on your Call To Action (CTA) button.
Final Verdict
E-commerce is a vast sector and there is a lot of room to grow for those who want to succeed. Being a businessman in this sector, apart from noticing what your competitors are doing, you have to tactfully outshine them. Keep going with your strategy. Fingers crossed for your vim and vigor!