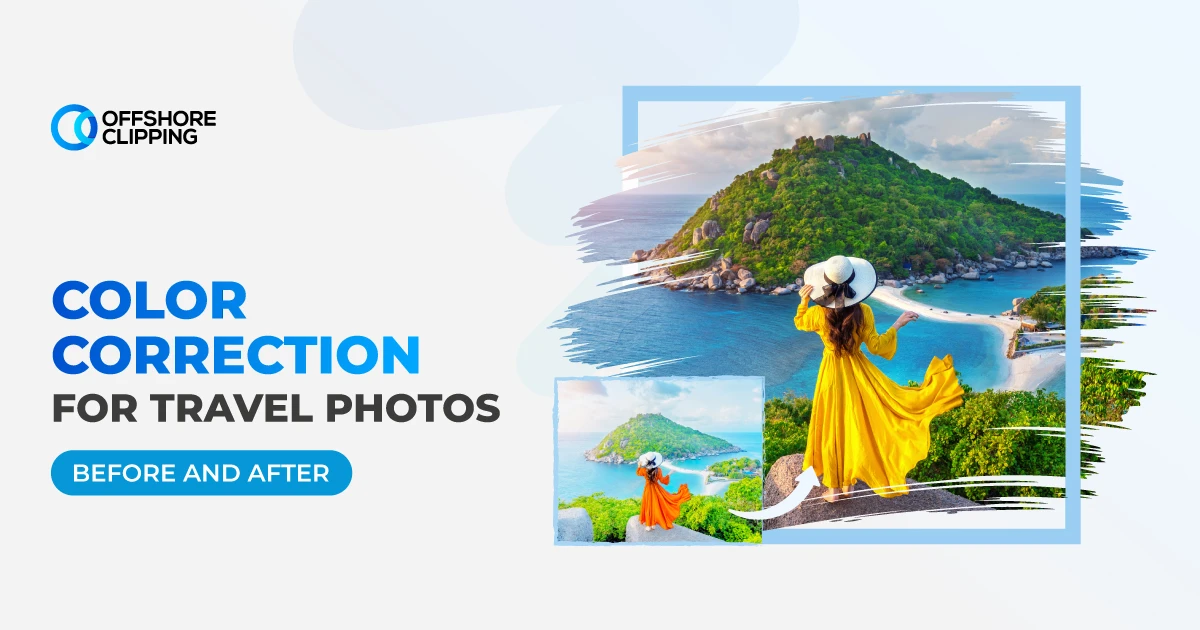
Have you ever captured a stunning sunset or a sparkling beach, then felt let down when you saw the photo later? The sand looked gray, the hotel sheets looked yellow, and the sea lost its glow.
That is a color problem, and it is fixable. Color correction for travel photos means adjusting white balance, brightness, and contrast so the image matches what you actually saw. In this guide, you will see before-and-after examples, learn a simple five-step method that works on any phone or computer, and find out when it is worth handing the job to professional color correction services.
How Do You Color Correct a Travel Photo?
To color correct a travel photo, set white balance on something that should be white or gray, reset the darkest and brightest points, add gentle contrast, and check skin tones. Work in that order and export in sRGB, so colors look right on every screen.
What Is Color Correction in Photography, and How Is It Different From Color Grading?
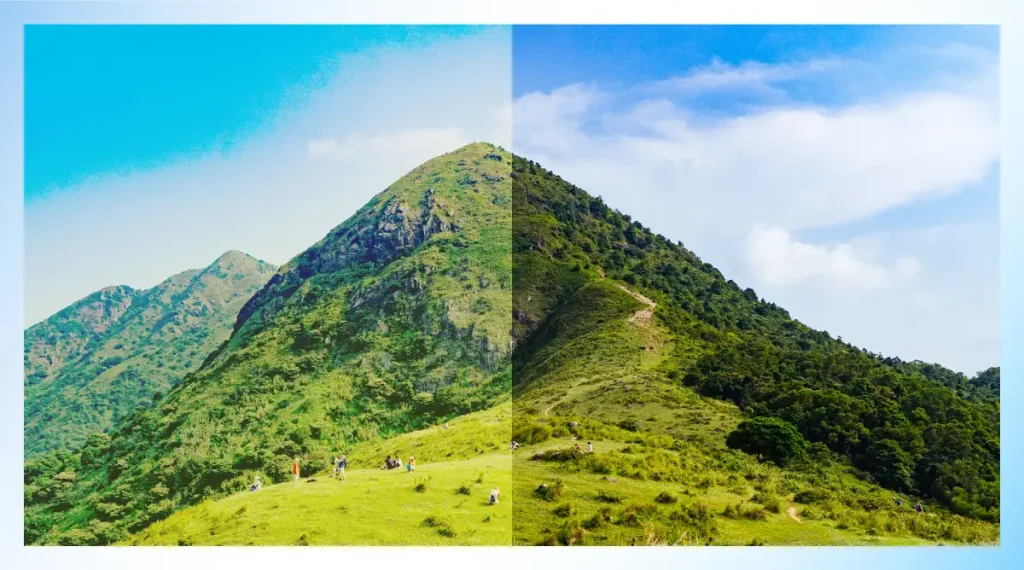
Color correction in photography is the process of making colors, brightness, and contrast accurate, so whites look white and skin looks natural. Color grading is the creative step that comes after, when you add a mood such as warm, moody, or cinematic.
Always correct first. If you grade a photo that still has a color cast, the cast becomes part of your style and is hard to remove later.
Why Do My Travel and Vacation Photos Look Dull or Flat?
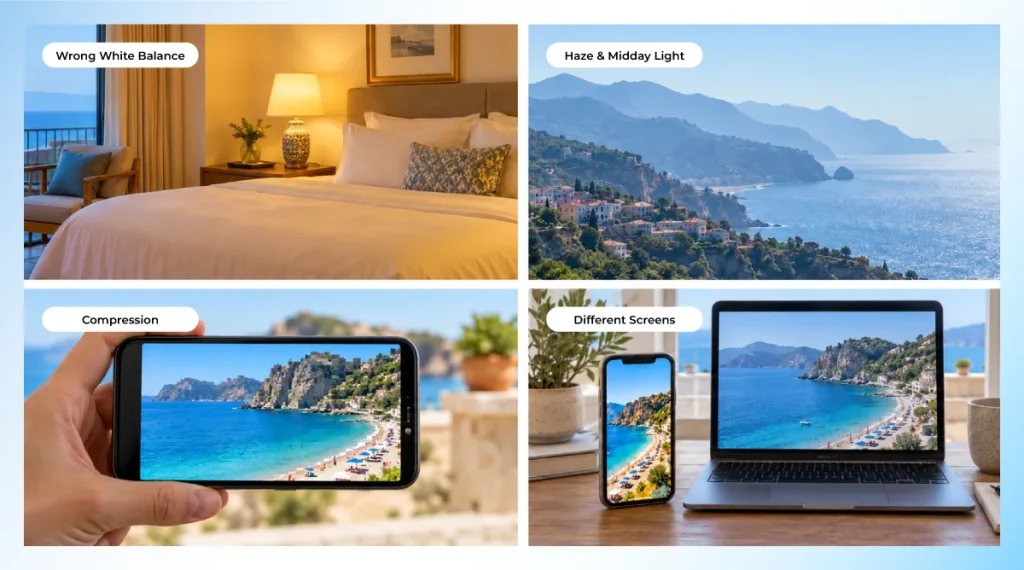
Travel photos look dull or flat for four common reasons, and all of them are fixable:
- Wrong white balance. Sunsets, shade, and hotel lamps confuse cameras and phones.
- Haze and harsh midday light. They lay a gray veil over the scene and flatten contrast.
- Compression. Messaging apps shrink files, so a photo sent over WhatsApp looks worse than the original.
- A different screen. Your phone and laptop show the same file differently, as explained below.
A quick check: open the histogram in your editing app. If it does not reach both the left and right edges, the photo has no true black or white, and it will look flat.
How to Tell What Is Wrong With Your Photo
Identify the problem before you edit. This table matches what you see to the likely cause and the fix.
| What you see | Likely cause | Fix |
|---|---|---|
| White sheets or walls look yellow or orange | Warm lamps, sunset light, Auto white balance | Make Temperature cooler |
| Skin and sand look gray or blue | Open shade, overcast sky, snow | Make Temperature warmer |
| A gray veil over the whole scene | Haze, humidity, low contrast | Reset black and white points, add a little Dehaze |
| Skin or shadows look slightly green | Fluorescent light, reflections from foliage | Move Tint toward magenta |
| Everything looks too orange | Desert or sunset light | Lower orange saturation slightly, keep the warmth |
Pro tip for Photoshop users: sample a neutral spot with the Color Sampler tool and read the Info panel. If R, G, and B are within about 5 points of each other, white balance is right.
Before and After: Three Common Travel Photo Fixes
These are the three problems I see most in real travel photos, how each is fixed, and what changes. The numbers are typical readings, so yours will differ with your camera and light.
How to Fix a Yellow Tint in Photos: Hotel Room Example
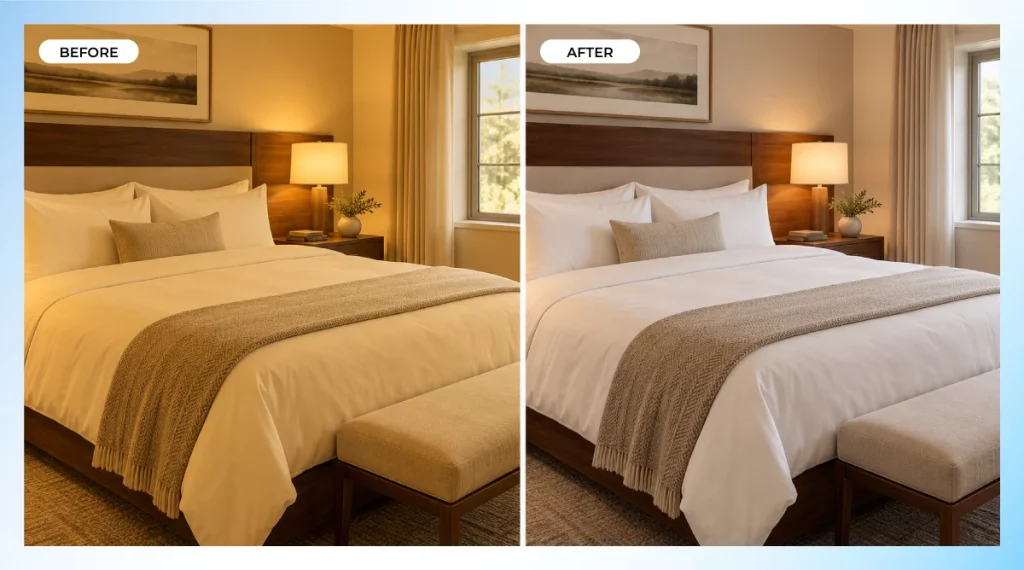
Before. Warm bedside lamps, usually around 2,700K to 3,200K, made white linen look yellow. The room felt cozy, but the sheets looked stained.
The fix. Click the white balance eyedropper on the linen, then make Temperature a little cooler. A window may turn blue after this global fix, so correct it separately. Keep a touch of warmth, because a perfectly neutral hotel room can feel cold.
After. Clean sheets, rich wood tones, and a room that still feels inviting.
Pro check: the linen read R 238, G 214, B 168 before and R 236, G 233, B 228 after.
How to Fix a Blue Tint in Photos: Beach Portrait Example
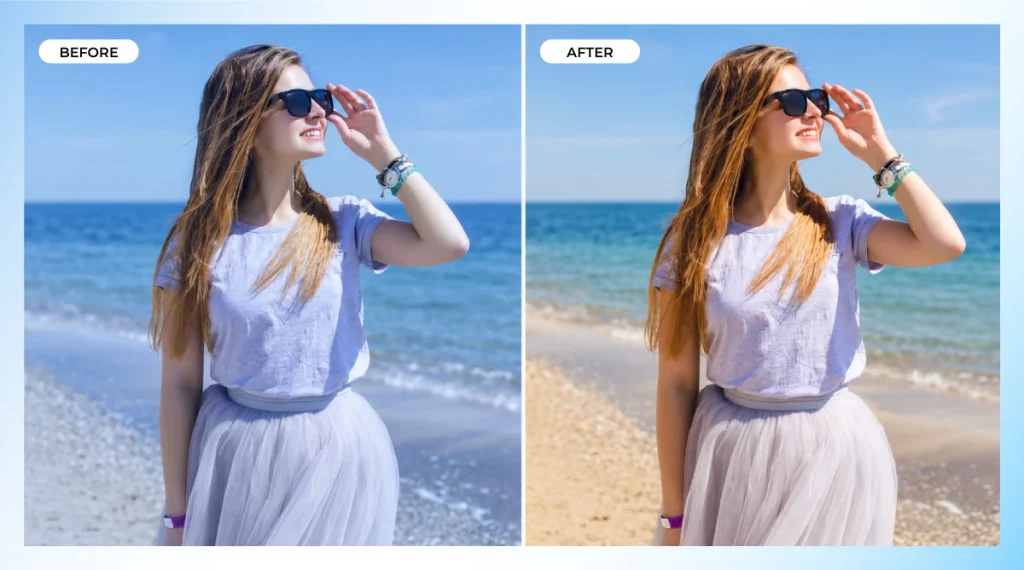
Before. A portrait taken in open shade under a clear sky, which can run 7,000K or higher. Skin looked gray and cold, and the sand looked bluish.
The fix. Make the temperature warmer until the skin looks natural. The sky may drift toward gray, so mask the sky and cool only that area. Do not warm a true blue hour or sunset shot until it looks neutral, because some blue is the mood.
After. Warm, natural skin, soft sand, and clean turquoise water.
Pro check: skin read R 142, G 124, B 131 before (blue above green) and R 178, G 136, B 112 after (red highest).
How to Fix Washed Out Photos: Hazy Coastline Example
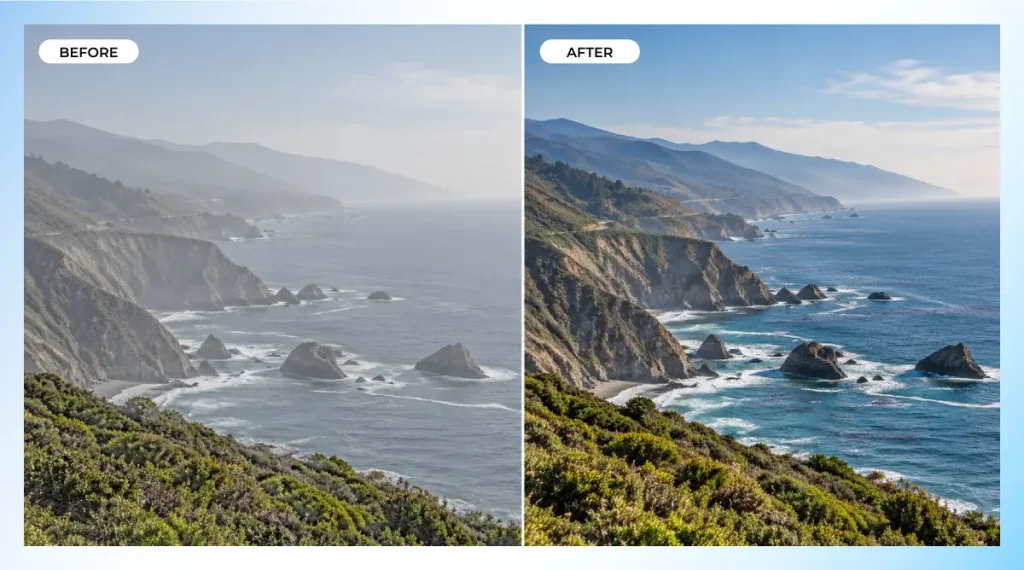
Before. Haze turned the dark areas gray, and the distant headland blended into the sky.
The fix. Reset the black and white points so the histogram reaches both edges, add a small amount of Dehaze, then a gentle contrast curve. Use Vibrance instead of Saturation so colors lift without looking fake.
After. The ridgeline stands apart from the sky, and the sea gains depth.
Pro check: the histogram ran from about 46 to 212 before and 0 to 255 after, with under 0.5 percent clipped.
How to Color Correct Travel Photos and Make Them Look Better: 5 Simple Steps
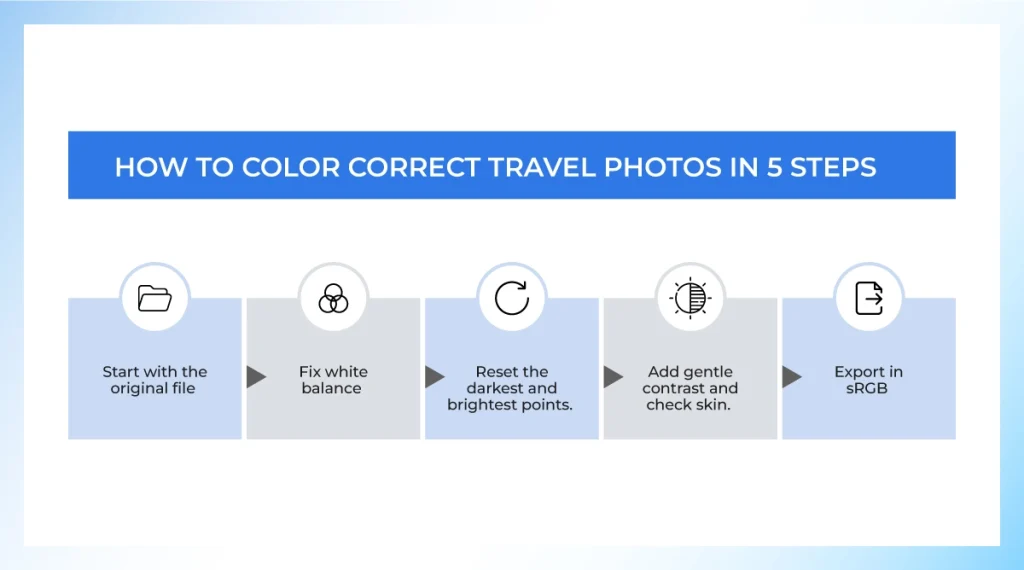
Follow these steps in order in any editor, such as Lightroom, Snapseed, the iPhone Photos app, or Photoshop.
- Start with the original file. Edit the original, not a WhatsApp copy or a screenshot. Shoot RAW if your camera or phone offers it.
- Fix white balance. Use the eyedropper or Temperature slider on something that should be white or gray, like linen, concrete, or a cloud.
- Reset the darkest and brightest points. Adjust Blacks and Whites, or use Levels, until the image has true black and white without losing detail.
- Add gentle contrast and check skin. Small moves look better. Skin should look healthy, not orange or gray.
- Export in sRGB. It keeps colors consistent across screens.
In Photoshop: use Camera Raw Filter for steps 2 and 3, check neutral areas in the Info panel, and set a Curves layer to Luminosity blend mode before adding contrast, so saturation does not shift.
Two mistakes to avoid: fixing a tint with Saturation, which only makes the cast louder, and neutralizing golden hour, which removes the warmth that makes it beautiful.
How to Make Beach Photos Look Vibrant
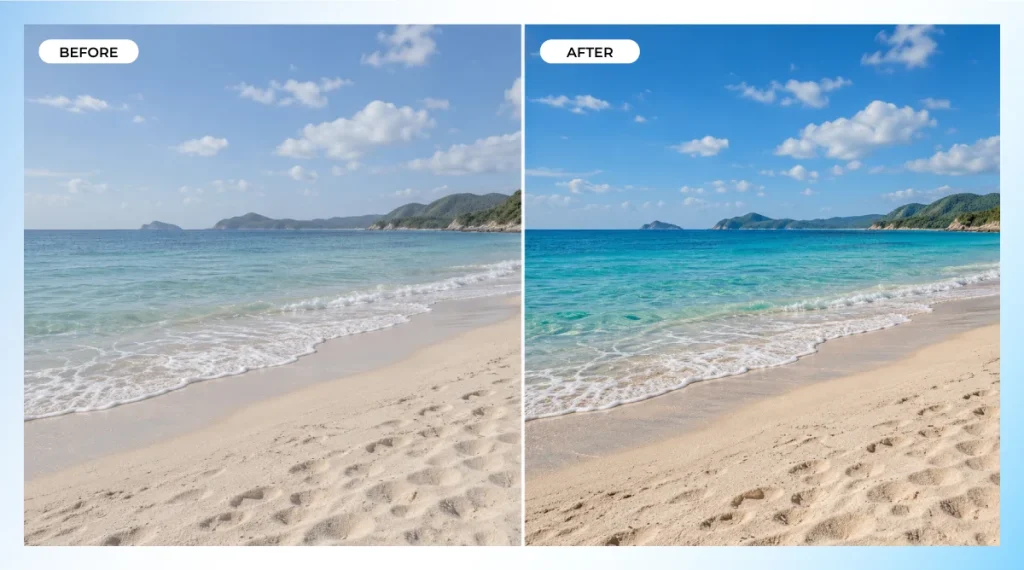
To make beach photos look vibrant, protect the highlights, raise Vibrance instead of Saturation, and nudge the water slightly toward cyan. Lower Highlights until the sand shows texture. Adjust the water and the sky separately, because they respond to different color sliders (Aqua and Blue in Lightroom or Photoshop). Stop when the sand still looks like sand.
Why Do My Photos Look Different on Phone and Laptop?
Photos look different on phone and laptop because the screens differ in brightness, color range, and calibration. Phones are usually bright with a wide color range, while many laptops are dimmer and uncalibrated.
- Edit with your screen at medium brightness, in a dim room.
- Export in sRGB, the safest color space for sharing.
- Check the final image on at least two devices before you publish.
Destination Color Guide: What Goes Wrong Where
Every destination has its own color problem, because light, water, and surfaces behave differently.
| Scene | Common color problem | What to do |
|---|---|---|
| Tropical lagoon (Maldives, Bora Bora) | Turquoise water turns gray-green, white sand clips | Lower Highlights, add a little Aqua saturation, keep sand warm |
| Whitewashed towns (Santorini, Mykonos) | White walls turn blue in shade and yellow at sunset | Set white balance on a wall, keep a small warm tone at golden hour |
| Desert safari (Dubai, Wadi Rum) | Everything goes orange, skin turns too red | Reduce orange saturation slightly; do not neutralize the dunes |
| African safari | Dust haze lowers contrast, foliage oversaturates | Small Dehaze, lower green saturation, protect warm animal tones |
| Night sky and Northern Lights | Auto white balance misreads the sky, aurora green clips | Set white balance manually near 3,500K to 4,500K when shooting |
| Snow and ski resorts | Snow turns blue in shade, gray when underexposed | Set white balance on the snow, lift exposure without clipping |
| Yacht and cruise decks | Deep blue water, glare on white decks | Lower Highlights, adjust Blue and Aqua separately |
The pattern is the same everywhere: correct what the camera got wrong, then protect what makes the place feel like itself.
Color Accuracy for Hotels, Villas, and Tour Operators
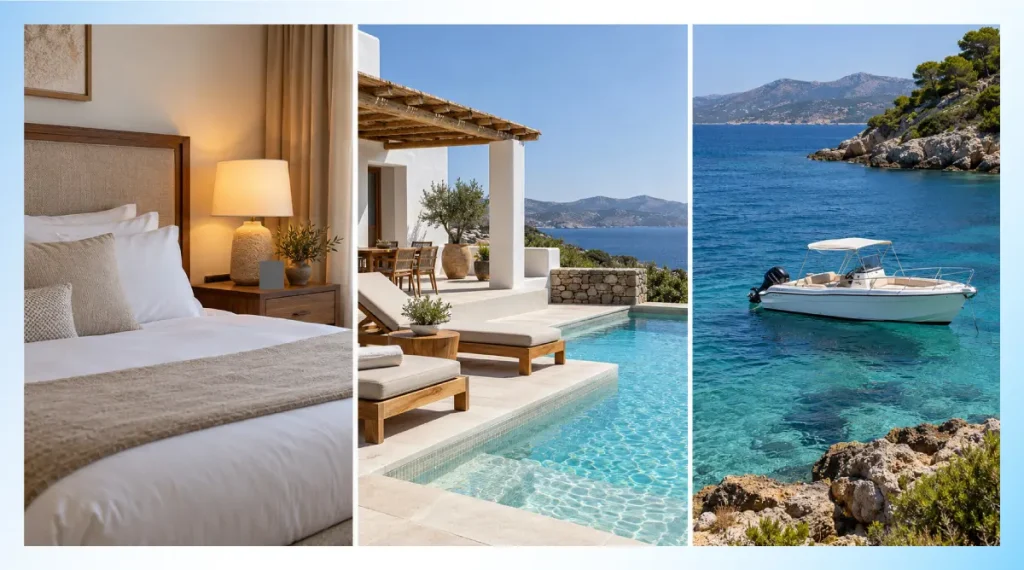
For hotels, villas, and tour operators, accurate color builds trust. Guests book from photos, and when the room, pool, or sea looks different on arrival, the gap shows up as complaints and poor reviews.
- Shoot one test frame with a gray card in the main light of each space, as a neutral reference.
- Keep one white balance per room, so the gallery feels consistent.
- Match woods, fabrics, and water to what a guest will really see.
- Keep a small warm tone in interiors so rooms feel inviting, and keep outdoor whites clean.
- Deliver in sRGB and keep the original RAW files for later updates.
Should You Hire a Photo Editor for Travel Photos?
Hire a photo editor for travel photos when you have many images, when the photos support a business, or when the light was difficult. For a few favorites, the five steps above are enough.
Does professional editing really make a difference in photos? Yes. The biggest difference is consistency. A set of 200 images with matching white balance and skin tones looks like it belongs in a magazine or a hotel listing. A trained editor also catches subtle problems, such as green shadows or clipped white linen.
If you decide to outsource photo editing, a professional photo color correction service delivers matched results across the whole batch. Many teams now work with a photo color correction service online: you upload files, add notes, and receive finished images. If your photos also need cleanup, such as removing a distraction or a blemish, choose a professional photo retouching service that handles both.
How much does professional photo editing cost? It is usually priced per image, per hour, or through a monthly plan. Simple color correction costs the least, and detailed retouching costs several times more. Volume and turnaround time change the price. Always ask for a written quote and a free sample edit on one of your own images.
Frequently Asked Questions
Why do my vacation photos look flat?
Flat photos usually come from haze, harsh light, or a missing true black and white. Reset the black and white points, then add gentle contrast.
How do I know if my photo has a color cast?
Look at something that should be white or gray. If it leans yellow, blue, or green, the photo has a cast. In Photoshop, the Info panel will show one channel clearly higher or lower than the other two.
What is the best white balance setting for travel photography?
Shoot RAW and set white balance later. If you must shoot JPEG, use Daylight in sun, Shade in shadow, and a custom setting or a gray card under artificial light.
Can I color correct travel photos on my phone?
Yes. Apps such as Lightroom Mobile, Snapseed, and the built-in Photos app offer white balance and contrast controls. For large batches or commercial work, a desktop editor or a professional team gives more consistent results.
Is professional color correction worth paying for?
It is worth it when you need consistent results across many images, when the photos support a business, or when you do not have time to edit them yourself.
Final Thoughts
A great travel photo is not only about the camera or the destination. It is about color that feels true to the moment. Use the five steps for your favorite shots, and when your library grows, or the photos need a professional standard, bring in an expert team and let the colors tell the story the way you remember it.