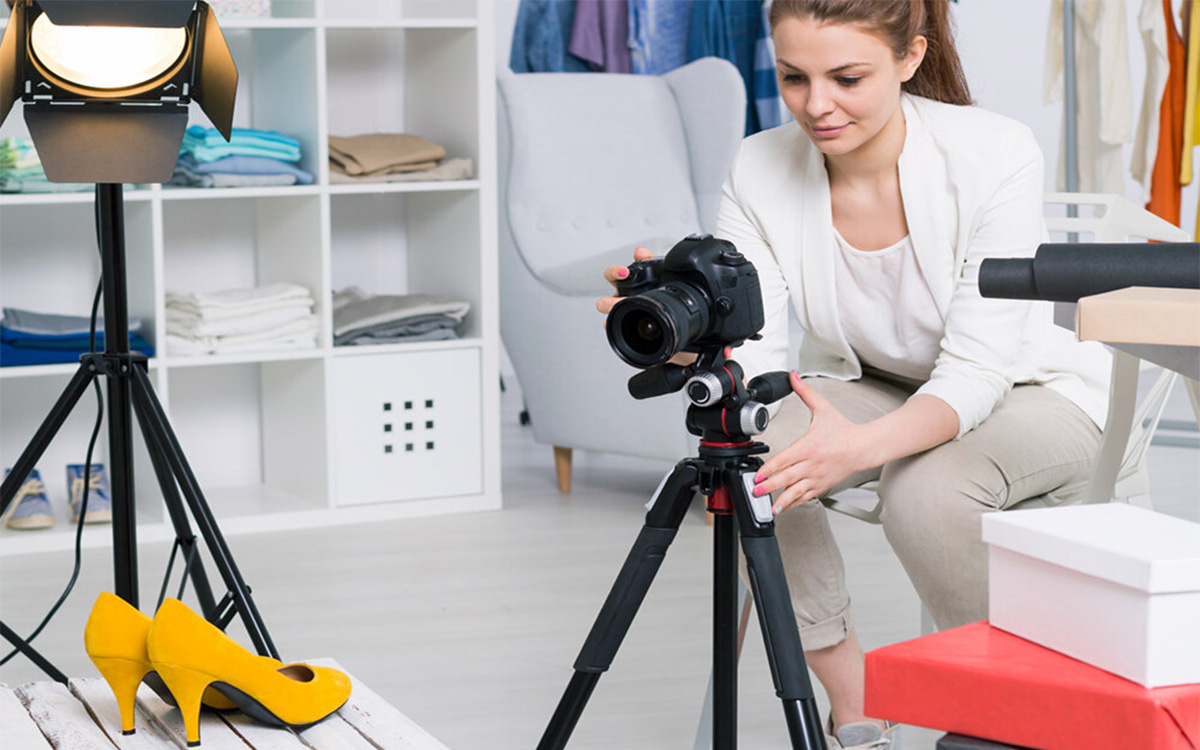
Furniture product photography is the process of capturing high-quality images of furniture for e-commerce listings, catalogs, and marketing. It involves specialized lighting, camera positioning, and post-production editing to accurately represent the size, texture, and finish of furniture items for online buyers.
If you have ever tried photographing a full-size sofa in a tight room with a single overhead light, you already know the frustration. The colors go flat. The legs look warped. And that beautiful oak grain you see with your own eyes disappears entirely in the image.
In the product photography industry, furniture stands apart as one of the most demanding categories. The pieces are large, heavy, and full of reflective surfaces that fight your lighting at every turn. Yet the stakes are high. Studies consistently show that over 75% of online buyers consider image quality the most important factor in a purchase decision. For furniture, where average order values regularly exceed $500, a single weak image can cost you the sale.
Today, we’ll explain everything you need to create professional furniture images. From choosing the right equipment and mastering lighting to exploring AI tools that are reshaping how furniture brands produce visual content at scale. Whether you are shooting your first dining table or building a 200-SKU catalog, you will find practical, field-tested advice throughout.
Need professional post-production for your furniture images? Explore our e-commerce photo editing services to get catalog-ready results without the editing bottleneck.
Types of Furniture Product Photography
Before you set up a single light, you need to know what types of images your listing actually requires. Each type serves a different purpose in the buyer’s journey.
White Background Product Photography
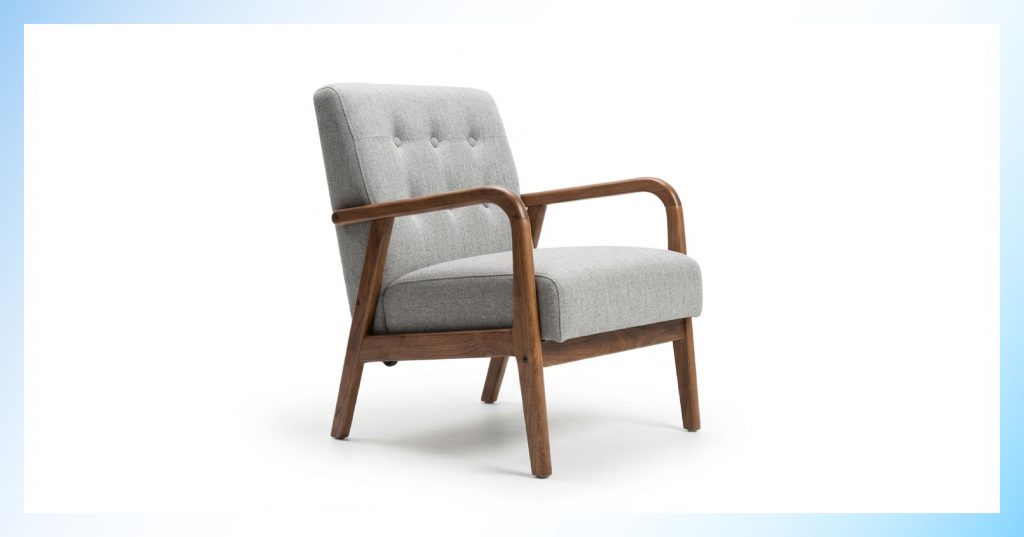
This is the foundation of any furniture catalog. A clean, white background isolates the piece and lets buyers focus entirely on the product. It is also mandatory for major marketplaces like Amazon, which require pure white (RGB 255,255,255) main images.
The key challenge is making the furniture look dimensional rather than flat. A common mistake is using harsh, direct flash that eliminates all shadows. You still want subtle shadows to show depth and form. Professional background removal in post-production gives you full control over exactly how clean that background appears.
Lifestyle Furniture Photography
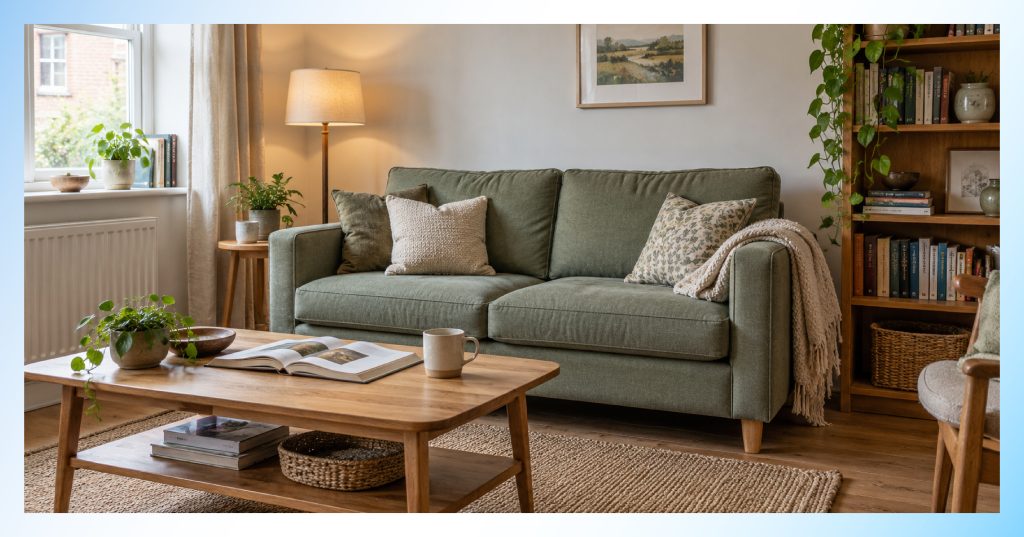
Lifestyle images place your furniture inside a styled room setting. A sofa beside a coffee table. A dining set under warm pendant lighting. These shots help buyers visualize the piece in their own space, and they convert significantly better. Industry data shows that furniture shown in room scenes converts at roughly 4–6% compared to just 2–3% for white-background-only listings.
The trade-off is cost. Building physical room sets requires space, props, styling crew, and time. A single room-set shoot can run $5,000 to $20,000 per day. Later in this guide, we cover how AI tools are changing this equation.
In-Context Furniture Photography
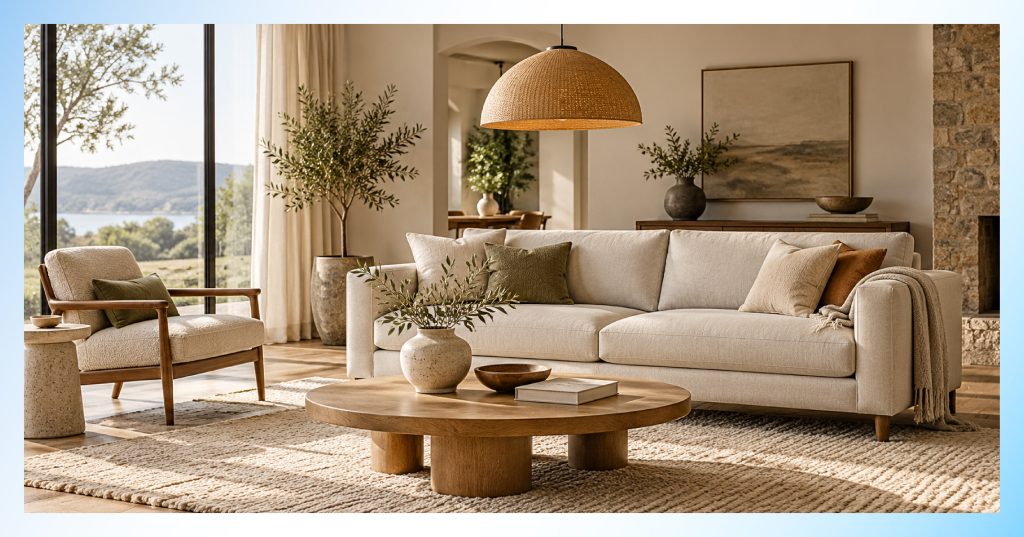
In-context shots are similar to lifestyle images but typically captured in real environments like showrooms, model apartments, or actual homes. They feel less staged and more authentic. This works especially well for home furniture product photography where you want to show how a piece fits into everyday living.
The challenge is controlling the environment. Natural light shifts throughout the day, existing decor may clash with your piece, and you rarely have the flexibility to rearrange walls. Planning and location scouting are essential.
Multiple-Angle Photography
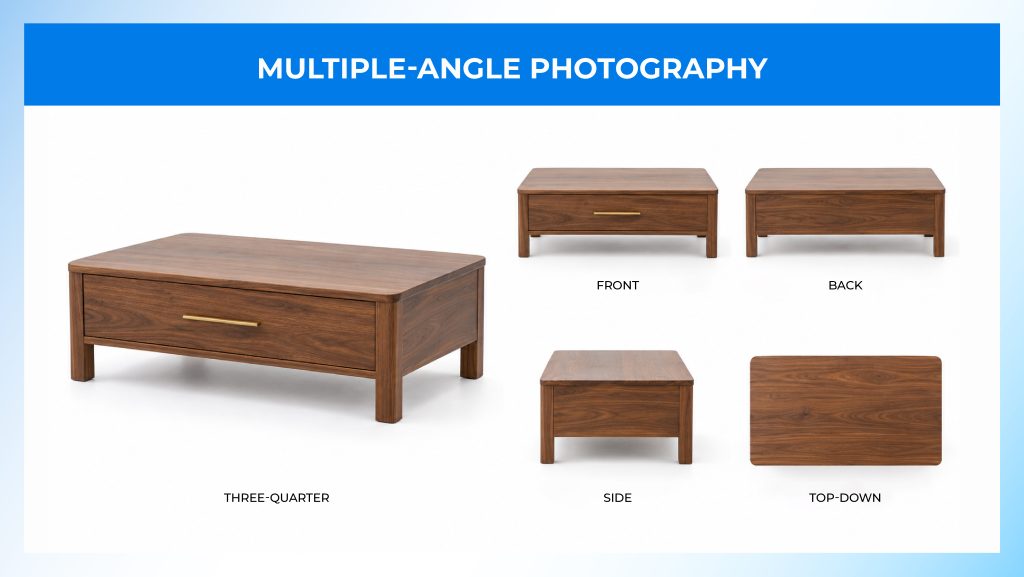
Buyers need to see every side of the furniture before committing to a purchase. Front, back, side, three-quarter view, and top-down shots give a complete picture. This is especially important for pieces with interesting details on the back panel or hidden storage features.
Consistency matters here. Use the same camera height, distance, and lighting setup for every angle within a product. When all your angle shots feel like they belong together, the listing reads as professional and trustworthy.
Detail and Texture Photography
This is where you sell the quality. Close-up shots of wood grain, fabric weave, stitching patterns, metal hardware, and joinery details communicate craftsmanship that wide shots simply cannot. Buyers shopping for a $1,200 walnut dining table want to see the grain. They want to inspect the dovetail joints.
Use a macro-capable lens and position your light at roughly 45 degrees to emphasize texture through shadow. This side-lighting technique is one of the most effective furniture product photography tips for revealing surface character.
AI-Generated Room Scene Photography
AI tools can now take a single product photo, often shot on a white background or a warehouse floor, and place it into a photorealistic room scene. The technology has matured significantly in 2025–2026, and several tools now preserve product details like wood grain and fabric texture during the compositing process.
This approach works especially well for brands with large catalogs that need lifestyle imagery at scale without the cost of traditional room-set photography. We cover specific tools, evaluation criteria, and cost comparisons in the AI section further down.
Furniture Photography Equipment
You do not need a $10,000 kit to get started. But when it comes to product photography, furniture demands specific gear choices that differ from smaller product categories. Here is what actually matters for producing professional results.
Camera and Lens
A DSLR or mirrorless camera with manual controls and at least 24 megapixels will handle most furniture shoots comfortably. Full-frame sensors perform better in mixed or low light, but crop-sensor bodies like the Canon EOS R10 or Nikon Z50 work perfectly well for controlled studio setups.
Lens selection matters more than most people realize. A 50mm to 75mm range keeps proportions honest and avoids the wide-angle distortion that makes chair legs look bent and tabletops look warped. For larger pieces, a 24–70mm zoom lens gives flexibility without sacrificing accuracy. For texture and detail shots, a 100mm macro gets you close without crowding the subject.
Lighting Equipment
Lighting makes or breaks furniture images. Large softboxes or diffused LED panels create the soft, even illumination that brings out texture without creating harsh hotspots on polished surfaces. Position your key light slightly above and to one side of the product, then use a fill reflector on the opposite side to open up shadows.
For product photography lighting furniture specifically, bounce boards become your best friend. A simple white foam core panel placed opposite your main light fills shadows naturally and reveals details on the dark side of the piece. This approach is far more forgiving than adding a second strobe, which can create competing shadows.
Avoid mixing light sources. Daylight from a window combined with warm tungsten overhead bulbs creates a color cast that is painful to correct later. Pick one source and control it. To understand these trade-offs in depth, our comparison of natural light vs artificial light breaks down the practical differences.
Backgrounds, Reflectors, and Accessories
Seamless white paper or fabric backdrops are standard for catalog work. For furniture, you will need wider rolls (9–12 feet) to cover the full width of larger pieces like sofas and dining tables.
A grey card is essential for accurate color reproduction. Photograph it under your exact lighting setup before each session, and use that frame to set white balance in post-production. This is especially important for wood tones, where even a slight warm or cool shift can misrepresent the finish.
A sturdy tripod with a geared head keeps your shots consistent across products. Lock your height and angle for each product category and note the exact settings. This repeatability separates a professional-looking catalog from one that feels improvised.
For styling inspiration beyond basic white, check out our roundup of product photo background ideas that work across different categories.
Step-by-Step Process for Furniture Product Photography
Preparation
Start before the camera comes out. Assemble the furniture completely and double-check every joint, drawer, and hinge. Loose hardware and misaligned doors show up instantly in high-resolution images.
Remove all packaging materials, stickers, price tags, and protective wrapping. Then clean the piece thoroughly using material-appropriate products: glass cleaner for shelves, furniture polish for wood, a lint roller for upholstery. Fingerprints and dust particles invisible to the naked eye become glaringly obvious under studio lighting.
Prepare your shooting area with a clean, neutral background. Pull the furniture at least two feet from the backdrop to create separation and avoid casting hard shadows on the surface behind it.
Setting Up a Furniture Photography Studio
You do not need a dedicated furniture photography studio to get professional results. A large, open room with high ceilings and minimal ambient light works perfectly. Clear out visual distractions, set up your backdrop, and center the furniture within the frame.
Place the piece first, then build your lighting around it. Start with your key light at about 45 degrees to the front, positioned slightly above the furniture’s midpoint. Add a fill reflector on the opposite side. Evaluate the light on the actual surface before adjusting. Every material responds differently. Matte wood absorbs light quietly. High-gloss lacquer bounces it back aggressively.
Once you find a setup that works, document everything. Note the light positions, distances, power settings, and reflector angles. When you shoot the next piece in that category, recreating the same setup takes minutes instead of an hour.
Lighting for Furniture Product Photography
How to light furniture for photography depends on the material, the finish, and the mood you want to achieve. But several principles hold true across the board.
Use large light sources. The larger the modifier relative to the subject, the softer the light falls. For a sofa-sized piece, you want at least a 4×6 foot softbox or a large diffusion panel. Small speedlights create specular highlights and hard shadows that work against the natural beauty of furniture surfaces.
Control shadows with intention. You want enough shadow to communicate dimension, but not so much that sections of the furniture disappear into darkness. Fill cards placed strategically around the piece are your most cost-effective tool for shadow management.
Avoid harsh reflections on glossy surfaces by adjusting your light angle until the reflection falls away from the camera’s field of view. Cross-polarization also helps. For upholstered pieces, you generally have more flexibility since fabric naturally diffuses light.
Maintain consistent lighting across every shot in a session. If your light shifts between products, the images will look mismatched in the final catalog. Shoot a grey card reference at the start and verify it periodically throughout the day.
Camera Settings and Positioning
Set your aperture between f/8 and f/16 to keep the entire piece in sharp focus from front to back. Furniture is deep, and a wide-open aperture will leave the back legs or far corners soft and unfocused.
Keep your ISO as low as possible (100–400) to preserve detail and avoid noise, especially in shadow areas where grain shows up first. Use a slower shutter speed on a tripod to compensate for the small aperture and low ISO. This is how to shoot furniture photography with the maximum clarity your sensor can deliver.
Camera distance matters enormously. Stand far enough back that you need to zoom in slightly rather than standing close with a wide-angle lens. This preserves the proportions and prevents the distortion that makes front legs look oversized and rear sections look unnaturally small. For larger sofas, this might mean positioning your camera 10–15 feet away at around a 70mm focal length.
Set white balance manually or use a grey card image to calibrate in post. Auto white balance shifts between shots, and that inconsistency becomes painfully visible when images sit side by side on a product page.
Angles and Composition
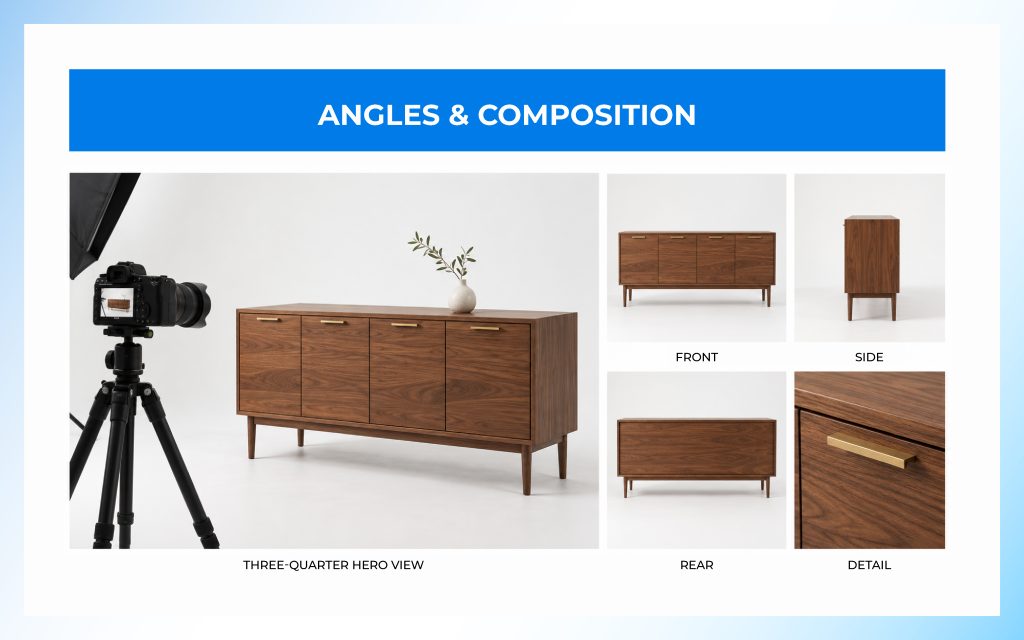
The hero angle for most furniture is the front three-quarter view, shot at the product’s midpoint height. This single angle shows the most dimension and gives buyers the best sense of overall shape and proportions.
Beyond the hero shot, capture a straight-on front, both side profiles, a rear view (especially for pieces with finished back panels), and a top-down for items like tables and desks. Detail shots of handles, joints, fabric texture, and hardware round out the set.
Keep vertical lines truly vertical. Tilted verticals are one of the most common indicators of amateur work. Use your camera’s built-in grid overlay and a leveled tripod to get this right in-camera. It saves significant correction time in post.
Resist the urge to over-style. A few carefully chosen props, like a single plant or a draped throw, can add warmth. But piling on decorative items distracts from the furniture itself and confuses buyers about what is actually included with the product.
Furniture Photo Editing and Post-Production
Even a well-lit, well-composed image needs post-production polish. Start with exposure and white balance correction to match the true colors of the piece. Wood tones are particularly sensitive. A walnut dresser should look like walnut, not cherry.
Retouch surface imperfections that are not part of the product. Dust specks, small scratches from handling, tape residue. But do not remove natural characteristics like wood grain variation or leather patina. Those are features, not flaws.
Straighten any remaining perspective issues using lens correction tools. Crop all images to the same aspect ratio, and ensure the furniture occupies roughly the same percentage of the frame across all products in a category. This catalog-wide consistency matters more than most sellers realize.
Enhance shadows and highlights to bring out dimensionality, but keep adjustments subtle. Over-processed images look artificial and erode buyer trust. Convert final files to sRGB color space for accurate display across screens, then resize and compress for web delivery without sacrificing texture detail.
If your catalog has dozens or hundreds of SKUs, batch editing through presets saves enormous time. And when the volume exceeds what your team can handle in-house, professional photo retouching services can maintain your quality standards while freeing up your time for shooting.
Advanced Furniture Photography Techniques
Turntable/360° Photography
Interactive 360-degree spins let buyers rotate furniture onscreen, exploring every angle at their own pace. Products with 360° views have been shown to increase conversion rates by up to 250%, according to research by ThreeKit.
Large motorized turntables rated for 500+ pounds handle most furniture. The camera stays fixed while the turntable rotates in precise increments, typically 24 to 72 frames for one full rotation. The resulting image sequence gets stitched into an interactive viewer embedded on the product page.
The setup demands consistent lighting from every angle, which is the main technical challenge. Graduated backgrounds and multi-light rigs are often necessary to prevent shadows from shifting as the piece rotates.
CGI Furniture Renders
Computer-generated imagery (CGI) skips the camera entirely. A 3D model of the furniture is built digitally, then rendered with photorealistic lighting, materials, and environments. Brands like IKEA have reported that up to 75% of their catalog imagery is now CGI rather than traditional photography.
The advantage is total control. You can show 20 fabric options without manufacturing 20 samples. The downside is cost per model. Creating a detailed 3D model runs $500 to $2,000 per SKU before a single render is produced. For brands with highly customizable product lines, the investment often pays for itself over time.
Combining Photography and CGI
A hybrid approach is gaining traction. Shoot the physical product for hero shots and detail images that demand real texture fidelity. Then use CGI or AI for lifestyle scenes and room-set placements. This gives you the authenticity of real photography where it matters most, and the scalability of digital production where variety is needed.
Choosing the Right Production Style for Your Catalog
Your decision depends on three variables: catalog size, budget, and how frequently your product line changes. A boutique maker with 20 SKUs and an annual collection might invest in full traditional shoots. A DTC brand with 300 SKUs and monthly new arrivals will almost certainly need AI or CGI to keep pace.
There is no single best furniture product photography approach that works universally. The right answer is usually a blend, tailored to your specific operational constraints and quality standards.
AI in Furniture Product Photography
AI has moved from novelty to a genuinely useful production tool in the furniture space. Here is what you need to know to evaluate and use these tools effectively.
Virtual Staging vs. AI Product Placement
These are two different tools that solve two different problems, and confusing them wastes time and money.
Virtual staging is a real estate tool. It takes a photo of an empty room and fills it with generic furniture from a stock library. The goal is to sell the property. Product fidelity does not matter because nobody is buying that specific sofa in the image.
AI product placement does the opposite. It takes your actual product image and generates a room environment around it. The goal is to sell the product. Every detail, from wood grain to fabric texture to hardware finish, needs to remain accurate. This is what furniture e-commerce brands actually need.
How to Evaluate AI Output Quality
Not all AI outputs are equal. Before publishing AI-generated lifestyle images, run them through these quality checks.
Zoom to 100% and inspect texture preservation. Can you still see the original wood grain and fabric weave? Generic tools tend to smooth or replace these details. Check that the lighting direction on the product matches the room’s light source. Mismatched shadows are the fastest giveaway of a composited image.
Verify scale accuracy. Does the furniture look the right size relative to the room elements? And confirm that the product casts a realistic contact shadow on the floor. A sofa floating in mid-air with no ground shadow breaks the illusion instantly.
Cost and Time: Traditional Photography vs. AI
The math is striking. Traditional room-set photography for a 150-SKU catalog needing three lifestyle variants each (450 images) runs approximately $50,000 to $150,000+ and takes 6 to 10 weeks. AI product placement tools can generate the same volume for $50 to $500 total within 1 to 2 days.
The cost gap is significant, but quality trade-offs exist. Traditional photography still delivers unmatched material authenticity. AI excels at speed, consistency, and cost per image. Most furniture brands exploring AI photography are using it to supplement their traditional shoots, not replace them entirely.
Popular AI Tools for Furniture Product Photography
Several tools have emerged that generate furniture product photography ideas and lifestyle scenes with varying degrees of quality.
Nightjar uses reference-based style extraction to maintain visual consistency across large catalogs. Photoroom offers template-based backgrounds that work for simpler placements. WizStudio caters specifically to B2B wholesale furniture brands. General-purpose tools like Midjourney and DALL-E can produce visually striking images, but they lack the product fidelity required for e-commerce because they recreate rather than preserve the original product details.
When evaluating any tool, test it with your actual products before committing. Upload a wood-grain piece and a fabric-upholstered piece, then inspect the output at full resolution. That tells you everything you need to know about the tool’s real-world performance.
Marketplace Image Requirements
Each marketplace has its own image specifications. Meeting them is not optional. Non-compliant images get suppressed, rejected, or both.
Amazon Furniture Image Guidelines
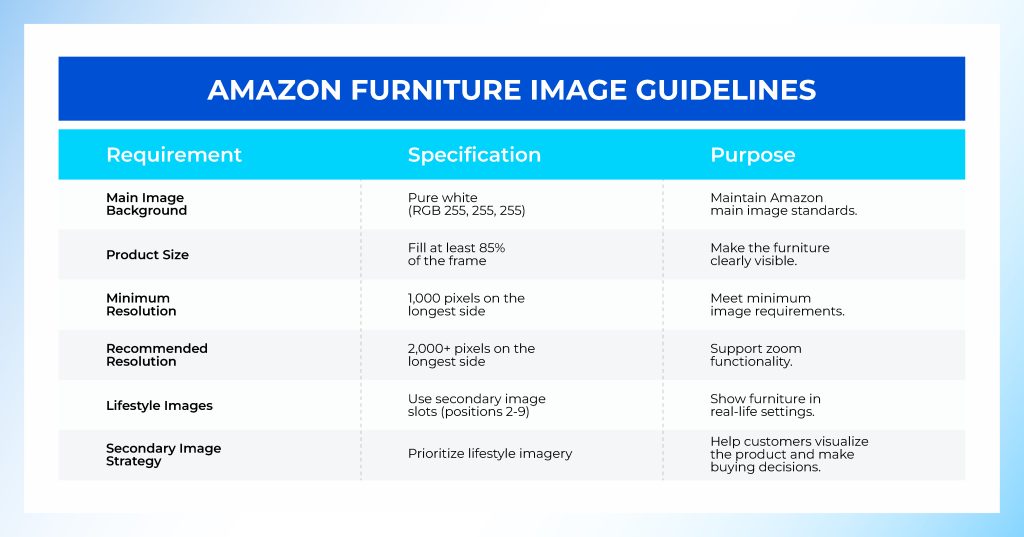
Amazon requires main images on a pure white background (RGB 255,255,255) with the product filling at least 85% of the frame. Minimum resolution is 1,000 pixels on the longest side, but 2,000+ pixels is recommended for zoom functionality. Lifestyle images belong in secondary slots (positions 2 through 9), and this is where buying decisions typically happen.
For a detailed compliance breakdown, our guide to Amazon image requirements covers what you need to know.
Shopify Recommended Specs
Shopify recommends square images at 2,048 x 2,048 pixels for optimal display and zoom performance, with a maximum upload of 5,000 x 5,000 pixels. Shopify’s product media guidelines emphasize consistent aspect ratios across all product images for a cleaner storefront experience.
For furniture, high resolution is especially important because buyers want to zoom into fabric texture, wood grain, and hardware details. Compressing too aggressively costs you those details and the trust that comes with them.
Wayfair Supplier Image Requirements
Wayfair requires a minimum of 1,000 x 1,000 pixels (2,000 x 2,000 recommended) and specifically asks for both silhouette/cutout shots and environmental lifestyle images with varied angles. According to Wayfair’s supplier imagery guidelines, products with comprehensive imagery, including lifestyle shots, see measurably higher engagement and conversion rates on the platform.
Final Thoughts
Furniture product photography is part technical skill, part creative judgment, and increasingly part technology strategy. The fundamentals have not changed. Good light, accurate color, honest proportions, and clean composition still drive buyer confidence and sales.
What has changed is the production landscape. AI tools, CGI rendering, and hybrid workflows have made it possible for brands of any size to produce catalog-quality imagery without six-figure budgets. But these tools do not replace the need for a well-captured source image. They amplify what you start with.
Start with the basics. Get your lighting right, your angles consistent, and your post-production workflow documented. Then scale with the tools that fit your budget and catalog size. The brands that win in furniture e-commerce are not necessarily the ones with the biggest photography budgets. They are the ones with the most consistent, trustworthy visual presence across every listing.
FAQs
What Is the Best Background for Furniture Photography?
A seamless white or light grey background works best for e-commerce and marketplace compliance. For lifestyle images, neutral wall tones in soft whites, grays, or warm beiges provide context without competing with the furniture. The key is choosing a background that keeps the focus on the product itself.
What Camera Settings Are Best for Furniture Product Photography?
Set your aperture between f/8 and f/16 for front-to-back sharpness. Keep ISO low (100–400) and use a tripod with slower shutter speeds to compensate. Set white balance manually or calibrate from a grey card for accurate color reproduction, which is especially important for wood tones and fabric colors.
How Much Does Furniture Product Photography Cost?
Traditional studio shoots with room sets typically cost $5,000 to $20,000 per day, including photographer, studio rental, and styling. Per-image costs, including retouching, range from $50 to $200+. AI-generated lifestyle images can reduce per-image costs to under $1, though quality varies by tool and use case.
Is AI Furniture Photography as Good as Traditional Photography?
For lifestyle and room-scene images, AI tools have reached a quality level that works for many e-commerce applications, especially at catalog scale. For detail shots, texture close-ups, and material accuracy, traditional photography still delivers superior results. Most brands benefit from using both strategically.
What’s the Difference Between Virtual Staging and AI Product Photography?
Virtual staging adds generic stock furniture to empty room photos to help sell real estate properties. AI product photography preserves your specific product image and generates a room around it to help sell the product. The workflows, quality priorities, and intended audiences are completely different.
How Do I Photograph Furniture at Home?
Choose the largest, most uncluttered wall in your space. Use window light at a 45-degree angle as your key light, with a white foam board as a fill reflector opposite. Position your camera at the furniture’s midpoint height, step back to use a mild zoom rather than a wide-angle lens, and capture at least four angles per piece. Consistent lighting and controlled angles matter more than expensive equipment.