Clothing- apart from basic needs, it has become part of fashion, trend, and class. Thus, the competition in the apparel industry is growing in full swing.
That’s why marketers are adopting different strategies to survive their online existence, defeat other brands and attract more clients. As part of a strategy for promoting clothing products online, the ghost mannequin effect has gained attention.
What you’ll learn in this article
- 1 What is Ghost Mannequin Effect?
- 2 How to Create Ghost Mannequin Effect?
- 2.1 Part 1: Ghost Mannequin Photography
- 2.2 Part 2: How to Create a Ghost Mannequin Effect in Photoshop
- 2.3
- 2.4 3D Mannequin Effect Editing Tips
- 2.5 How to Outsource Post-processing Part?
- 2.6 How Does the Ghost Mannequin Effect Help Ecommerce Ventures?
- 2.7 Ghost Mannequin Effect in Photoshop (Tutorial- 5.35 s)
- 2.8 Important FAQs
- 3 Bottom Line
What is Ghost Mannequin Effect?
A type of photoshop work for clothing-also known as 3d mannequin, invisible mannequin, or hollow man. It is a unique way to photograph clothing without a model and is applied in clothing images to create a realistic appearance. Thus, online shoppers can visualize how pieces of the garment look or fit in a body after wearing.
Displaying clothing through models is not an affordable solution for all newly formed businesses when hiring a professional model costs around $10,000 per month. And that’s where the mannequin performs as an alternative solution.
If you are asking why applying an effect when models or mannequins are available, there are reasons.
– Mannequin divides attention.
– Hiring a model is expensive, and it limits the target audience.
Achieving a model or mannequin-like figure takes extreme work and dedication. The figure doesn’t have to be inch-perfect, but certainly not any less than the fashion industry standards. Not everyone has the time to be a model of their own shop and run it simultaneously!
If your clothing is worn on someone who doesn’t have an ideal body shape, there may be a lower chance of finding prospective buyers.
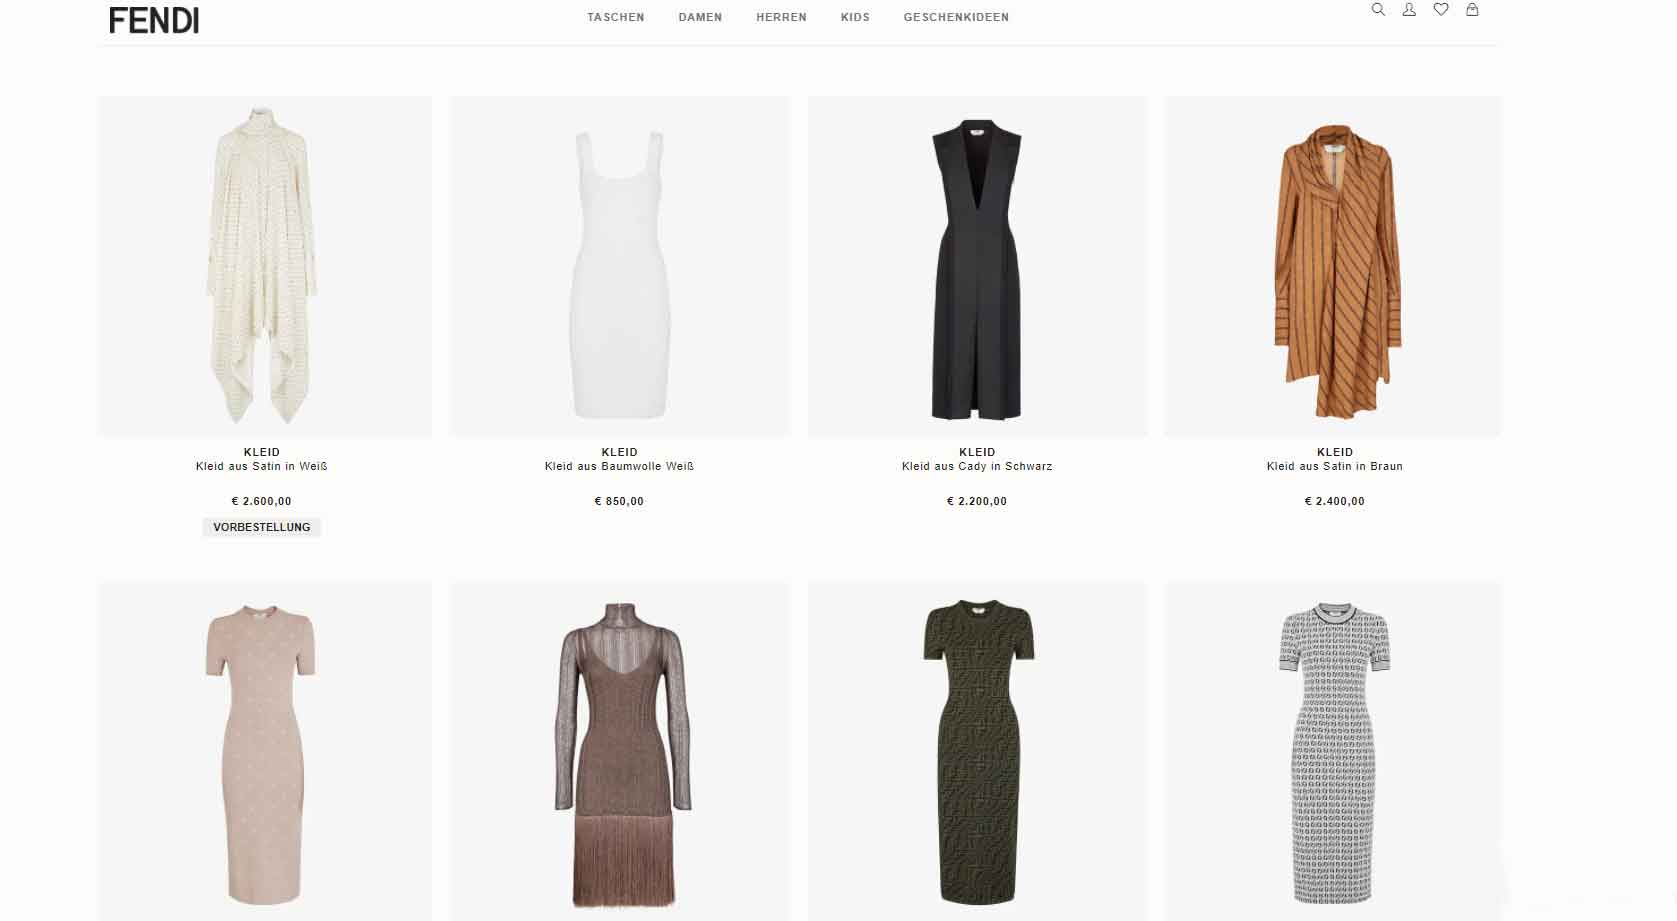
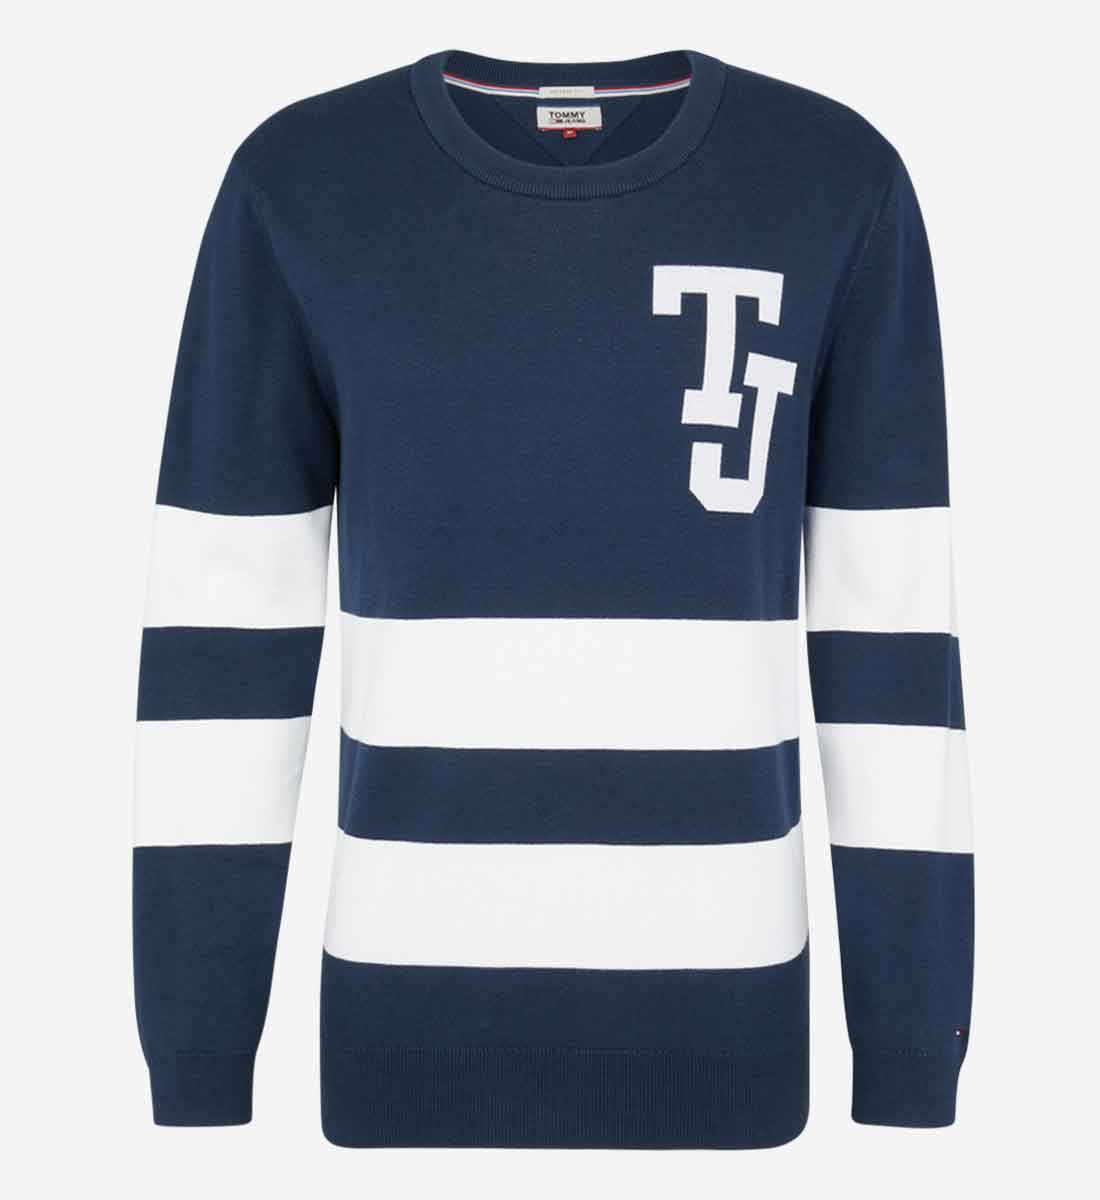
But the show must go on. That’s where the invisible mannequin effect has stepped in and gained enormous popularity in the apparel industry, especially among branded online stores, as ‘Fendi’ has done.
Are you targeting international clients with your clothing store? Then take ghost mannequin service from experts to have high-quality and realistic view images that will help increase CTR (Click Through Rate).
How to Create Ghost Mannequin Effect?
This task requires a combination of 2 parts.
Part 1: Ghost Mannequin Photography
Part 2: Creating Invisible Mannequin Effect in Photoshop
And these parts have been described here below-
Part 1: Ghost Mannequin Photography
Photography preparation begins with stage setup. Without a proper arrangement of the clothing photoshoot set, you won’t have good photos. This will end by not having a good effect as well.
Then again, if you already own a photography studio setup, that’s good! But if you don’t, you have got a lot on your plate. Let’s get started.
1. Location
In ecommerce, product photography requires a single color background- that’s why professional product photographers usually shoot indoors.
Pick a room if you can’t rent one. Basement or backyard, anything would do. Just being spacious would be enough for your equipment placement.
If you don’t have an alternative to shoot outdoors, make sure the place is soft, even light, and is not windy.
2. Background
The next vital part is background. Anything can play the role of background as long as it is not cluttered. For example, you can arrange the setup in front of a white/off-white or any color wall and later take background removal service; that would do.
Using a backdrop is another solution. It is a large piece of cloth or paper or board that performs as a screen behind the subject of photography. It is available in various colors, designs, and materials according to the users’ choice.
Some popular backdrops are described here below.
A. Clothing pieces / Fabrics
Cloth backdrops are a portable choice. Different fabrics are used for stretching hanging behind the subject.
While you are about to choose one, consider color, texture, lighting effect, your purpose, etc. For example, choosing shiny fabrics will reflect lights or fabrics that easily wrinkles are not good for outdoor shots (as they require traveling).
Most sought after fabrics are –
– Muslin
– Fleece
– Cotton and Polyester mix etc.
Maintenance:
- Iron or steam before shooting.
B. Seamless Papers
Seamless papers are another good-to-go and cost-effective option. These are available in 2 sizes: half and full. Such papers are kept in a roll and stay smooth and wrinkle-free.
These are durable and wide enough (up to 107 inches/ 9 ft) to capture group people’s photos. The risky part of this backdrop is getting torn.
Most sought after seamless papers are
– Vinyl
– Poly paper
Maintenance:
- Store vertically.
- Avoid keeping in sunlight.
C. Collapsible Backdrops
Collapsible backdrops are convenient for portability and space efficiency. Moreover, it has not only chroma-key colors available that are used for special effects but also numerous colors and patterns.
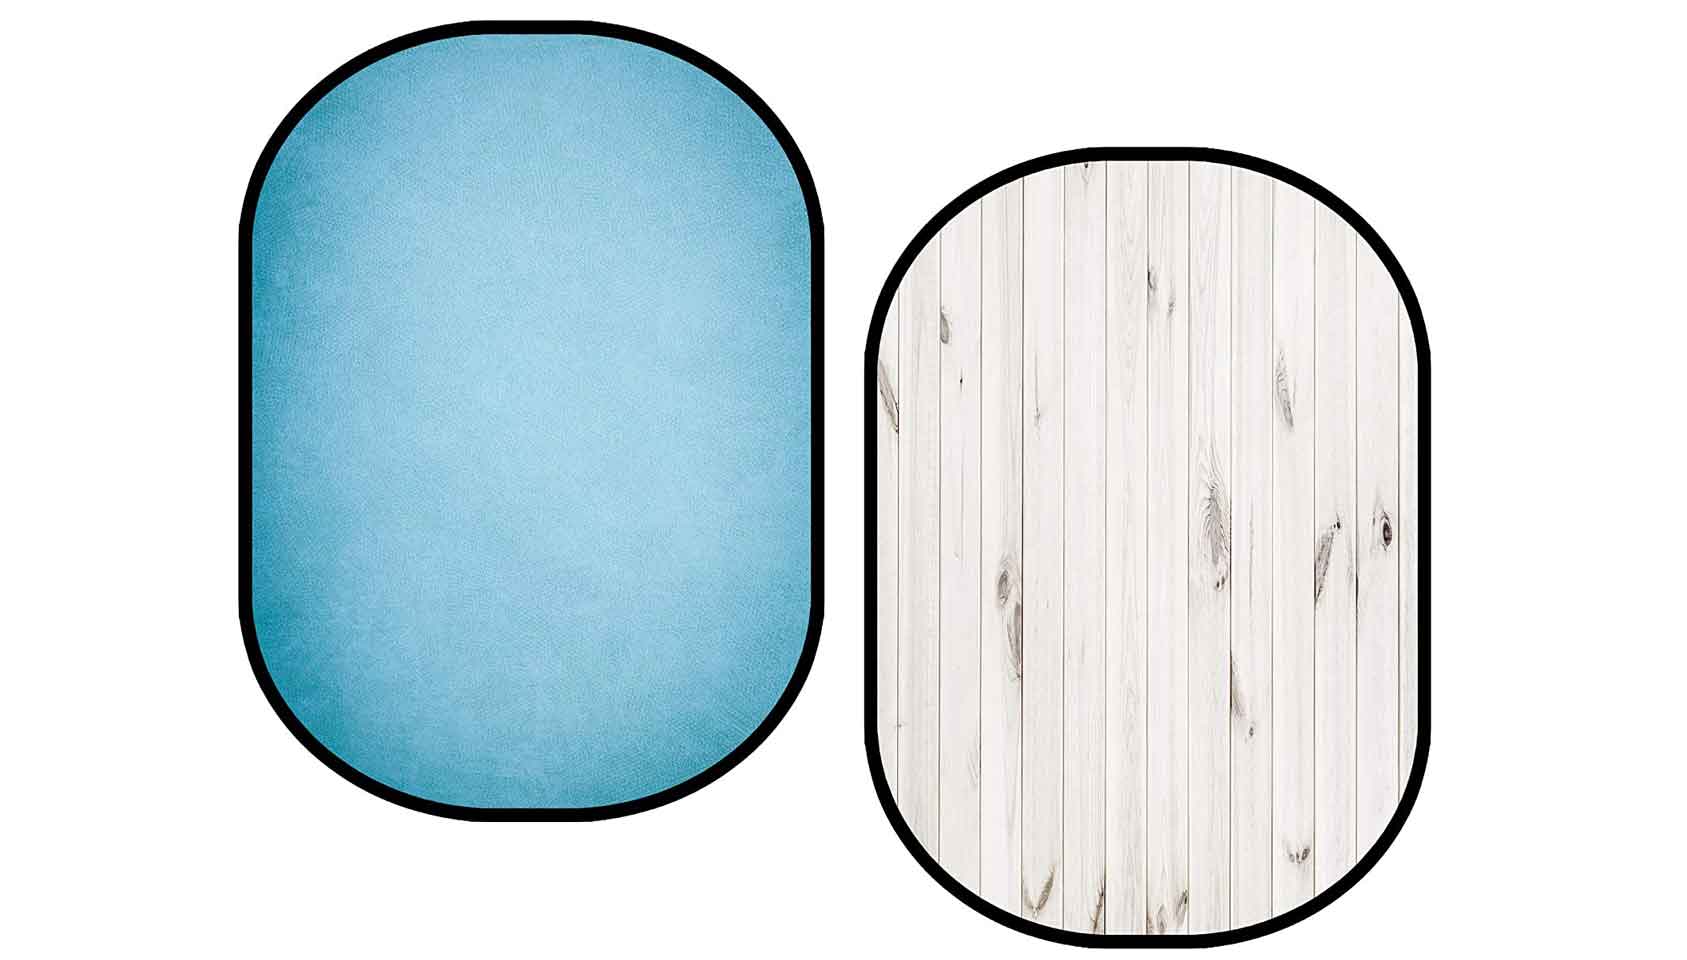
Generally, these are made of cotton muslin or nylon and are easy to fold to a third of their size. However, these are not big enough, so it allows a limited range of shooting.
Maintenance:
- Ensure spot cleaning.
D. Canvas
Canvas is a type of backdrop made of colors and textures. It is heavy, somewhat costly, yet long-lasting and efficient as long as it is used inside the studio.
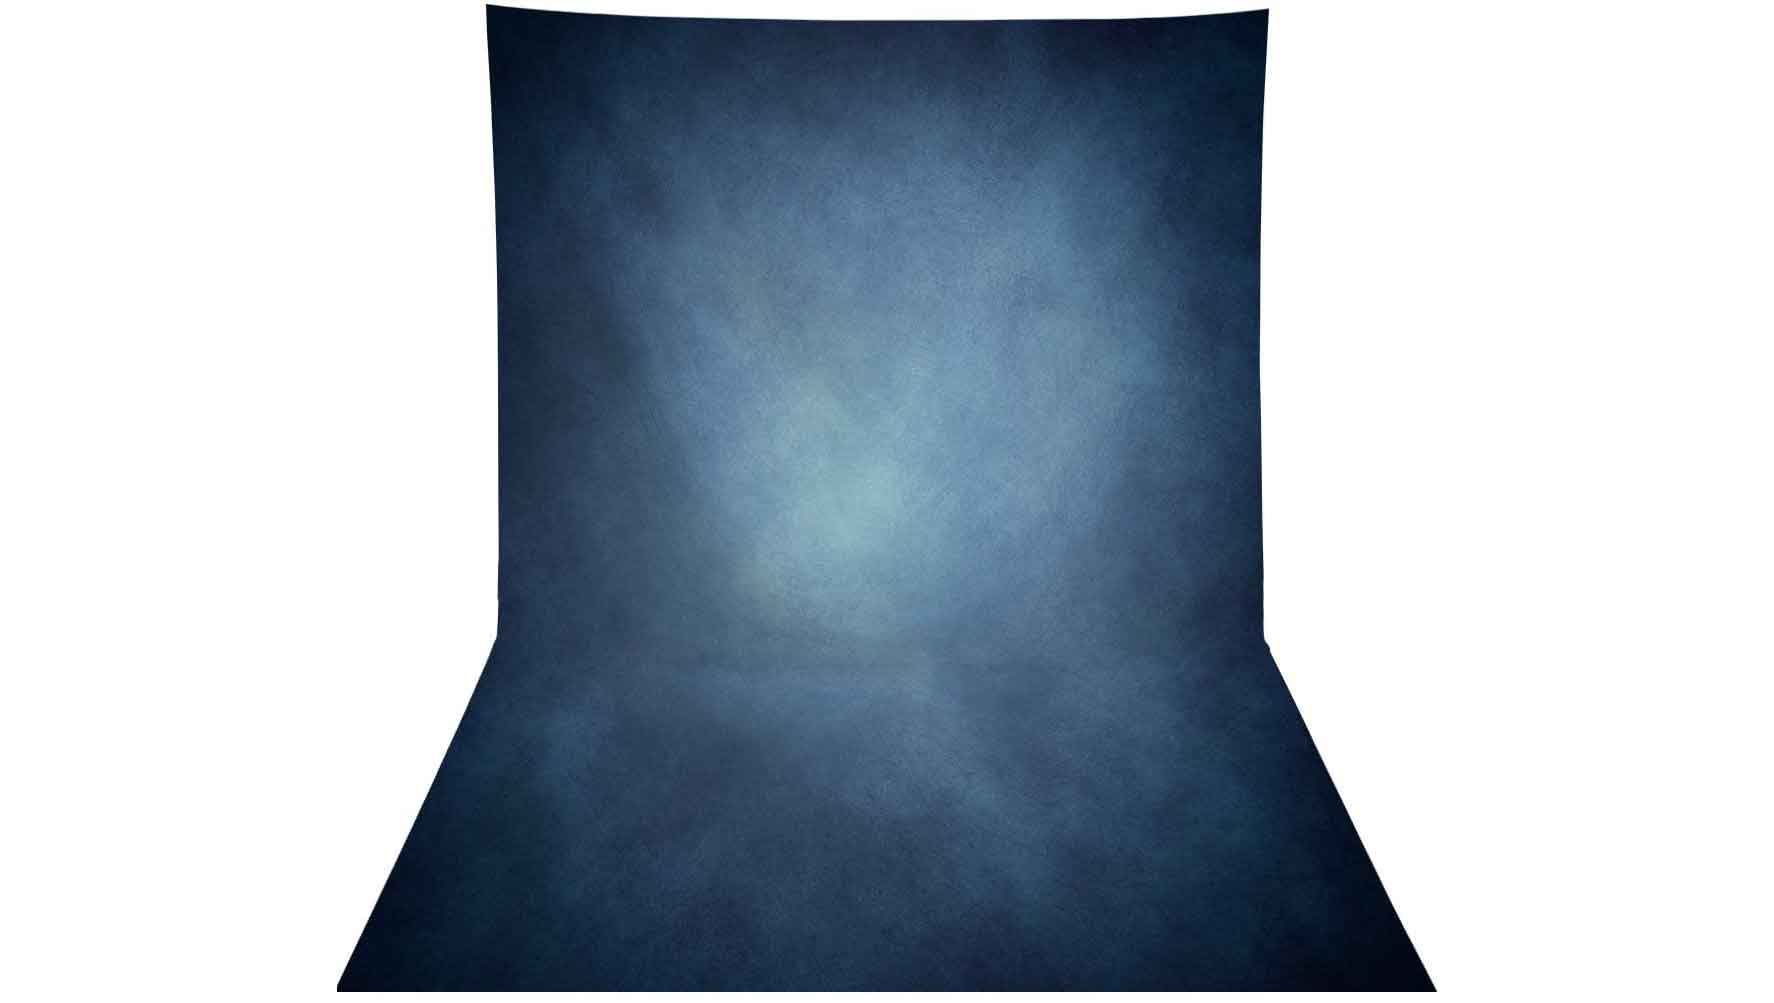
There are variations like- single layer or multi-layer. This type of backdrop goes well with simple set-up stages and is a nifty choice for creating an elegant look.
Maintenance:
- Use a case and roll up to protect.
E. Board
Photographers prefer to use boards as well. They are comparatively low-priced and easily available in any place, even pre-own ones. You can make a customized one from any wood piece or cupboard as well.
Maintenance:
- Keep it in a steady position; too much movement can deform shape.
F. DIY Background
Sometimes everything can’t be manageable at once- but you must run the show. Then what? Will you stop shooting as you don’t have a backdrop?
You have your all-time and anytime DIY (Do It Yourself) option available. For example, a piece of cloth, or paper or a wall near the window- this would do the job just fine.
3. Mannequin
All sorts of mannequins are available in the market now. For clothing product photography, the common type of mannequin used has no head and is available in full-body or half-body.
Before buying a mannequin, some of the matters need to be considered. This can be differentiated into the following matters.
A. Garment you are Shooting
So, what’s your product? Is it for men or women or kids?
Mannequin differs in shapes, sizes, arm lengths, body structure, so are dresses. Neither a figure for a t-shirt will fit a sleeveless frock, nor one for adults will be suitable for kidswear and vice versa.
Then again, a buyer cannot purchase every single piece depending on those differences. Therefore, calculate and get an average, and get one that resembles your target clients. It may help you buy 2 or 3 figures for a particular range instead of 7-8.
Such as, for a man clothing, you can have 2 mannequins-
- Large one (for tall and above height male)
- Medium one (male up to average height).
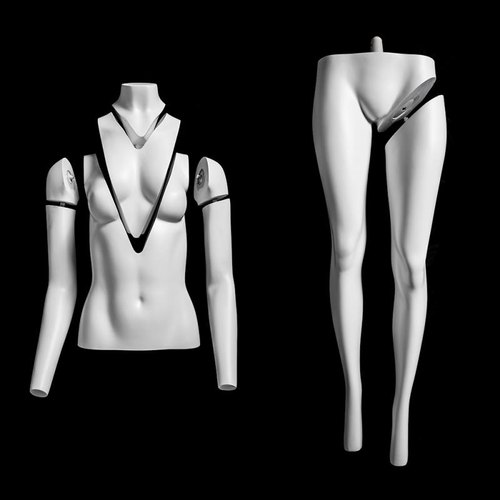
B. Adjustable Body Parts
You are about to purchase a common mannequin based on gender and stature; ensure that the torso parts are adjustable. You can remove arms, necks, chest, waist, or legs as per your product demands.
It is important. Otherwise, a mannequin for a t-shirt won’t be a nice choice for a blesser as it will block the inside lining of that garment.
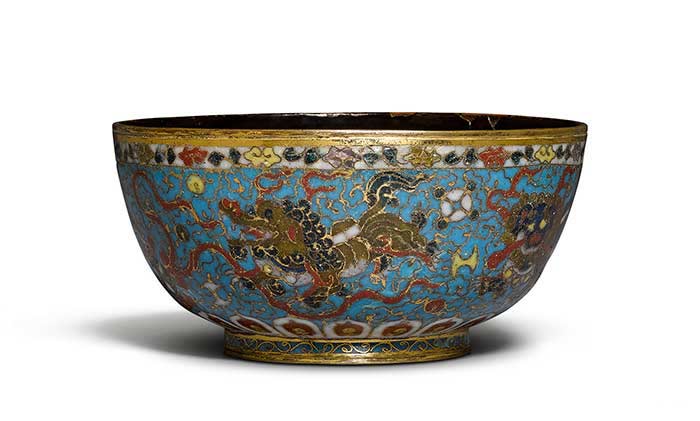
Having a mannequin shown in the image below is recommended.
C. The price of a Mannequin.
The bang you will receive for your buck needs a good thought. Price will vary depending on materials, full or half body, colors, designs, manufacturing country, etc. Considering those matters, have a proper budget. It will help you not to be duped and get your quality product.
4. Outfits
Now it’s time to prepare outfits for the mannequin photoshoot. Having new and clean clothes is suggested for invisible mannequin photography.
Take these safety steps before shooting an attire-
- Wash before shooting to avoid visibility of speck, tiny dirt, etc.
- Iron or steam- to remove wrinkles or creases.
- Use safety pins, tape clips, cloth clamps to make the dress fit.
- Remove any type of stickers or tags.
However, an uncertain situation may arise, for example-
Case 1: Products were received at the last minute; no time to wash or other preparation.
Case 2: Got delivered wrong products.
Case 3: A dress got a stain, can’t be removed.
Don’t freak out! There are photoshop services available to make these types of images spotless.
Final Check
- Make sure the attire on the mannequin is symmetrical- start checking from the neckline, then shoulder, sleeves, body parts till the end.
- Make parts like arms, collar, buttons etc. visible.
Have you finished dressing up your mannequin?
Now place it in front of your background.
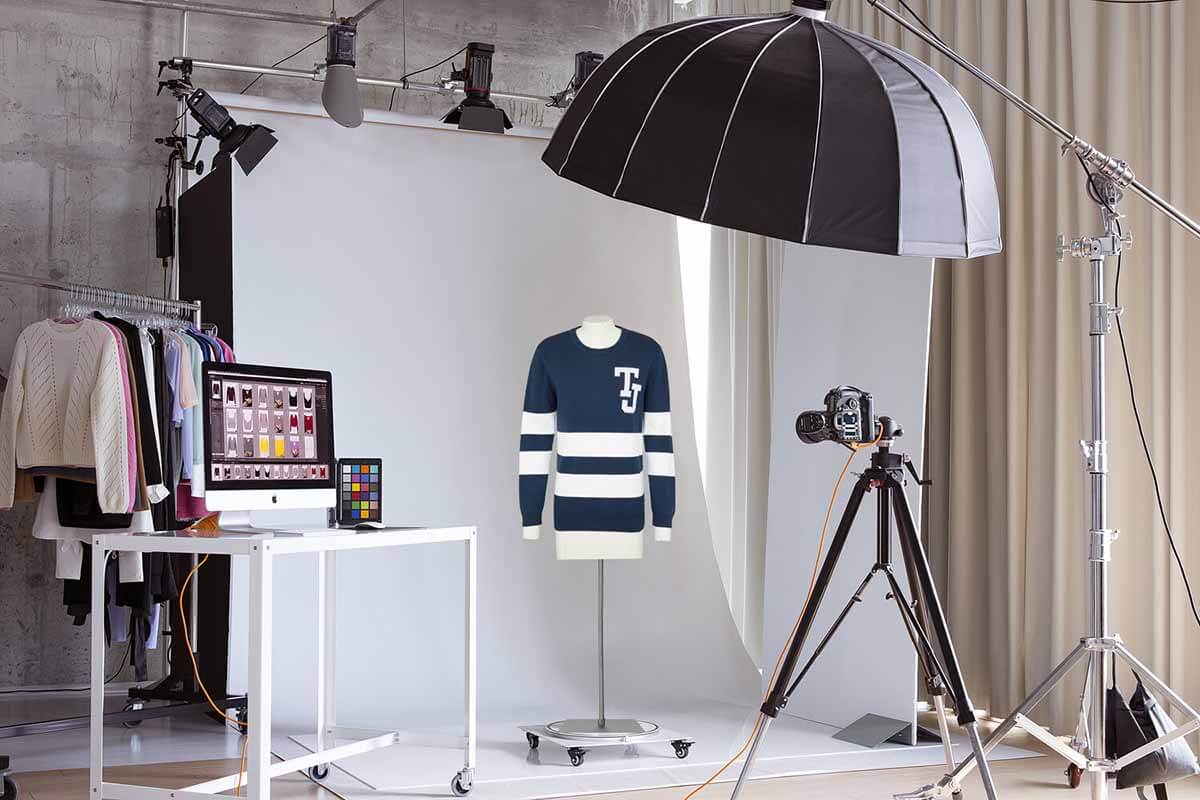
5. Photography Lighting
Leo Tolstoy said, ‘all the beauty of life is made up of light and shadow’.’ When it is about beautifying the subject of photography, light, and shadow have much more to do with the entire setup.
There are 2 types of lighting you can use for shooting.
A. Natural light source
Natural light is the greatest source for any and every type of photography. If you have a room with a window where plenty of light can penetrate, take advantage of that.
Also, take note before combining natural and artificial lights; if you do so, make sure those blend well.
B. Artificial light Source
Availability is the top benefit artificial lights provide, and that’s what a photographer needs. Any time, any place you need to enlighten a setup, this comes in handy.
There is an abundance of artificial lights. The most used ones are-
- Tungsten
- Fluorescent
- LED light
- Flash heads (Strobe)
- Speedlights
- LED Lamps
- Fresnel lights
Whether you are using natural or artificial light, you need some adjustment either for uniformity in light or casting a shadow. These pieces of equipment suffice those purposes.
- Modifiers- helps improve lighting
- Diffusers- spread lighting
- Reflectors- redirect lights to subject
6. Camera
You need to have one of the best cameras for product photography for ecommerce that includes necessary features and functionalities to help you work at your highest pace.
Your camera perspective is vital for you to see the subject vividly. Position your camera in front of your mannequin. It should be somewhere in the mid-level height, neither too high nor too low.
There are few functionalities to consider in your camera.
Aperture
Have a high f-stop for the aperture to have your product in focus and show up the detail. Then, start from f/11 and adjust it accordingly.
ISO
ISO depends on how much lighting your focal point is getting. If it is brightened enough, start from a low ISO around 400.
Shutter Speed
Faster shutter speed isn’t a requirement for mannequin photography as there won’t be any movement. So having a lower one will work just fine.
Exposure
Experts suggested that when you are shooting a light color attire, underexpose will be a good choice. And if your focus on the subject is a dark garment, overexposure will be better.
Color Space
As you are going to publish your images online, how will the color impact? That’s where you need your priority focused on the color space option. From there, select the sRGB model, which is a safe option for online and ecommerce publications. And it ensures no harm in post-production, rather good color combination.
7. Shoot
Stage, light, camera, mannequin are all in place.
Time to get down to business.
First, take a couple of experimental shots.
Observe if everything in your setup is okay.
Is there anything working or not; if not, step up.
Once you have found the exact combination of everything, start shooting.
To Do-
- Take multiple images from different angles (front, back, sides).
- Turn your clothing inside out for shots of the inner neckline.
- Pay heed to unique features like a ribbon flower on the side of the frock, a hoodie or print on the backside, or any other details.
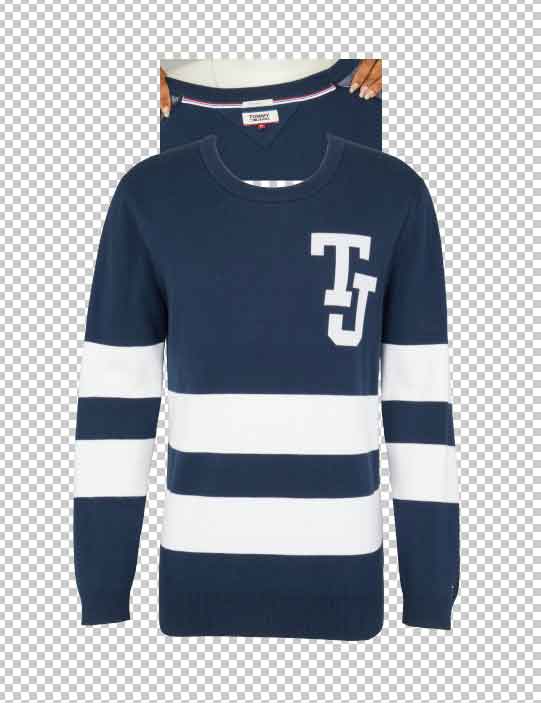
Part 2: How to Create a Ghost Mannequin Effect in Photoshop
Concluding our stage setup, here comes our mannequin photo editing part. If you have to edit your clothing product by yourself, here is the step-by-step process to do it in Adobe Photoshop.
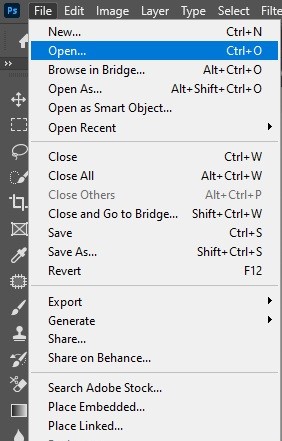
Step One : Open the image
Go to File and then click on Open.
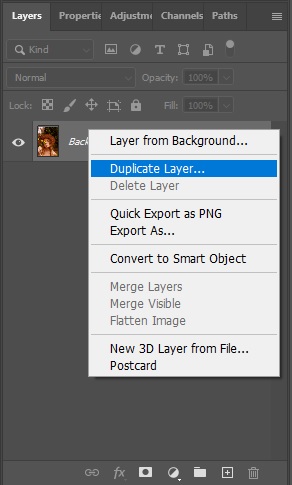
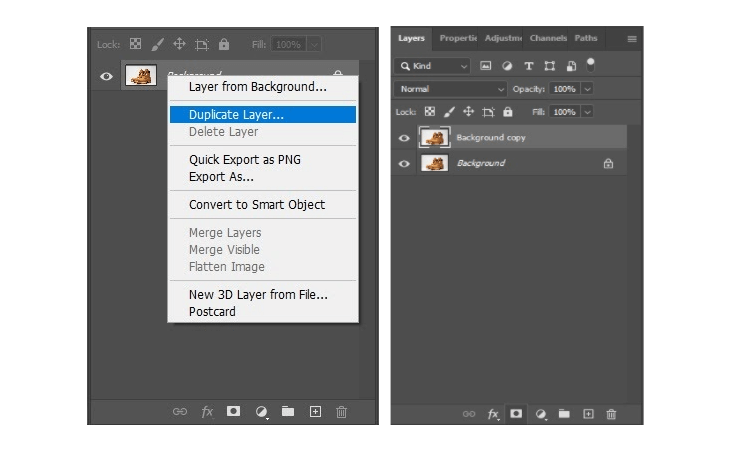
Step Two : Duplicate Layer
In case you want to make a mistake, create a duplicate layer by pressing Ctrl+j
Step Three: Create Clipping Path
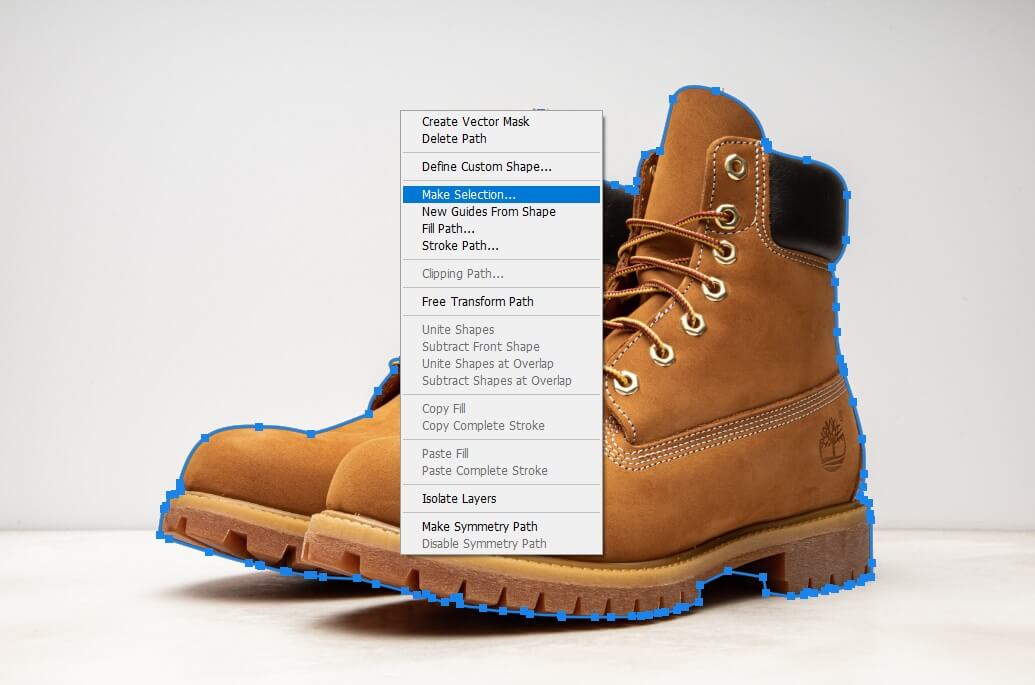
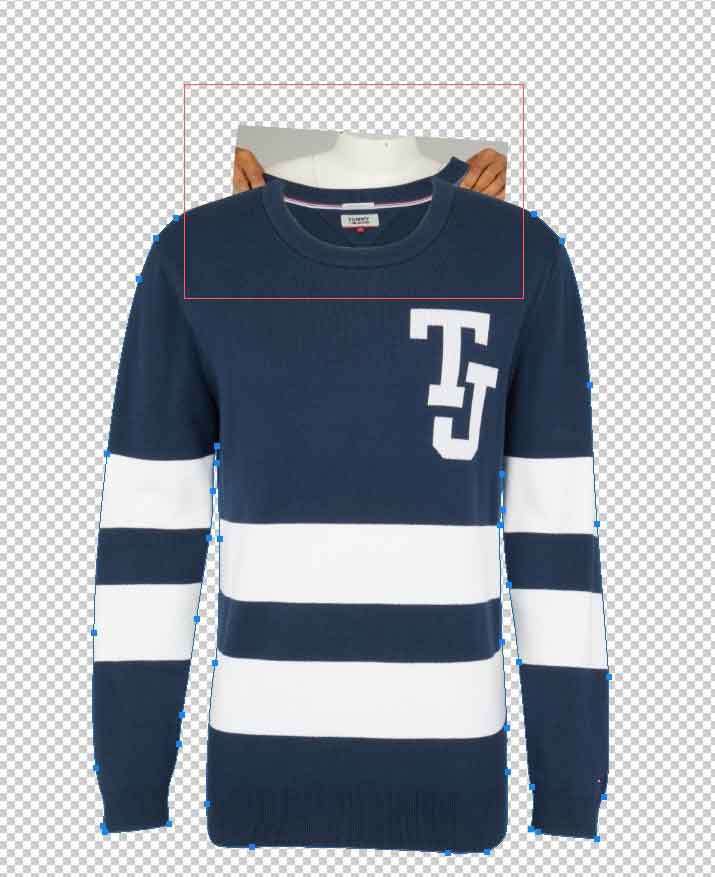
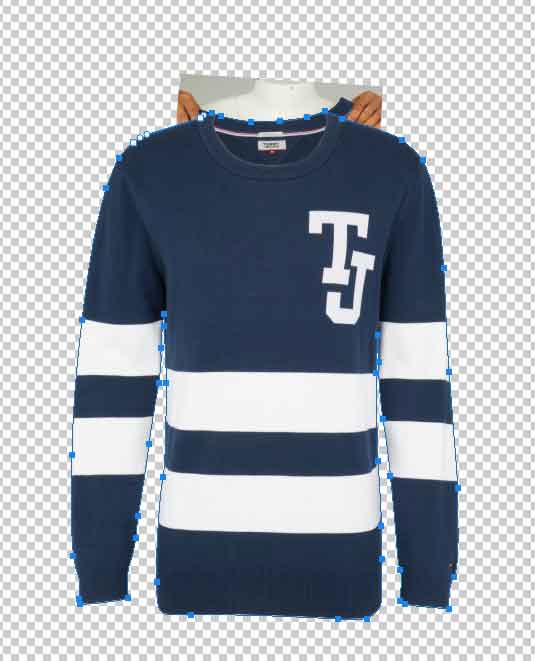
Now create a clipping path by using the Pen Tool. Pick the tool from the toolbar. Press ‘Ctrl & +’ on your keyboard at a time to Zoom the image. Zoom in as much as you need so that you can see the edges clearly. Then create a clipping path around the dress by creating anchor points.
Leaving the unwanted parts, draw a line covering the whole dress. Start from the top of the mannequin’s collar. While creating anchor points, be careful about the edges so that no part of your product is erased.
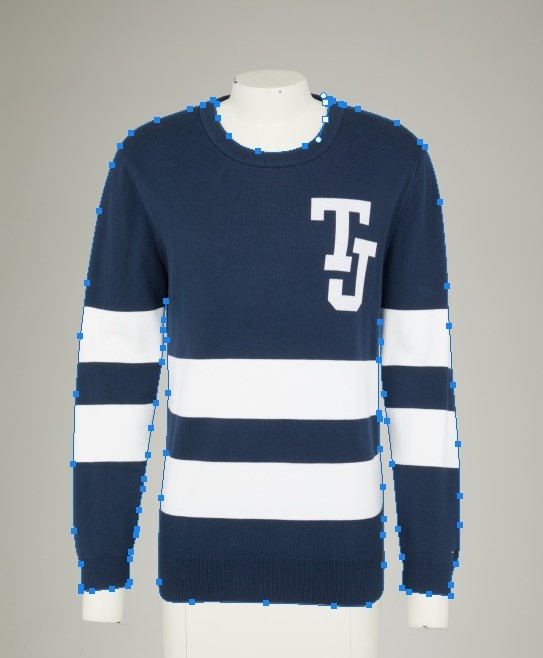
So, now you’re done with creating a clipping path.
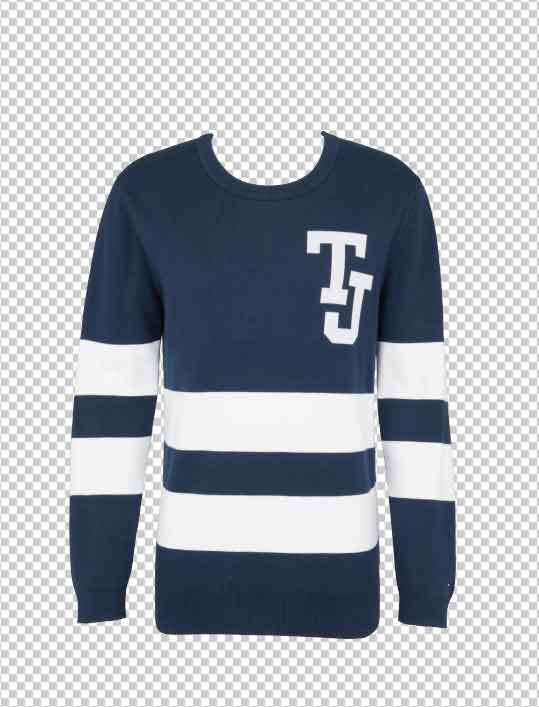
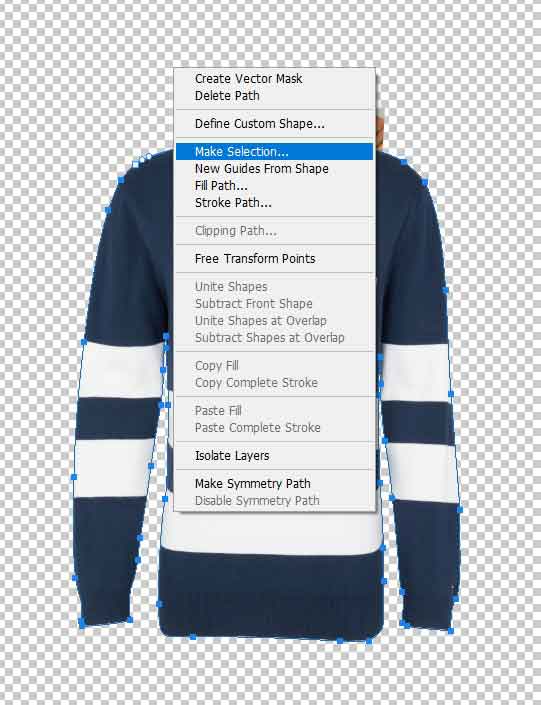
Step Four : Remove Background
Right-click on the mouse and a box will pop-up. Click on ‘Make Selection’ from the menu.
Now, go to the Layer Panel and there is a square box below, with a circle inside. Click on that button to add a layer mask. This will remove the background. Then, right-click on the mask and click on ‘Apply Mask’.
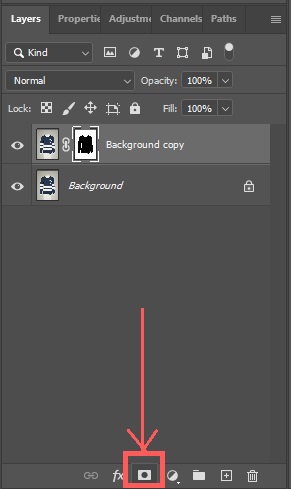
Turn off the Background layer by clicking on the eye beside Background Layer.
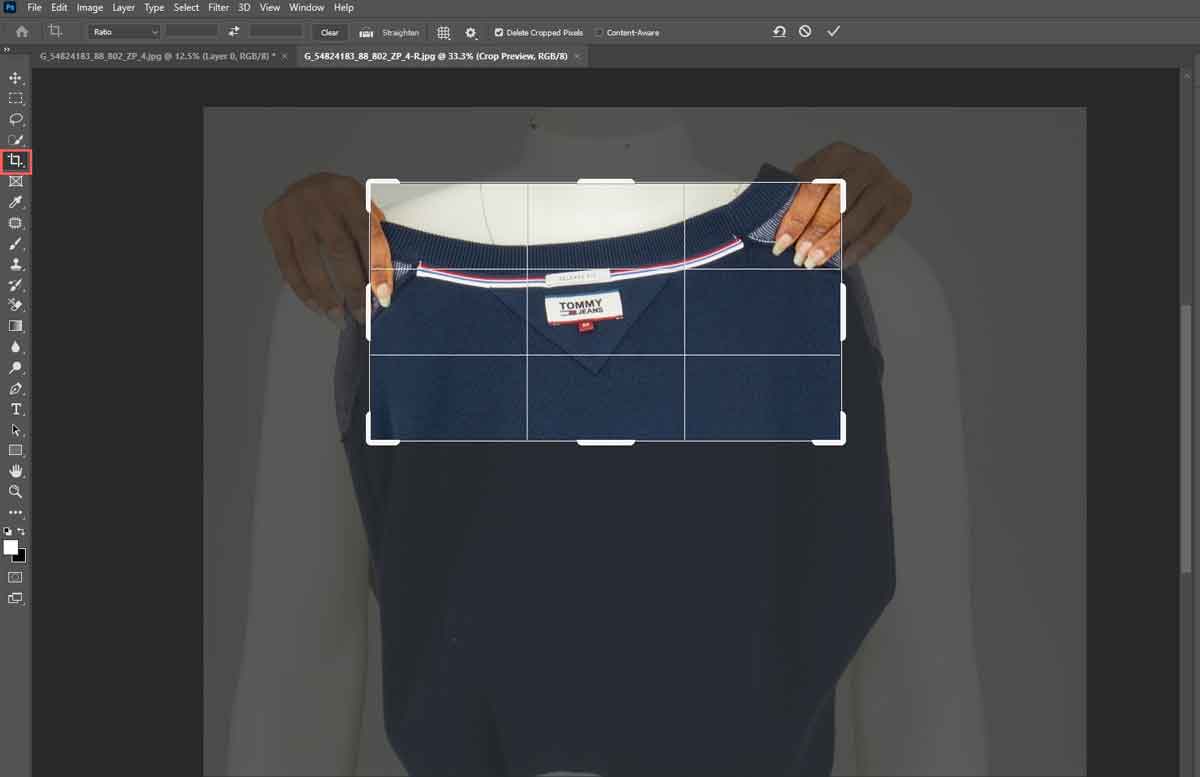
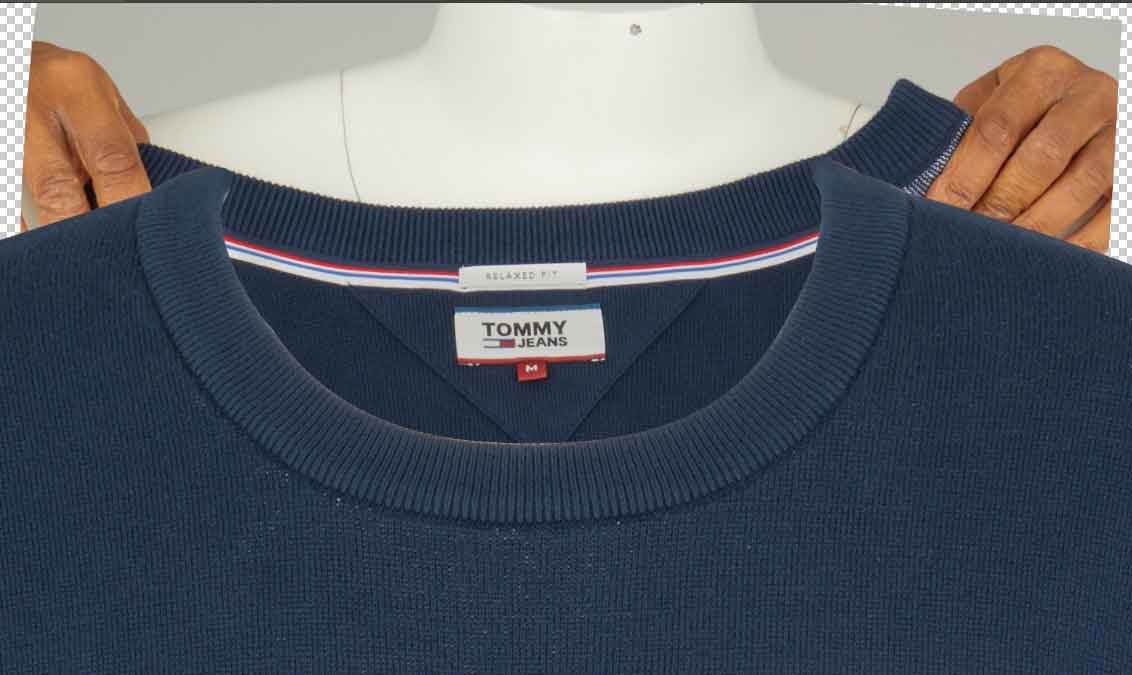
Step Five : Cut the collar image
Go to File and then click on Open to open the inside back image of the T-shirt.
Now, take the crop tool from the toolbar and draw a box around the collar to crop the collar area with the label, and then press Enter.
Step Six : Place the Collar
Click on the collar image Layer, hold and drag the Layer and place it on the main image. Move the collar’s image underneath the first layer of the front.
To adjust the collar position, click on Edit from the top menu and click on Free Transformation, or you can just press Ctrl+T. This will allow you to move the collar wherever you need it. Now, set the collar position.
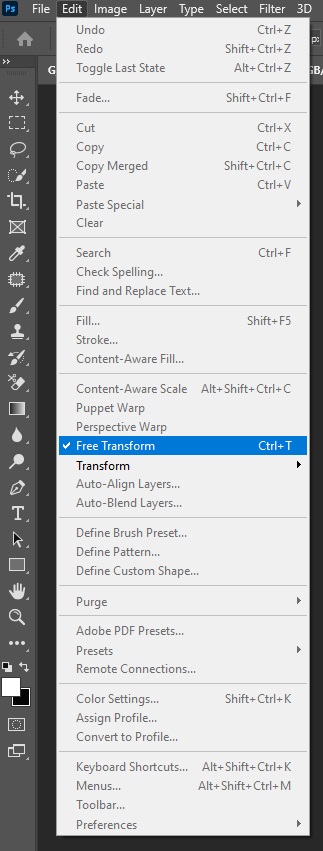
You might need to set the angle too. For that, right-click on your mouse and select Warp option, and set the angle with the main image. Make sure you’re working on Free Transform, otherwise Warp won’t work.

Step Seven : Create Shadow
Select the Brush Tool from the toolbar. Set the opacity according to your need, which can be around 35% and 40%. Make sure your foreground color is selected as black.
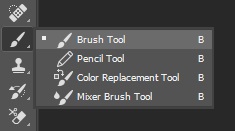
Now, start to brush the area under the collar to add shadow to the image.
Step Eight : Delete Anchor Points
Click on the path you created before from the layer menu.
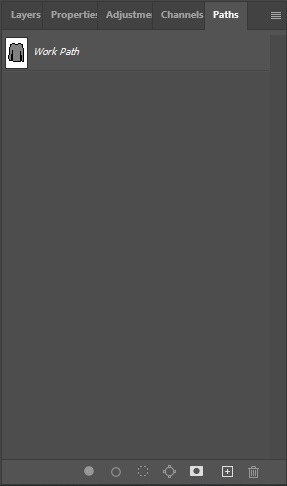
Pick the Pen tool from the toolbar. Now, draw a box around the collar area to select the anchor points you want to delete. Press ctrl on your keyboard and click on your mouse to select the anchor points. Click on delete on your keyboard to delete the anchor points around the collar.
Step Nine : Create New Path
Now, add new anchor points, including the collar, and create a path.
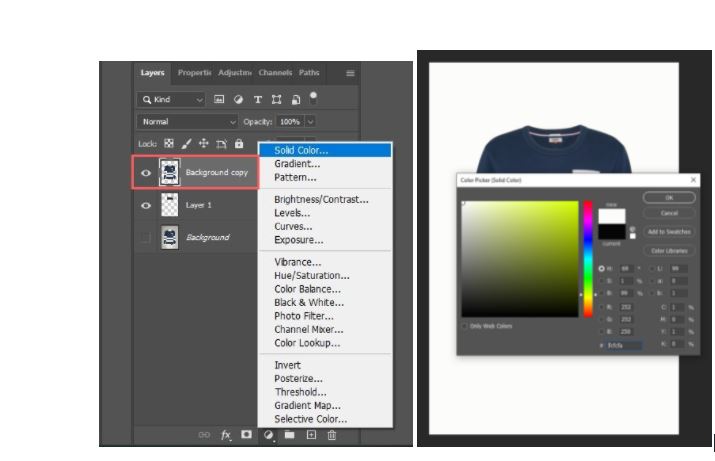
Step Ten : Change the background color
Right-click on the mouse and a box will pop-up. Click on ‘Make Selection’ from the menu. (same as step 4)
Go to Layer Menu and select the Background Copy Layer. Now, click on the round box below the Layer menu. Click on the Solid Color and choose the color you want to put as the background color. If you see your product color has changed, just press ‘Ctrl + I’ on your keyboard. This will invert the color.
Step Eleven : Save the file
Now save the file from the File option or press Ctrl+Shift+S.
3D Mannequin Effect Editing Tips
- Keep a duplicate layer of the background layer so that you can go back to that anytime if you make a mistake while editing.
- Create the clipping path accurately so that you don’t cut any wanted area.
- Be careful while working with the collar as you’ll set this part separately, try to make it realistic.
- Adjust the angle of the collar appropriately.
- Don’t make the shadow too dark or too light. Just keep it looking natural. Try different brush sizes and find which one goes with your image.
- Change the background color to something that goes with the attires.
- Save the files in both JPEG and PSD formats. PSD will allow you to work with the file in the future, and JPEG can be used to upload the image online.
Does this part seem difficult? Professional ghost mannequin services are here to ease your burden.
How to Outsource Post-processing Part?
If you need an invisible mannequin service, assign a photo clipping path service provider for your project. This is fast, secure, and cost-effective.
The photo editing pricing structure for this service is shown here-

Apart from the regular pricing, you will get a discount at bulk amount order.
This is how you can get the work done-
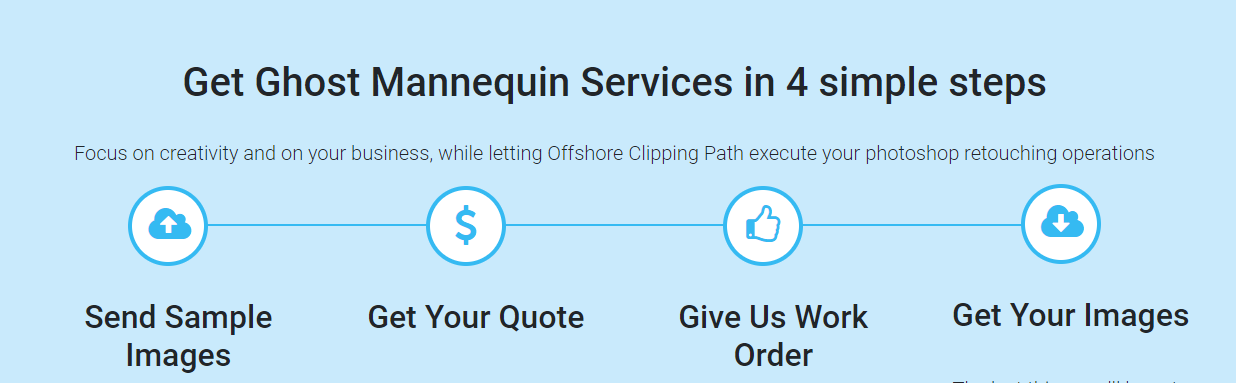
How Does the Ghost Mannequin Effect Help Ecommerce Ventures?
We got accustomed to digitalization too much. Now shopping is at our fingertips, so we don’t bother going out. It’s time-saving, going to online stores, searching for a product, and clicking it to check details. Then, if it matches our preference, we click to order.
This goes for anyone. But before making that buying decision, there are these inevitable parts of ‘check details’ and ‘match preference’.
To ensure buyers’ demands comply well with the supply and vie with one another in the competitive online market, companies are adopting every possible method. Point to note- the international apparel market was worth $527.1 billion in 2020 and is growing.
Clothing product photography has proven to be an effective method for ecommerce businesses against diversified challenges. Moreover, it has connected a lot of potential buyers.
However, this doesn’t end there. Now, marketers have leveled their methods up and are using the ghost mannequin effect technique- a unique and widely preferable way to display clothing realistically. Almost all clothing businesses use it to show their attires on online platforms.
This technique is a cost-cutting and eye-catching method for entrepreneurs who are having a fresh start with their online store or already have one. When you have a grounded platform, have images of professional models alongside that of the invisible mannequin effect. This technique can help you impress your clients and stay ahead of the trend in virtual business.
The upsides of the invisible mannequin effect are-
- Cost effective
It is indeed a cost-effective solution. Hiring professional models cost $64,000 to $147,000 or more per year, statistics say. So it is certain that mannequins won’t be anywhere near half of that price. And if you go for neck-joint service, the pricing of outsourcing is much less than you think!
- Increase add on sale/ upselling
The neck joint helps not only in solo selling strategy but also in upselling. How? Let’s say you are selling a customized floral dress, and this is a very convenient dress for sea-beach. While promoting, you can add girls’ hats. This way, you are helping increase hat sales as well.
- Offers original view
Online shopping does not provide the benefit of touching or live-checking options of any product, let alone clothing. Therefore, the neck joint offers an original 3d look, like a non-visible figure is wearing that dress. And different details of the dress make it appear original. This actually works best for womens’ outfits, activewear, etc.
- Stylish, clear, and detailed presentation
Customers’ need a thorough check of a product given that today’s businesses are internet dependent with no scope of tangibility. The invisible mannequin serves that purpose. It offers an iconic and transparent look of any dress to lure and inspires customers to purchase. Moreover, if it is a 360-ghost mannequin, it sure does a lot!
- Appeals and draws potential buyers
When you have targeted an international client base with your online store, you will perform no least effort for that. Having this effect on clothing is sensually pleasing and interesting. As it has a realistic look, it helps stimulate potential clients’ thoughts for intense checking.
- Retains brand professionalism
No business wants to end up as a laughing stock, and by any means, they will want to ensure its professionalism. A major part of this relies on presentation and visual promotional activities like images and videos. High-quality photos of attires can help do that.
Ghost Mannequin Effect in Photoshop (Tutorial- 5.35 s)
Important FAQs
Q: Why use a neck joint service?
Ans: Services are provided in a broader range by experts. Ecommerce businesses, online stores look to this service frequently for it being a risk-free, cost-effective solution.
Q: How do I get the invisible mannequin effect?
Ans: This effect is photoshop work. We recommend you go through our step-by-step process to learn this.
Q: How does a 3d mannequin work?
Ans: The process starts with dressing a mannequin/model in fitting attire and then taking photos. After getting the raw images, we process those in photoshop to bring that effect.
Q: How can I model clothes without a mannequin?
Ans: If you don’t have a mannequin/model for clothing photography, there are other options available; go to this link to check out.
Q: Does the invisible mannequin effect increase sales?
Ans: Yes, it does. It is one of the top picks for apparel business owners and has proven an effective method to help increase sales.
Bottom Line
If you are a learner, hope you find this article helpful to achieve your goals. To learn other photoshop works, check our blog for tutorial content. Keep up the good work, and learn every day. One day you will master it.
And if you are looking for outsourcing ghost mannequin services or any other photo editing services, feel free to knock us.
Offshopre Clipping Path is gladly offering you a FREE trial to test their service quality on Ghost Mannequin