Clipping masks in Photoshop let one layer control another’s visibility, making layered designs precise and flexible. They’re used to crop images, apply effects selectively, or shape text and graphics without changing the original layers. You can create, adjust, and manage clipping masks to control which parts of a layer are visible, ensuring professional, editable results every time.
What you’ll learn in this article
- 1 How to Create a Photoshop Clipping Mask?
- 2 What is the Difference Between Layer Mask and a Clipping Mask?
- 3 How Do You Find a Professional Clipping Mask Service Provider?
- 4 FAQ’s
- 4.1 What is a clipping mask?
- 4.2 Where is the clipping mask in Adobe Photoshop?
- 4.3 What is the shortcut for a clipping mask?
- 4.4 Why does my clipping mask disappear in Photoshop?
- 4.5 Can you create a clipping mask for a whole group in Photoshop?
- 4.6 What is the Ctrl+Alt+G shortcut in Photoshop?
- 4.7 What file types support clipping masks?
How to Create a Photoshop Clipping Mask?
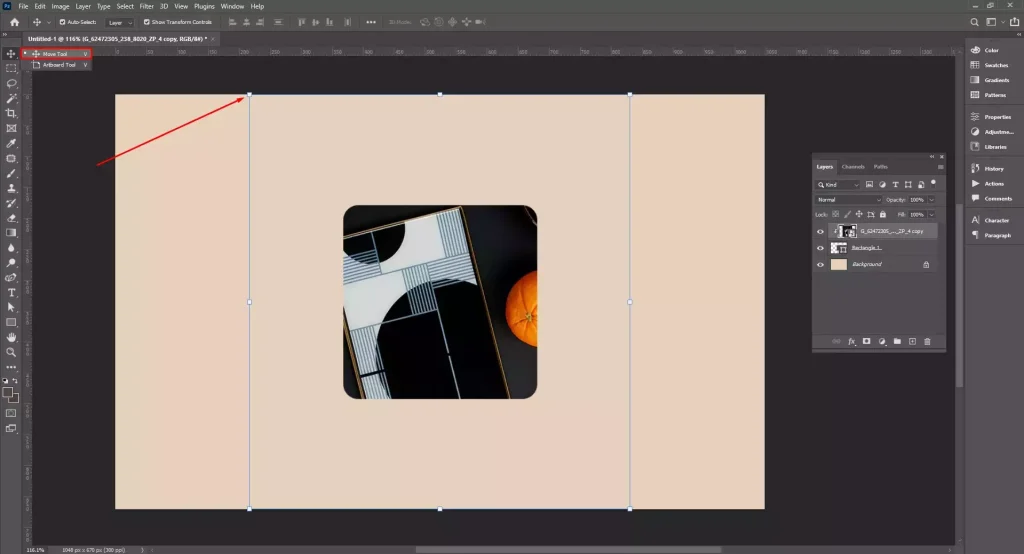
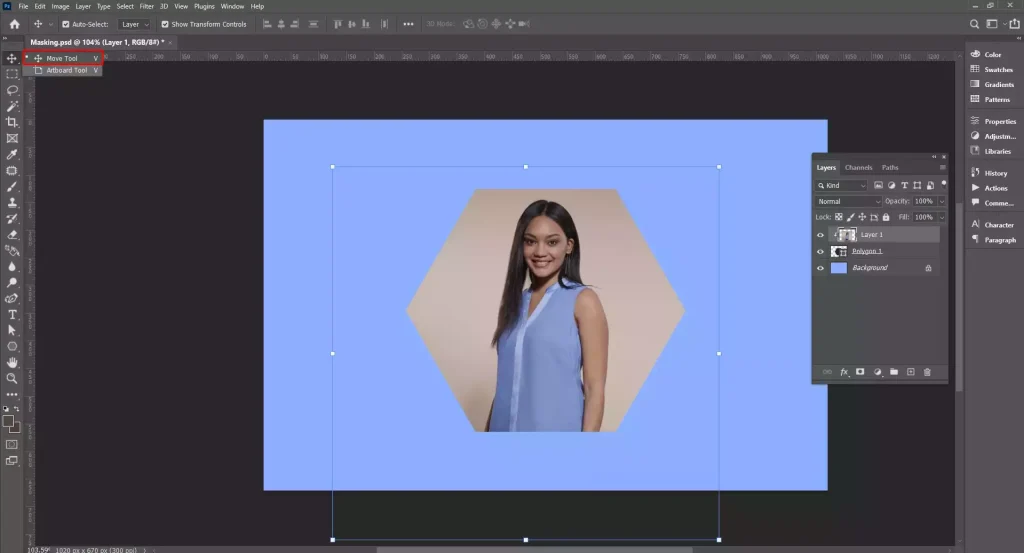
The process of creating a clipping mask in Photoshop starts by letting one layer show only inside the shape of another layer. It is perfect for placing images inside text, shapes, or custom graphics without cutting the image itself. You keep full control and can move or edit layers at any time. It is simple, clean, and non-destructive once you understand the steps.
Below are the essential steps involved in Photoshop Clipping Mask:
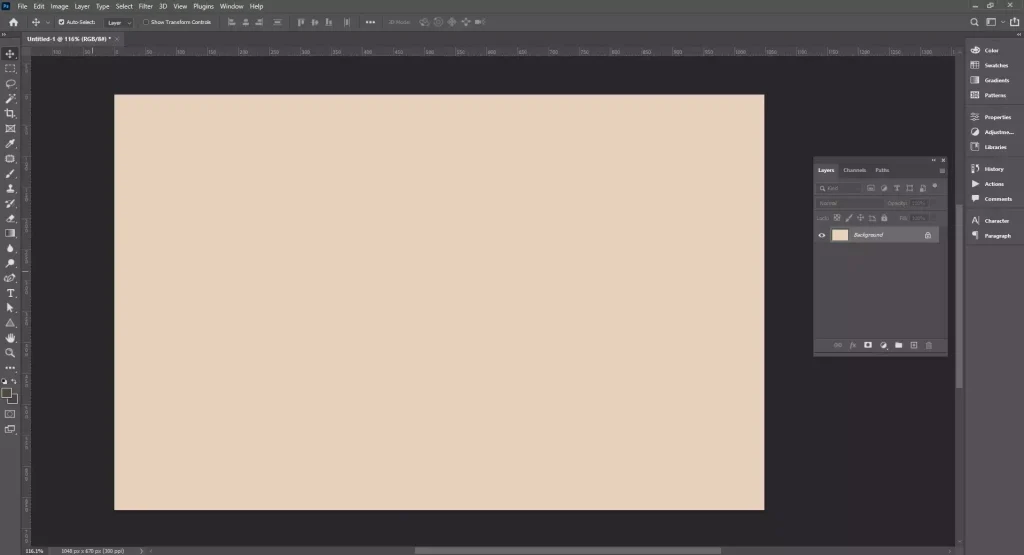
Step 1: Open Your Project in Photoshop
Launch the project you want to edit and make sure the layers panel is visible so you can manage your layers properly.
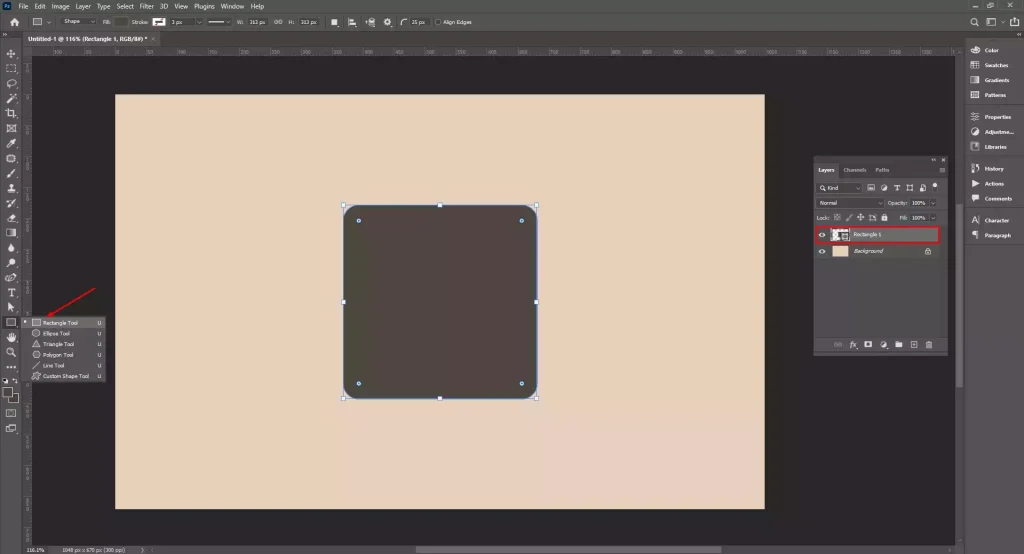
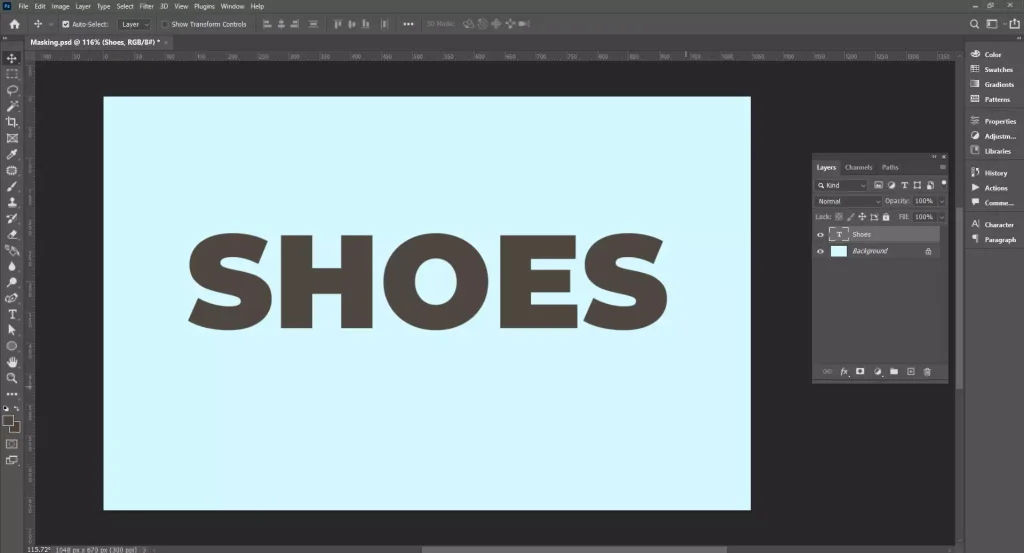
Step 2: Add the Base Layer that Will Control the Visible Shape
Add a text layer, shape layer, or graphic element that will act as the visible boundary for the image.
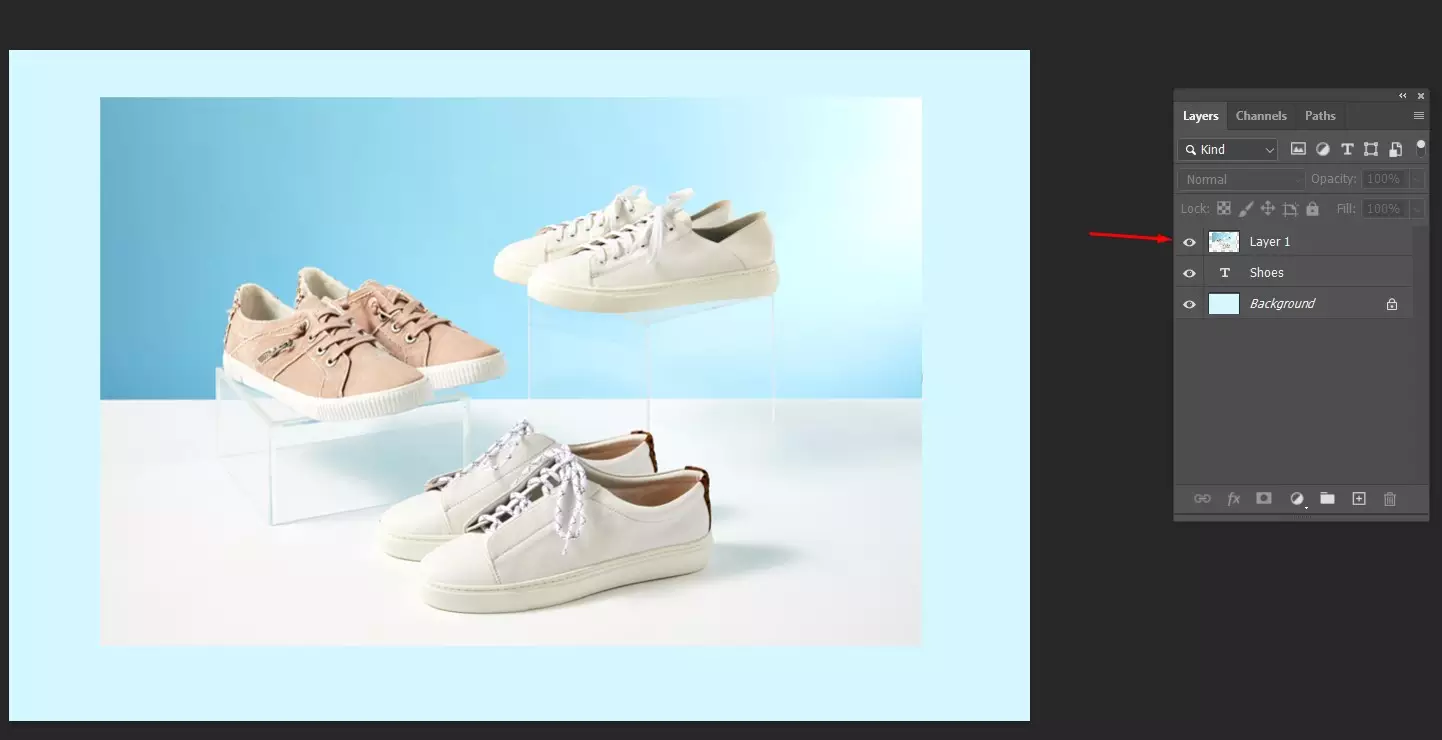
Step 3: Import or Drag the Image Layer Above the Base Layer
Place the image directly on top of the shape layer in the layers panel to prepare it for clipping.
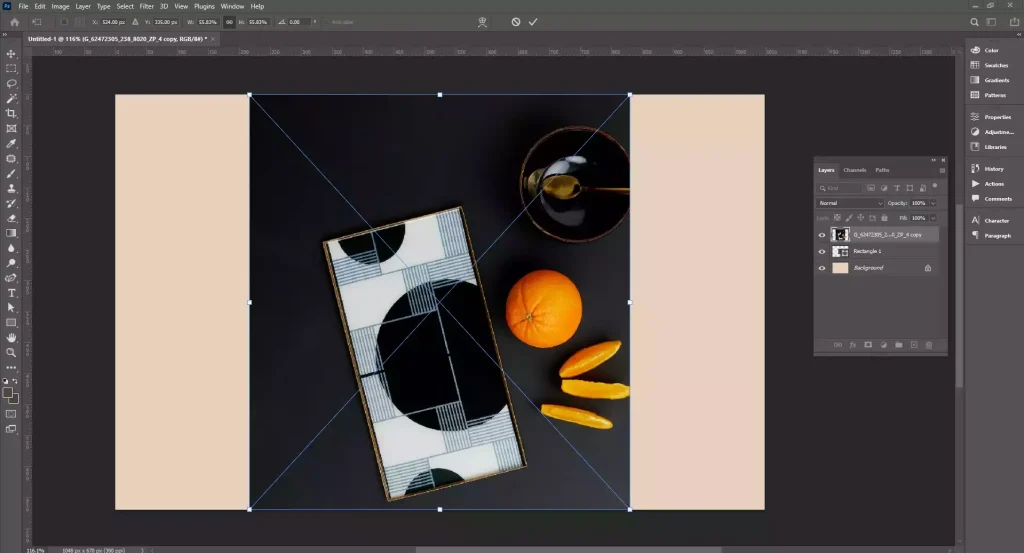
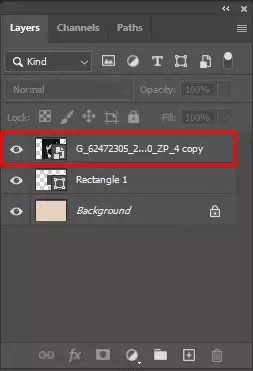
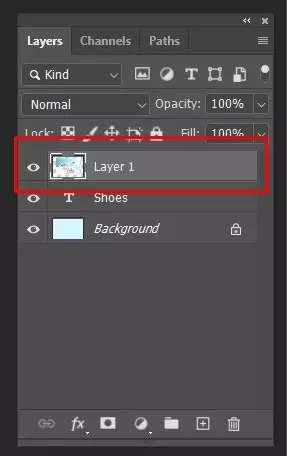
Step 4: Select the Image Layer You Want to Clip
Click on the top layer to activate it so Photoshop knows which layer you want to mask.

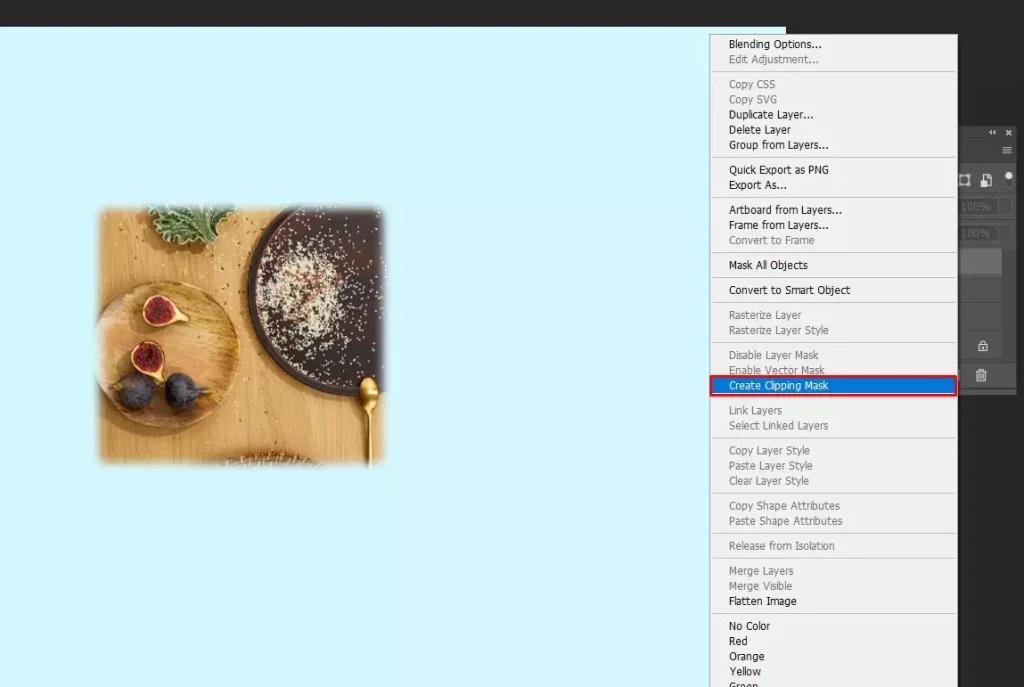
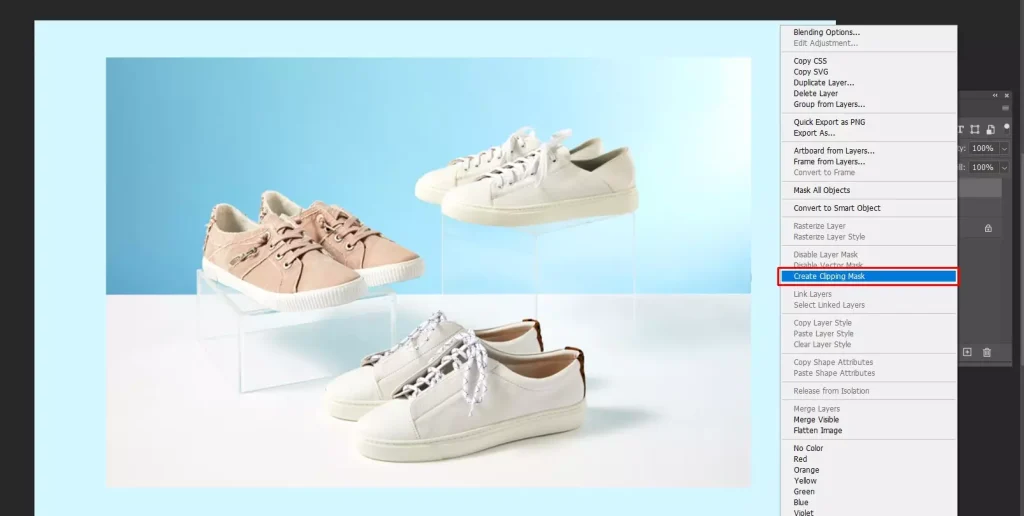
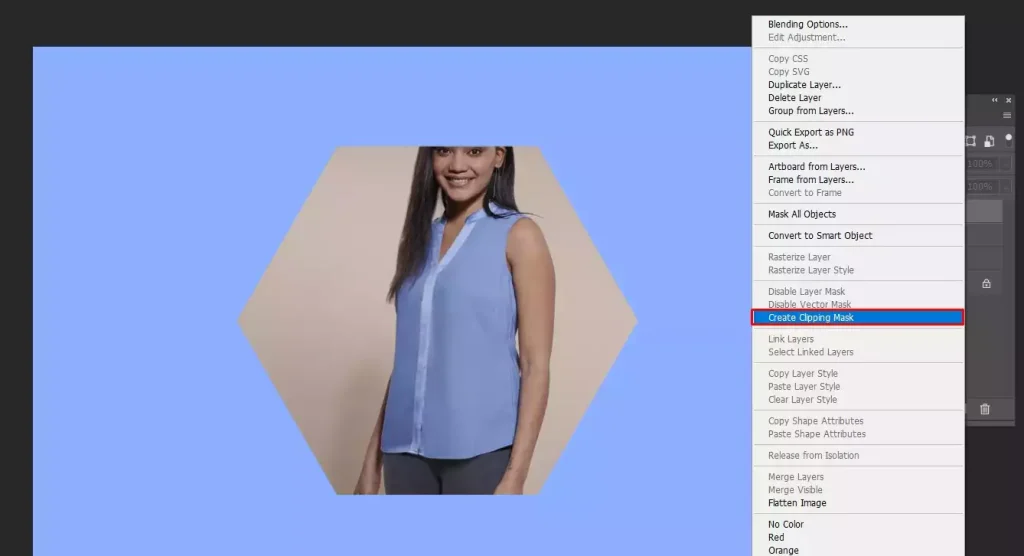
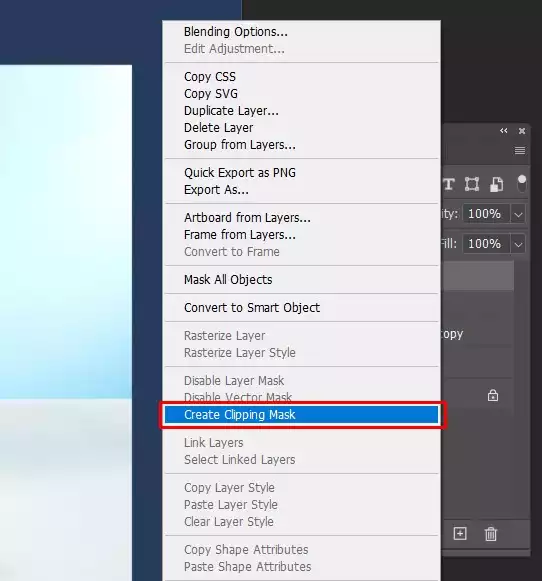
Step 5: Right-Click the Selected Layer and Open the Options Menu
Access the layer controls to find the clipping mask command.
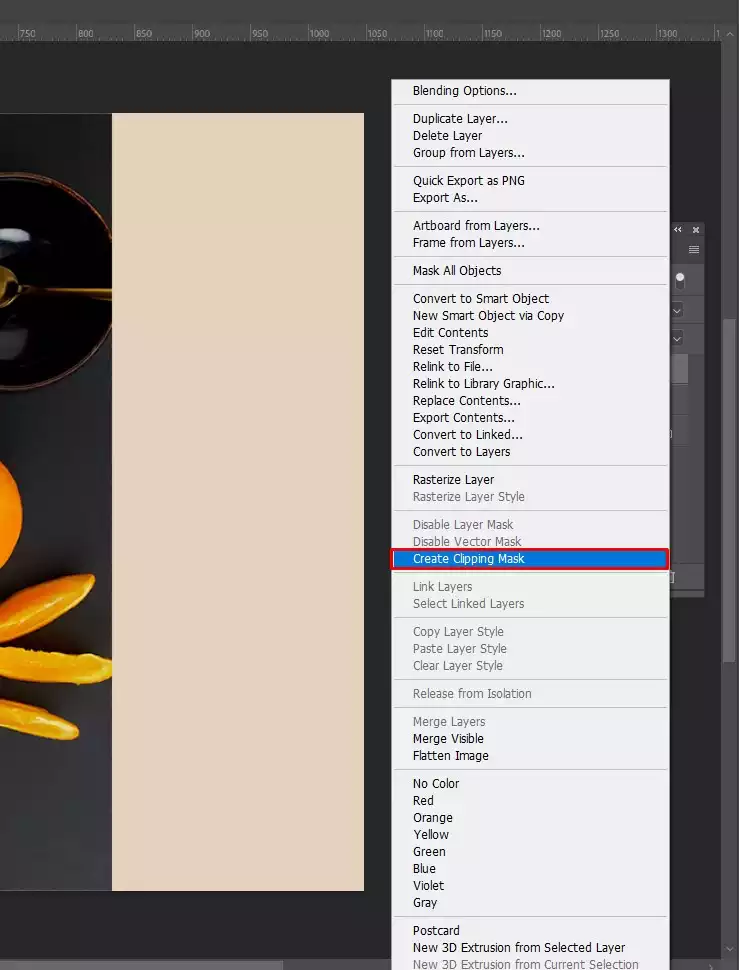
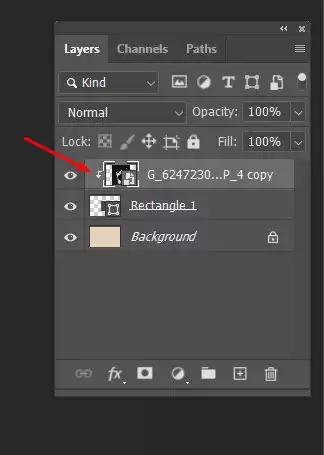
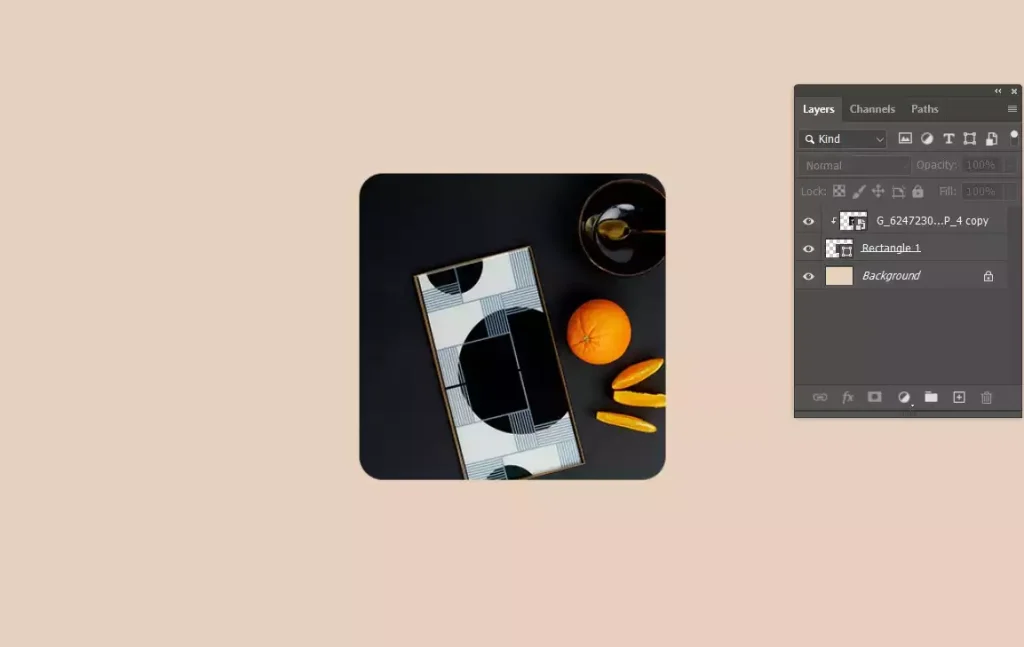
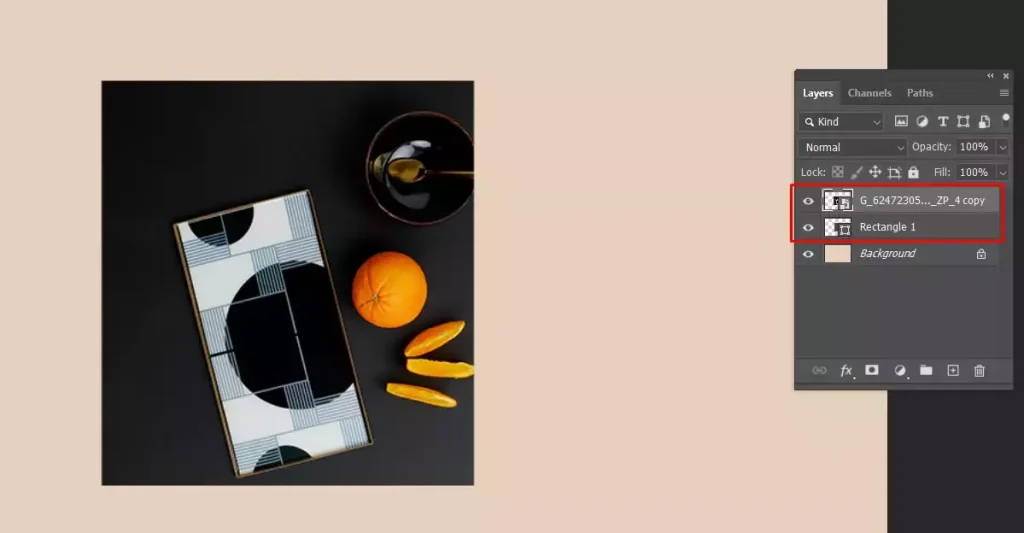
Step 6: Click on Create Clipping Mask
Apply the mask and instantly confine the image inside the shape of the layer below.
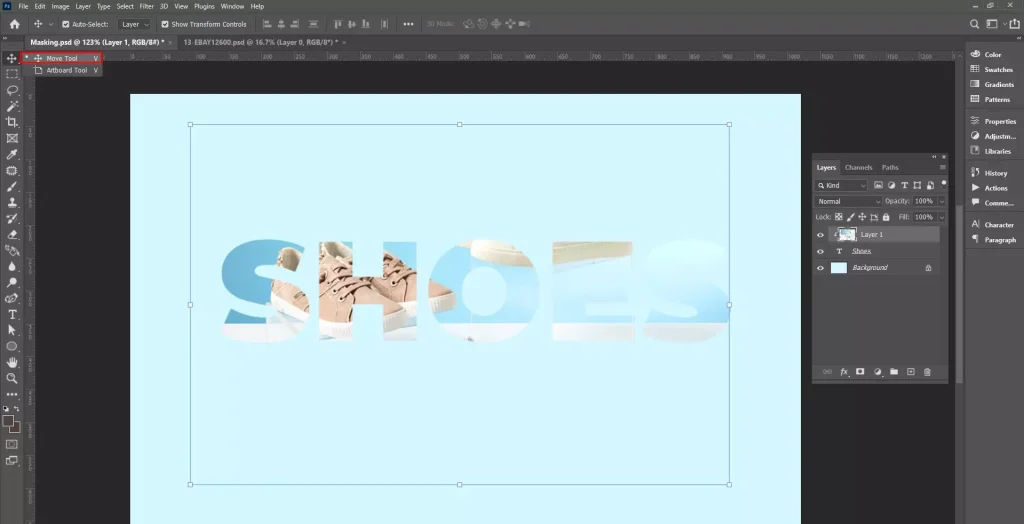
Step 7: Reposition or Resize the Clipped Image as Needed
Use the Move Tool or Transform controls to adjust how the image fits inside the shape.
Step 8: Use the Keyboard Shortcut for a Quicker Workflow
Press Ctrl + Alt + G on Windows or Cmd + Option + G on Mac to create or release a clipping mask faster.
How Do You Create a Clipping Mask From Selection in Photoshop?
To create a clipping mask from a selection in Photoshop, first make a selection of the area you want to use. Turn that selection into its own layer by filling it or converting it into a shape. Place your image layer above it, then create the clipping mask. The image will now appear only inside the selected area.
To create a clipping mask from a selection in Photoshop, follow these steps:
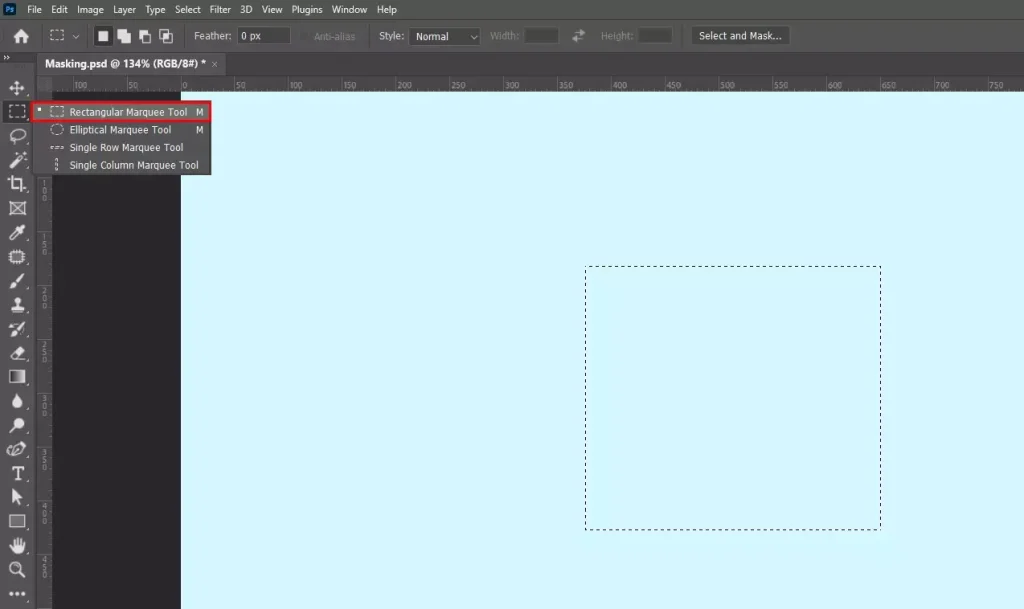
Step 1: Make a Selection
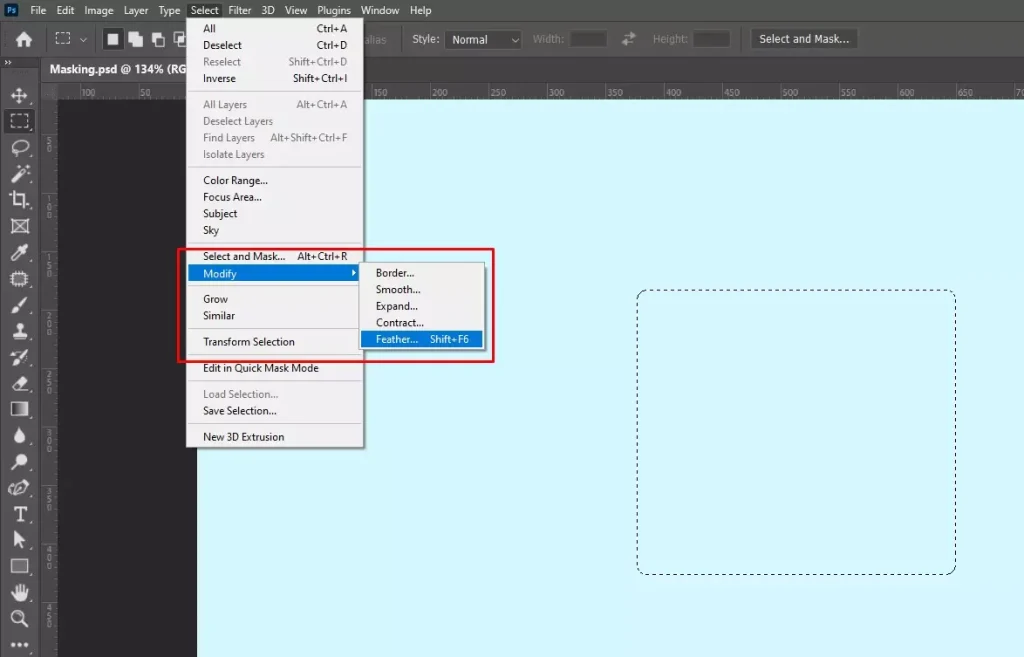
- Use selection tools like Rectangular Marquee (M), Lasso (L), or Quick Selection (W).
- Refine the selection by going to Select > Modify (e.g., Feather, Expand) or Select > Select and Mask for smooth edges.
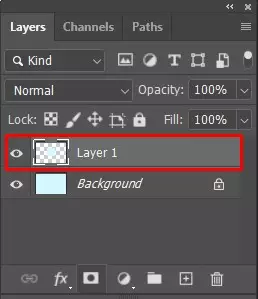
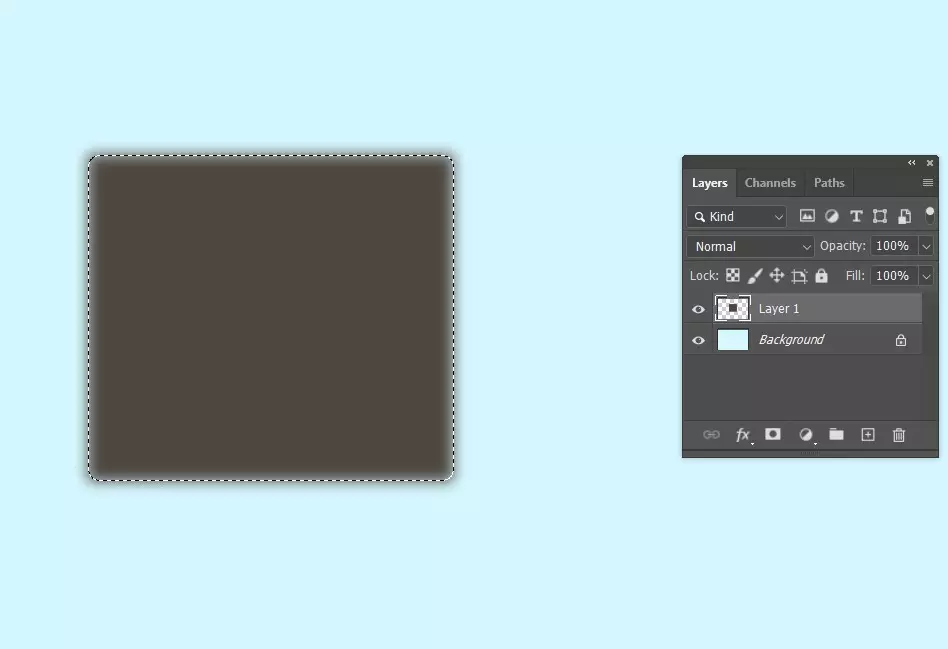
Step 2: Turn the Selection Into a Layer
- With the selection active, press Ctrl+J (Cmd+J on Mac) to copy the selection into a new layer.
- Alternatively, fill it with color using Shift+F5 and create a shape layer if needed.
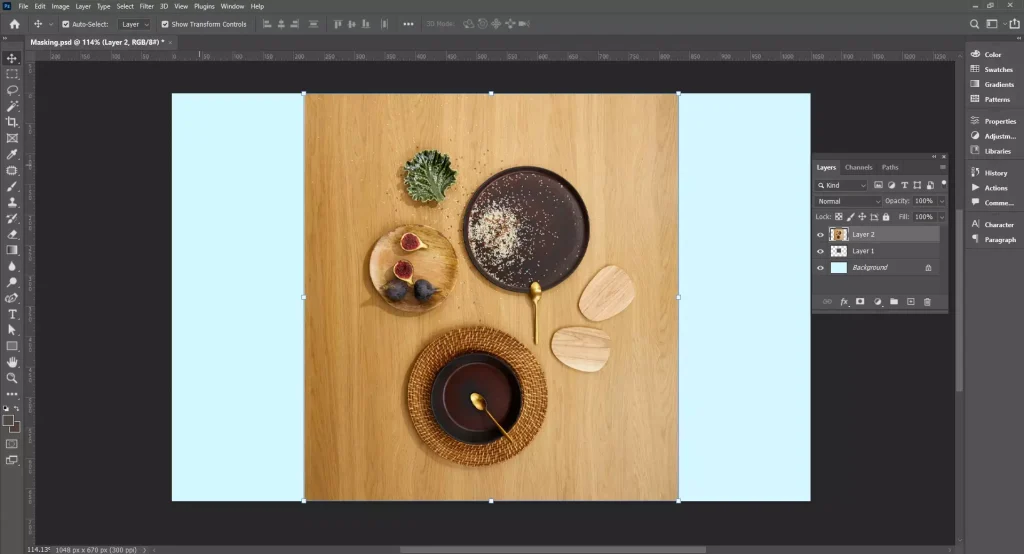
Step 3: Place Your Image Above
- Drag the image layer above the new selection layer in the Layers panel.
Step 4: Create the Clipping Mask
- Right-click the image layer and select Create Clipping Mask, or use the shortcut Alt+Ctrl+G (Option+Cmd+G on Mac).
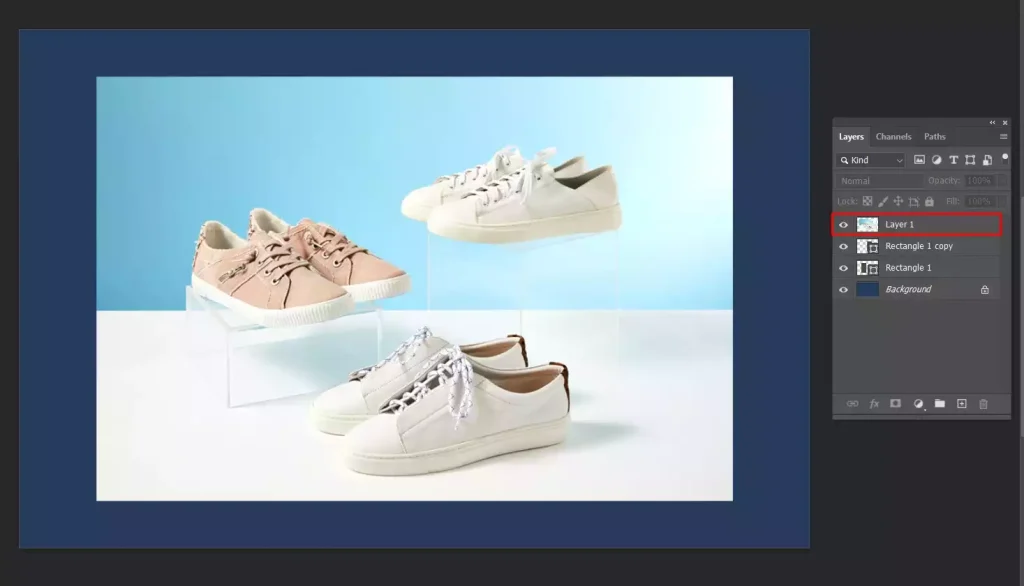
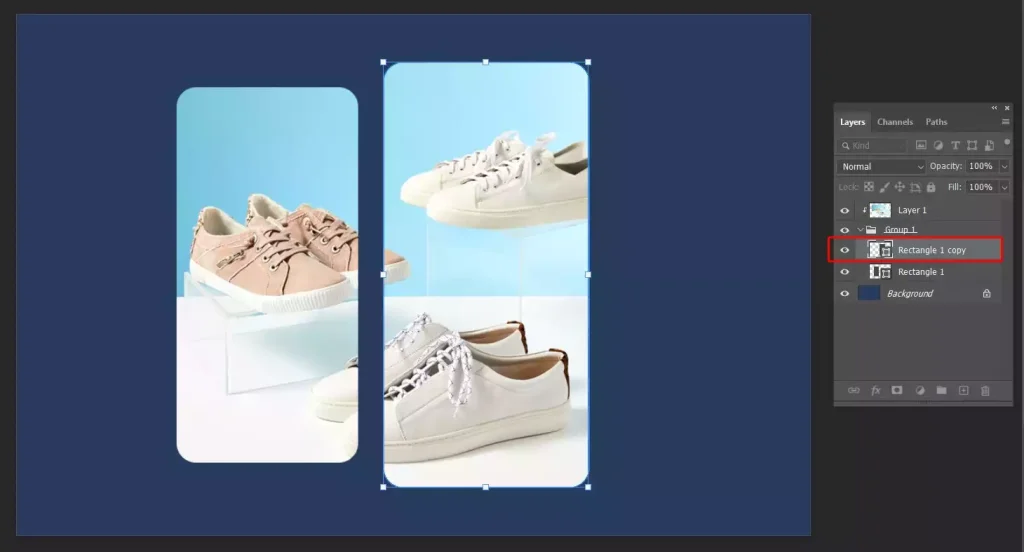
How Do You Make a Clipping Mask With Two Layers?
To make a clipping mask with two layers in Photoshop, place the layer you want as the shape on the bottom and the layer you want to clip on top. Right-click the top layer and choose Create Clipping Mask. The top layer will now appear only inside the shape of the bottom layer, while remaining fully editable and non-destructive.
To make a clipping mask with two layers in Photoshop, follow these steps:
Step 1: Arrange Your Layers
Place the layer you want as the shape on the bottom. This can be text, a shape, or any filled layer. Put the image or design you want to clip on top.
Step 2: Select the Top Layer
Click on the top layer in the Layers panel. This is the layer that will be clipped.
Step 3: Create the Clipping Mask
Option 1: Right-click on the top layer and choose Create Clipping Mask.
Option 2 (Quick Shortcut): Select the top layer (or multiple layers) and press Ctrl + Shift + G. Photoshop will create a clipping group, adding a “mask layer” that inherits the transparency of the bottom layer.
Step 4: Adjust as Needed
Now the top layer appears only inside the shape of the bottom layer. You can move, resize, or edit both layers anytime without affecting the original image.
How Do You Make a Clipping Mask From a Layer in Photoshop?
To make a clipping mask from a layer in Photoshop, start by placing the layer you want to clip directly above the base layer. Then right-click the top layer and choose Create Clipping Mask, or press Alt+Ctrl+G (Option+Cmd+G on Mac). The top layer will now appear only within the boundaries of the layer below, while both layers remain fully editable.
To make a clipping mask from a layer in Photoshop, follow these steps:
Step 1: Arrange Your Layers
- Place the layer you want to clip directly above the base layer in the Layers panel.
- The base layer can be a shape, text, or any other layer.

Step 2: Select the Top Layer
- Click on the layer you want to clip to highlight it.
Step 3: Create the Clipping Mask
- Right-click the top layer and choose Create Clipping Mask.
- Or use the shortcut Alt+Ctrl+G (Option+Cmd+G on Mac).
Step 4: Adjust and Edit
- Move, resize, or transform the clipped layer using Ctrl+T (Cmd+T on Mac).
- Both layers remain fully editable, so you can change the base layer or the clipped layer at any time.
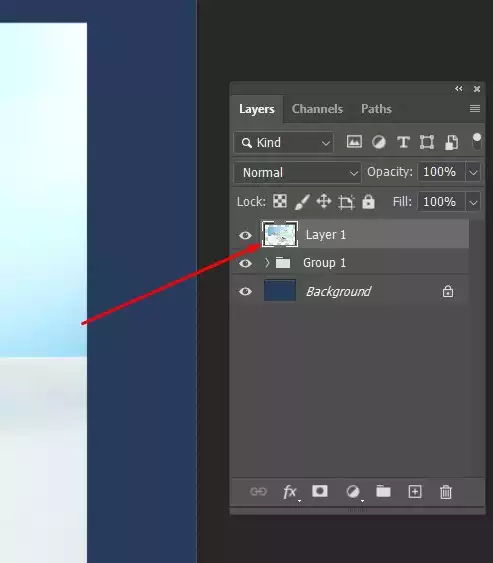
How to Turn a Group Into a Clipping Mask in Photoshop?
Turning a group into a clipping mask in Photoshop lets you apply one or more layers as a single clipped unit inside a base layer. It’s perfect for complex designs where multiple elements need to appear only within a shape or text. The original layers remain editable, keeping your workflow non-destructive and flexible.
To turn a group into a clipping mask in Photoshop, follow these steps:
Step 1: Organize Layers Into a Group
- Place the layer you want to clip directly above the base layer in the Layers panel
- Press Ctrl+G (Cmd+G on Mac) or go to Layer > Group Layers. And make a base layer group
- Select the layers you want to clip.
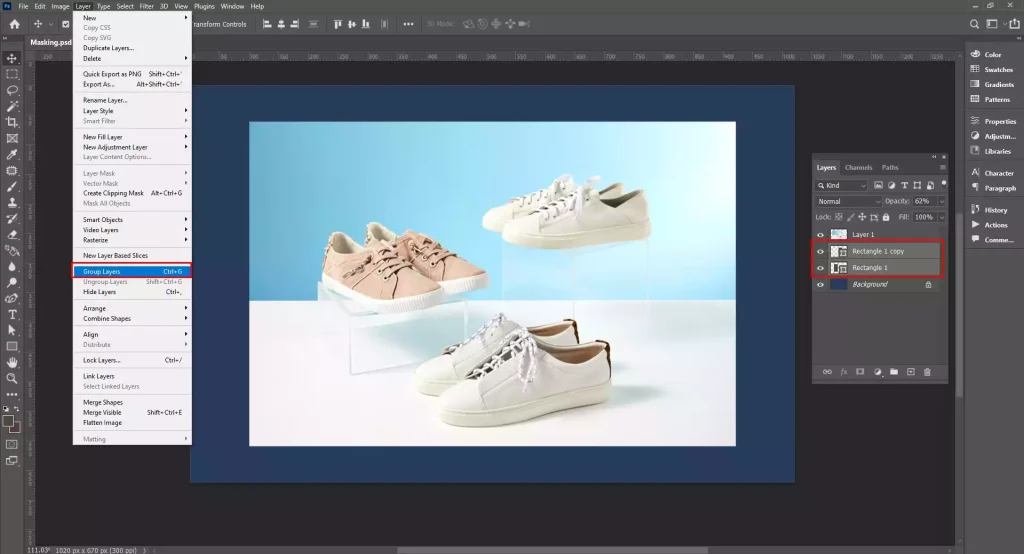
Step 2: Create the Clipping Mask
- Right-click the top layer and choose Create Clipping Mask.
Step 3: Edit the Group
- Expand the group to adjust individual layers.
- Move, transform (Ctrl+T / Cmd+T), or apply effects; everything remains confined to the base layer shape.
Why Won’t Clipping Mask Work in Photoshop?
Clipping Mask won’t work in Photoshop because the layers aren’t set up correctly, or the wrong type of layer is on top. Common issues include trying to clip a background layer, using a layer without transparency, or placing the image below the shape layer. Understanding how layers interact ensures masks function as expected, keeping designs editable and precise.
The common reasons behind a clipping mask in Photoshop not working are:
- Background layers can’t be clipped until converted to a normal layer.
- The layer you want to show must be above the shape or text layer.
- Solid layers without transparency won’t reveal the clipped effect.
- Clipping a layer inside a group incorrectly can prevent it from working.
- Any locked layer cannot act as a clipping base until unlocked.
How Do You Enable Clipping Mask?
Enabling a clipping mask in Photoshop lets you control which parts of a layer are visible inside another layer’s shape. It keeps your design non-destructive, so you can move, resize, or replace the clipped layer anytime without altering the base layer.
Here’s the major method to enable a clipping mask in Photoshop:
Method 1: Place Your Layers
Drag the layer you want to clip above the base layer (text, shape, or vector). Ensure the base layer has transparency to define the visible area.
Method 2: Select the Top Layer
Click on the layer you want to appear inside the base layer.
Method 3: Apply the Clipping Mask
Right-click the top layer and choose Create Clipping Mask, or press Ctrl + Alt + G (Windows) / Cmd + Option + G (Mac). Look for the small downward arrow showing the layer is clipped.
Method 4: Move or Resize the Clipped Layer
Use the Move Tool or Free Transform (Ctrl + T / Cmd + T) to adjust position, scale, or rotation while keeping the base layer unchanged.
Method 5: Edit Freely
Replace, recolor, or mask the clipped layer without affecting the base layer for a non-destructive workflow.
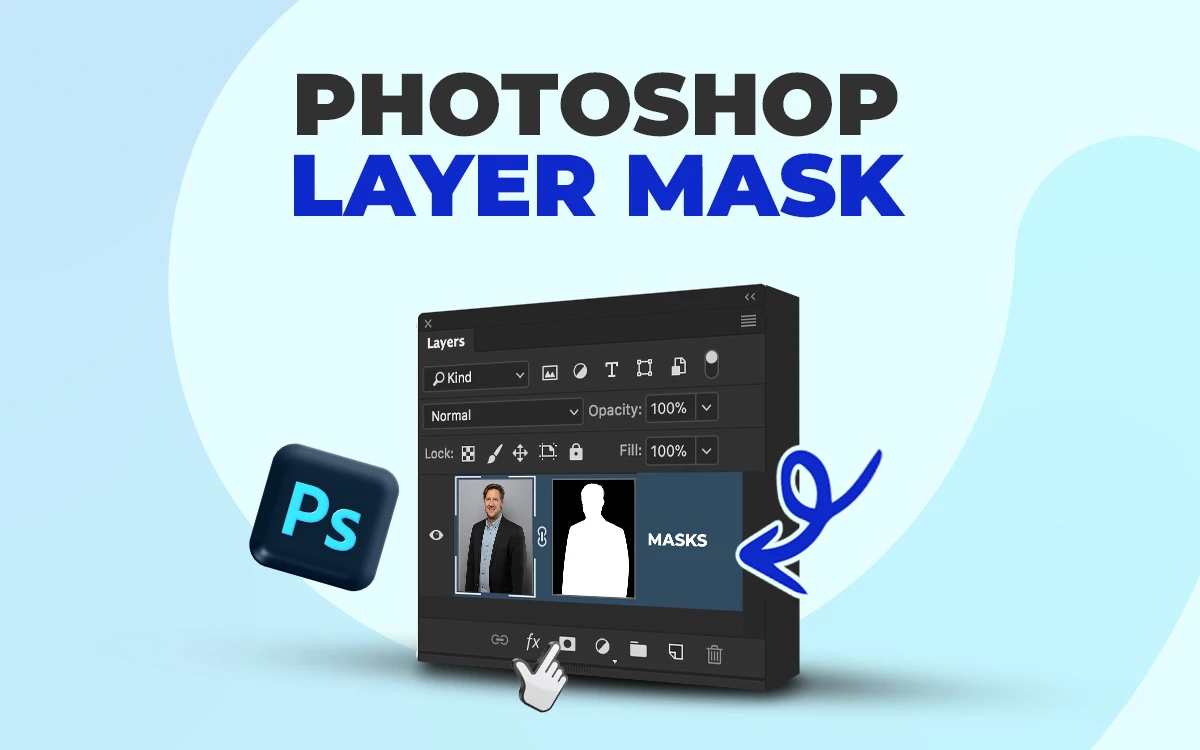
What is the Difference Between Layer Mask and a Clipping Mask?
The differences between a layer mask and a clipping mask lie in how they control visibility. A layer mask hides or reveals parts of its own layer, while a clipping mask confines one layer’s visibility to the shape of another layer below it.
Here is the core difference between a layer mask and a clipping mask:
| Feature | Layer Mask | Clipping Mask |
|---|---|---|
| Function | Hides or reveals parts of the same layer | Shows a layer only within the shape of the layer beneath |
| Non-Destructive | Yes, edits can be modified anytime | Yes, the top layer remains editable |
| Application | Works on a single layer | Requires at least two layers |
| Control | Uses black, white, and gray on the mask | Uses the transparency of the base layer to define visibility |
| Flexibility | Can be painted on for precise edits | Can clip multiple layers to the same base layer |
How Do You Convert a Layer Into a Mask?
To convert a layer into a Mask, generate a selection from its alpha channel, then assign that selection as a layer mask to a target layer, defining pixel-level transparency, preserving non-destructive editing, and enabling precise compositing control within the document stack.
Here’s a detailed, step-by-step guide to convert a layer into a mask in Photoshop:
Step 1: Open Your Project
Launch photoshop and open the file containing the layer you want to mask.
Step 2: Select the Layer
In the layers panel, click the layer you want to turn into a mask.
Step 3: Duplicate the Layer
Right-click the layer → “Duplicate Layer” → click OK. This keeps your original intact.
Step 4: Load Transparency as Selection
Hold Ctrl (Cmd on Mac) and click the layer thumbnail. This selects all non-transparent pixels.
Step 5: Add a Layer Mask
With the selection active, click the “Add Layer Mask” button at the bottom of the Layers panel. The visible part of the layer becomes the mask.
Step 6: Refine the Mask
Select the mask thumbnail, then use the Brush Tool (B) with black or white to hide or reveal areas.
Step 7: Apply Mask to Another Layer
Drag the mask thumbnail onto a different layer while holding Alt (Option on Mac) to copy it.
How Many Layers Do We Need to Create a Clipping Mask in Photoshop?
To create a clipping mask in Photoshop, you need at least two layers. The Bottom layer acts as a mask, shape, text, or pixel to control visibility. And the top layer acts as a content, text, or texture that is clipped to it, showing only where it overlaps.
When you set the top layer as a clipping mask, Photoshop uses the transparency of the bottom layer to show or hide parts of the top layer.
You can also stack multiple layers above the base layer, and all of them will clip to that single bottom layer.
Here is a detailed description of the two layers that we need to create a clipping mask in Photoshop:
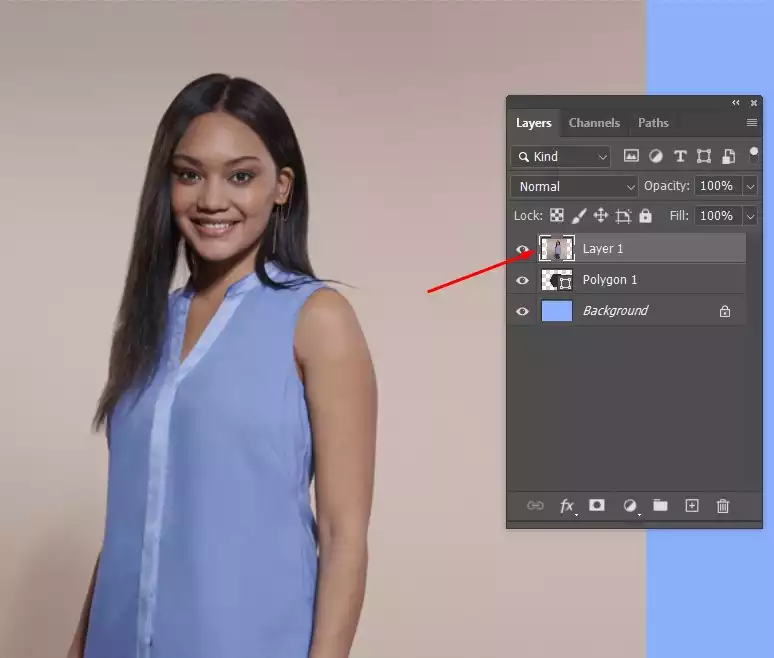
1. Bottom Layer (Base Layer):
- This is your shape layer, or the layer that defines the visible area.
- Whatever is on this layer acts like a window; anything above it will only show where this layer has pixels.
2. Top Layer (First Clipped Layer):
- Place the first layer directly above the base layer.
- Right-click it and select “Create Clipping Mask” or press Alt+Ctrl+G (Windows) / Option+Command+G (Mac).
- Now this layer only shows through the shape of the base layer.
3. Adding Multiple Layers: Add as many layers as you want on top of the clipped layer.
To clip them to the same base layer:
- Option 1: Clip each layer individually to the base layer.
- Option 2: Clip the first layer to the base, then clip the second layer to the first clipped layer, and so on. Photoshop will keep the mask effect cascading down.
How Do You Find a Professional Clipping Mask Service Provider?
To find a professional clipping mask service provider involves looking for companies specializing in image editing and graphic design with expertise in Adobe Photoshop, offering precise object isolation, high-resolution output, fast turnaround, bulk processing, and customizable masking techniques for e-commerce, photography, or marketing needs.
Here are the major steps of finding a professional clipping mask service provider:
1. Check Specialized Design Platforms
- Websites like Fiverr, Upwork, and 99designs have freelancers who specialize in Photoshop editing and clipping masks.
- Look for profiles that specifically mention clipping masks, image masking, or photo editing.
2. Review Portfolios
- A good provider will have a portfolio showing before-and-after images.
- Pay attention to clean edges, smooth masking of hair, fur, or tricky details, and consistency across multiple images.
3. Read Past Client Feedback and Ratings
- Accuracy of masking
- Turnaround time
- Communication clarity
4. Ask About Tools and Techniques
- Professionals often use Photoshop, Illustrator, or specialized masking software.
- You can ask how they handle complex edges like hair, smoke, or transparency, and whether they offer revisions.
5. Test with a Small Project
- Before giving a big batch, send 1 to 2 sample images.
- Check the quality and see if their workflow matches your needs.
6. Consider Cost vs. Quality
- Extremely cheap services might cut corners.
- High-quality clipping masks require careful manual work, so expect to pay a fair rate.
Check Out Best Clipping Mask Service Provider
FAQ’s
What is a clipping mask?
A clipping mask is a design tool that uses one shape to hide parts of another. The top shape controls what you see, and anything outside its edges disappears. It’s often used to place images inside text or custom shapes.
Where is the clipping mask in Adobe Photoshop?
The clipping mask in Adobe Photoshop is found in the layers panel. Right-click on the top menu under Layer > Create Clipping Mask. A faster way is to hold Alt and click between two layers in the Layers panel.
What is the shortcut for a clipping mask?
The shortcut for a clipping mask is Ctrl + Alt + G on Windows and Command + Option + G on Mac in Adobe Photoshop. In Adobe Illustrator, use Ctrl + 7 on Windows or Command + 7 on Mac. Both are default shortcuts, so no setup is required. Select your objects, then press the keys to create the mask instantly.
Why does my clipping mask disappear in Photoshop?
The clipping mask disappears in Photoshop because the base layer is hidden, deleted, unlocked incorrectly, or moved above the clipped layer. It can also happen after merging layers or changing layer order. Make sure the bottom layer stays visible and directly beneath the clipped layer.
Can you create a clipping mask for a whole group in Photoshop?
Yes, you can create a clipping mask for a whole group in Adobe Photoshop. First, put all layers into one group. Then, place the layer you want to use as the mask directly above that group. Hold Alt and click between the layers to apply the clipping mask instantly.
What is the Ctrl+Alt+G shortcut in Photoshop?
The Ctrl+Alt+G shortcut in Adobe Photoshop creates or releases a clipping mask. This action constrains the visibility of one layer based on the content of another layer directly below it, creating a powerful and efficient way to control the visibility of your elements. This makes it easy to control text, images, and effects within specific shapes.
What file types support clipping masks?
The types of files that support a clipping mask are PSD, AI, Sketchbook/TIFF, EPS, SVG, AFPHOTO, and PDF. In Sketchbook, masks are preserved in TIFF and PSD files, but only PSD keeps layers editable across other apps. These formats let one layer control another’s visibility, ensuring precise, flexible masking for layered designs.