Product photos are the first impression your buyers get. In most cases, the only impression is before they decide to scroll past or add to cart. According to multiple e-commerce studies, listings with high-quality images receive significantly more engagement and conversions than those with blurry, poorly lit, or cluttered product shots.
To take good product photos at home, find a large window for natural light, tape a white poster board into a gentle curve behind your product, set your phone on a tripod, shoot with the grid on, and do basic exposure and white balance corrections in a free editor. That alone puts you ahead of most sellers shooting on kitchen counters with overhead fluorescents.
You do not need a professional studio or thousands of dollars in gear. Learning how to take good product photos at home is entirely possible with a smartphone, natural light, and a few inexpensive tools.
Key Takeaways:
- A window, a white poster board, and a smartphone are enough to start shooting product photos that convert.
- Consistent lighting and clean backgrounds matter more than expensive camera gear.
- Planning a shot list before you shoot saves hours of rework and keeps your catalog looking uniform.
- Basic free editing tools can handle white balance, exposure, and background cleanup for most sellers.
- When volume or complexity grows, outsourcing post-production lets you focus on what you sell.
What Is Product Photography?
Product photography is the process of capturing images that accurately represent a product for commercial use. It covers everything from a single white-background hero shot on an Amazon listing to a styled flat lay on Instagram.
The purpose is always the same: show buyers exactly what they are getting. So they feel confident enough to purchase.
For a deeper breakdown of every style and when to use it, check out this complete guide to product photography
What Counts as “Good” Product Photography?
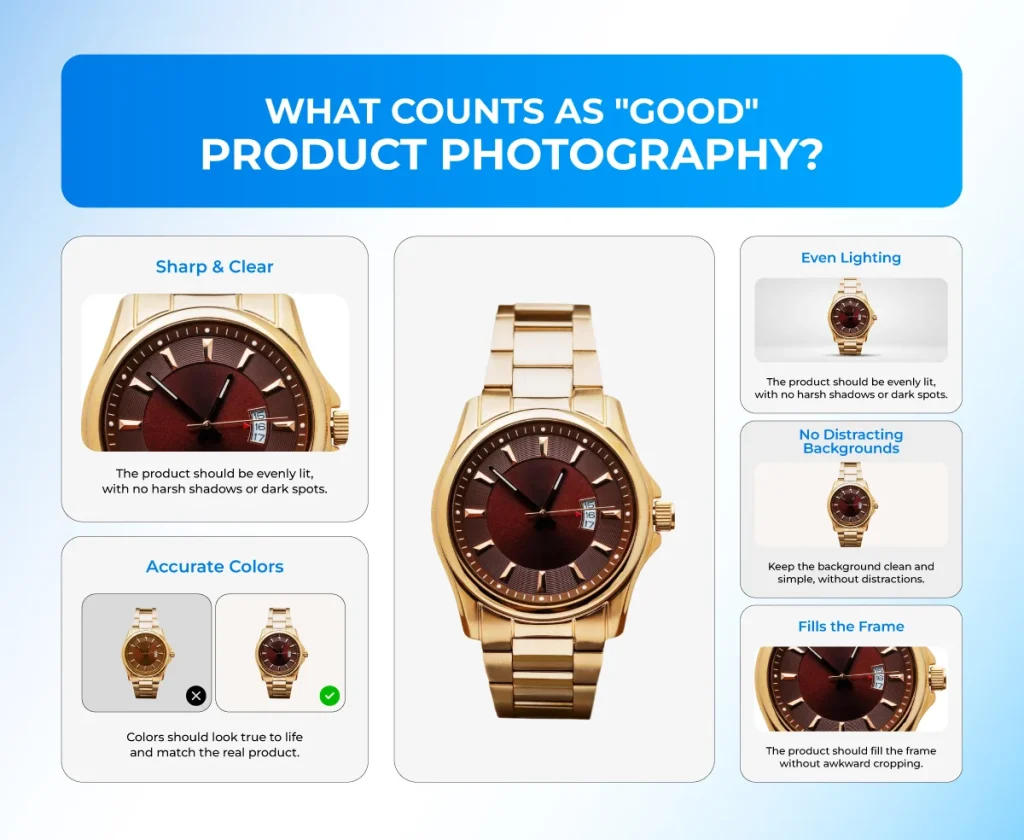
Taking “good” product photography is about clarity, consistency, and trust. A good product photo is sharp, evenly lit, accurately colored, and free from distracting backgrounds. The product fills the frame without awkward cropping.
Colors look true to life, not washed out or oversaturated. Shadows exist but do not compete with the product for attention. If a shopper can understand the size, texture, and color of your item within two seconds of looking at the photo, you have done the job.
Product Photos vs. Lifestyle Photos: What Is the Difference?
Product photos (also called studio shots or pack shots) isolate the item on a plain background. They are the bread and butter of marketplaces like Amazon, eBay, and Shopify storefronts.
Lifestyle photos, on the other hand, show the product in use. Both serve different goals, and a strong listing typically uses both. If you want to learn how to plan and execute lifestyle shots, read our guide on lifestyle product photography.
Why Product Photos Decide the Sale
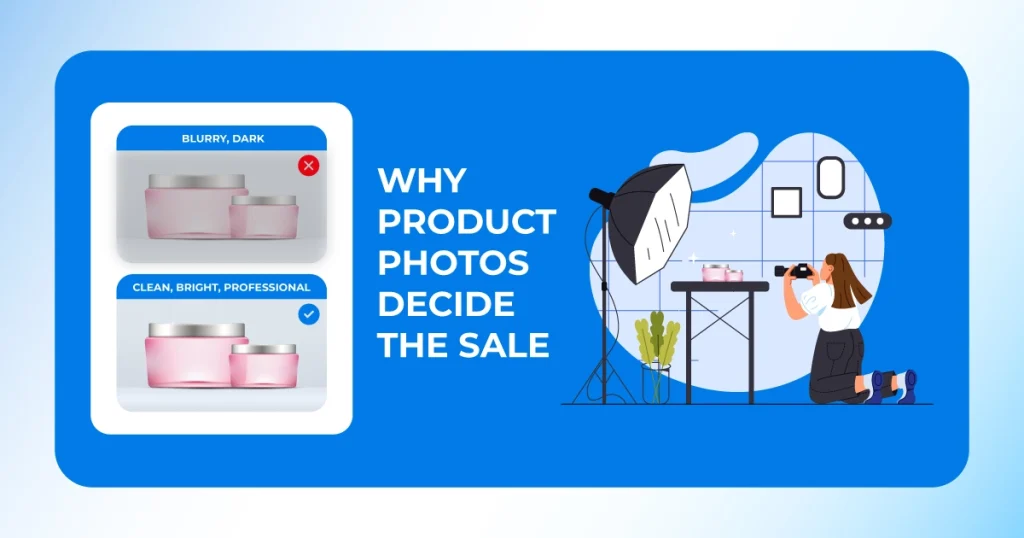
Online shoppers cannot touch, hold, or try your product. Your photos are the only bridge between curiosity and checkout. Blurry, dark, or inconsistent images signal low quality, even if the actual product is excellent. On the other hand, clean and professional-looking photos build instant trust.
This matters whether you are an e-commerce store owner listing hundreds of SKUs, a handmade jewelry seller on Etsy, or a beauty brand launching a new skincare line. The visual quality of your listing directly affects click-through rates, return rates, and how many units you sell per month.
Your Products Should be on Demand in E-commerce Platforms! Let Offshore Clipping elevate it with professional photo editing services that drive sales!
Edit My Product Photos
For fashion and apparel brands, this becomes even more critical. A wrinkled T-shirt photographed under yellow kitchen light looks cheap, regardless of the fabric quality. Meanwhile, a well-lit shot on a clean background or, better, a ghost mannequin setup in post-production can make the same shirt look like a premium brand offering.
What You Need to Photograph Products at Home
One of the biggest myths about product photography is that you need expensive gear to get started. In reality, most sellers and small business owners already have the essentials sitting around their house. For a full gear breakdown, see our photography equipment guide.
Free and Household Items You Already Have
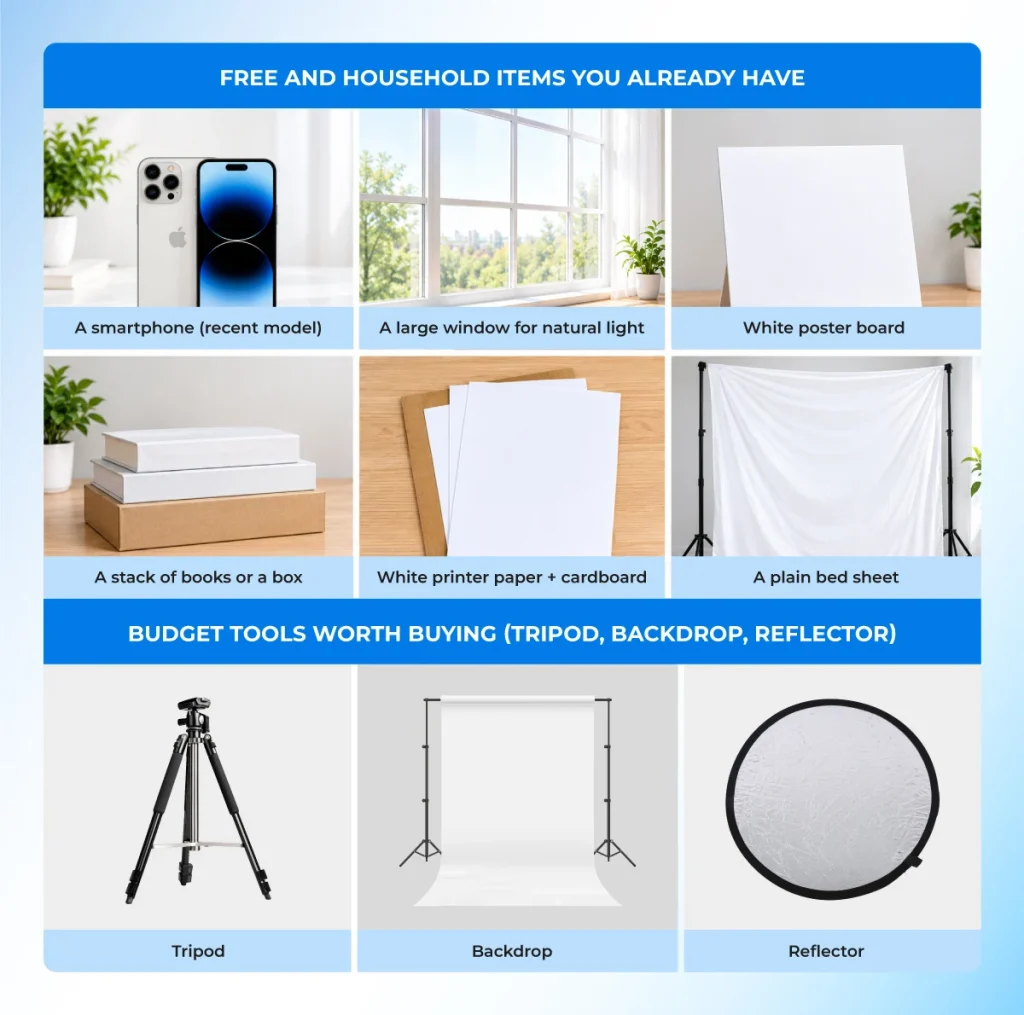
A smartphone manufactured in the last three to four years has more than enough camera quality to take professional product photos at home. Pair it with a large window for natural light, a sheet of white poster board or foam core for a seamless background, and a stack of books or a box to elevate your product to the right height.
White printer paper taped to a piece of cardboard works as a bounce reflector. A plain bed sheet can diffuse harsh sunlight if you hang it over the window.
Budget Tools Worth Buying (Tripod, Backdrop, Reflector)
If you are shooting regularly, even a few products a week, three inexpensive purchases will dramatically improve your results:
| Tool | Approx. Cost | Why It Matters |
|---|---|---|
| Phone tripod or flexible mount | $15–$30 | Eliminates camera shake and keeps framing consistent across shots. |
| White/gray paper backdrop roll | $10–$25 | Creates a smooth, seamless sweep behind the product without visible edges. |
| Collapsible reflector (5-in-1) | $15–$20 | Bounces or diffuses light to fill shadows on the opposite side of your light source. |
How to Plan Your Product Photography Shoot Before You Start
Fifteen minutes of planning before a session will save you hours of reshooting later.
Creating a Shot List for Multiple Products
A shot list is exactly what it sounds like. A written list of every angle and variation you need for each product. For a single product, you might need a hero shot, two detail shots, a scale reference, and one lifestyle image. Multiply that by 20 products, and you are looking at 100 images.
Setting Up Your Space for Shooting Efficiency
Batch similar products together. If you have ten white products and ten dark products, shoot all the white ones first. You do not have to re-adjust exposure settings repeatedly while taking studio-like photos of products at home. Keep your backdrop, tripod, and reflector in place while swapping products in and out.
Keeping Consistency Across Every Photo in Your Catalog
When a shopper scrolls through your product grid and every image has the same background, the same lighting tone, and the same spacing around the product, it looks professional. Inconsistent lighting or backgrounds make even good individual photos look sloppy when displayed together.
How to Set Up Lighting for Product Photos at Home
Lighting is the single most important variable in product photography at home.
Our in-depth product photography lighting guide covers advanced setups, but here are the essentials to get started at home.
Natural Light Setup
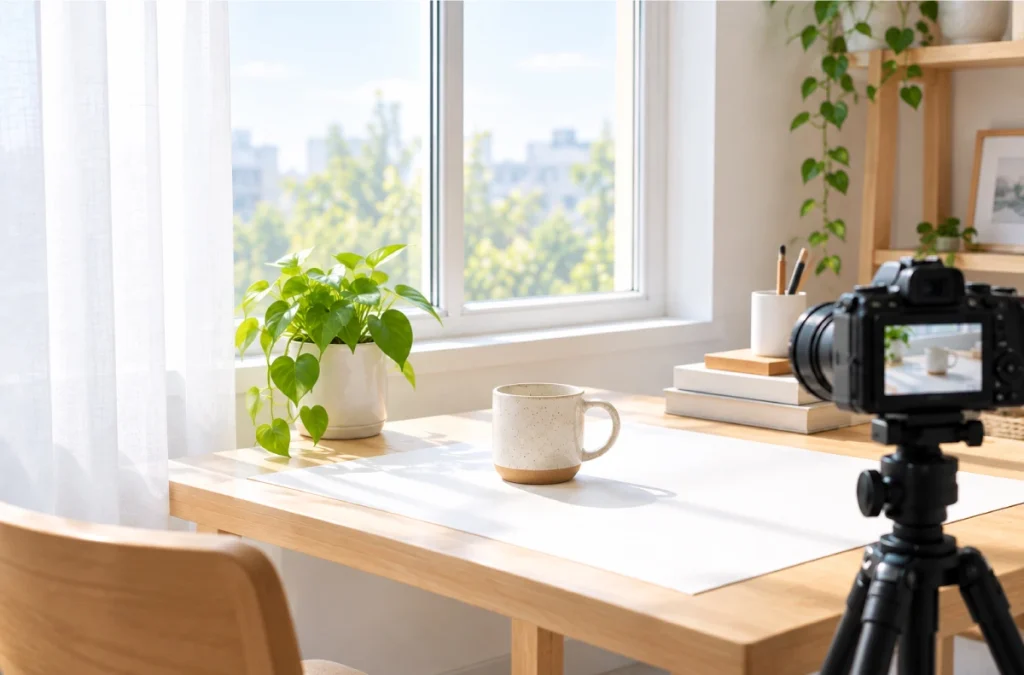
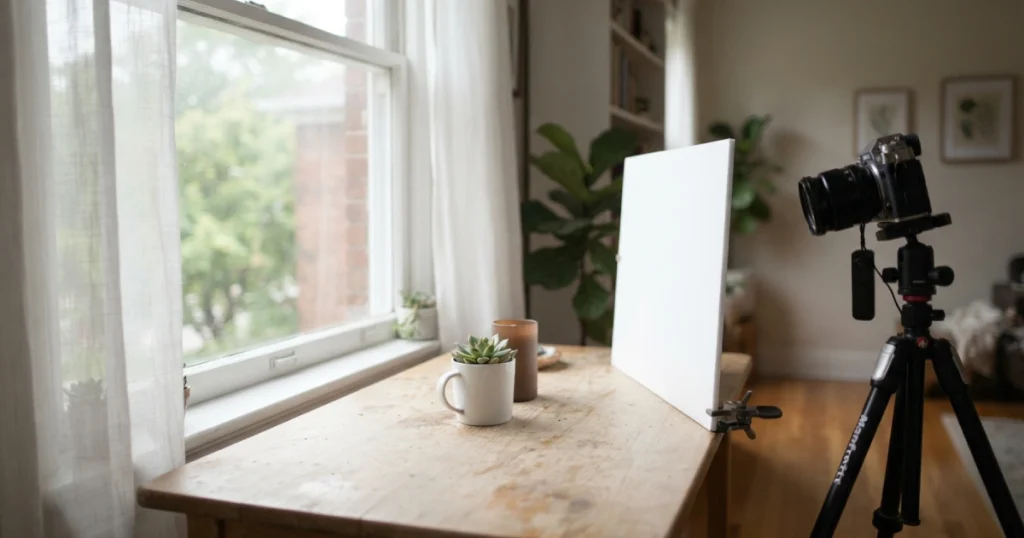
The easiest and most cost-effective way to take good product photos at home is with natural window light. Position your shooting table next to a large window. Ideally, one that does not receive direct sunlight, or diffuse it with a sheer white curtain.
Using Reflectors and White Boards to Fill Shadows
When light comes from one side, the opposite side of the product falls into shadow. A white foam board or reflector placed directly across from the window bounces light back onto the dark side. It fills in those shadows and creates a more even exposure.
Angle the reflector until the shadow softens but does not disappear entirely. For glossy or reflective products, a matte white card works better than a shiny reflector to avoid unwanted hot spots.
Artificial Light Setup
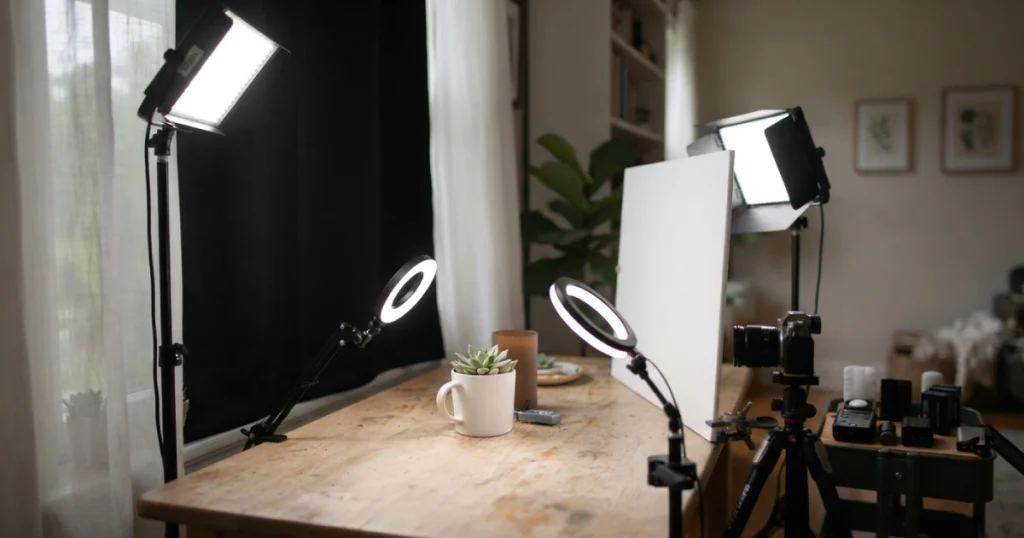
If you have the limitation of natural light when taking product photos at home, artificial lights are a reliable alternative. A daylight-balanced LED panel ($25–$60) provides consistent white light regardless of the weather. A ring light works well for smaller flat-lay setups.
A tabletop lightbox encloses the product and diffuses light from all sides. Choose lights rated at 5000K–5500K (daylight temperature) for accurate color representation.
Avoiding Mixed Lighting and Color Casts
One of the most common mistakes is mixing light sources. For example, using window light and an overhead incandescent bulb at the same time. Different light sources have different color temperatures. Combining them creates uneven color casts that are difficult to fix in editing. Turn off all room lights when shooting with natural light. If using artificial lights, make sure every source is the same color temperature.
Not Satisfied with Colors after Shooting Your Objects?Let us handle it and get your expected color combination with a short turnaround!
Get a Free Trial!
Choosing a Background and Surface That Works
Your background should support the product, not compete with it. Most marketplaces require or strongly prefer a pure white background.
The Seamless White Background (Infinity Curve)
The infinity curve is the standard in e-commerce photography. Tape a large piece of white poster board, foam core, or paper roll to a wall and let it sweep gently down onto your shooting surface. The curve eliminates the hard line where the wall meets the table, giving you a clean, edgeless background.
Colored and Textured Backgrounds for Brand Storytelling
If you sell on platforms like Instagram or your own branded website, colored and textured backgrounds can help communicate your brand identity. A piece of marble tile works beautifully for skincare and beauty products. A slab of reclaimed wood fits handmade or artisanal goods. Matte-colored paper rolls (available at craft stores for a few dollars) let you match your brand palette. Just keep the texture subtle.
Household Items That Double as Effective Backdrops
You do not need to buy professional backdrops to start. A clean white bed sheet, a cutting board, a piece of fabric, or even a large book cover can work as a shooting surface. The key is cleanliness and simplicity. Iron out wrinkles, wipe off dust, and avoid patterns that pull attention away from the product.
Explore more creative product photography ideas for inspiration beyond the standard white sweep.
Camera and Phone Settings for Sharp Product Photos
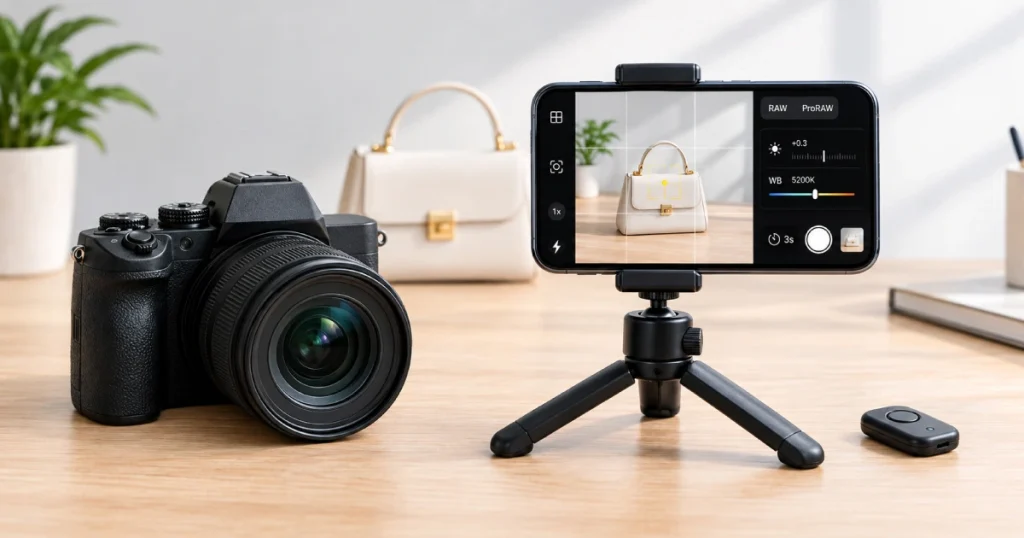
You do not need to understand every camera setting to shoot well, but a few adjustments make a noticeable difference.
- Grid Lines and Composition: Turn on the grid overlay in your camera app. It divides the frame into nine equal sections. Place your product along the intersecting lines rather than dead center. For hero shots, centering works fine.
- Focus, Exposure, and White Balance: Tap your product on the phone screen to lock focus. Then swipe up or down (on most phones) to adjust exposure. Make the image slightly brighter if your product is on a white background. Set white balance to match your light source or use the auto setting and correct in editing.
- Shooting in RAW or ProRAW: If your phone supports ProRAW (iPhone) or RAW capture (many Android phones via the Pro mode), enable it. RAW files retain far more color and exposure data than standard JPEGs. Especially when taking good product photos at home depends partly on getting the post-production right.
- Tripod and Self-Timer Use: Even subtle hand movement causes blur, especially in lower light. A tripod eliminates this. Pair it with a two-second self-timer or a Bluetooth shutter remote so you are not touching the phone at all when the image is captured.
The Shot List: What to Capture for Every Single Product
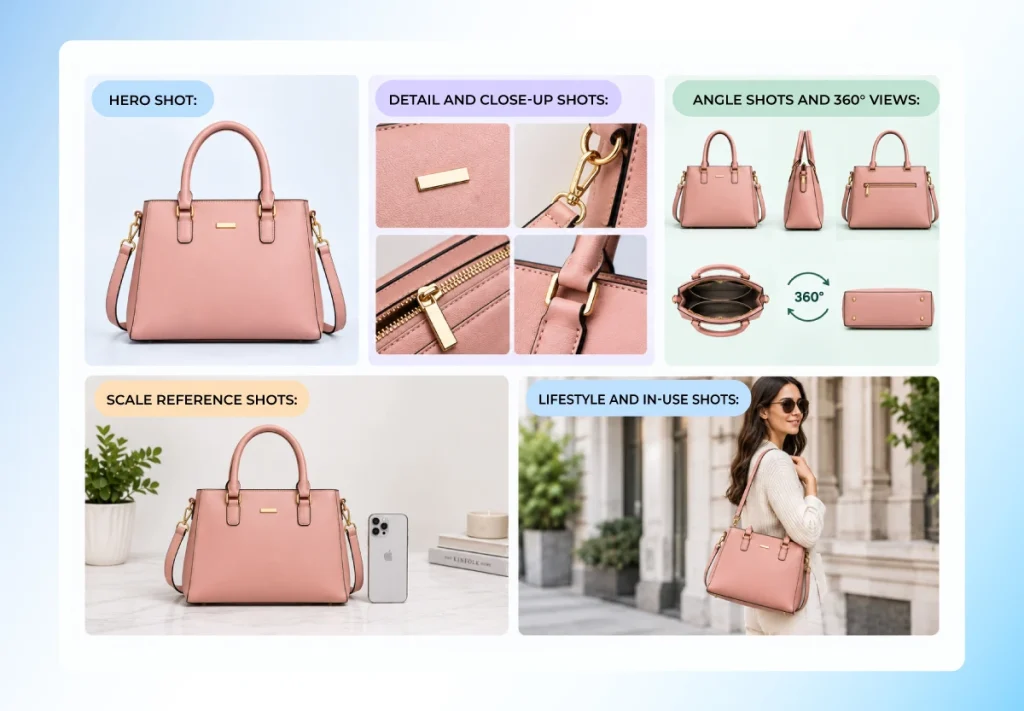
Every product in your catalog should have a minimum set of images. Marketplaces reward listings with more photos, and shoppers trust them more. Here is the standard shot list professional sellers follow.
- Hero Shot: This is your main listing image. The one that shows up in search results and category pages. It should be a clean, straight-on shot of the product against a white or neutral background. The product should fill about 80% of the frame.
- Detail and Close-Up Shots: Zoom in on textures, stitching, labels, buttons, clasps, or any feature that buyers care about. A close-up of the sole of a shoe, the weave of a fabric, or the ingredient label on a skincare bottle answers questions.
- Angle Shots and 360° Views: Shoot from the side, back, top, three-quarter angle, and bottom (if relevant). The more angles you provide, the more confident the buyer feels. Some sellers create 360° spin views by shooting from 24 to 36 evenly spaced angles on a turntable and stitching the images together.
- Scale Reference Shots: Place the product next to a common object. You can use a hand, a coin, a pen, or a coffee mug to communicate actual size. This is especially important for products where scale is not obvious from the photo alone: jewelry, miniatures, bags, and home decor.
- Lifestyle and In-Use Shots: These images show the product being used in real life. A candle lit on a dining table, a backpack on someone walking through a market, a face cream being applied. Lifestyle shots tap into emotion and aspiration.
They are especially powerful for social media marketing and branded websites. Influencers and content creators rely heavily on this format to connect with their audiences.
See our flat lay product photography guide for one of the most popular lifestyle formats.
Photographing Tricky Products and Fixing Common Problems
Reflective surfaces, dark-colored items, tiny jewelry, and transparent materials each present unique challenges.
Metallic and Reflective Surfaces
Shiny products like stainless steel, chrome, or glossy plastic reflect everything around them. The fix is to surround the product with white cards or shoot inside a lightbox. So, the only thing the surface reflects is neutral white. You can also use a polarizing filter to reduce glare. Avoid flash entirely. It creates hard, concentrated reflections that are almost impossible to remove in post.
Dark or Black Products
Black products absorb light, which makes them look flat and featureless in photos. The solution is to use slightly more light than you normally would and position your reflector closer to the product. A subtle side light creates edge definition, separating the product from the background.
Tiny Products
Small items need macro-level focus and precise lighting. Most modern phones have a macro mode or allow you to get very close and still focus. Use a lightbox to surround the product with diffused light and eliminate shadows.
Image Retouching is Something Most of the Photographers Don’t Avoid! Professional photographers, e-commerce businesses, and studio owners always seek professional photo retouching.
Free Retouching Trial!
Clear and Transparent Products
Transparent products need backlighting. Place a light source behind the product (or behind a translucent white panel) so the light passes through the material and defines its shape. Front lighting alone makes glass and clear plastic look invisible.
Blurry or Shaky Photos
Blur comes from two sources: camera shake and incorrect focus. A tripod solves the first problem. For focus, tap the product on your phone screen to lock focus before shooting. If you are using a DSLR, switch to manual focus and use live view to zoom in and confirm sharpness.
Yellow or Orange Color Cast
That warm, yellowish tint on your product photos is caused by tungsten or incandescent light bulbs. The fix is simple: turn off indoor lights and shoot with daylight only, or switch to daylight-balanced LED panels.
Harsh or Uneven Shadows
Direct sunlight or a bare bulb creates hard-edged shadows that make products look dramatic in the wrong way. Diffuse your light by hanging a sheer white curtain or taping a sheet of white tissue paper over the window.
Distracting Backgrounds: Cleaning Up the Frame
Clutter, wrinkled fabric, visible tape, and household items in the background kill the professional look instantly. Always check the entire frame before pressing the shutter. Use a dedicated backdrop and remove everything non-essential from the background.
How to Edit Product Photos Without Overcomplicating Things
Over-editing is just as damaging as no editing at all. The goal is to correct, not to fabricate. Your edited photo should look like the product your buyer will receive.
Free Editing Apps for Phone-Based Workflows
Snapseed (free, iOS and Android) is arguably the most powerful free photo editor available. It handles exposure, white balance, sharpening, and selective adjustments with precision. Google Photos, Apple Photos, and VSCO (free tier) also offer solid basic editing tools.
Lightroom and Photoshop Basics for Desktop Editing
Adobe Lightroom excels at batch editing. Adjust exposure, white balance, and tone across dozens of images with a single preset. This is ideal for sellers who shoot large batches and want uniform results. Photoshop handles more complex tasks like removing blemishes, cleaning up backgrounds, etc.
If you are new to Photoshop, start with the crop, levels, and healing brush tools; those three alone handle 80% of basic product editing needs. To learn what’s trending in the editing space, check out the latest product photo editing trends.
What Not to Over-Edit
Do not oversaturate colors. Do not smooth textures into oblivion. Do not add filters that change the product’s actual appearance. Buyers who receive a product that looks different from the listing photo leave negative reviews and file returns.
Frequently Asked Questions
How Can I Take Professional Product Photos With My Phone?
Use a tripod, natural window light, and a white backdrop. Enable grid lines, tap to focus, and shoot in the highest resolution or ProRAW mode. Clean up exposure and white balance in a free editor like Snapseed.
What Is the Best Lighting for Product Photography at Home?
Indirect natural light from a large window is the best starting point. It is free, soft, and color-accurate. If you need to shoot at night or on overcast days, a daylight-balanced LED panel (5000K–5500K) is an affordable alternative.
What Household Items Can I Use as a Backdrop?
White poster board, foam core, a clean white bed sheet, a marble tile, a wooden cutting board, or a sheet of colored craft paper all work as effective backdrops. Choose based on your brand style.
Do I Need a Tripod for Product Photography?
A tripod is not strictly mandatory, but it is the single most impactful upgrade for home product photography. It eliminates camera shake, keeps your framing consistent, and frees your hands to adjust the product, lighting, or reflectors between shots.
How Do I Photograph Shiny or Metallic Products Without Glare?
Surround the product with white diffusion panels or shoot inside a lightbox. Avoid direct flash. Use a polarizing filter if available.
What Camera Settings Are Best for Product Photos?
On a DSLR, shoot in manual mode with ISO 100, aperture between f/8 and f/11 for maximum sharpness, and adjust shutter speed to match your lighting. On a phone, use the Pro or Manual mode if available, lock focus and exposure on the product, and shoot in RAW.
How Do I Edit Product Photos for Free?
Snapseed, Google Photos, and Apple Photos offer free editing tools that cover exposure, white balance, cropping, sharpening, and selective adjustments. For desktop users, GIMP is a free Photoshop alternative.
Conclusion
Learning how to take good product photos at home does not require a professional studio, expensive gear, or years of experience. It requires attention to lighting, a clean background, consistent camera settings, and a willingness to plan before you shoot. Those fundamentals alone put you ahead of the majority of sellers uploading rushed, poorly lit images.
Start simple: a window, a white board, a tripod, and a phone. As your catalog grows, invest in better tools and consider outsourcing the editing work so your time stays focused on building your business. Whether you shoot ten products a month or a thousand, the principles in this guide remain the same.